Table of Contents
Let us look at each of these methods.
Download the Excel Workbook below to follow along and understand How to Set the Print Area in Excel –
download excel workbook Print-Area-in-Excel.xlsx
Table of Contents
Why Set a Print Area?
Setting the print area in Excel allows you to customize exactly which part of your spreadsheet you want to print. This can be particularly useful when you want to print a dataset that spans over multiple columns and rows. If a print area is not determined, the final print output will include lots of unnecessary data and blank parts. Additionally, setting a print area will allow you to adjust the printouts’ margins, orientation, and scale. Ultimately, allowing the reader of the printouts to easily access easy-to-read information.
Step-by-step Guide
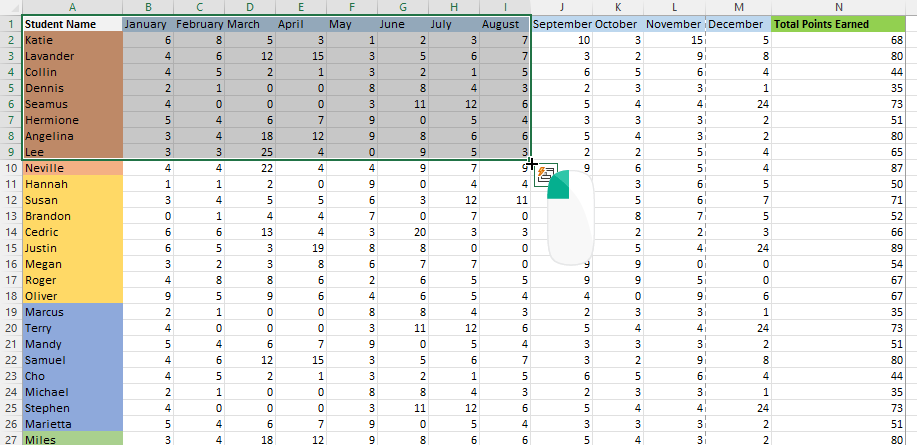
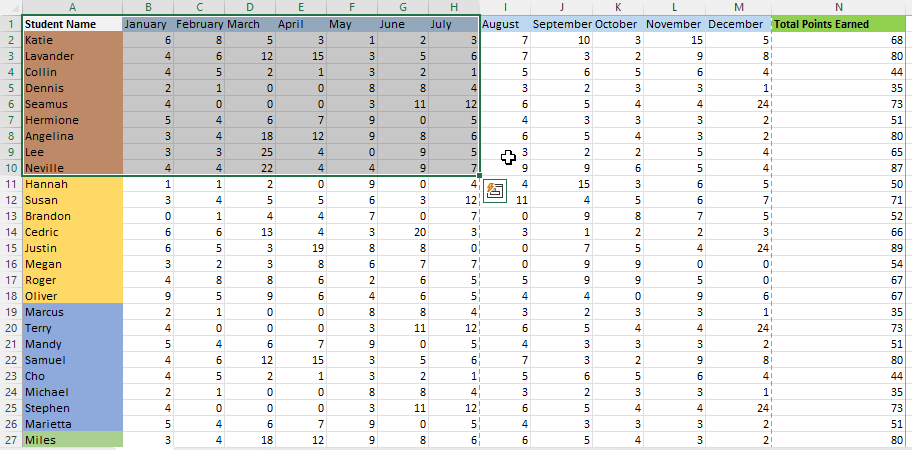
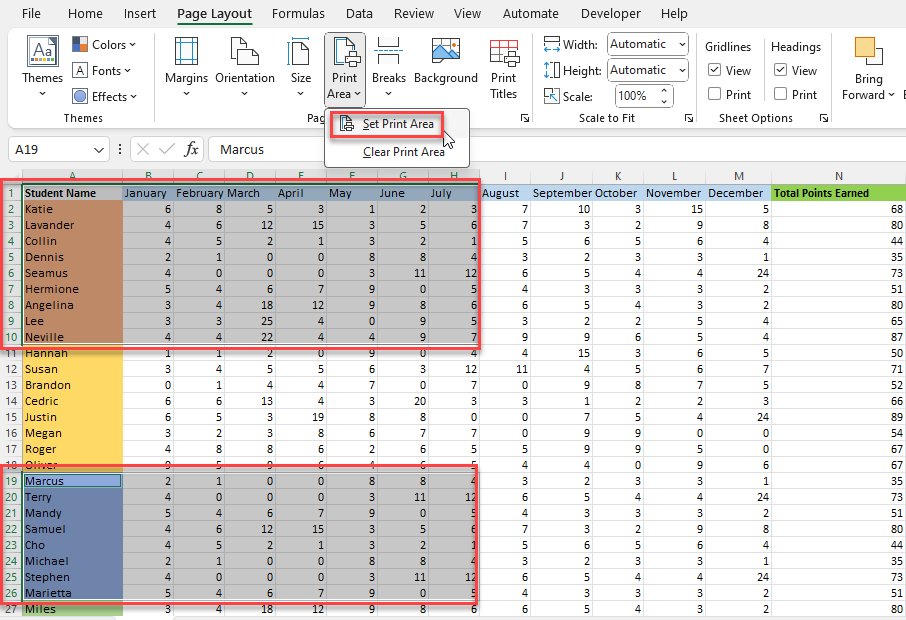
Click and hold the left mouse button to highlight the range of cells that you want to include in your print area.
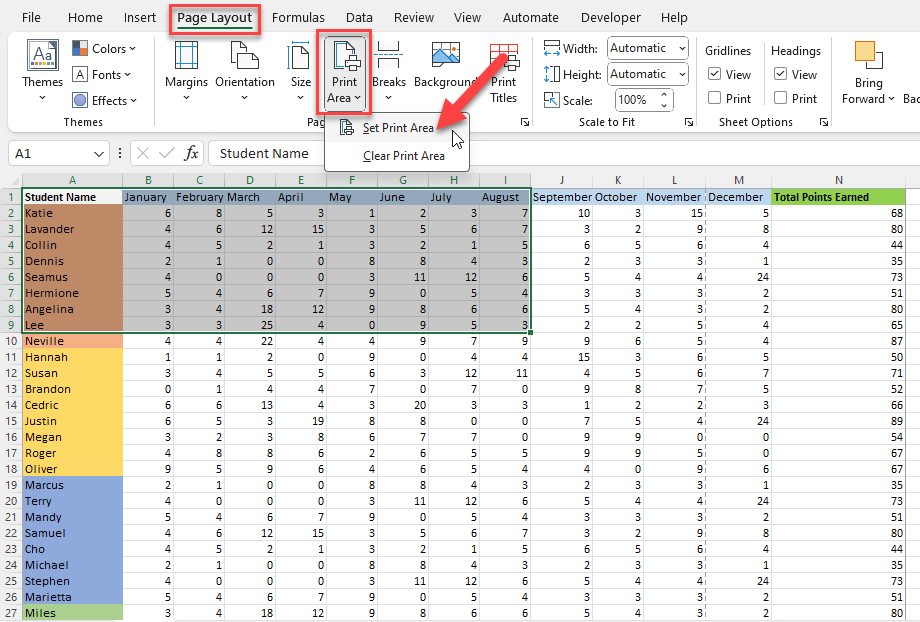
Go to the Page Layout tab. Click on the Print Area and a drop-down menu will appear.
Choose the Set Print Area option.
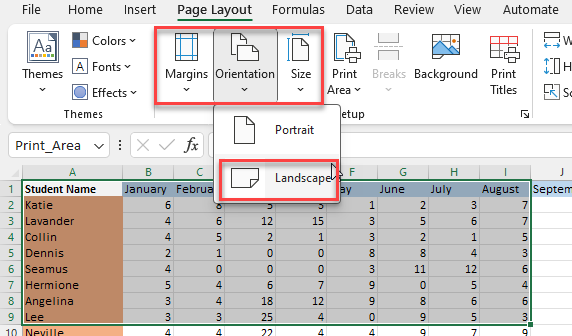
While still in the Page Layout tab, you can customize your print settings using Margins, Orientation, and Size.
In our case, we will adjust the orientation to Landscape.
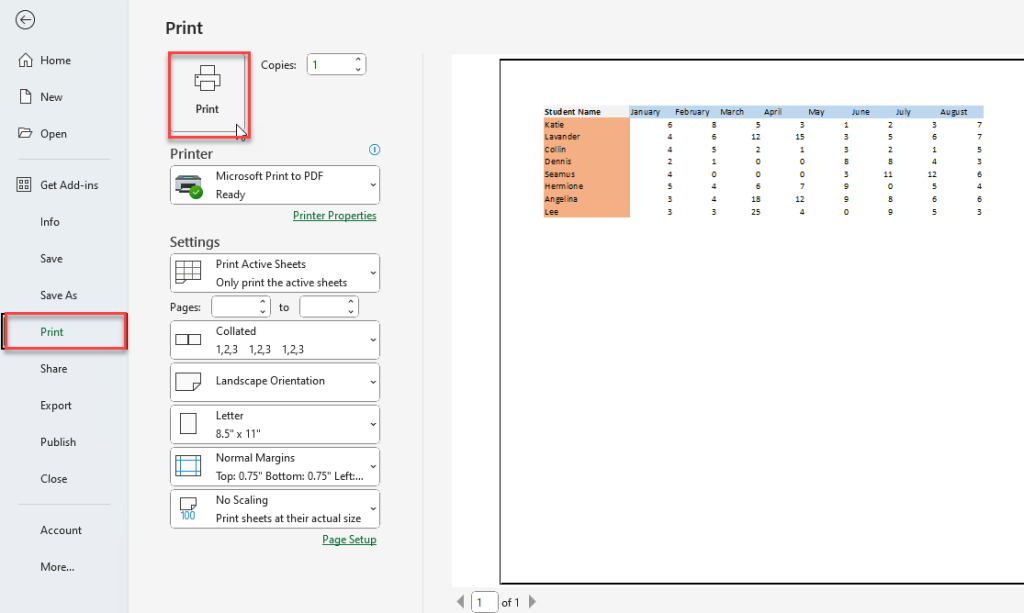
To confirm that you have successfully added cells to the print area, click on the File tab, select Print, and preview how your spreadsheet will look when printed.
Once you are satisfied with the print area and settings, click the Print button to send your document to the printer.
Add Cells to an Existing Print Area
Follow these steps if you want to expand the existing print area by adding cells:
Note: You can only add adjacent cells to an existing print area. Meaning if you wanted to extend the print area, you can only do so by selecting the rows next to the last row of the current selected print area.
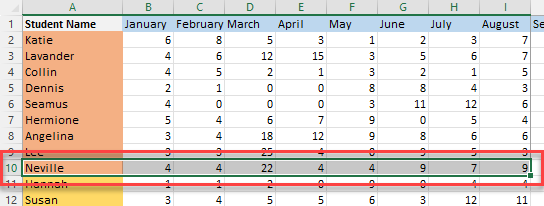
Select the additional cells by clicking and holding the left mouse button to highlight the range of cells that you want to include.
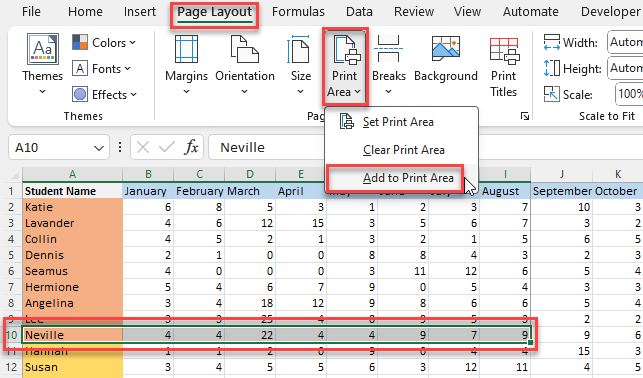
Go to the Page Layout tab and select the Print Area menu. From there, you should see an option that says Add to Print Area. Click on it.
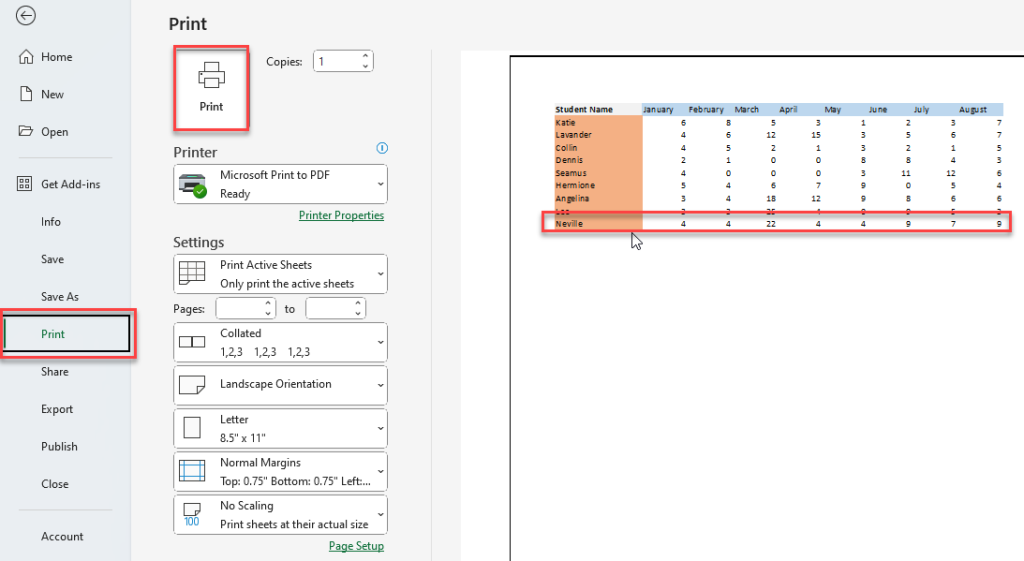
To confirm that you have successfully added cells to the print area, click on the File tab, select Print, and preview how your spreadsheet will look when printed.
As you can see, the preview will show the expanded print area.
Once you are satisfied with the updated print area and settings, click the Print button to send your document to the printer.
Set Columns or Rows to Repeat
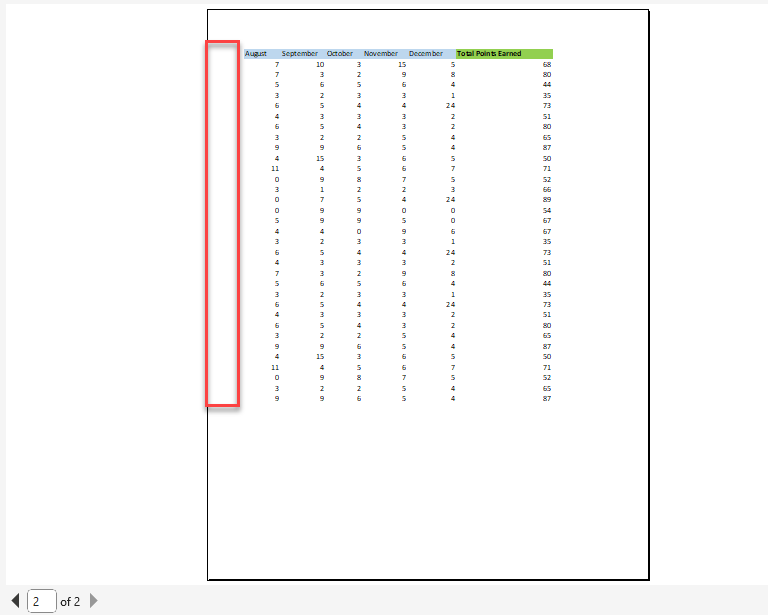
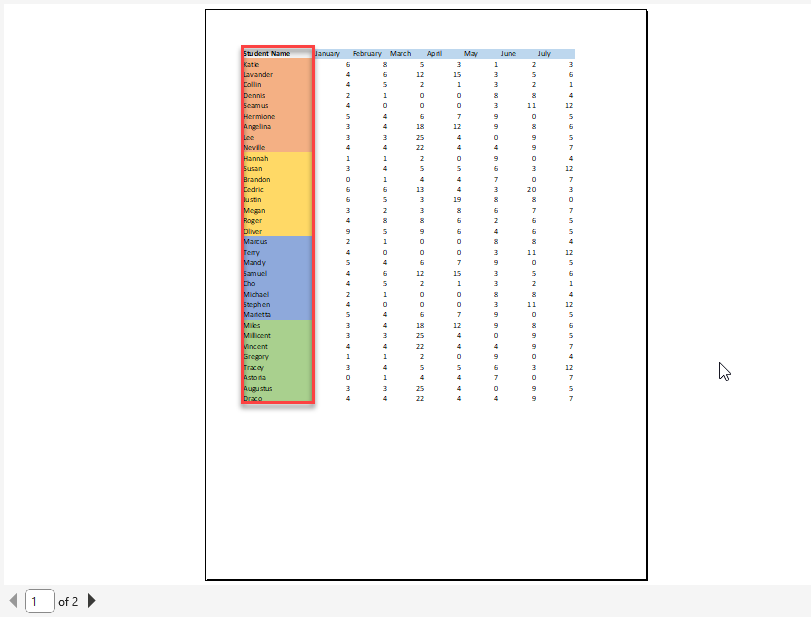
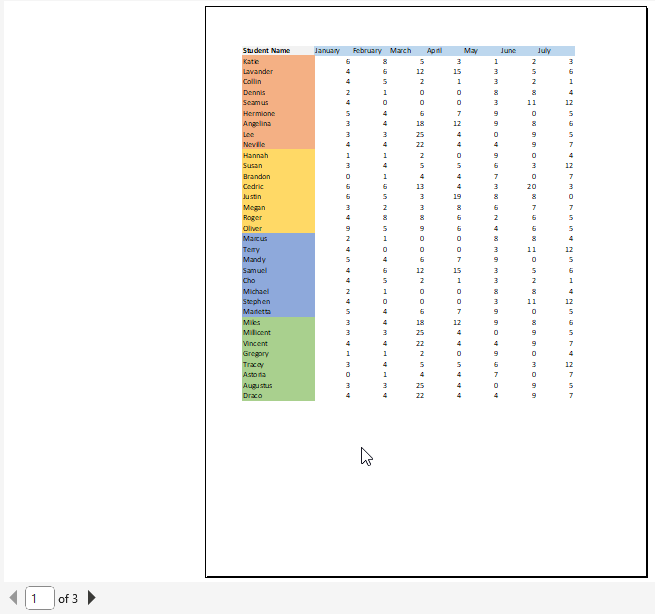
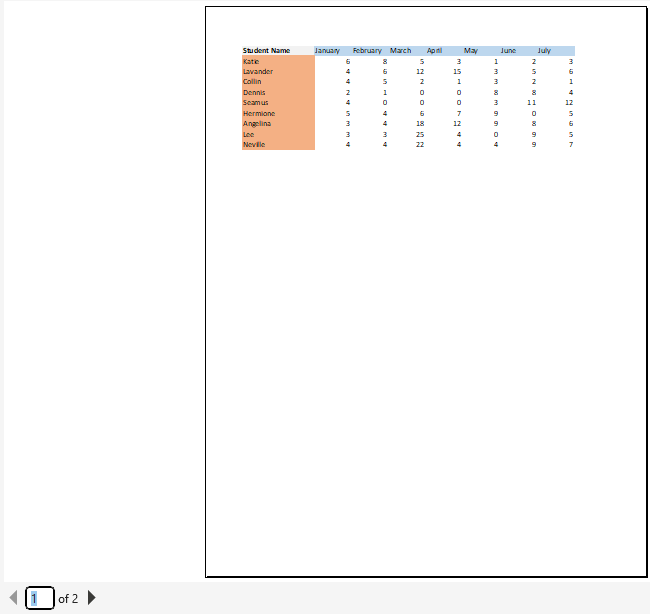
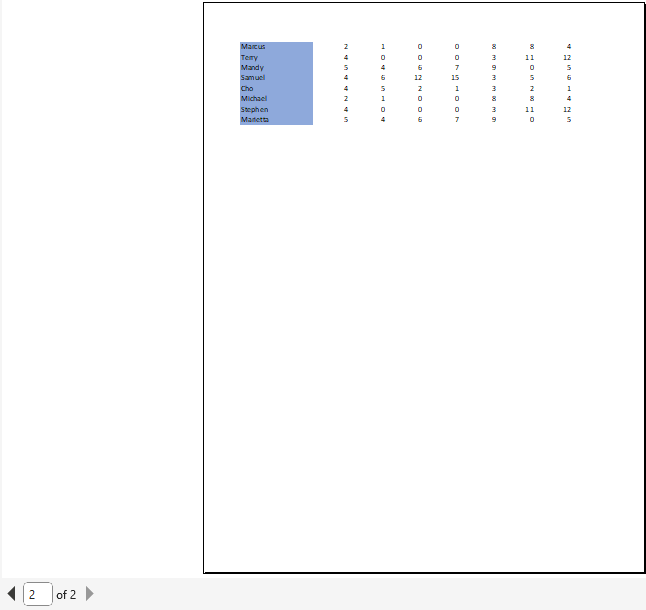
Suppose you wanted the names column to be included in page 1 and page 2. As of right now, the names column is not present in page 2, which may lead to some confusion when looking at page 2 exclusively.
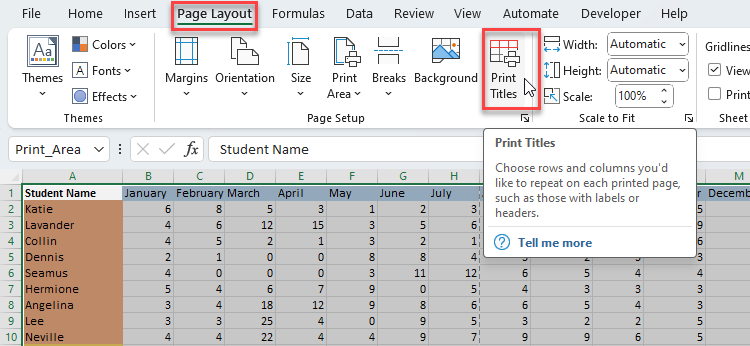
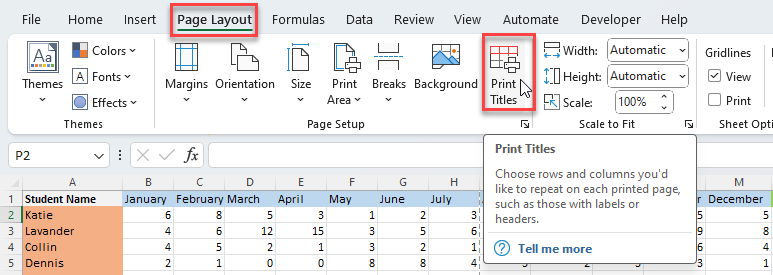
Go to the Page Layout tab. Click on Print Titles.
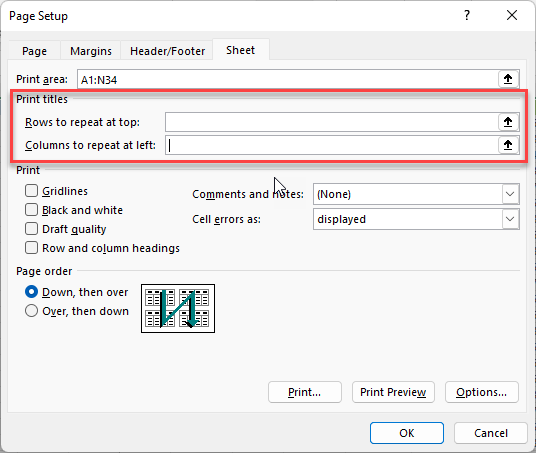
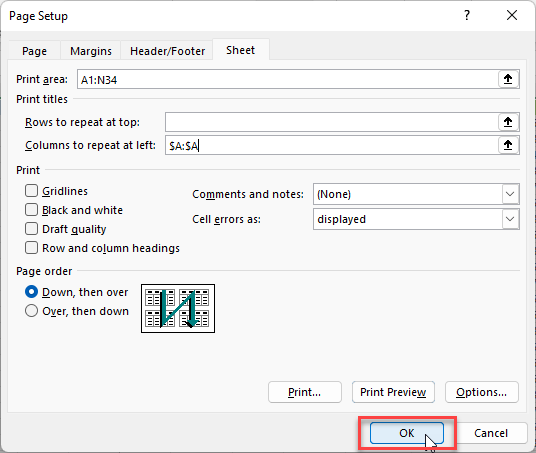
You will see options for Rows to repeat at top and Columns to repeat at left. This time, we will choose Columns to repeat at left option.
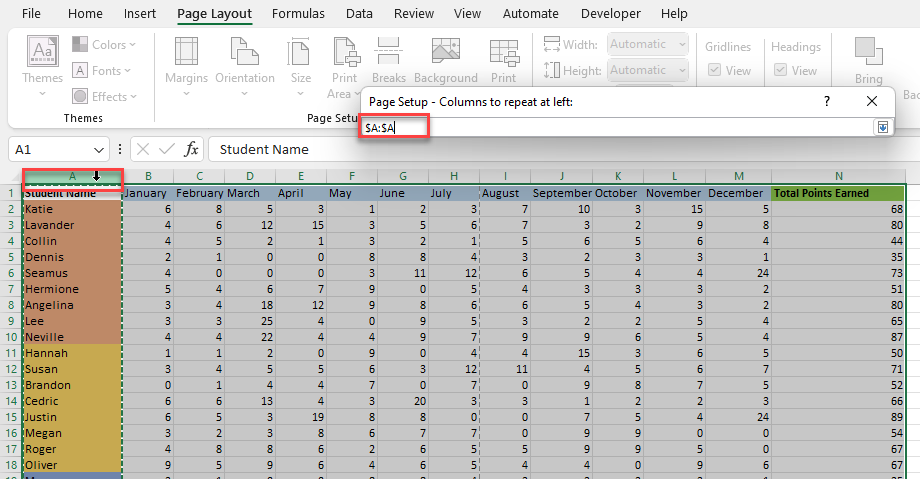
Select column A, then click OK.
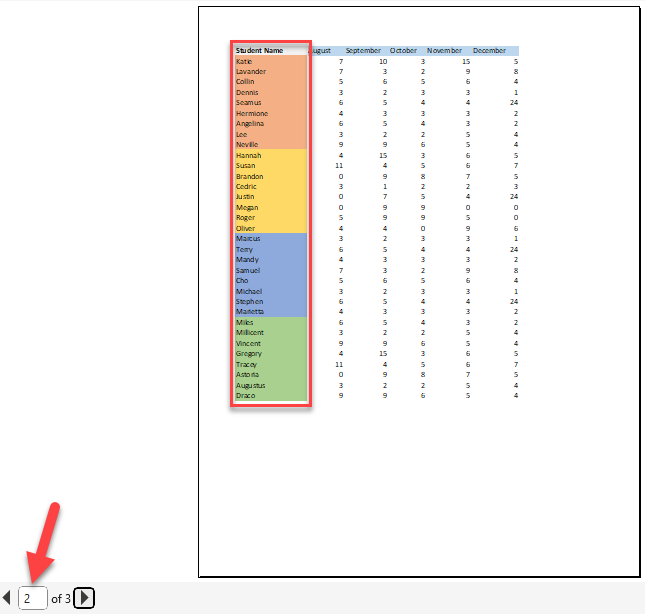
To confirm that you have successfully repeated the names column to the print area, click on the File tab, select Print, and preview how your spreadsheet will look when printed.
As you can see, the preview will show the repeated names column on the left.
Once you are satisfied with the updated print area and settings, click the Print button to send your document to the printer.
Add Multiple Print Areas
If you have other data on the same sheet that you wish to print separately, you can add multiple print areas.
Click and hold the left mouse button to highlight the range of cells that you want to include in your print area.
Hold down the Ctrl key and highlight as many groups of cells that you want to make into print areas. Using the Ctrl key enables you to highlight different areas without losing the initial range.
Once you highlight your selected areas, click on the File tab, select Print, and preview how your spreadsheet will look when printed.
As you can see, the preview will show the multiple print areas. Each area will print on different pages.
Using the Page Break
If you have a large dataset and you don’t want information to overflow to other pages, it would be best to use the Page break feature. Page break allows you to display different parts of your data on separate pages.
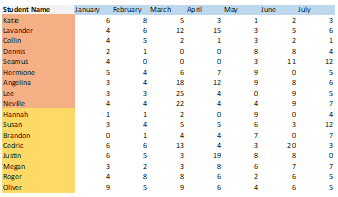
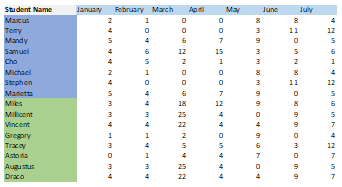
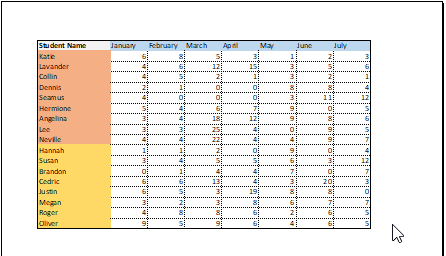
Suppose you wanted to divide the dataset into two parts. The first part being the students on the red and yellow category (rows 2 to 18). And the next part being the students on the blue and green category (rows 19 to 34). Follow these steps:
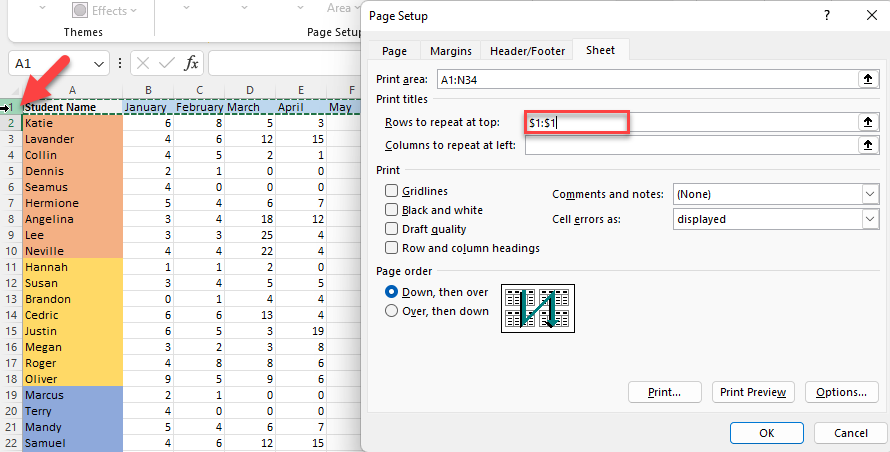
Go to the Page Layout tab and click on Print Titles.
For the Rows to repeat at the top, enter in $1:$1, or simply click on row 1. We want this row to be present in all of the printed pages to represent the months and the point totals.
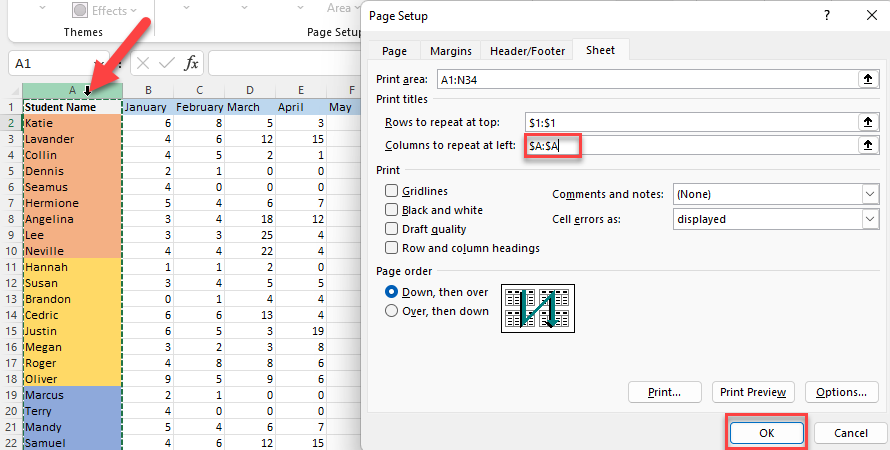
For the Columns to repeat at left, enter in $A:$A, or click on column A. Then click OK.
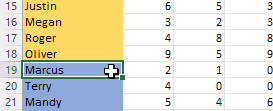
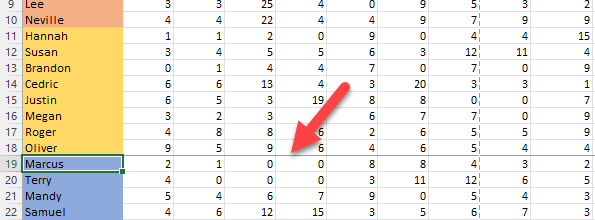
Now, click on any cell in row 19. This is because we want a new page to start from row 19.
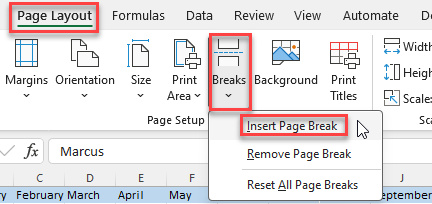
Once again, go to the Page Layout tab, and click on Breaks. Choose Insert Page Break.
You will see a line in between rows 18 and 19. This is the Page Break indicator.
Note: Follow the same steps for vertical breaks. The only difference is you have to click on a column, instead of a row.
Once you have selected your page break, click on the File tab, select Print, and preview how your spreadsheet will look when printed.
As you can see, the preview will show the page break in between rows 18 and 19.
Additional Tips
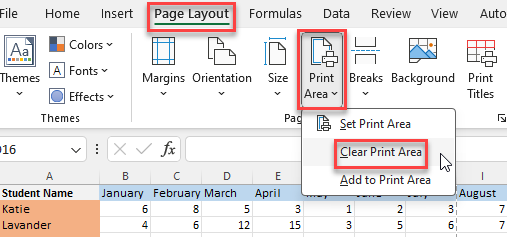
Clearing Print Area: If you want to remove the set print area, go to the Page Layout tab, click on Print Area, and select Clear Print Area.
Include Grid Lines in Printouts: If you want to include the grid lines in your printed copy, go to the Page Layout tab and tick the box for Print under Gridlines.
As you can see, the print preview will show the gridlines.
Conclusion
There you have it! By following these steps, you can efficiently set the print area in Excel, without printing the unnecessary information, at the same time making your printed documents more organized and professional.
John Michaloudis is a former accountant and finance analyst at General Electric, a Microsoft MVP since 2020, an Amazon #1 bestselling author of 4 Microsoft Excel books and teacher of Microsoft Excel & Office over at his flagship MyExcelOnline Academy Online Course.

