Printing in Microsoft Excel can sometimes be a complex task, but with a few tips and tricks, you can achieve professional-looking results with ease. This article will guide you through the essential steps to print your Excel sheets, ensuring your data is presented clearly and efficiently. From setting up your page layout to managing print areas and scaling options, you’ll learn how to optimize your spreadsheets for print. Whether you’re preparing reports, charts, or simple tables, these instructions will help you to use print shortcuts to produce polished, print-ready documents.
Key Takeaways:
- Master Print Shortcuts: Learn essential print shortcuts like ‘Ctrl + P’ to streamline your printing process.
- Set Print Areas Efficiently: Use the ‘Set Print Area’ option to print only the necessary parts of your worksheet, saving paper and ink.
- Customize Print Options: Discover how to print gridlines and manage multiple print areas for clearer, more organized printouts.
- Troubleshoot Print Issues: Overcome common printing challenges by learning how to clear and adjust print areas.
- Combine Shortcuts for Efficiency: Enhance productivity by integrating print shortcuts with other Excel functions for a smoother workflow.
Table of Contents
Introduction to Print Shortcuts in Excel
Boost Your Productivity with Excel Print Shortcuts
Imagine soaring through your Excel tasks like a productivity superhero, thanks to harnessing the power of print shortcuts! These nifty tricks aren’t just about cutting corners; they’re about investing more time in what matters by eliminating repetitive steps.
Understanding the Importance of Efficient Printing in Excel
Efficient printing in Excel isn’t just a convenience; it’s a necessity for anyone juggling multiple tasks and looking to maintain accuracy while reducing the time spent on formatting documents. When your spreadsheets look crisp and professional right off the printer, it speaks volumes about your attention to detail and efficiency.
Getting Started with Basic Print Shortcuts
The Power of ‘Ctrl + P’: The Quick Print Command
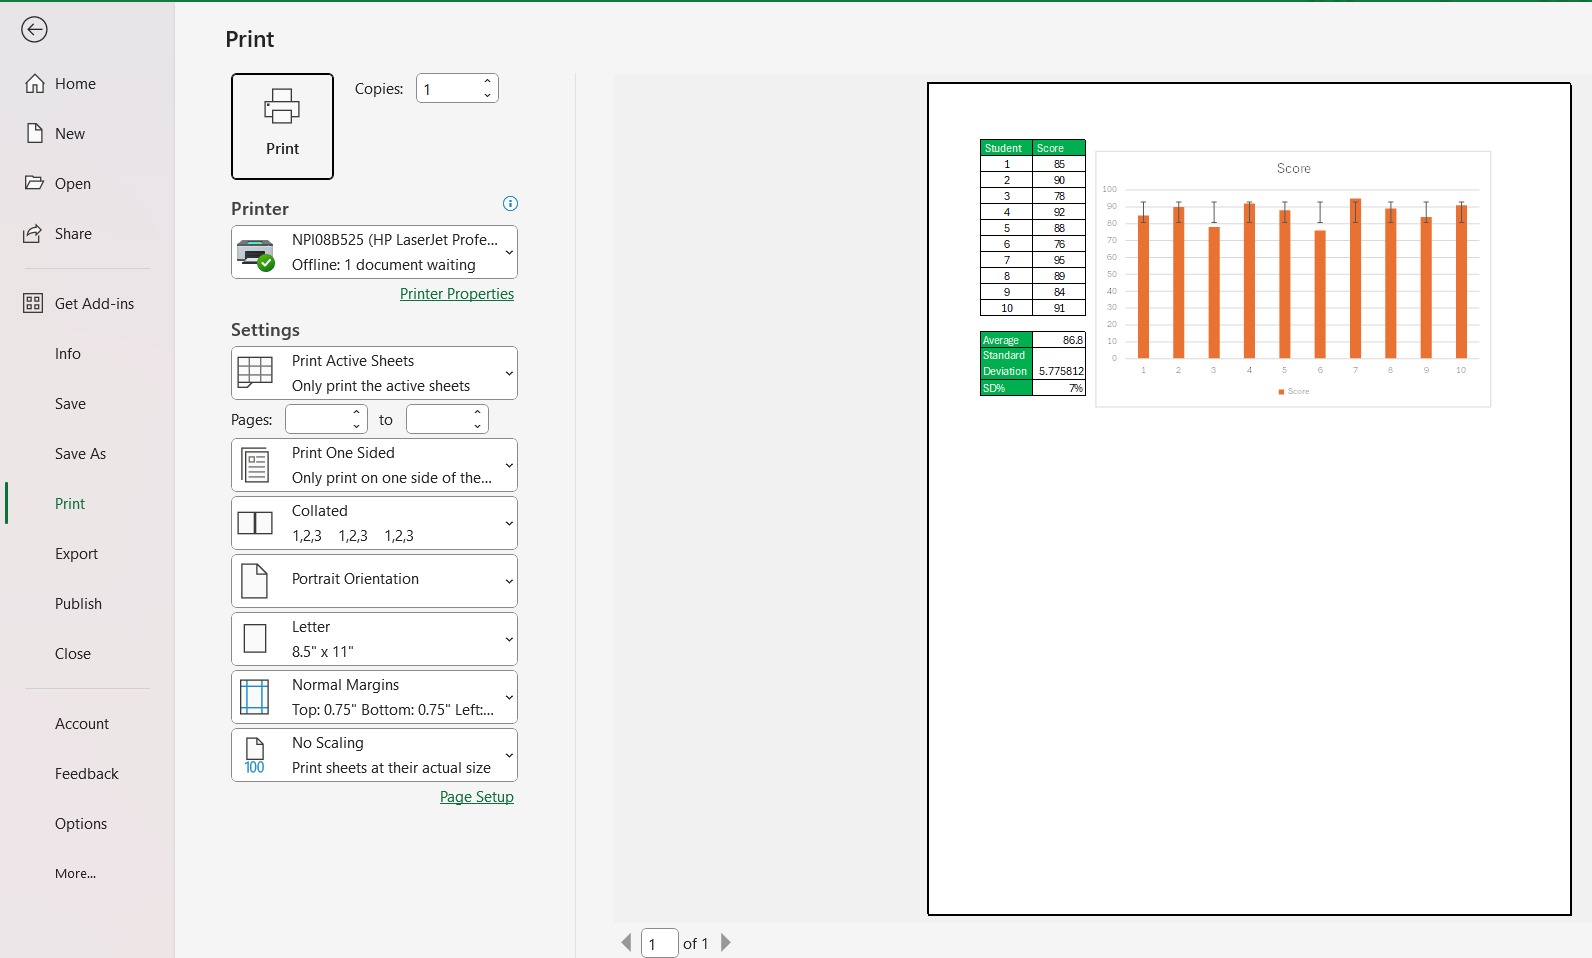
Unleash the full potential of your printer with the ‘Ctrl + P’ command. This simple yet powerful shortcut is your portal to the printing dialog box, offering quick access to all of Excel’s printing functionalities.
Whether you need to print the whole sheet or a selection, ‘Ctrl + P’ is your one-stop command to make it happen efficiently.
Setting Your Print Area: A Primer
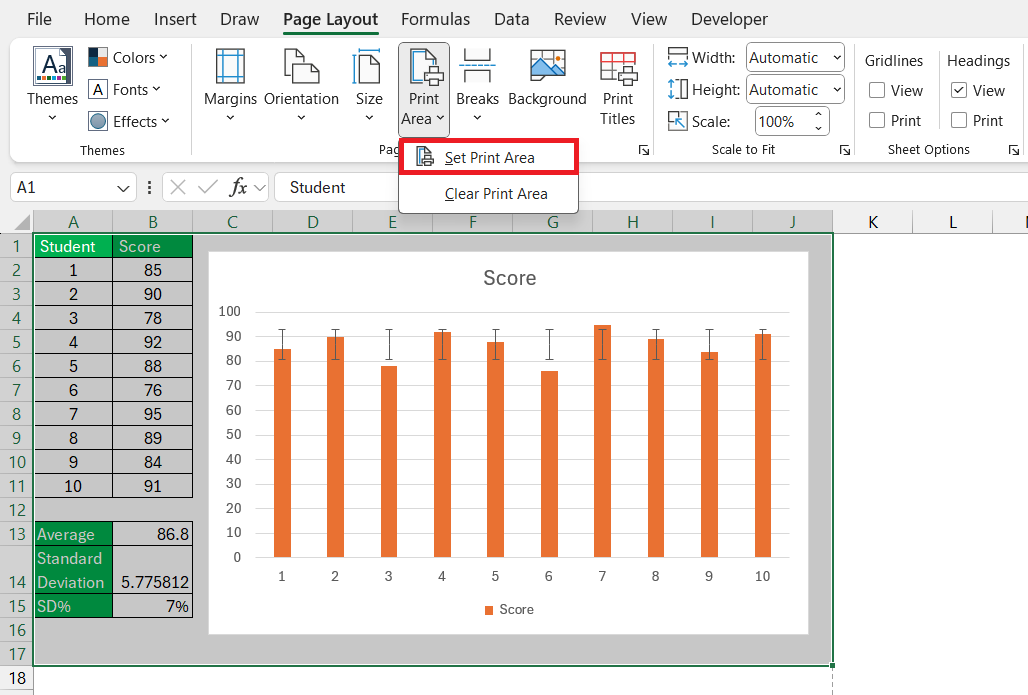
To avoid wasting paper and ink, setting your print area in Excel ensures that you print exactly what you need. By selecting the cells you want and then using the ‘Set Print Area’ option under ‘Page Layout,’ you tell Excel to focus on those cells alone.
This means no more printing of irrelevant data—just the parts you want.
Tailoring Your Printouts with Shortcut Expertise
How to Print All Grid Lines with Ease
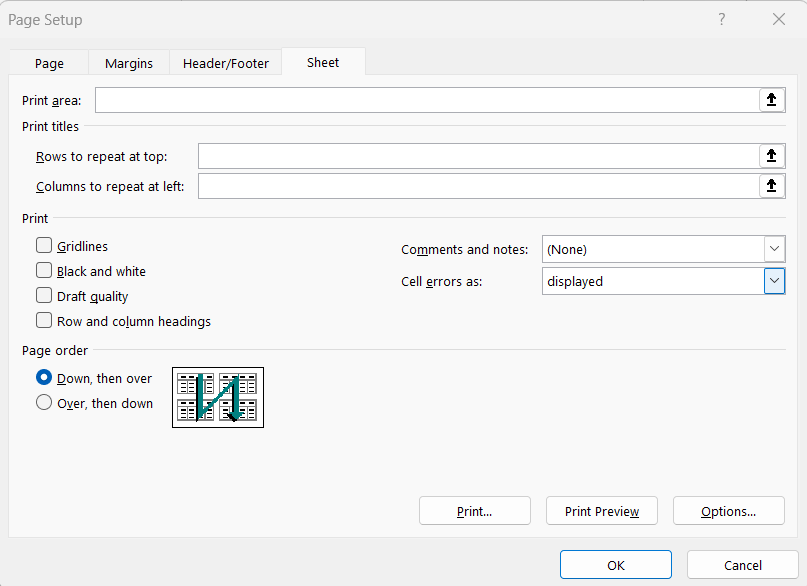
Printing all grid lines in Excel is a breeze. With just a few clicks, you can ensure that the grid lines appear on your printed worksheets, outlining each cell for better clarity. Simply navigate to the ‘Page Layout’ tab, find the ‘Sheet Options’ group, and tick the ‘Print’ checkbox under ‘Gridlines’. Voila! Your grid lines are print-ready.
For an even deeper dive into gridline printing, remember you can preview them with Ctrl+F2 and address any troubleshooting issues through the ‘Page Setup’. This little know-how will ensure every cell, filled or empty, stands out in your printout.
Customizing Multiple Print Areas with Shortcuts
To manage complex spreadsheets, customizing multiple print areas can be a game changer. By holding down the Ctrl key while selecting the ranges you wish to print, you can define multiple print sections. This ability to segregate data into distinct printable parts promises clean and targeted printouts. To set them, just click ‘Set Print Area’ in the ‘Page Layout’ tab. And remember, Excel remembers these settings the next time you’re ready to print.
If you prefer keyboard shortcuts, Alt + P + R can swiftly set the print area for you, letting you stay focused on the data instead of navigating menus. Each selected area gets its own page, creating a series of clearly defined documents from one Excel sheet.
Special Tips and Tricks
Overcoming Common Print Area Challenges in Excel
Facing print area issues in Excel? You’re not alone. Sometimes print areas are set unintentionally, leading to incomplete or fragmented documents. But don’t fret! To clear all print areas, go to ‘Page Layout’, find ‘Print Area’ and select ‘Clear Print Area’.
Also, if the print area isn’t adjacent, Excel prints each area on a separate page. To keep related data together, ensure that the cells are contiguous before setting the print area. And for those pesky times when settings like “Rows to repeat at top” are grayed out, make sure to launch ‘Page Setup’ from the ‘Page Layout’ tab, not from the Print Preview.
With these tips, you’ll navigate through common print area troubles like a pro.
Leveraging Excel’s Printing Shortcuts in Combination with Other Functions
To maximize efficiency in Excel, savvy users combine print shortcuts with other functions. This strategy amplifies your productivity by chaining commands together. For instance, after setting your print area, jump straight into print preview with ‘Ctrl + P’ to assess and adjust settings then ‘Ctrl + P’ again to print.
Also, consider using ‘Ctrl + Arrow keys‘ to quickly navigate across ranges before setting the print area. When dealing with formulas, ‘F9’ recalculates your sheet ensuring data accuracy before you print. By integrating shortcuts, you create a smooth, rapid workflow that transforms complex tasks into simple steps.
Each combination you master is an investment in streamlined Excel usage, so explore and experiment to find the perfect workflow suited to your tasks.
Leveraging Shortcuts Beyond Printing
The Interconnection Between Excel Shortcuts: From Navigation to Printing
Shortcuts in Excel are not isolated tricks; they are interconnected threads that create a fabric of efficiency. Linking navigation shortcuts such as ‘Ctrl + Arrow Keys’ to rapidly move to the dataset edges with ‘Ctrl + P’ for printing, for instance, streamlines your preparation process. Mastering this dance between shortcuts means fewer clicks and faster results, allowing you to transition seamlessly from data entry to final output, reflecting a harmonious blend of productivity tools.
Remember, fluid navigation leads to better data management, which in turn ensures error-free printing. It’s a cycle that promotes a proficient and stress-free Excel experience.
Elasticity in Practice: Pivot Tables and Charts Print Shortcuts
Pivot tables and charts are power players in data analysis, and knowing the right print shortcuts can make them even more potent. When working with pivot tables, first ensure your table fits on one page using ‘Ctrl + A’ to select your pivot table, followed by ‘Alt + P + I + S’ to open Page Setup and adjust the scaling.
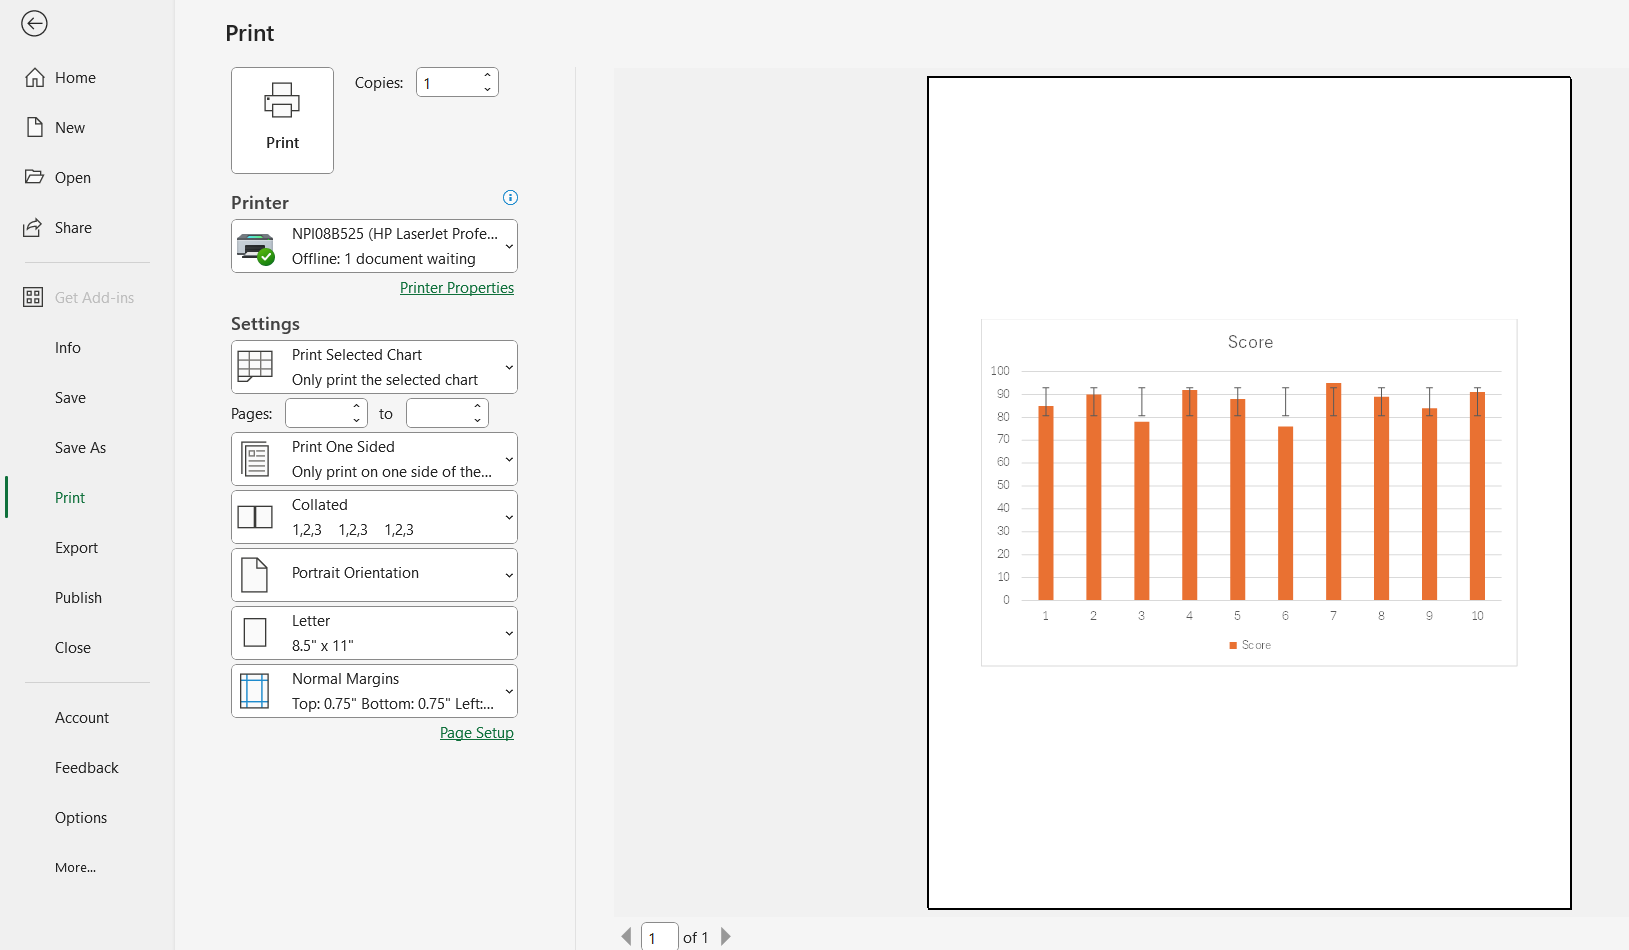
For Excel charts, select your chart and hit ‘Ctrl + P’ to move directly to the print preview, where you can verify that the chart is centered and scaled correctly.
Using these shortcuts ensures your pivot tables and charts are not just insightful but also presentation-ready at a moment’s notice.
Leverage these methods to easily translate your complex data visualizations into printed formats that are just as impactful on paper as they are on screen.
FAQ: Mastering Excel’s Print Shortcuts
What is the shortcut key for print?
The shortcut key to open the print dialogue box in Excel and most other applications is ‘Ctrl + P’. This quick command allows you to jump straight to printing options, where you can set your preferences and print your document.
Can I Create a Keyboard Shortcut to Set the Print Area in Excel?
Yes, you can create a keyboard shortcut to set the print area in Excel by recording a macro and assigning a shortcut key to it. There isn’t a default shortcut for this, but a quick macro can do the job efficiently.
How Do I Ensure That My Entire Worksheet Prints Correctly?
To ensure your entire worksheet prints correctly, check your print area settings, confirm that no rows or columns are hidden, and use ‘Page Layout’ to adjust scaling and page breaks. Preview the print layout using ‘Ctrl + P’ before printing.
What is Ctrl Shift F3 in Excel?
In Excel, ‘Ctrl + Shift + F3’ is a shortcut used to create names in a workbook from a selected range. It allows you to use the values in the row or column of your selection as the names for the rest of the selected data.
How to use print preview in Excel?
To use print preview in Excel, press ‘Ctrl + P’ or ‘Ctrl + F2’, which quickly opens the Print Preview window. Here, you can see how your document will look when printed and make adjustments as needed before sending it to the printer.
John Michaloudis is a former accountant and finance analyst at General Electric, a Microsoft MVP since 2020, an Amazon #1 bestselling author of 4 Microsoft Excel books and teacher of Microsoft Excel & Office over at his flagship MyExcelOnline Academy Online Course.


