How to Remove Drop Down Lists in Excel – Step by Step Guide
If I want to simplify my Excel spreadsheets by removing drop-down lists, I’m in the right place.
Whether I've outgrown certain options or need to streamline data entry, getting rid of these lists is a straightforward process.In this article, I’ll guide myself through the step-by-step procedure to remove drop-down lists, so I can regain control over my data and adjust my spreadsheet to fit my current needs.
Let’s get started! Key Takeaways:
- Introduction to Drop-Down Lists: Drop-down lists in Excel offer an easy way to standardize data entry and minimize errors by providing predefined options for users to select from.
- Common Reasons for Removal: You might need to remove drop-down lists if they become obsolete if you want to allow more flexibility in data entry, or during a spreadsheet overhaul.
- Steps for Removal: To delete a drop-down list, select the relevant cells, navigate to the ‘Data’ tab, open ‘Data Validation,’ click ‘Clear All,’ and confirm with ‘OK.’
- Bulk Removal: Use the ‘Clear All’ feature to efficiently remove multiple drop-down lists at once by selecting the cells and choosing ‘Clear All’ from the ‘Editing’ group in the ‘Home’ tab.
- Post-Removal Checks: After removing drop-down lists, verify data integrity by checking for gaps, ensuring no unintended lists remain, and updating any affected formulas or calculated fields.
Table of Contents
Introduction to Drop Down Lists in Excel
Understanding the Utility of Drop Down Lists
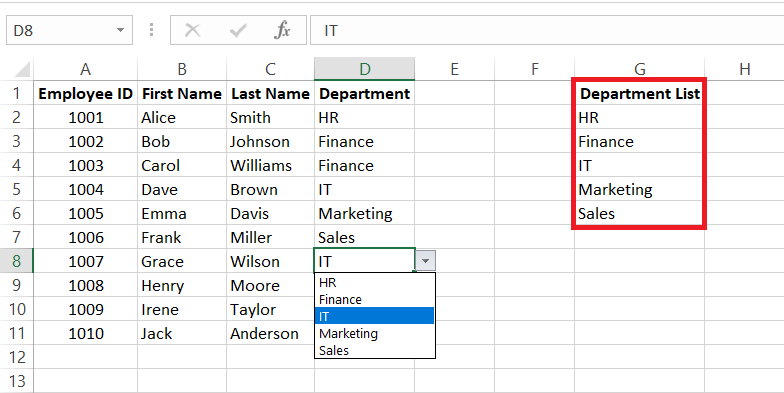
Drop down lists in Excel offer an intuitive way for users to enter data into spreadsheets. They help maintain consistency and accuracy by presenting a set of predefined choices, minimizing the chances of input errors.
Imagine being able to pick from a list of options rather than typing out each entry; that’s the convenience drop-down lists bring to the table.
They’re particularly useful when the same values recur across your data set—like department, product names, locations, or categories. By standardizing inputs, they ensure that everyone is on the same page, quite literally!
Common Scenarios for Removing Drop Down Lists
There are a few situations where you might find yourself needing to cut these handy helpers loose from your Excel worksheet. For instance, when a project evolves and the set choices no longer apply, removing drop-down lists clears the way for fresh data.
Perhaps you’re looking to share the spreadsheet with others and want to give them the freedom to enter their unique data. Or maybe you’re doing a clean sweep, reorganizing your data setup, and those once helpful lists have become obsolete.
In any case, purging unnecessary drop-down lists helps keep your workbook tidy and adaptable to new requirements.
Simple Steps to Remove Drop Down List
Deleting a Specific Drop Down List
To remove drop-down list from existence in your spreadsheet, follow these magical steps:
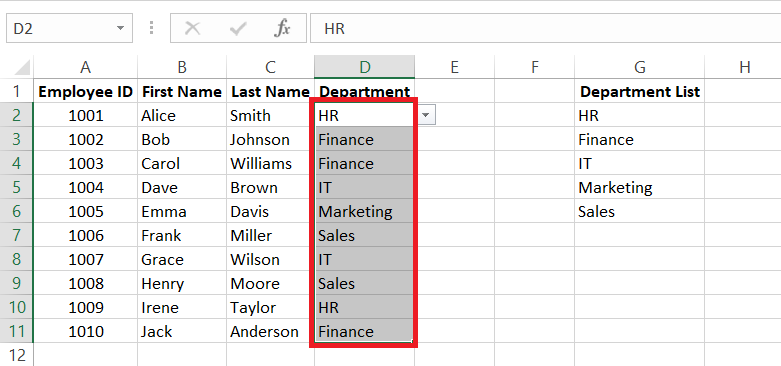
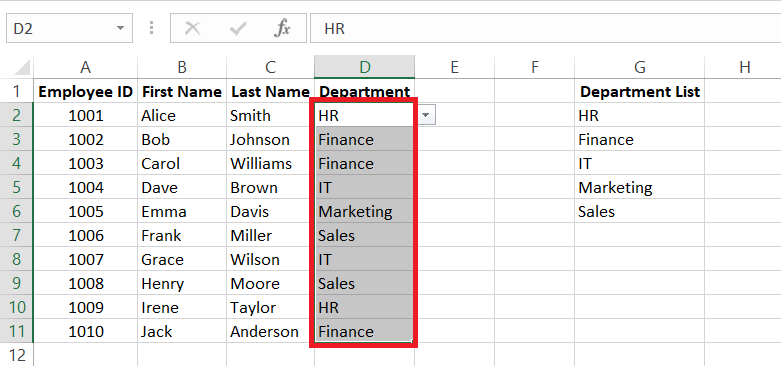
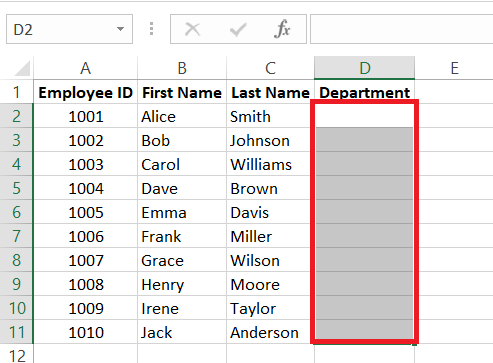
STEP 1: First, select the cells where the drop-down list you wish to eliminate resides.
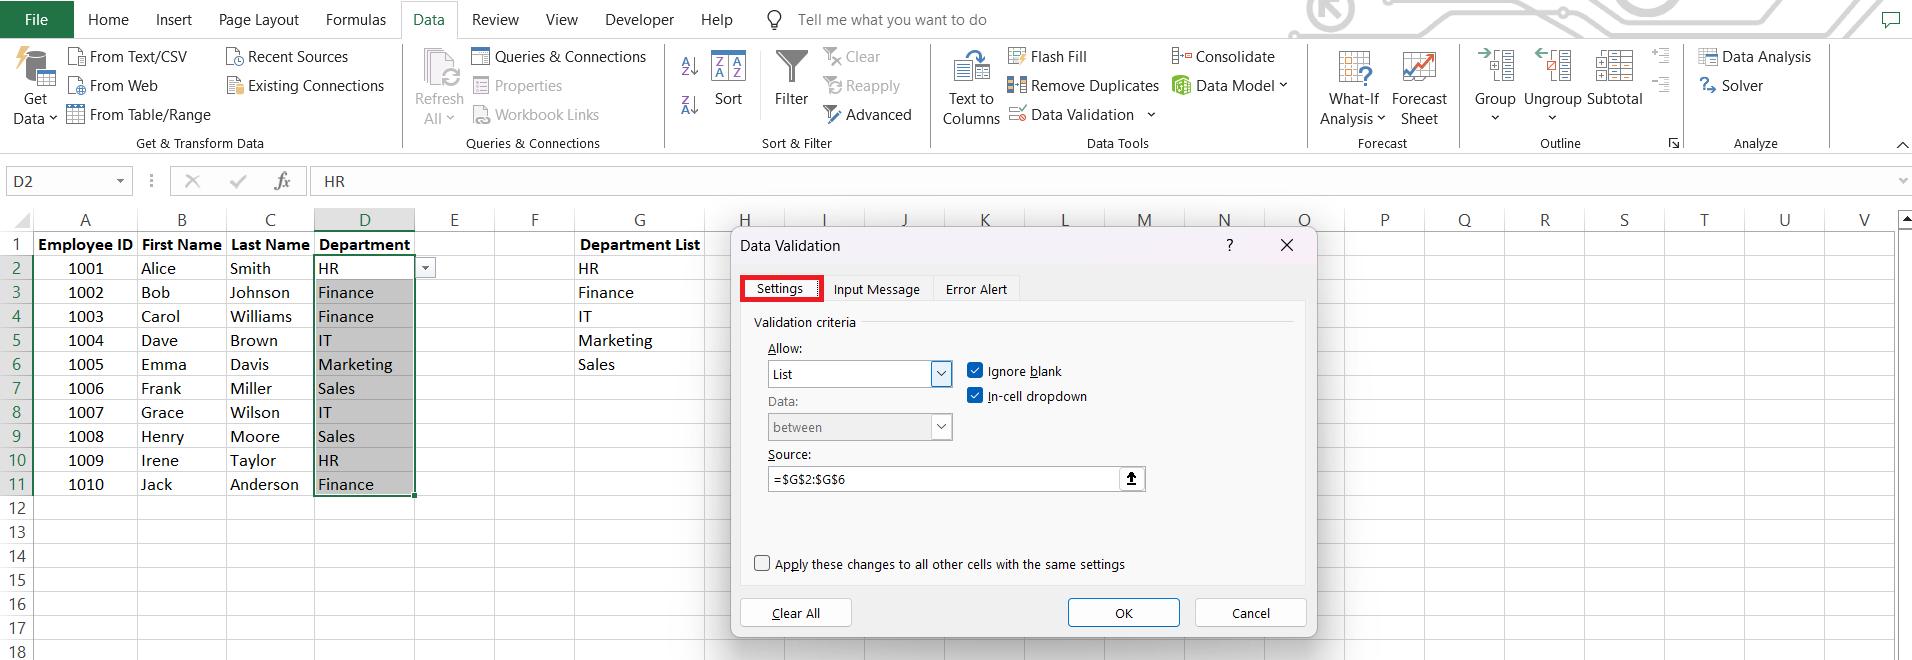
STEP 2: Take a trip to the ‘Data’ tab once more and click on ‘Data Validation’.
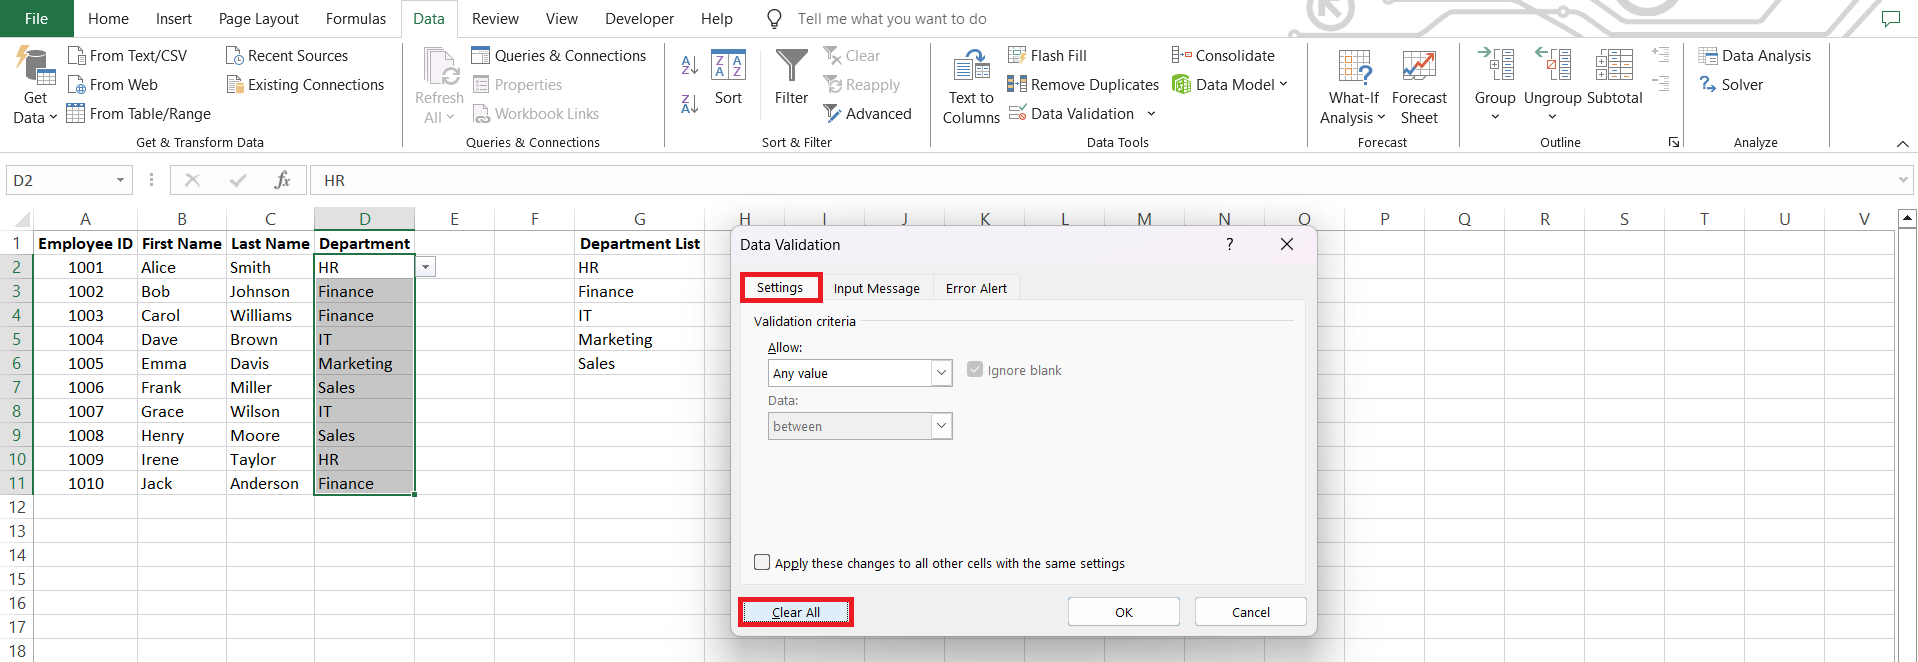
STEP 3: With the ‘Data Validation’ dialog window now open, hop on over to the ‘Settings’ tab.
STEP 4: Look for and engage the ‘Clear All’ button—your magic eraser.
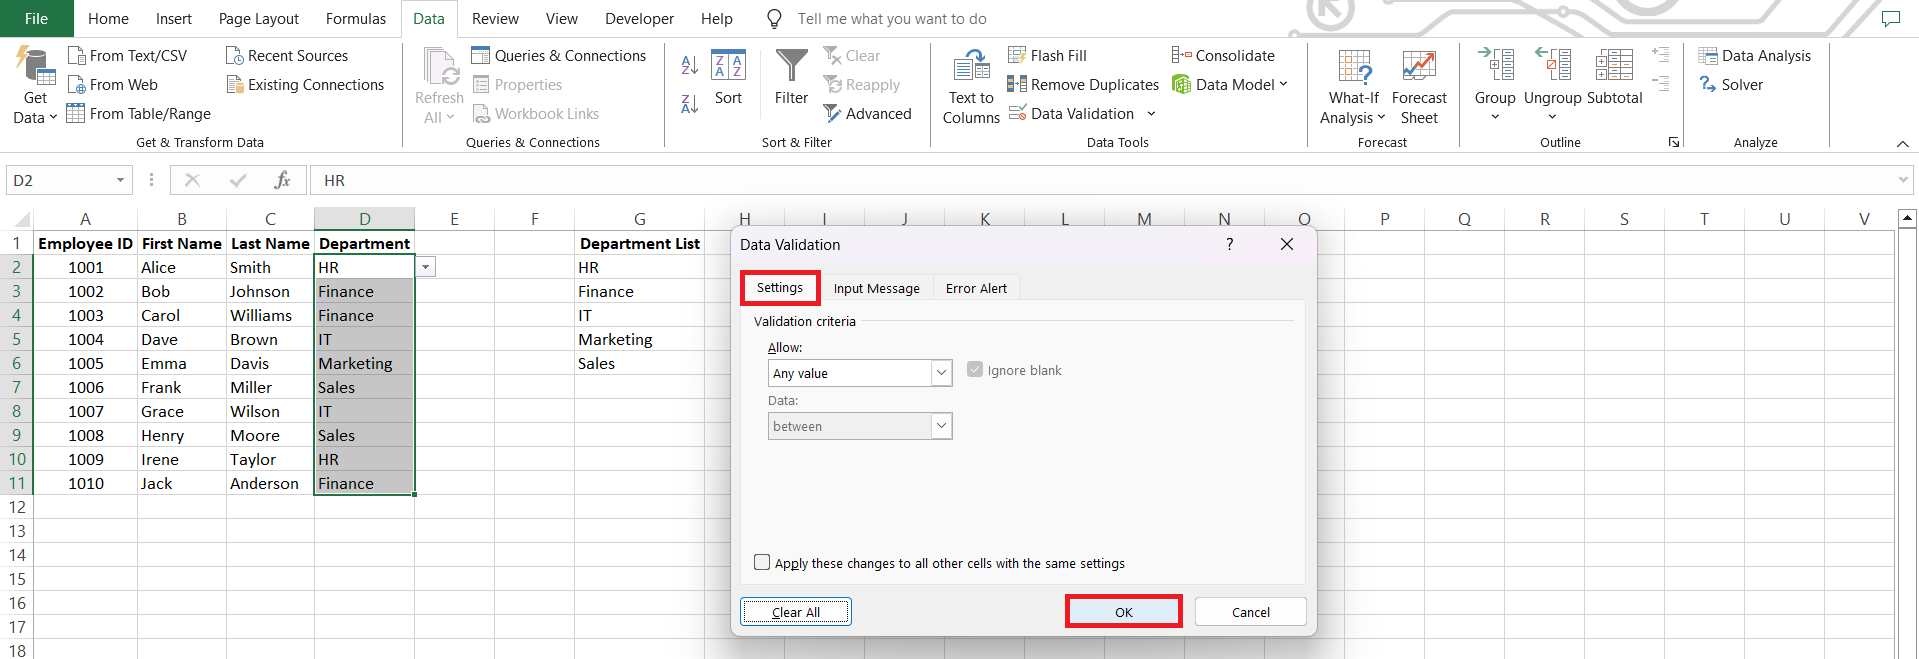
STEP 5: Conclude the incantation by clicking ‘OK’, and like that, the selected drop-down list is no more.
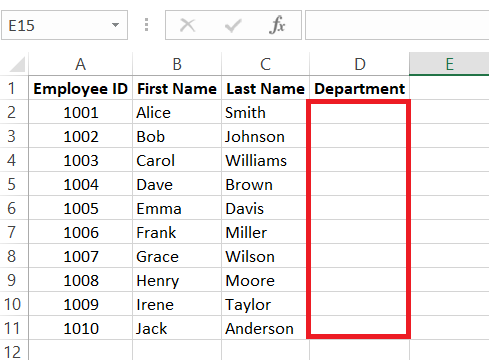
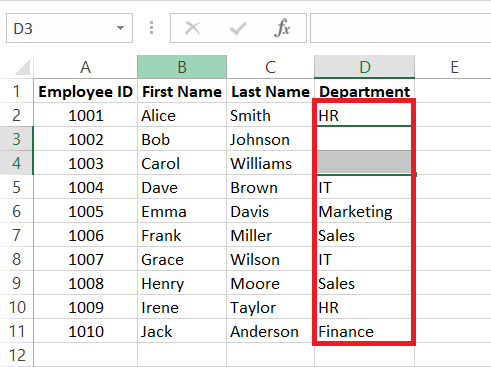
STEP 6: Don’t worry, the data that already exists in those cells remains untouched, allowing you a clean slate without disturbing the existing fabric of your data mosaic.
Clearing Multiple Drop Down Lists Effortlessly
Using the “Clear All” Feature for Bulk Removal
When you’re ready to dive into a deeper level of cleaning, the “Clear All” feature is your trusty broomstick. Envision the satisfaction as you sweep away not one, not two, but multiple drop-down lists in one graceful motion. Here’s how you execute this room-clearing spell:
STEP 1: Select the multitude of cells that house the drop-down lists you’re ready to part with.
STEP 2: Direct your wand, or cursor, to the ‘Home’ tab and click on the ‘Clear’ option located in the ‘Editing’ group.
STEP 3: Revel in the choice of ‘Clear All’ from the drop-down menu—this is your incantation for bulk removal.
STEP 4: With a final click, witness how all data, including those drop-down lists, vanish from the selected cells. It’s a fresh start where rules, values, and previous formatting are all but distant memories.
Using the ‘Clear All‘ feature is the best way to declutter your Excel worksheet when you’re set to reset and begin anew.
Maintaining Data Integrity Post Removal
Verifying Data Consistency After Deletion
Once you’ve waved goodbye to those drop-down lists, it’s time to ensure everything else remains shipshape. Start by combing through your data to verify that only the intended drop-down lists have vanished and all others are still dutifully at their post. Check for gaps that might have appeared and confirm whether the remaining data aligns with your spreadsheet’s overall logic and rules.
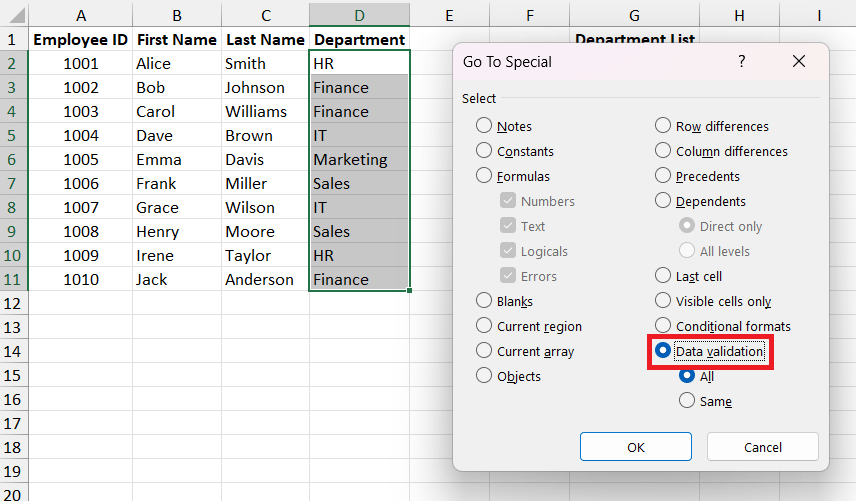
Consider employing the ‘Go To Special’ feature to select all cells with data validation and make sure no unwanted stragglers remain. It’s similar to checking your pockets after a magic trick—always a good idea to ensure nothing’s disappeared that wasn’t meant to!
Additionally, be vigilant for any calculated fields or formulas that may have relied on those now-absent drop-down lists. If they exist, you’ll need to perform some quick wizardry to adjust or update those formulas to maintain the integrity of your data.
Best Practices for Drop Down List Management
Navigating the seas of drop-down list management in Excel need not be a daunting voyage. Here are some best practices to keep you afloat:
- Review Regularly: Periodically check your drop-down lists for relevance and update them to suit changing data requirements.
- Keep it Simple: Aim for clear, concise options within your lists to lessen confusion and enhance user experience.
- Uniformity is Key: Ensure uniformity in your lists, using the same data type and formatting across similar fields.
- Backup Before Bulk Actions: Before making sweeping changes—or ‘Clear All’—actions, backup your data. In the realm of Excel, a saved version is like a protective charm.
- Document Changes: Keep a log of updates made to your drop-down lists, their criteria, and their sources. This serves as a valuable reference, especially when multiple users are involved.
By adhering to these best practices, you’ll have a streamlined process in place for managing your drop-down lists, ensuring they’re always serving their intended purpose without becoming a source of spreadsheet chaos.
Resolving Potential Issues and Troubleshooting
Addressing Common Challenges in List Removal
When removing drop-down lists, you might encounter a few bumps on the road. Maybe you’re finding that the lists just won’t disappear, or they keep reappearing like a bad penny. One common issue could be that the lists are fed by data validation rules that reapply themselves every time the workbook is opened. Nip this problem in the bud by ensuring you’ve removed the correct data validation settings, not just the visual drop-down interface.
Another stumbling block could be merged cells causing mischief in your list removal endeavors. Drop-down lists don’t take kindly to merged cells, so ensure they’re separated before you begin extermination.
Lastly, shared or protected worksheets can throw a wrench into your plans. If you’re not the sheet owner or don’t have editing privileges, you’ll need permission to proceed with your cleansing mission. So, remember to check your access permissions or seek the digital key from the owner for unhindered drop-down demolition.
FAQ: Navigating Drop Down List Removal in Excel
How do I turn off drop-down list?
To turn off a drop-down list in Excel, select the cell or range with the list, go to the ‘Data’ tab, click ‘Data Validation’, and in the dialog box that appears, hit ‘Clear All’, then ‘OK’. This removes the list, letting you input any data freely.
Why might I need to remove drop down list from an Excel sheet?
You might need to remove a drop-down list if the set choices become irrelevant, to grant users more freedom in data entry, or if you decide to update and reconfigure the list to better reflect the data requirements of your Excel sheet.
Can I undo the removal of a drop down list if I make a mistake?
Yes, if you immediately realize a mistake after removing a drop-down list, you can quickly press ‘Ctrl + Z’ to undo the action. If changes were saved, restoring the list will require you to manually reapply the data validation or recover an earlier version of the document.
What are alternative methods for restricting data input without using drop down lists?
Alternatives to restrict data input include using data validation to set specific criteria like date ranges or numerical limits, creating input messages or error alerts, utilizing checkboxes, option buttons, form controls, or even Excel’s conditional formatting to signal when entered data doesn’t meet established rules.
How do I edit a drop-down list in a spreadsheet?
To edit a drop-down list, select the cells with the list you want to change, go to the ‘Data’ tab, hit ‘Data Validation’, and in the ‘Settings’ tab, modify the ‘Source’ box with new items. Click ‘OK’ to save these changes and your list will be updated.
John Michaloudis is a former accountant and finance analyst at General Electric, a Microsoft MVP since 2020, an Amazon #1 bestselling author of 4 Microsoft Excel books and teacher of Microsoft Excel & Office over at his flagship MyExcelOnline Academy Online Course.

