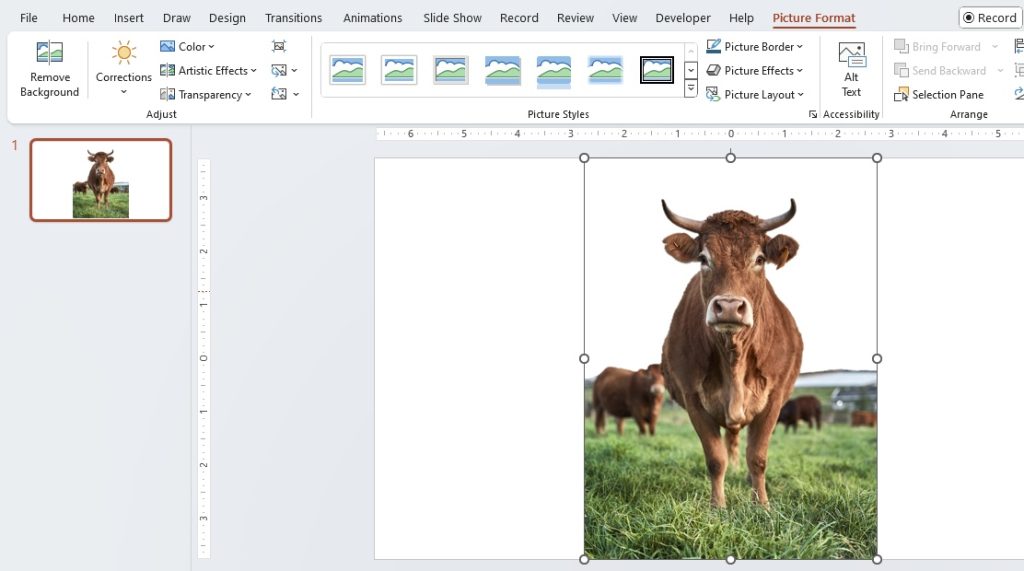
To remove picture backgrounds in PowerPoint goes beyond mere aesthetics; it’s about creating crisp, focused slides that hold your audience’s attention. Imagine how much more impactful your presentations can be when all eyes are drawn to the subject that truly matters – freed from the shackles of a chaotic background! Plus, by decluttering your visuals, you’re not just streamlining the design; you’re also minimizing file sizes, which means quicker load times and snappier transitions.
Download our 101 Advanced Excel Formulas & Functions Examples!
Key Takeaways
- Use the ‘Remove Background’ tool in the ‘Picture Tools Format’ tab after opening and selecting your image in PowerPoint to automatically select and remove the unwanted background.
- Manually adjust the auto-selected areas if necessary to ensure that only the desired parts of the image are kept, achieving a precise background removal.
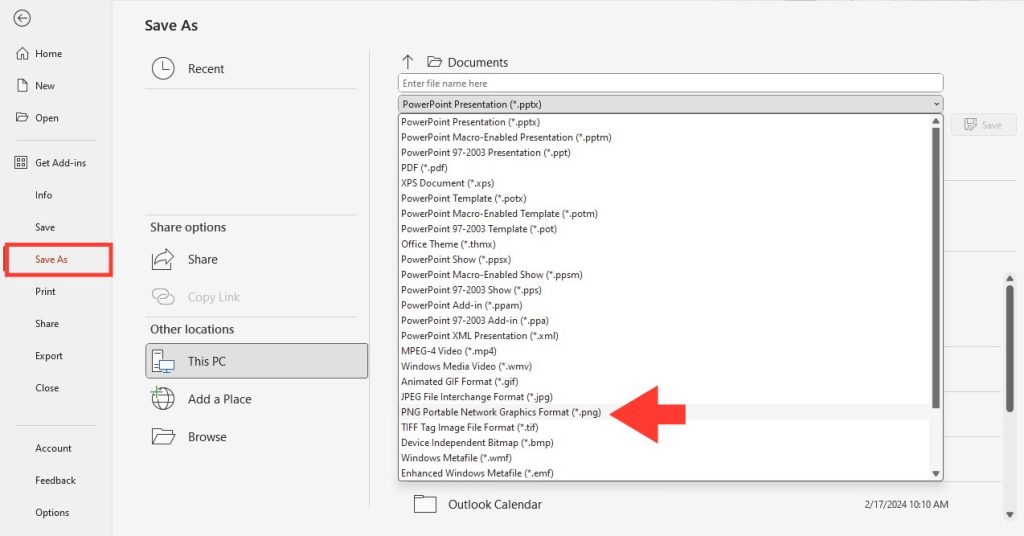
- After perfecting the selection, right-click on the image, choose ‘Save as Picture’, and save in a PNG format to maintain transparency; then, reinsert the edited image into your PowerPoint presentation for a clean look with no background.
Before You Start: Image Selection Best Practices
Before diving headfirst into background removal, consider the image itself. Start by choosing high-resolution and sharp images. A clear distinction between your subject and its background is key to a smooth edit. A uniform and solid background is a walk in the park for PowerPoint’s tools, but if you’re dealing with more complexity, aim for simplicity in the patterns and colors behind your main subject. A blurred or uncluttered backdrop can be your best friend here.
Remember, the right image can mean the difference between a one-click fix and a tedious editing session. Choose wisely, and you’re halfway to a clean, professional-looking presentation.
Table of Contents
Techniques for Background Erasure in PowerPoint
Technique 1: Using the ‘Remove Background’ Feature
Employing the ‘Remove Cultivating a neat and polished look for your PowerPoint slides often involves taking out unnecessary image backgrounds. Thanks to PowerPoint’s ‘Remove Background’ feature, you can achieve this swiftly. This built-in tool is anyone’s ally when they want to focus on the main image subject.
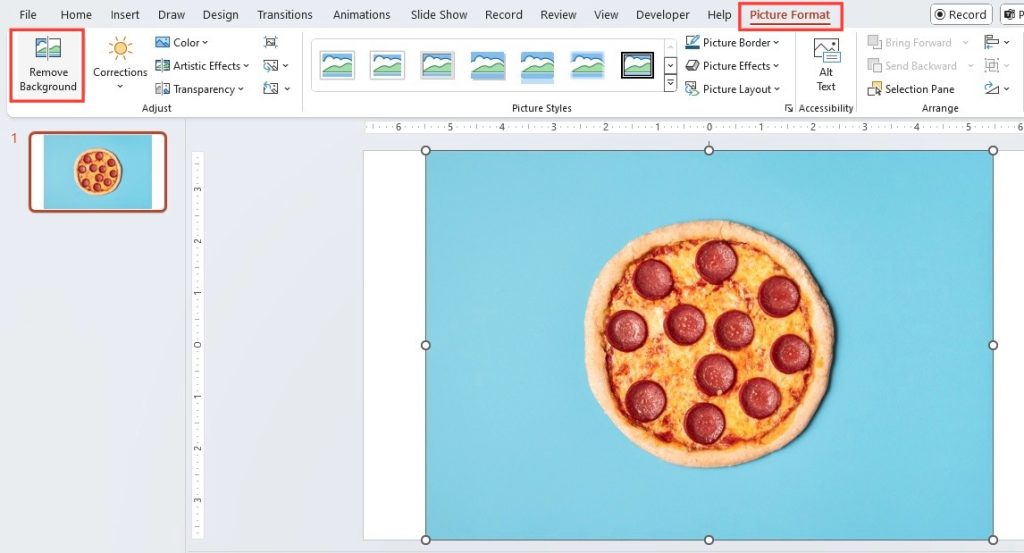
The feature relies on AI to differentiate between the foreground subject and the background. When the subject and background contrast well, the tool works like a charm. Simply access the “Picture Format” tab and select “Remove Background.” PowerPoint does a preliminary sweep and you refine from there.
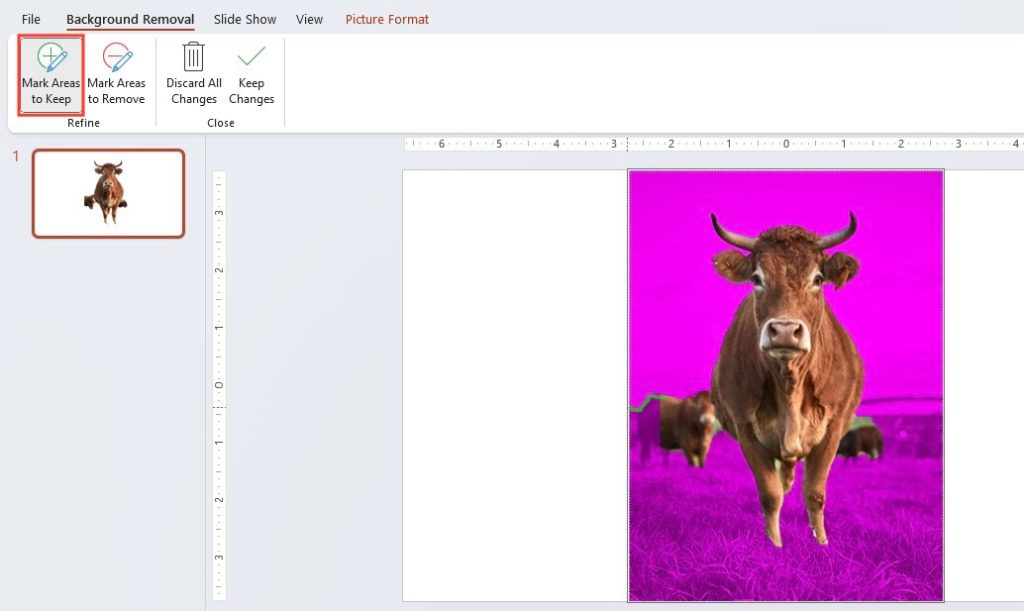
But patience is vital; occasionally, you’ll need to guide the tool by using ‘Mark Areas to Keep’ or ‘Mark Areas to Remove’ to achieve perfection. Background” Feature
Utilizing PowerPoint’s ‘Remove Background’ feature can be likened to waving a magic wand over your slides – with a few nuanced movements, you can transform a cluttered image into a standout visual. It involves a mix of automated processes and manual adjustments:
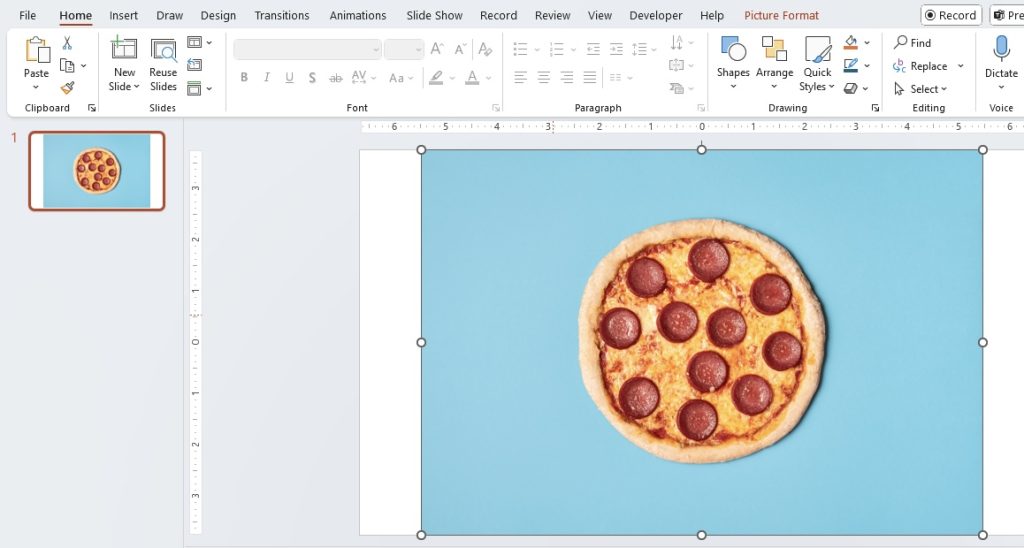
STEP 1: Choose the image you wish to edit and click to select it.
STEP 2: Navigate to the ‘Picture Format’ tab to find the ‘Remove Background’ option.
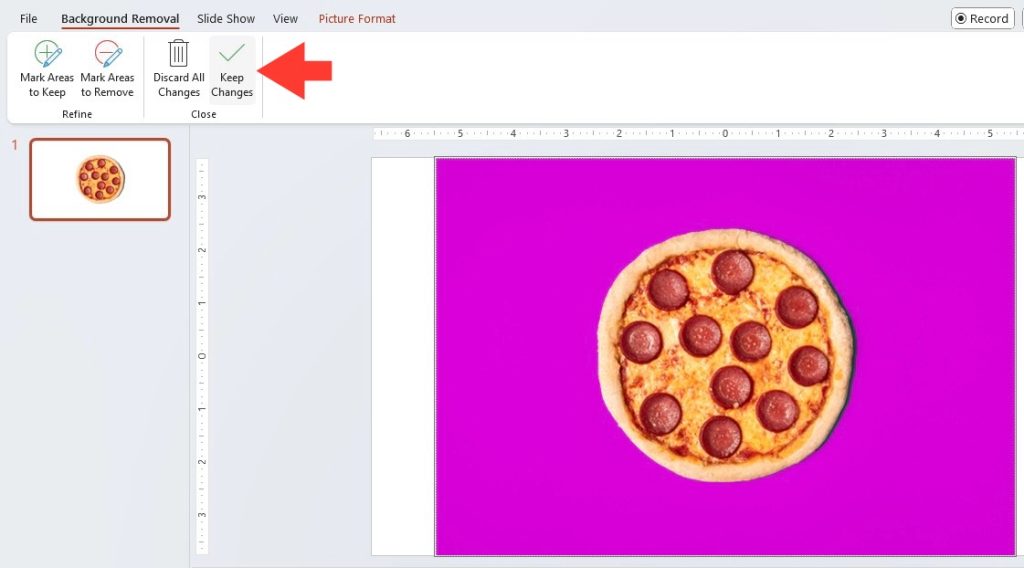
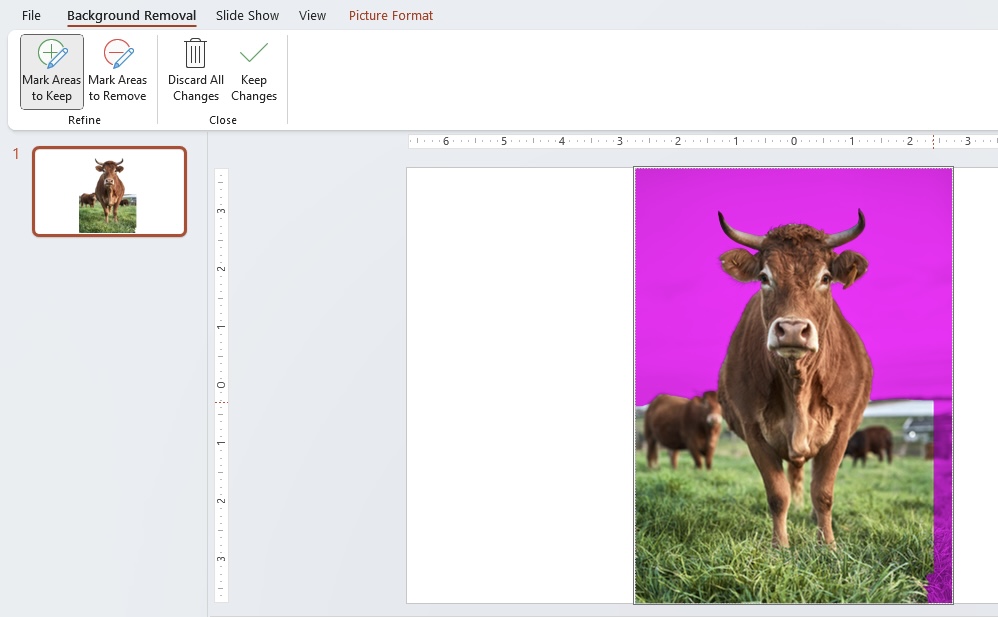
STEP 3: The tool will attempt to distinguish the background automatically. If it’s not perfect, use ‘Mark Areas to Keep’ or ‘Mark Areas to Remove’ to fine-tune the selection with the drawing pencil.
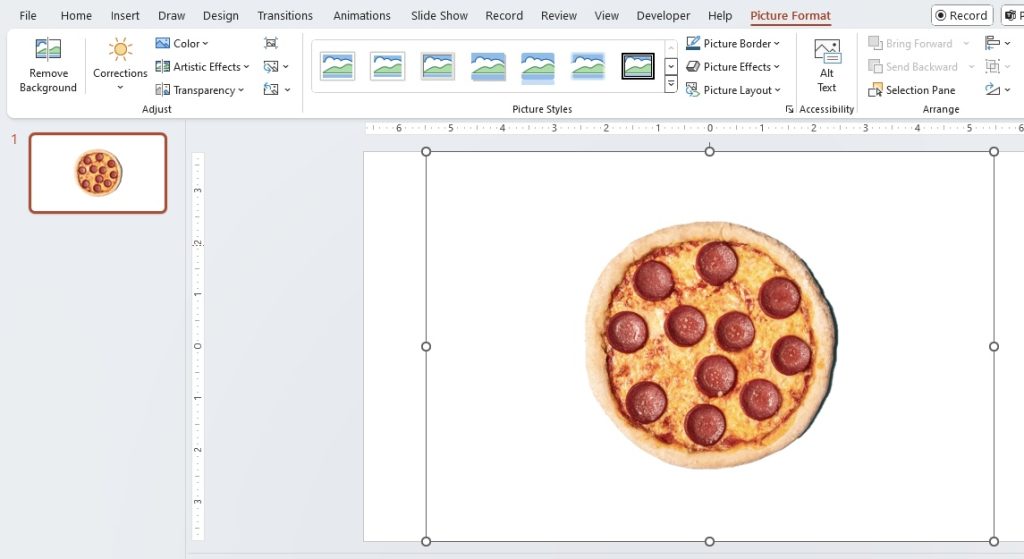
STEP 4: Lastly, commit to the changes by selecting ‘Keep Changes’ or revert by choosing ‘Discard All Changes’.
This technique is straightforward and effective for pictures with solid-colored backgrounds but be prepared to spend a little more time on pictures with more complex backgrounds.
Technique 2: Employing the ‘Set Transparent Color’ Tool
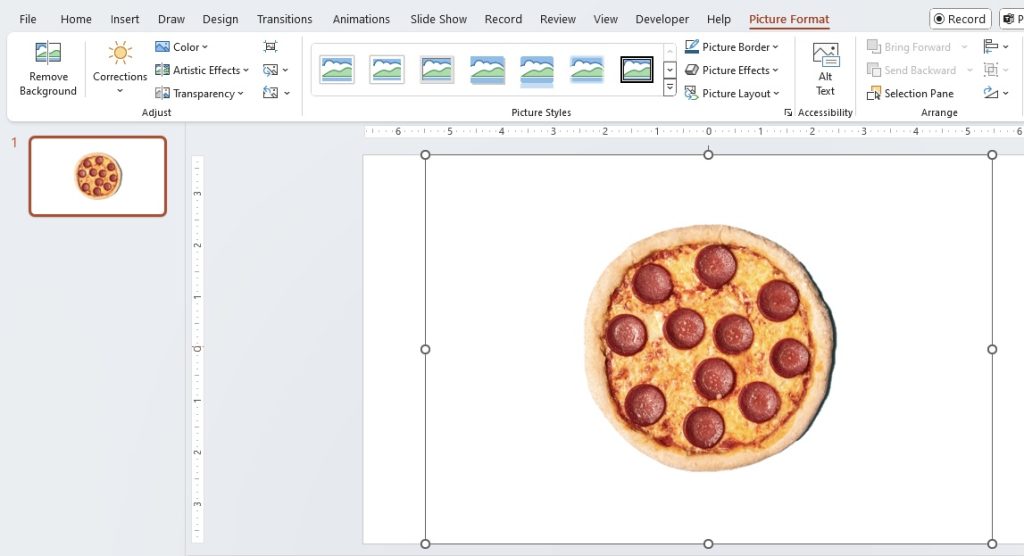
When you’re dealing with images that have a solid background color, the ‘Set Transparent Color’ tool is a skilful trick to use. It’s like playing a game of hide and seek, where you tell PowerPoint which color to make disappear, and ta-da – it’s gone!
To start the magic:
STEP 1: Upload your image into PowerPoint and give it a click to select.
STEP 2: Hop over to the ‘Picture Format’ tab that pops up on the ribbon.
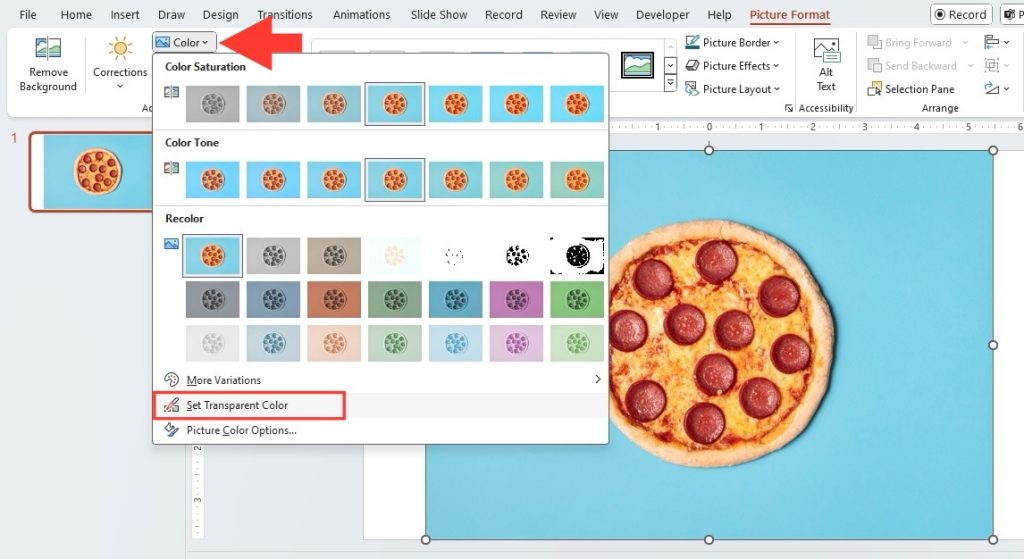
STEP 3: Find and click the ‘Color’ dropdown menu and look down at its bottom for ‘Set Transparent Color’.
STEP 4: Your cursor shifts shape to a pen with an arrow. With this, click on the background color in the image you wish to vanish.
It feels like having an eraser that targets only the color you choose, making it transparent. However, do bear in mind that this tool has its limits. It might not work as intended if the background blends too much with the main content or if there are shadows or gradients.
So, use this technique for simple backgrounds, and remember to have an alternative plan when complexity arises.
Navigating Complex Background Removal for Pristine Presentations
For the trickier backgrounds – those with gradients, multiple colors, intricate patterns, or shadows – patience and PowerPoint’s more advanced options become your allies. Here are the savvy steps to navigate through complex background removal:
STEP 1: Insert your chosen image and select it to kick off the process.
STEP 2: Click on ‘Remove Background’ under the ‘Picture Format’ tab that springs up.
STEP 3: PowerPoint will try its best to figure out what to eliminate. You might find yourself in a bit of a complex dance with the ‘Mark Areas to Keep’ and ‘Mark Areas to Remove’ options. Use these to let PowerPoint know the precise areas you’re targeting.
STEP 4: Zoom in for precision work. It can make all the difference in catching those intricate spots that need to stay or go.
STEP 5: Keep alternating between marking areas to keep and remove until the background is fully erased to your satisfaction.
Remember, this can be time-consuming with complex backgrounds, so reserve this for those truly important slides that require a polished look.
With a bit of practice and these steps, even the most complex images can be purged of their backgrounds, ensuring your presentations look nothing short of pristine.
Enhance Your Slides Post-Background Removal
Creative Uses for Removed Background Images in Everyday Tasks
Once you’ve mastered the art of background removal, a new world of creative possibilities opens up for your everyday tasks. For instance, you can take a product photo and whisk away the background to create a sleek, catalog-style visual right within PowerPoint. Or perhaps, you’re organizing a virtual event; removed background images can serve as customizable elements for virtual backgrounds or invitations.
Another handy use? Create professional profile pictures for your team by eliminating busy backgrounds and standardizing the look – perfect for company websites or LinkedIn. And let’s not forget marketing materials; with background-free images, your brochures and flyers can achieve a clean, focused aesthetic that directs your audience’s attention exactly where you want it.
It’s all about getting creative with how you repurpose those images for seamless integration into your daily tasks and projects. You’ll wonder how you ever did without this skill!
Pro Tips for Maintaining Quality: Saving Formats and Resolution
Once you’ve got your background removed, the next step is safeguarding the quality of your image. Here’s how to do it like a pro:
Firstly, always aim to save your images as PNG files – this format preserves the transparency and ensures that your subject doesn’t carry an unwanted background when you move it elsewhere. A PNG file also tends to retain higher quality and details, making it ideal for both print and digital use.
Resolution is another cornerstone of quality. Before you start the background removal process, check that your image has a high resolution. This ensures that the subject remains crisp and clear once isolated. If you’re working with vector images, however, remember that PowerPoint isn’t the best playground, as it does best with raster images like JPEGs and PNGs.
When you’re all set, check your edited image by overlaying it onto various colors and designs in PowerPoint – this last step ensures that no stray marks or patches have been left behind. Keep these tips in tow, and your images will look top-tier every time!
Overcoming Common Removal Challenges
When Built-in Tools Fall Short: Troubleshooting Tips
PowerPoint’s built-in tools are usually up to the task, but sometimes they might fall short, leaving you scratching your head. If you find that the ‘Remove Background’ or ‘Set Transparent Color’ tools aren’t quite cutting it, don’t fret – troubleshooting can turn the tide.
Start by revisiting the image selection best practices: are you using high-contrast, high-resolution images? If the answer’s no, you might need to swap out your picture. If you’re already on the right track image-wise, then manual adjustments are your next stop. Use the ‘Mark Areas to Keep’ and ‘Mark Areas to Remove’ tools to navigate through trickier sections of the background – even if it means zooming in for a detail-oriented approach.
If you’ve done all you can and there are still pesky remnants of the background or an untidy look around your subject, third-party editing tools may be your saving grace. Look for free online background removers that offer a different algorithm for detecting edges and background patterns.
Remember, a methodical approach often wins the race – tweak, test, and repeat until your images look ready for the spotlight.
Alternative Methods: Free Tools to Assist with Stubborn Backgrounds
When PowerPoint’s wizardry doesn’t quite conjure up the clean image you’re after, exploring free alternative tools can be a game-changer. AI-powered tools like Removal.ai are at your service, offering sophisticated algorithms that often outperform standard software for those stubborn backgrounds. They can identify and clear away complex patterns or similar colors with surprising precision.
After uploading your image to these online services, you’re usually just a click away from a neatly edited picture. Most tools allow for basic edits after removal, like tweaking contrast or adding a shadow, adding a professional touch to your image. Though the free versions generally limit the resolution of your final download, they often suffice for on-screen uses.
Yet, be aware that high-resolution needs might require a premium version. So, if PowerPoint’s tools leave you high and dry, remember these free digital magicians can save your slides – with only a minimal need for wizardry on your part.
Closing Thoughts on Quick Background Removal
The Final Touch: Ensuring Your PowerPoint Slides Shine
The final touch is all about attention to detail, ensuring your PowerPoint slides don’t just look good, but sparkle with professionalism. Once you’ve removed the backgrounds from your images, take a moment to review your slides as a whole. Check for consistency in image sizing and alignment, which contributes to a neat and structured appearance.
A handy PowerPoint feature is the ‘Align’ tool, which allows you to line up images precisely. Also, consider the placement of your text in relation to your newly edited images; make sure there’s enough contrast and space for readability.
And don’t forget the power of animations! When used sparingly, they can add dynamism, drawing the eye to your background-free images at just the right moment.
With these final refinishing touches, your presentation won’t just convey your message – it’ll do so with a dash of panache that’s sure to leave a lasting impression.
Beyond the Basics: Continuing Your PowerPoint Mastery Journey
Removing backgrounds is just the beginning of what you can achieve with PowerPoint. To continue your mastery journey, delve into advanced features like morph transitions, which can bring seamless animation to your slides, or explore the plethora of custom templates that can give your presentations a unique flair.
Consider tapping into interactive elements – such as action buttons or hyperlinks – to turn a static presentation into a dynamic experience. And as you enhance your slides, keep an eye on the latest trends in PowerPoint design to stay ahead. Join online forums and follow expert blogs to exchange tricks and tips with fellow PowerPoint enthusiasts.
Remember, ongoing learning and experimenting with new tools and features are key to transforming from a PowerPoint user to a maestro.
So go on, embrace the wealth of knowledge available at your fingertips and let your creativity with PowerPoint know no bounds!
FAQ on Removing Picture Backgrounds in PowerPoint
Can I Restore a Background After I’ve Removed It in PowerPoint?
Absolutely, you can restore a background if you haven’t finalized all your changes yet. Just hit ‘Discard All Changes’ in the ‘Remove Background’ option and your image will bounce back to its original form, background and all. But remember, once you save and close your PowerPoint file after removing the background, there’s no undo button for that session. Always keep a copy of the original image as a backup.
How Do I Deal With Tricky Backgrounds That Won’t Remove Easily?
For those stubborn backgrounds that won’t budge, patience and attention to detail are key. Use PowerPoint’s ‘Mark Areas to Keep’ and ‘Mark Areas to Remove’ tools for a manual touch-up. If that doesn’t cut it, switch to a high-tier tool like Adobe Photoshop, or leverage free online background removal services that offer advanced capabilities.
Are There Any Online Resources That Can Help Remove Backgrounds?
Certainly! There are a plethora of online resources like Removal.ai, Fotor, and Clipping Magic that specialize in background removal. They’re user-friendly and just what you need for a hassle-free fix. These tools often come with tutorials and community support to guide you through the process. Plus, they’re excellent for quick edits when you’re short on time.
John Michaloudis is a former accountant and finance analyst at General Electric, a Microsoft MVP since 2020, an Amazon #1 bestselling author of 4 Microsoft Excel books and teacher of Microsoft Excel & Office over at his flagship MyExcelOnline Academy Online Course.

