In this example, you can see there is a column I mentioned quarter. You want to extract the last character from the text. QTR1 mentioned in cell I2, you want to extract the number 1.
You can use the Text.End function in Excel PowerQuery to return the number of characters from the end of a text value.

Syntax of Text.End Function
The syntax of Text.End Function is:
=TEXT.END(text, num_chars)
where:
- text – the cell from which you want to extract characters
- num_chars – number of characters you want to extract
Follow the step-by-step tutorial on Replicating Excel RIGHT Function with M in Power Query and download this Excel workbook to practice along:
Let’s go through the steps in detail:
STEP 1: Select your data and turn it into an Excel Table by pressing the shortcut Ctrl + T or by going to Insert > Table

STEP 2: Go to Data > Get & Transform > From Table (Excel 2016) or Power Query > Excel Data > From Table (Excel 2013 & 2010)
Excel 2016:

Excel 2013 & 2010:

STEP 3: This will open up the Power Query Editor.
Select the SALES QTR column.
Go to Add Column > Add Custom Column

STEP 4: We want to get the last character of the SALES QTR cell values. For example: 1, 2, 3 or 4
So, let us create a simple M expression to replicate the Power Query RIGHT function.
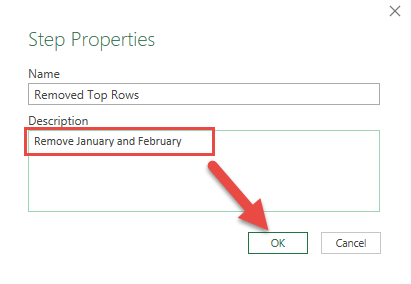
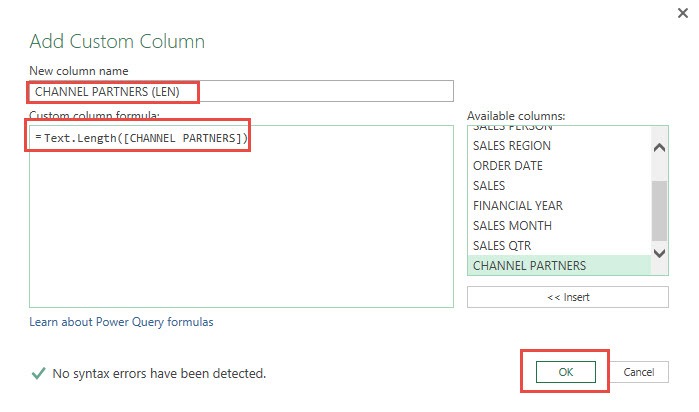
In the New column name text box, type SALES QTR (Shortened)
In the Custom column formula, type in: Text.End(
From the Available columns choose SALES QTR and Insert
Then finish off the formula by entering, 1)
We now have built the following formula:
Text.End([SALES QTR], 1)
So let us quickly break down what we just did:
- We are using the Text.End formula to get the last X characters of the SALES QTR column
- We place in 1, to specify that we want the last 1 character.
Click OK to confirm.

Now you will see your changes take place.

STEP 5: Click Close & Load from the Home tab and this will open up a brand new worksheet in your Excel workbook with the updated values.

Congratulations! You have used a M formula for replicating the RIGHT function in Power Query!

Just like Text.End can be used to replicate the Excel Right function,
- Use Text.Start to replicate the LEFT function
- Use Text.Position to replicate the FIND function
- Use Text.Length to replicate the LEN function
Table of Contents
Tips & Tricks
Best Practices for Readable and Maintainable M Code
To craft M code that stands the test of time and collaboration in Power Query, one should focus on readability and maintenance. Start by assigning intuitive names to your steps; consider ‘ExtractLastName’ far more informative than ‘Step2’. This small effort can lead to a more narrative-style code, allowing anyone who reads it to follow along easily.
Sprinkle your code with comments generously, as they narrate the ‘why’ which is just as important as the ‘what’ part of your code. It’s like leaving breadcrumbs for the next person to follow your logic with less guesswork.
Top tip: Keep your M code modular. Break down transformations into bite-sized steps that can easily be altered or debugged. Imagine assembling a picture with puzzle pieces instead of trying to change a section of a large tapestry.
Write your M code with someone else in mind, so that clarity, simplicity, and thorough documentation are your stalwart companions on your Power Query adventures.
Custom Functions for Repeated Use of RIGHT Logic
Creating a custom function in Power Query can skyrocket your productivity, especially if you find yourself frequently applying the RIGHT function logic. Imagine you have a myriad of tables where you consistently need to extract specific information from the right end of text values. Why not craft a reusable tool for that?
Here’s the recipe: devise a function once and call upon it wherever needed. You simply feed it parameters like the text you’re dissecting and the number of characters you yearn to extract—and voilà, consistent results and a codebase devoid of redundancy.
To conjure a custom function, navigate to the Advanced Editor, start with a let expression, define your parameters, pen your logic using Text.End, and conclude with an in statement. Remember to add comments to elucidate the purpose and usage of your function.
Here’s the essence of it: custom functions not only serve as a timesaver but also instill uniformity across your workbooks, making repeatable tasks a breeze.
Troubleshooting Common Errors and Solutions
Common Mistakes When Using Text.End in Power Query
When you’re going through data transformation in Power Query, using Text.End to replicate Excel’s RIGHT function, it’s easy to get an incorrect result if you’re not careful. A frequent mistake occurs when you try to extract more characters than the string’s actual length, which will lead to “out of range” error. Always confirm the length of the text before you attempt to use Text.End.
Another mistake to watch out for is ignoring the null or blank values. These null values can cause unexpected errors that seem to come out of nowhere.
Protect your workflow by conducting a check and making sure that the data types are consistent, text lengths are verified, and nulls are addressed.
Tips on Error Handling and Data Clean-up
Embrace the power of anticipation in Power Query by being proactive with error handling and data clean-up. Your first line of defense is the ‘try…otherwise…’ expression, a trusty sidekick that lets you test waters before plunging in. Set up a fallback plan for when things don’t go as expected. Think of it as adding a safety net that catches errors and keeps your workflow graceful.
Before attempting to use Text.End, engage the dynamic duo Text.Trim and Text.Clean. They’re like the dynamic clean-up crew for your data, trimming extra spaces and sweeping away hidden gremlins — those non-printable characters that can befuddle your text analysis.
Imagine going fishing. You wouldn’t want to start without cleaning your catch first, right? Similarly, cleanse your text data before filleting it with Text.End to ensure you don’t reel in any unwanted errors.
FAQs
How Can I Ensure Accurate Replication of Excel’s RIGHT Function in Power Query?
To ensure a true-to-form replication of Excel’s RIGHT function within Power Query, closely mirror its behavior by using the Text.End function. Exercise precision—always pass the correct type of data, typically a text string, and specify the exact number of characters you need to extract from the end.
Double-check your work by comparing the Power Query output with what you would get in Excel using the RIGHT function. Keep an eye out for discrepancies, which could signal a need for data type adjustments or error handling.
Remember, it’s all about attention to detail, make sure that data is in the right format, and meticulously simulate the RIGHT function’s behavior so your data dances to the same rhythm in Power Query as it does in Excel.
What Are Some Common Pitfalls When Using RIGHT Function in Power Query?
Avoid the common pitfalls of replicating the RIGHT function in Power Query by keeping a few key things in mind:
- Watch out for data type inconsistency. Power Query is tricky about types, so ensure strings are converted with Text.From before trying to use Text.End.
- Beware of assuming fixed-length strings. In the real world, data can be inconsistent. Verify lengths using Text.Length to prevent ‘out of range’ error.
- Prevent null values from causing any problem by doing a null check.
- Avoid using complex code. Keep it simple with a modular approach to make it more readable.
Try to avoid these mistakes so that Power Query works perfectly under each situation.

Bryan
Bryan Hong is an IT Software Developer for more than 10 years and has the following certifications: Microsoft Certified Professional Developer (MCPD): Web Developer, Microsoft Certified Technology Specialist (MCTS): Windows Applications, Microsoft Certified Systems Engineer (MCSE) and Microsoft Certified Systems Administrator (MCSA).
He is also an Amazon #1 bestselling author of 4 Microsoft Excel books and a teacher of Microsoft Excel & Office at the MyExecelOnline Academy Online Course.


