Microsoft Excel, renowned for its numerical analysis capabilities, also places a high premium on textual accuracy with its proofing tools, including Spelling Check. This feature is crucial in avoiding the embarrassment of presenting documents filled with spelling errors, thereby upholding professionalism. Unlike Word or PowerPoint, Excel requires user initiation to highlight spelling mistakes, ensuring your data remains pristine and credible.
Key Takeaways:
- Spell Check in Excel is a manual process that helps identify and correct spelling errors in text strings, vital for maintaining the integrity of your documents.
- Unlike Word, Excel does not automatically underline misspelled words or offer real-time grammar suggestions, emphasizing its unique role as a number-centric application with essential text-proofing capabilities.
- To utilize Spell Check, users must select cells and initiate the process via the F7 key or the ‘Spelling’ button in the ‘Review’ tab, making it a proactive tool for error detection.
- Excel allows for customization in proofing, including the addition of unique words to its dictionary, adjusting settings to include uppercase words, and ensuring alphanumeric strings are scrutinized.
- Troubleshooting common issues with Spell Check, such as ensuring worksheets are unprotected and recognizing the tool’s limitations with formulas and special cases, ensures efficient and accurate data presentation.
Table of Contents
Introduction to Excel Proofing
Importance of Spell Check
Just imagine presenting a financial report or an inventory list riddled with spelling errors—yikes! Not only does it reflect poorly on your professionalism, but it can also lead to misunderstandings. Excel’s proofing tools, including its spell-check feature, are your allies here, helping to maintain the credibility of your work.
What is Spell Check in Excel?
Spell Check in Excel is your secret weapon in ensuring that your text entries remain error-free. Despite Excel being number-centric, it understands the importance of correct spelling in text strings throughout your worksheets. Unlike its cousins, MS Word and PowerPoint, Excel won’t automatically underline those pesky typos or misspelled words.
That’s where Spell Check comes in, highlighting mistakes only when you prompt it to. By using this feature, you can prevent errors in your data that could otherwise go unnoticed, keeping your Excel workbooks polished and professional.
Delving Into Spelling Check Features
How Does Spell Check in Excel Work?
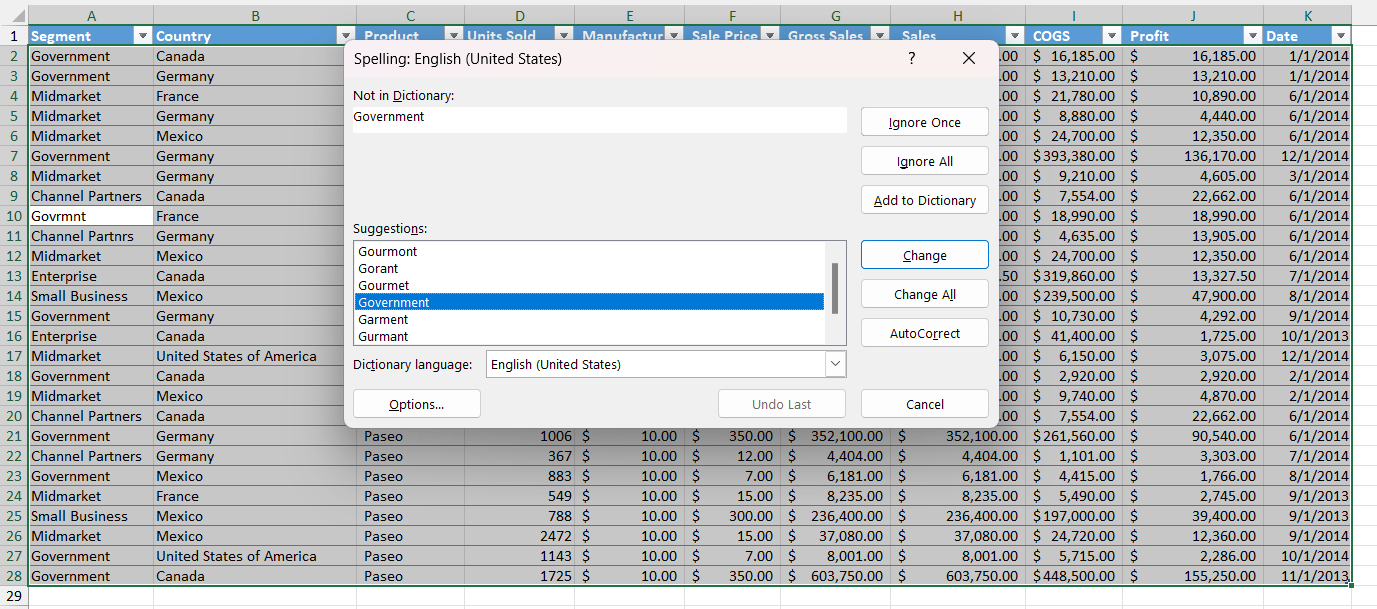
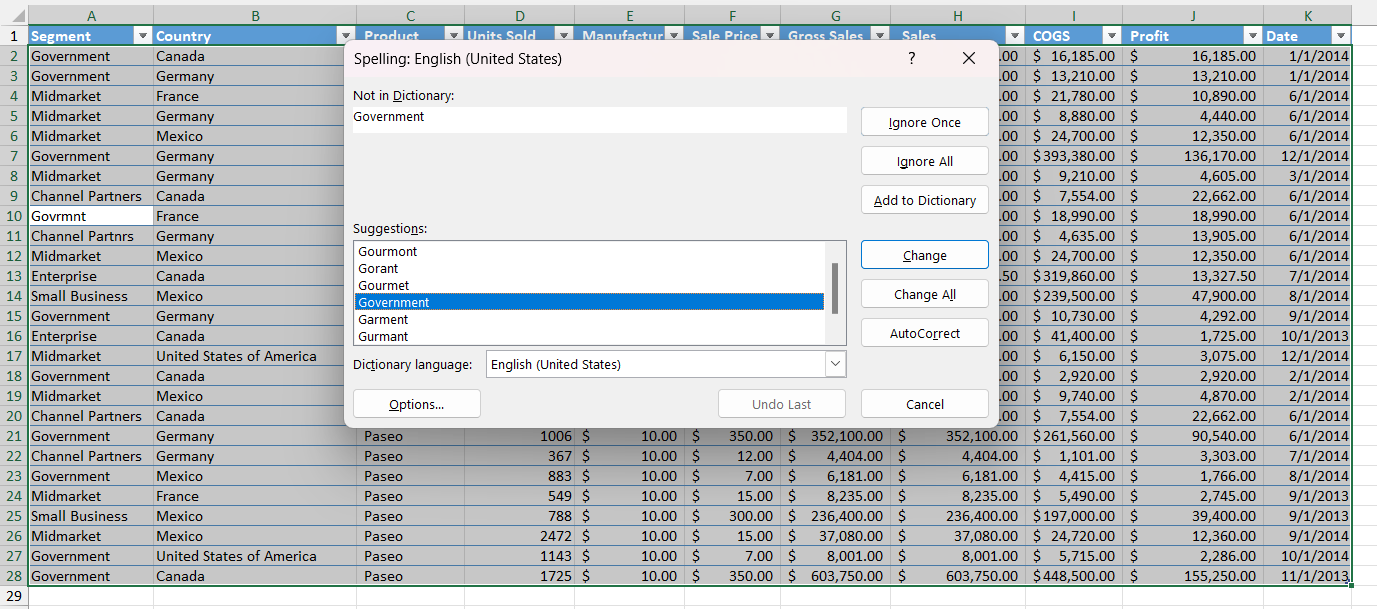
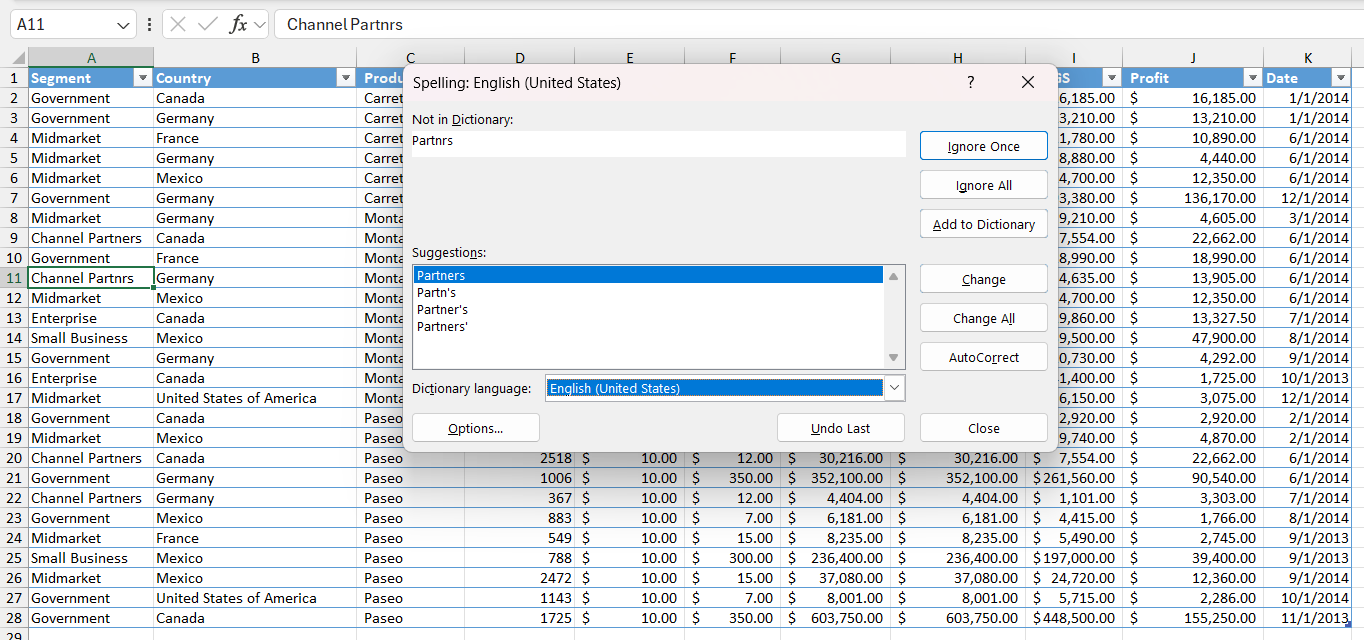
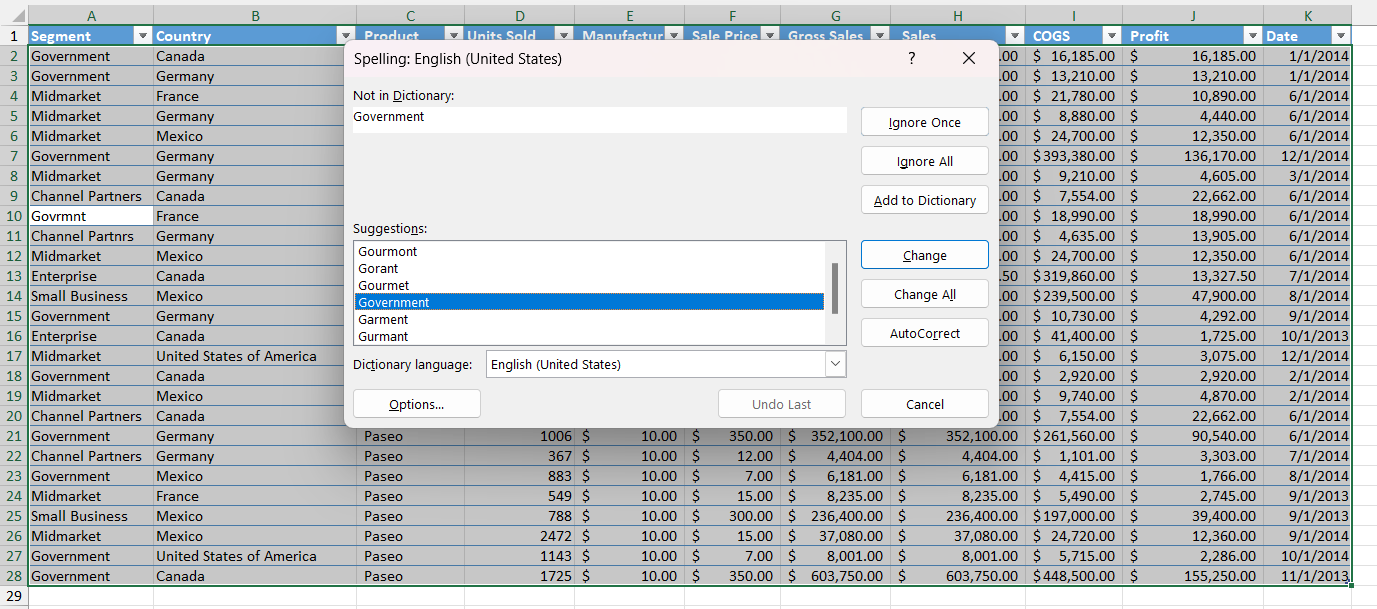
To start a Spell Check in Excel, you’ll select the cells you want to review, then, with a simple press of the key F7 or a click on the ‘Spelling’ button under the ‘Review’ tab, Excel springs into action. It scans your text entries for any misspellings against its internal dictionary, and when it finds one, it opens a dialogue box.
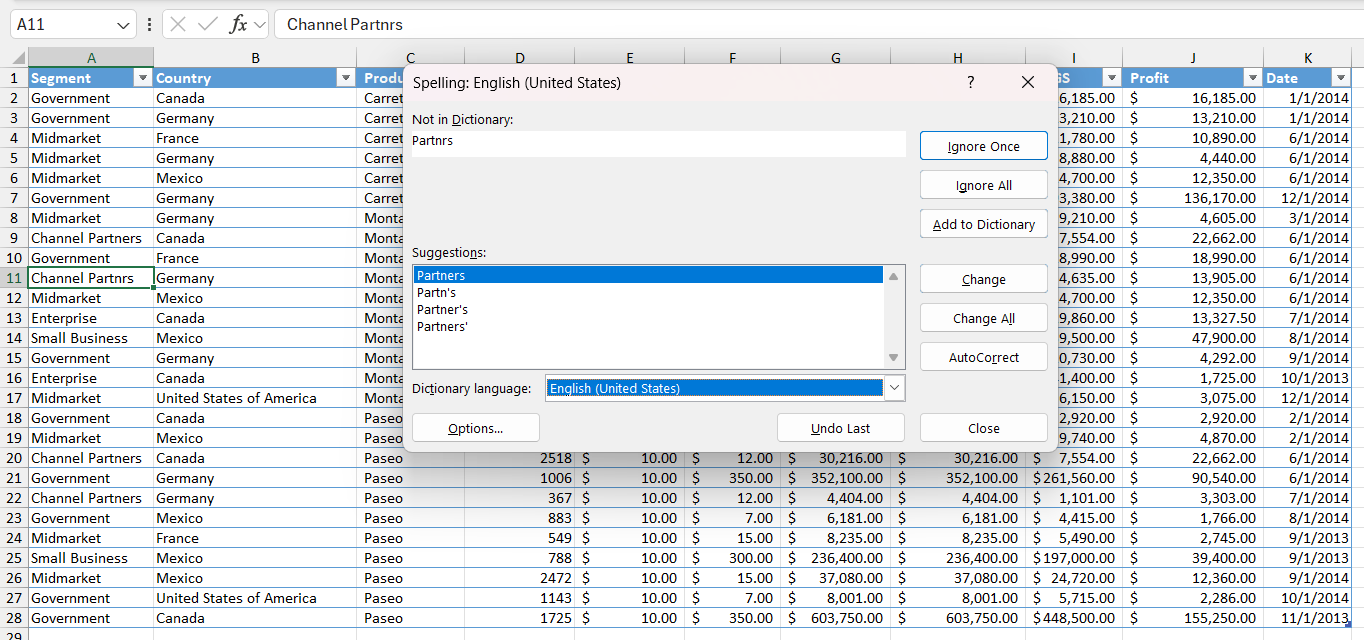
In this box, Excel not only points out the word in question but also offers suggestions for corrections. You can then choose to ignore the find, change it to the suggested spelling, or even add a new term to the dictionary.
Key Differences Between Excel and Word Spell Check
When comparing Excel’s Spell Check to Word, there are several key differences to note. While Word checks your spelling as you type, underlining errors in real-time, Excel waits for you to take the initiative. You won’t find any red squiggly lines in Excel; it requires a manual trigger to go through your workbook.
Also, Word dives into grammar, offering suggestions on sentence structure and usage, but Excel stays solely in its lane of spelling. And don’t forget, Excel has a penchant for overlooking uppercase entries and combinations of letters and numbers, assuming that these might be purposeful entries such as product codes or abbreviations.
Hence, when using these applications, it’s important to remember that Word is a bit like an overeager proofreader, while Excel behaves more like a spell-check specialist called upon request.
Step-by-Step Guide to Using Spell Check in Excel
Spell Checking a Single Worksheet
To spell-check a single worksheet is as easy as pie. Just follow these steps:
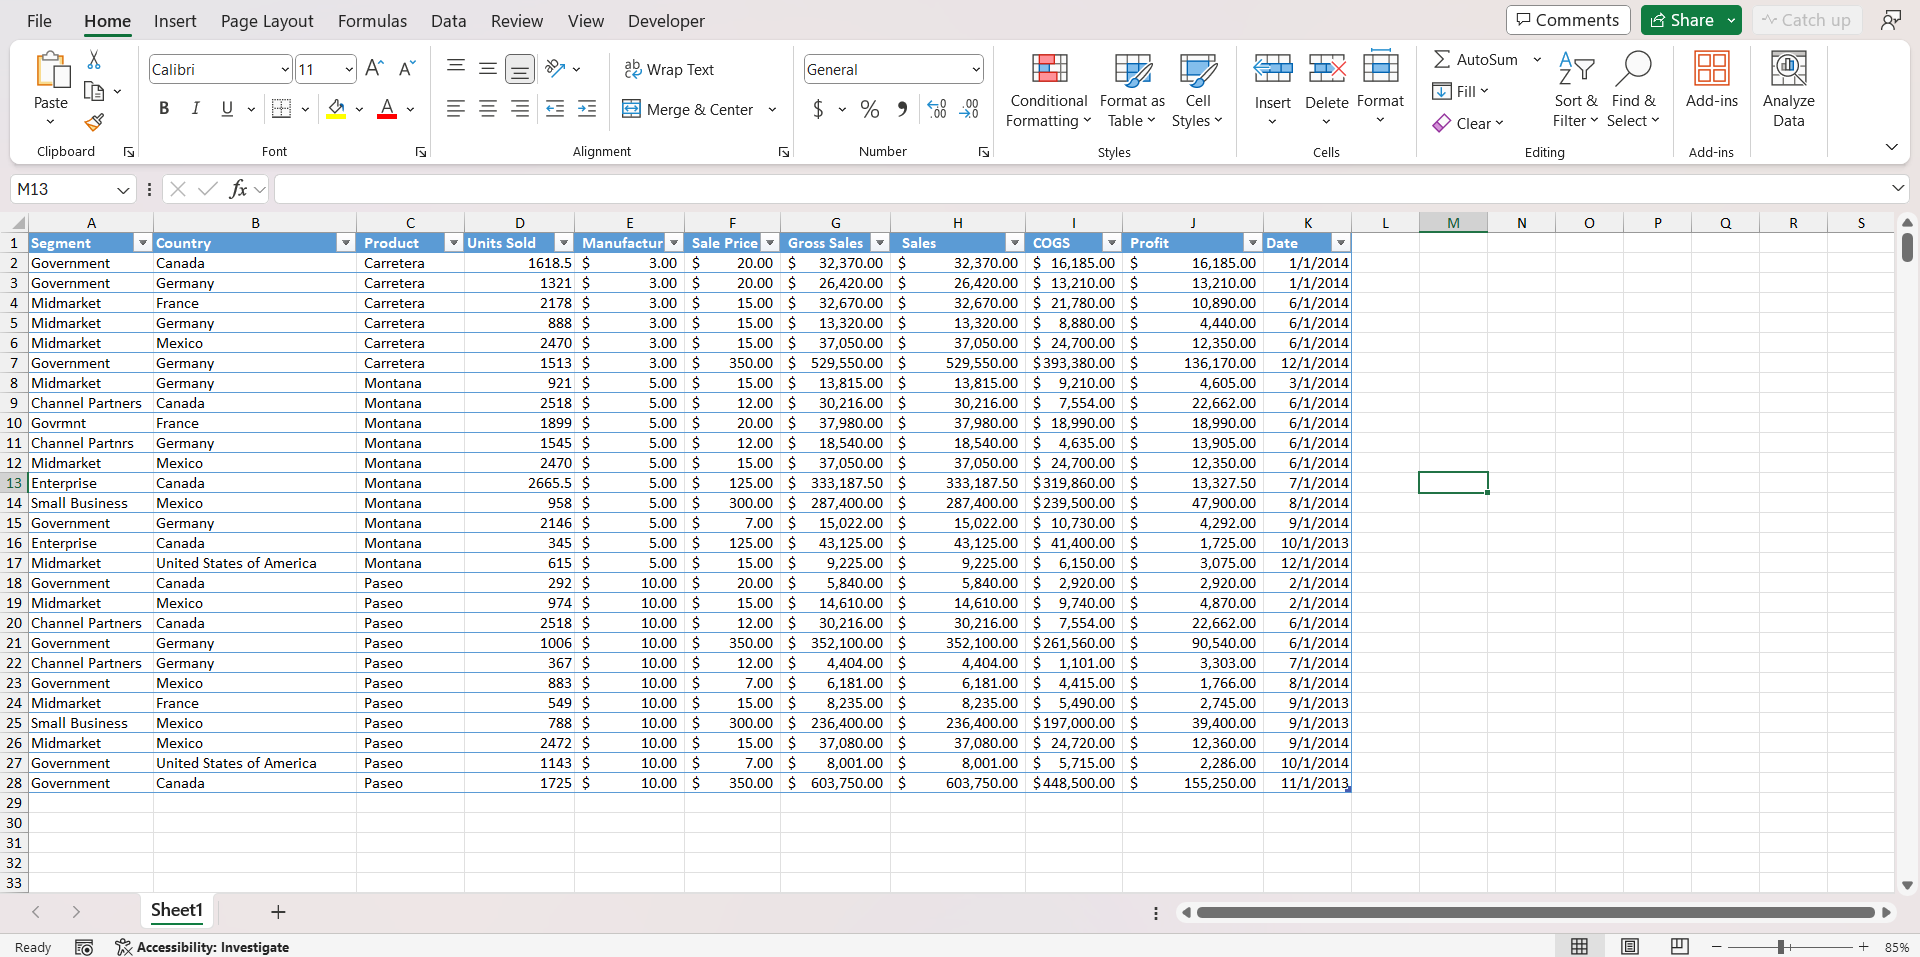
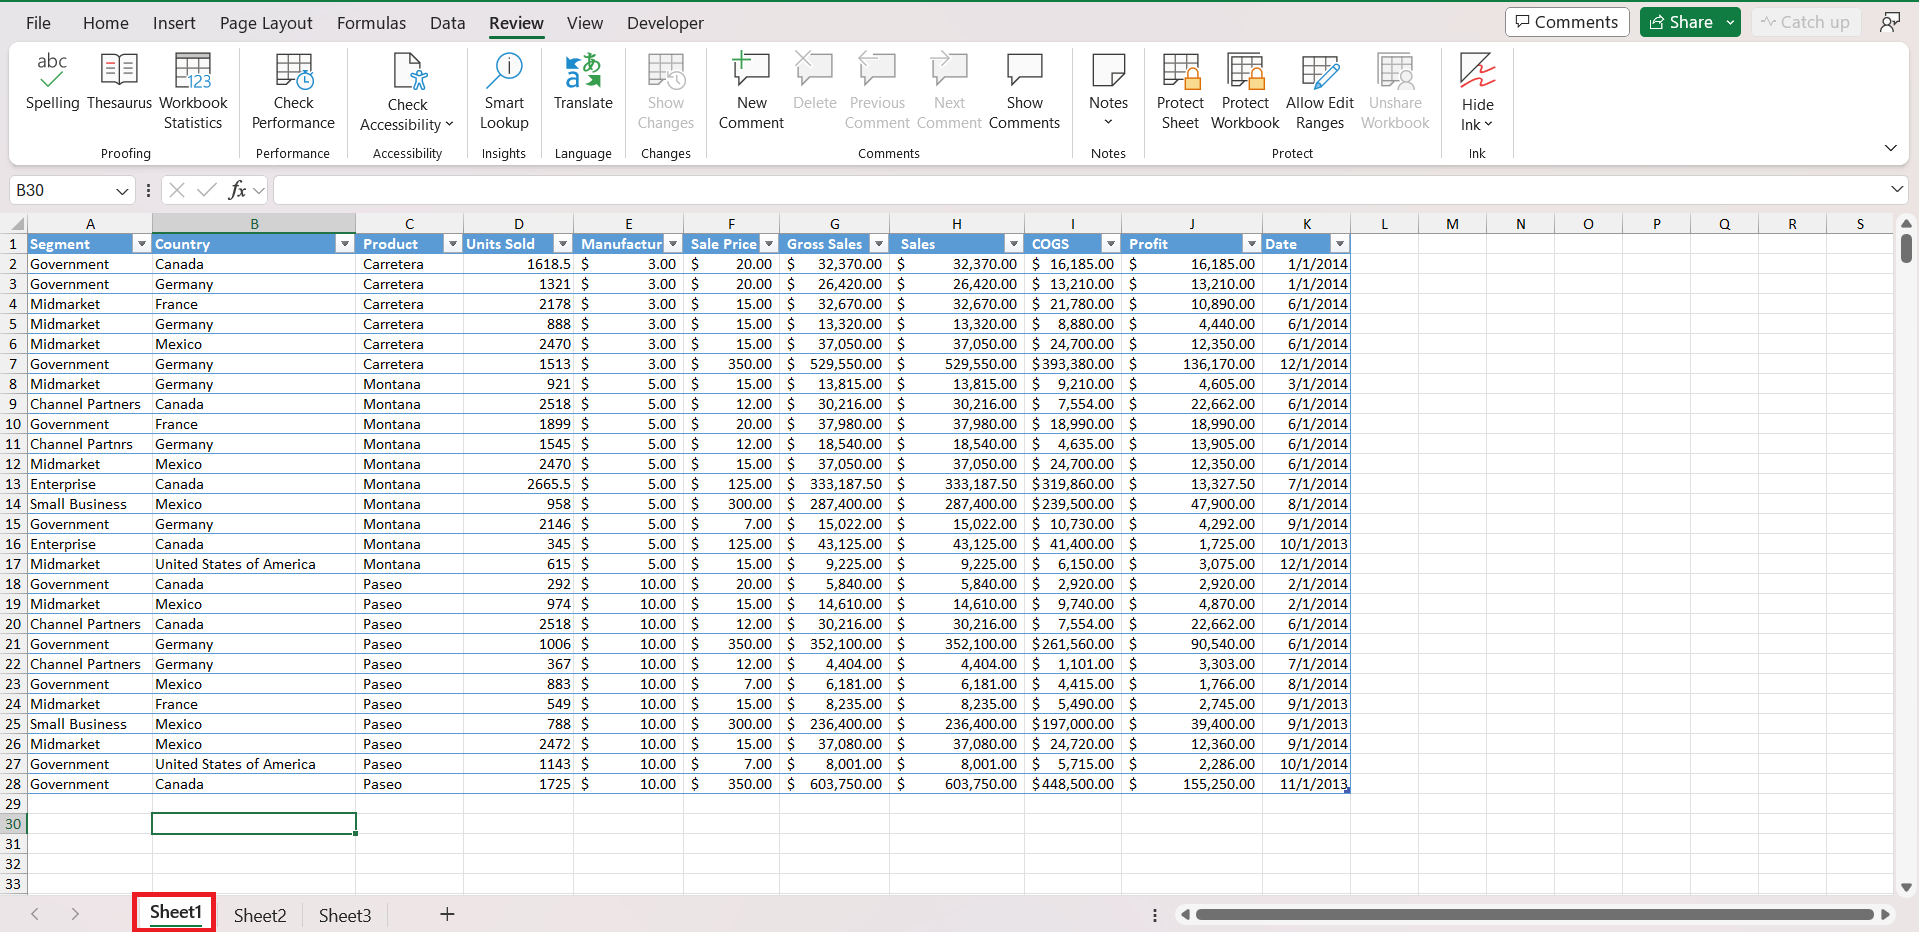
STEP 1: Open up the worksheet that needs proofing.
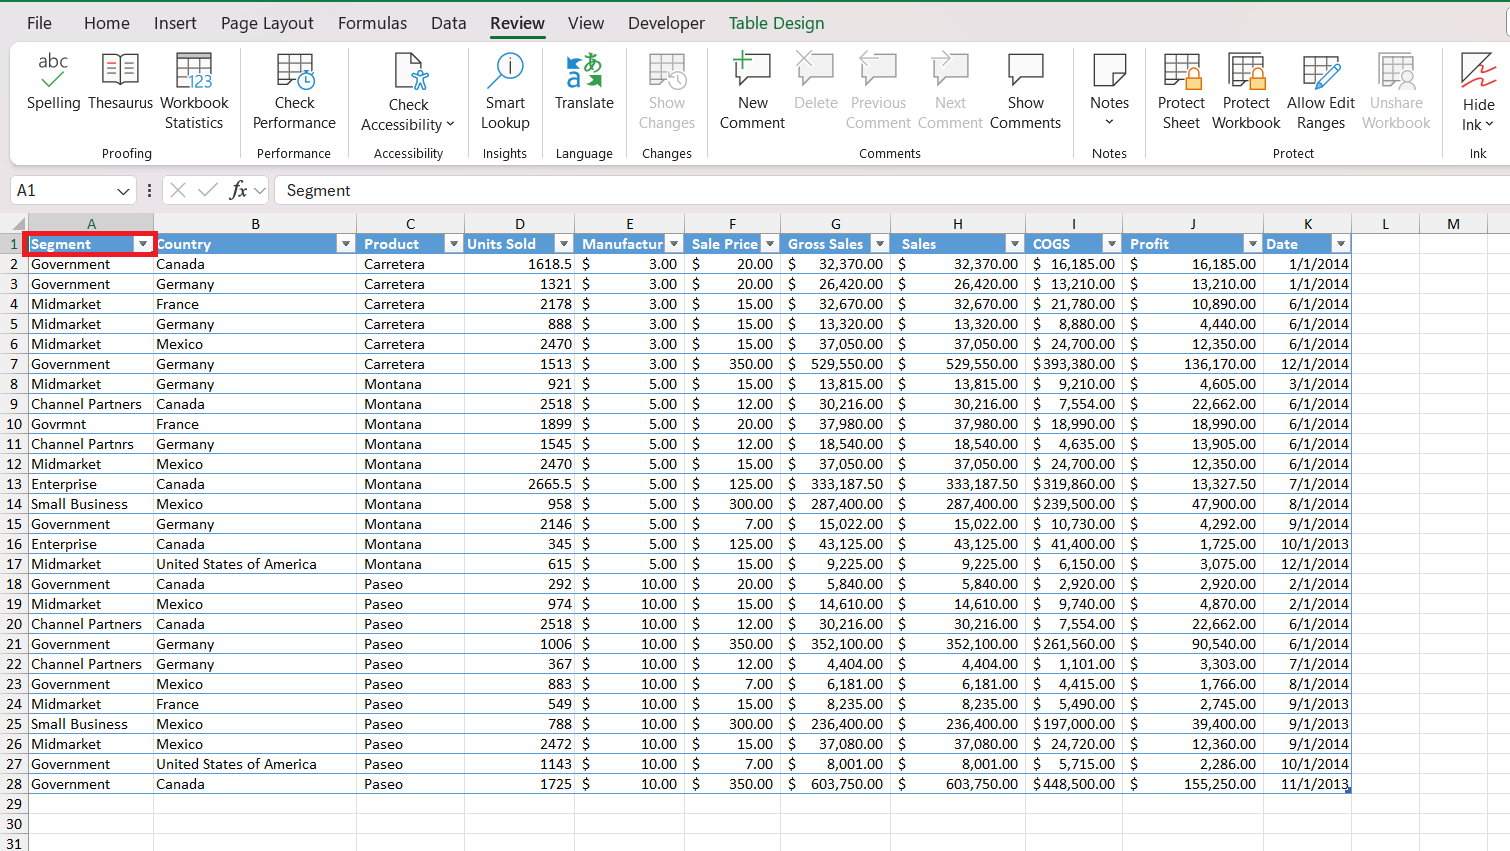
STEP 2: Click the ‘Review’ tab on the Excel ribbon.
STEP 3: Look for ‘Spelling’ in the ‘Proofing’ group or simply hit F7 for a shortcut.
STEP 4: If you’re targeting the entire worksheet, make sure to start by selecting any single cell.
STEP 5: As Excel finds spelling discrepancies, engage with the dialogue box by choosing to ignore, ignore all, or change to the appropriate suggestion.
STEP 6: Continue through all the prompts until the spell check wraps up.
Remember these features – the Review tab, the Spell Check dialogue box, and F7 – as they’re your toolkit for a mistake-free worksheet.
How to Spell Check Multiple Sheets
Checking multiple sheets for spelling at once in Excel is a real time-saver when working on expansive workbooks. Here’s what you do:
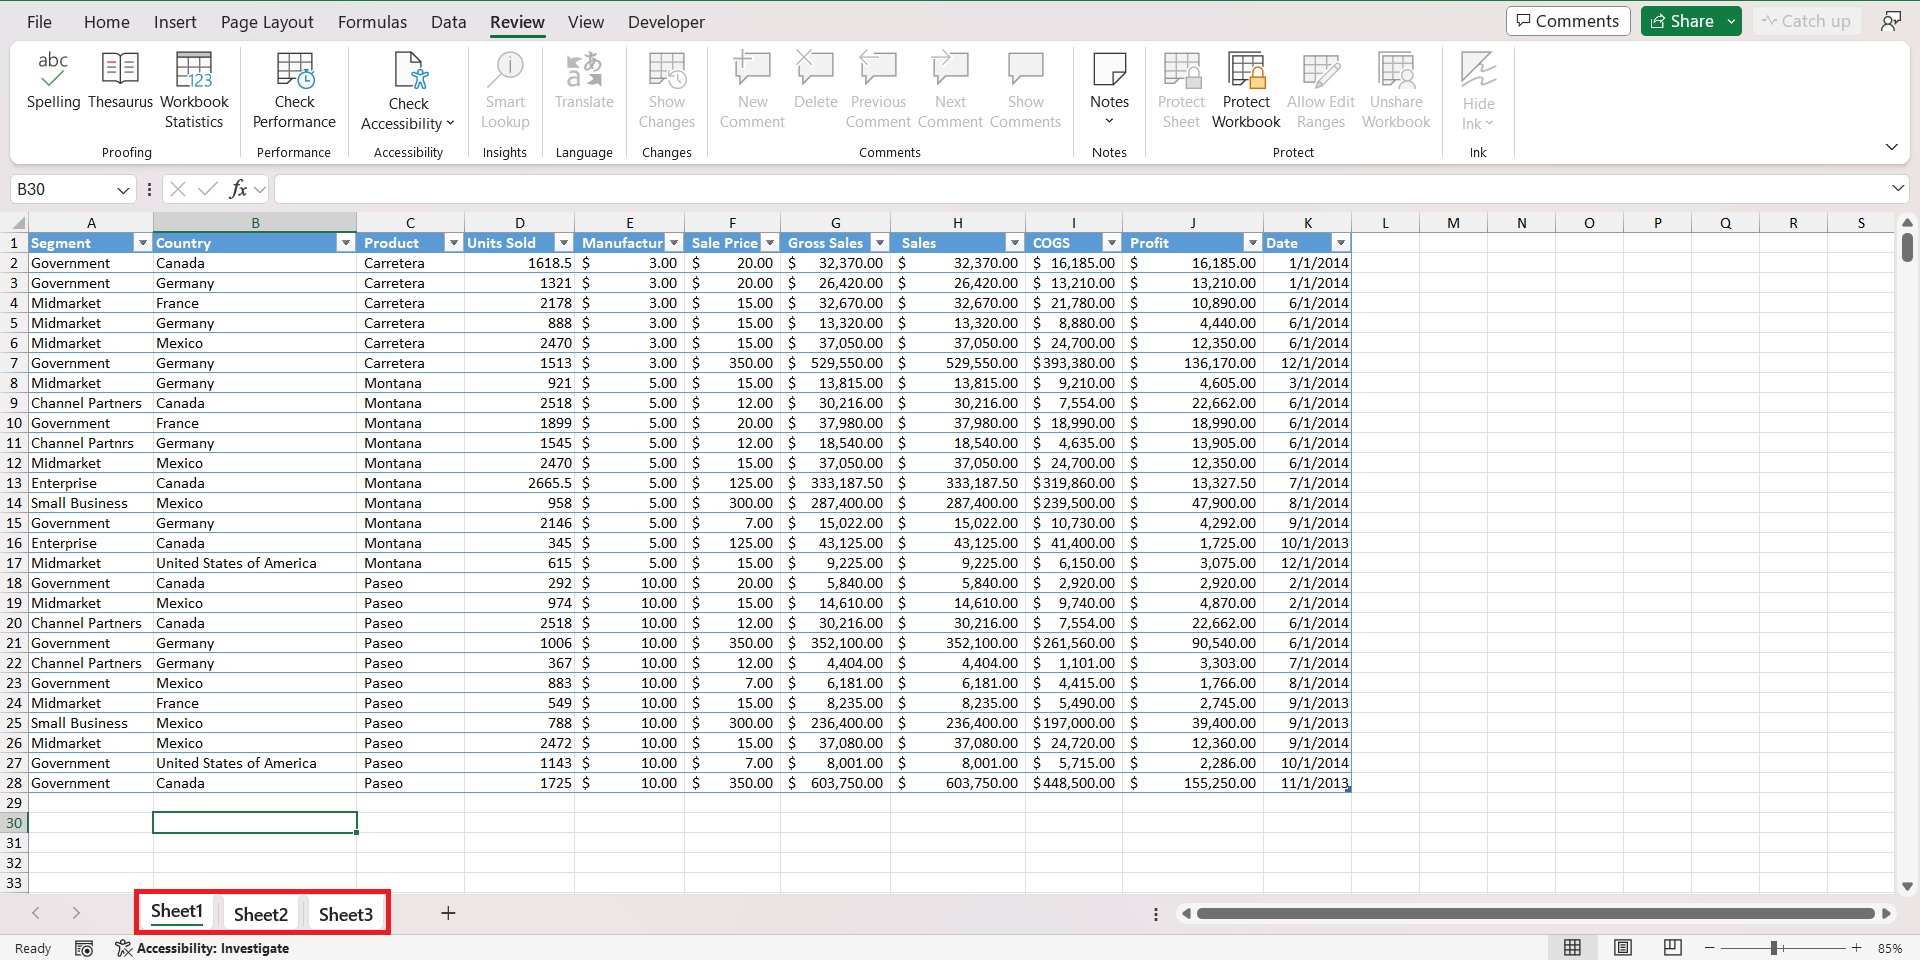
STEP 1: Click on the first sheet tab you want to check.
STEP 2: To add non-adjacent sheets to your selection, hold down Ctrl and click their tabs. And for consecutive sheets, click the first sheet, then hold Shift and click the last sheet tab to group them together.
STEP 3: Once your tabs are highlighted, press F7 or go to the ‘Review’ tab and click the ‘Spelling’ button.
Excel will scrutinize each cell in your selected sheets, one by one, opening up a dialogue box for spelling errors it encounters. After you’ve made the desired corrections or skips, be sure to right-click a sheet tab and select ‘Ungroup Sheets.’
Enhancing Spell Check with Advanced Options
Customizing Autocorrect and Adding to Dictionary
Expanding your Excel toolkit with customizations in Autocorrect and adding uncommon or specialized terms to the dictionary will significantly refine your proofing process.
Adjusting Spell Check Settings for Optimized Proofing
Optimizing your Spell Check can massively improve your Excel experience:
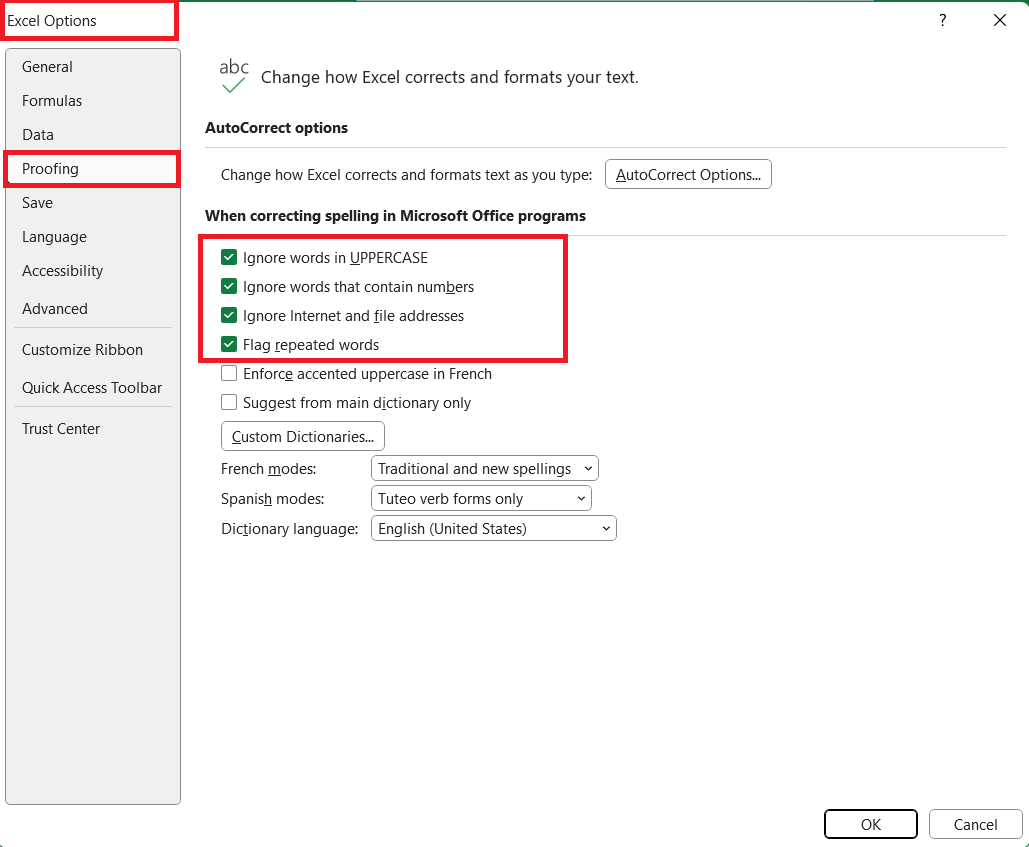
- Uncheck ‘Ignore words in uppercase’ if you want to include acronyms in the check.
- Uncheck ‘Ignore words that contain numbers’ to catch errors in alphanumeric text.
- Uncheck ‘Ignore Internet and file addresses’ for URL and filepath precision.
- Check ‘Flag repeated words’ to avoid embarrassing duplications.
By tweaking these settings, you enhance Excel’s proofing capabilities to match your unique workflow.
Troubleshoot Spell Check Issues
Solving Problems When Excel’s Spell Check Is Not Working
When Excel’s Spell Check doesn’t work as expected, here are some troubleshooting tips to solve the issue:
- Worksheet Protection: Check if the worksheet is protected. Excel does not perform spell checks on protected sheets, so you’ll need to unprotect the sheet first.
- Edit Mode: Ensure you are not in edit mode. Spell Check operates on the worksheet level, not within a specific cell’s edit mode.
- Formula Text: Remember, text within formulas isn’t included in Spell Check by default. To check such text, enter the cell’s edit mode.
By understanding these common scenarios, you can ensure that the Spell Check feature functions properly, maintaining impeccable standards within your spreadsheets.
Understanding Special Cases in Excel Spell Check
Excel’s Spell Check has a few quirks that you should be aware of to avoid confusion:
- Uppercase snubs: It usually skips words in ALL CAPS, under the assumption that they’re acronyms or initialisms.
- Numbers in-text: Words combined with numbers, often product codes or specific data points, are also generally ignored.
- Repeated words: Curiously, Excel will flag a word that’s repeated consecutively in a text string, but not if the repetition occurs across different cells.
- Formulas and VBA: Regular formulas won’t be checked, except for any text within quotes. And don’t expect any help with your macros; VBA code is off the Spell Check radar.
- Addresses and URLs: Excel gives a pass to internet and file addresses, sparing you unnecessary interruptions while proofing.
Understanding these exceptions ensures you won’t be caught off guard when Excel decides to pass over certain strings during a spell check.
Spell Check Like a Pro with Shortcuts
Excel Proofing Shortcuts for Efficiency
Boosting your Excel efficiency is easy with these proofing keyboard shortcuts:
- F7: The most famous one, F7, launches the Spell Check tool from anywhere in your workbook.
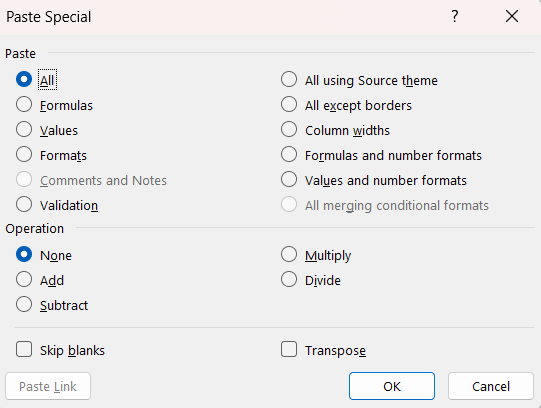
- Alt + E + S or CTRL + ALT + V: This combo opens up the Paste Special dialogue which can be handy when dealing with formulas that might be misinterpreted by Spell Check.
- Alt + R + S: For those who love the Ribbon, this shortcut can streamline accessing the ‘Review’ tab and ‘Spelling’ button, if you prefer the mouse-free route.
Memorizing these shortcuts ensures your proofing is not just accurate, but also hyper-efficient.
FAQs: Excel Proofing Clarified
How to perform spell checking in Excel?
To spell check in Excel, click on the ‘Review’ tab, then select ‘Spelling’, or simply press the ‘F7’ key. Excel will guide you through any potential misspellings in your selected range or worksheet, allowing you to act on the suggestions it provides.
What occurs when I select ‘change’ or ‘autocorrect’ during Excel’s spell check process?
Selecting ‘Change’ substitutes the incorrect word with the chosen recommendation. ‘Autocorrect’ corrects it and remembers your choice, adjusting the same mistake automatically in the future.
What is the keyboard shortcut to initiate a spell check in Excel?
The keyboard shortcut for running a spell check in Excel is ‘F7’. It instantly initiates the proofing process on the active worksheet or selected range.
Is Excel Capable of Automatically Underlining Words That Are Misspelled?
No, Excel cannot automatically underline misspelled words like Word does. Spell check needs to be run manually using ‘F7’ or the Review tab options to identify spelling errors.
How Can I Add New Words to My Excel Spell Check List?
To add new words to your Excel Spell Check list, click ‘Add to Dictionary’ during a spell check session, or edit your custom dictionary in the Proofing options. This saves the new word for future use.
John Michaloudis is a former accountant and finance analyst at General Electric, a Microsoft MVP since 2020, an Amazon #1 bestselling author of 4 Microsoft Excel books and teacher of Microsoft Excel & Office over at his flagship MyExcelOnline Academy Online Course.

