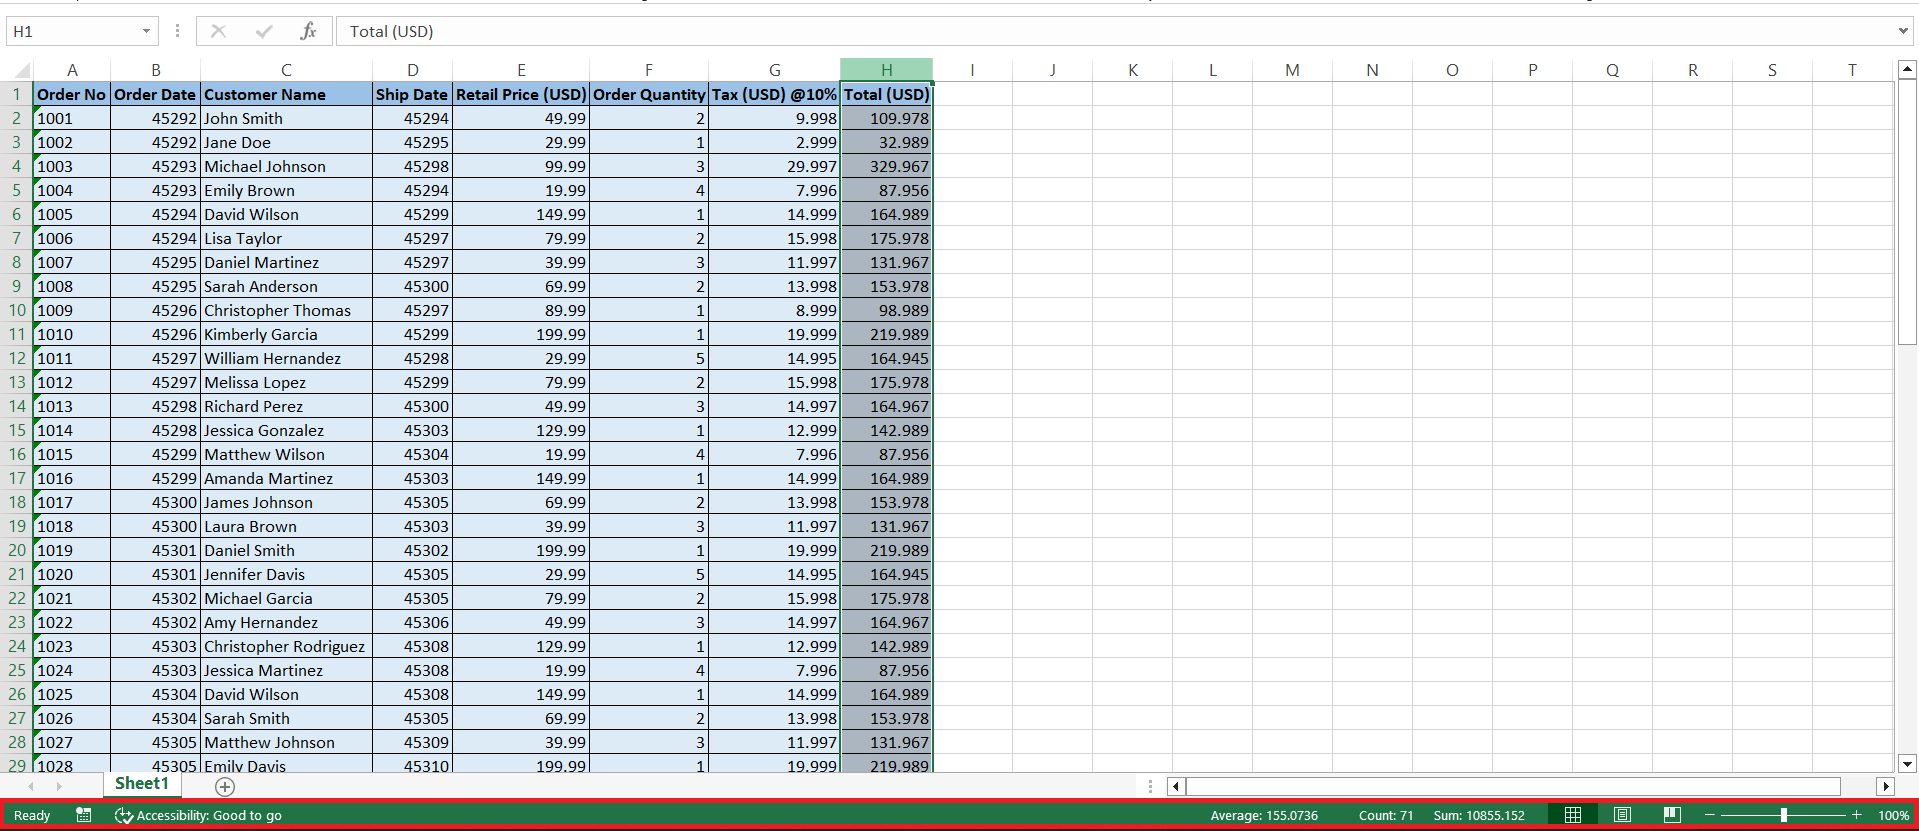
The status bar in Microsoft Excel, located at the bottom of the window, provides a quick overview of key worksheet information such as the sum, average, and count of selected cells, as well as the current mode. Users can customize it to display or hide specific details, enhancing efficiency and productivity by keeping essential data readily accessible.
Key Takeaways:
- Quick Access to Data: The status bar in Excel provides immediate insights into key worksheet information such as sum, average, and count of selected cells.
- Customizable Features: Users can tailor the status bar to display or hide specific details, enhancing efficiency by keeping essential data easily accessible.
- Enhanced Productivity: By summarizing data and displaying current modes, the status bar helps streamline tasks and boosts productivity without the need for additional formulas.
- Hidden Gems: Beyond common functions, the status bar can track additional indicators like ‘Caps Lock’, ‘Num Lock’, and includes interactive tools like the ‘Zoom Slider’.
- Macro Integration: The status bar can be further customized through VBA macros to display custom messages or alerts, aiding in task automation and user communication.
Table of Contents
Grasping the Excel Status Bar for Enhanced Productivity
What is the Status Bar in Excel?
Imagine you’re mid-formula, juggling dozens of cells, and you need a quick sum or average. Instead of creating new cells for these operations, look to the status bar. It sits patiently at the bottom of your worksheet, offering real-time insights into your selected data.
Think of it as the silent assistant, ever-ready to provide stats like sum, average, and count, or to offer shortcuts to manage macro recording, page layout, or zoom levels. It’s like having a mini dashboard that reveals the heartbeat of your spreadsheet with just a glance.
The Role of the Status Bar in Data Analysis
The status bar plays a critical ally in your data analysis escapades. When you select a range of cells, it springs into action, displaying valuable data summaries without the need for additional formulas. It’s as if you’ve got a partner in data-crunching crime, revealing sums, averages, and counts on the fly.
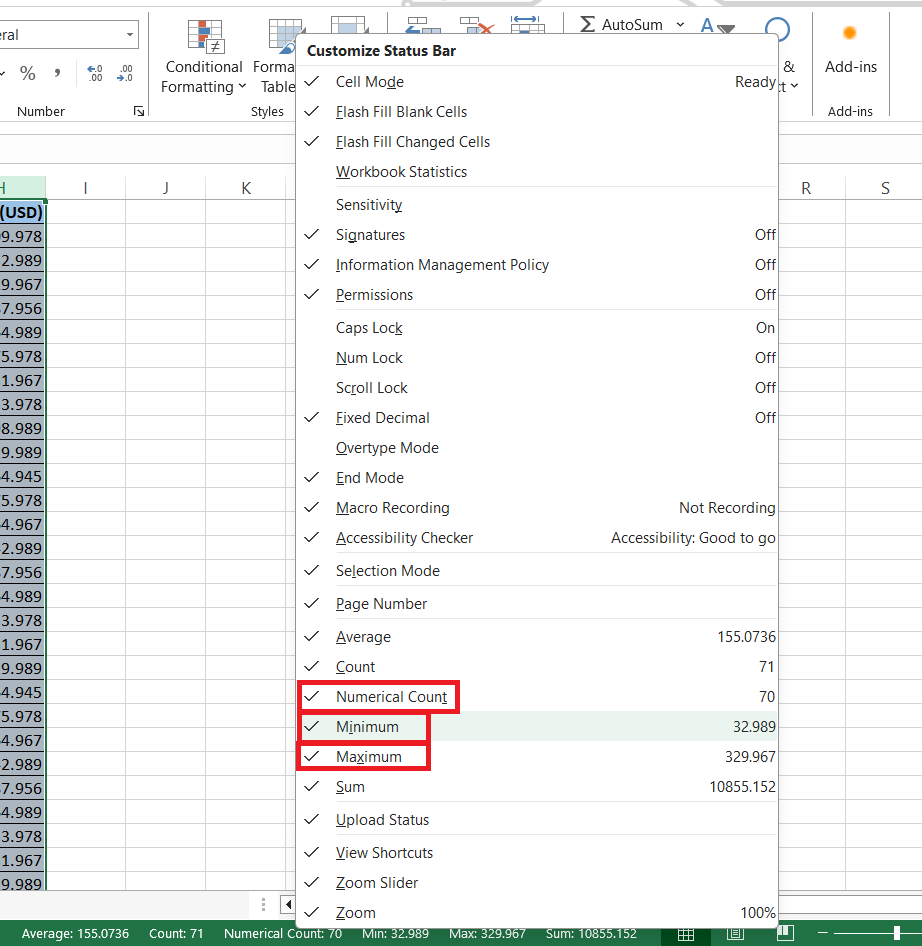
Moreover, it can become your go-to for a quick check on selected numerical data’s minimum or maximum values. With the status bar, you can breeze through datasets, assessing values at a glance, significantly speeding up your analysis process and boosting productivity.
Tailoring Your Experience
How to Customize the Status Bar to Suit Your Workflow
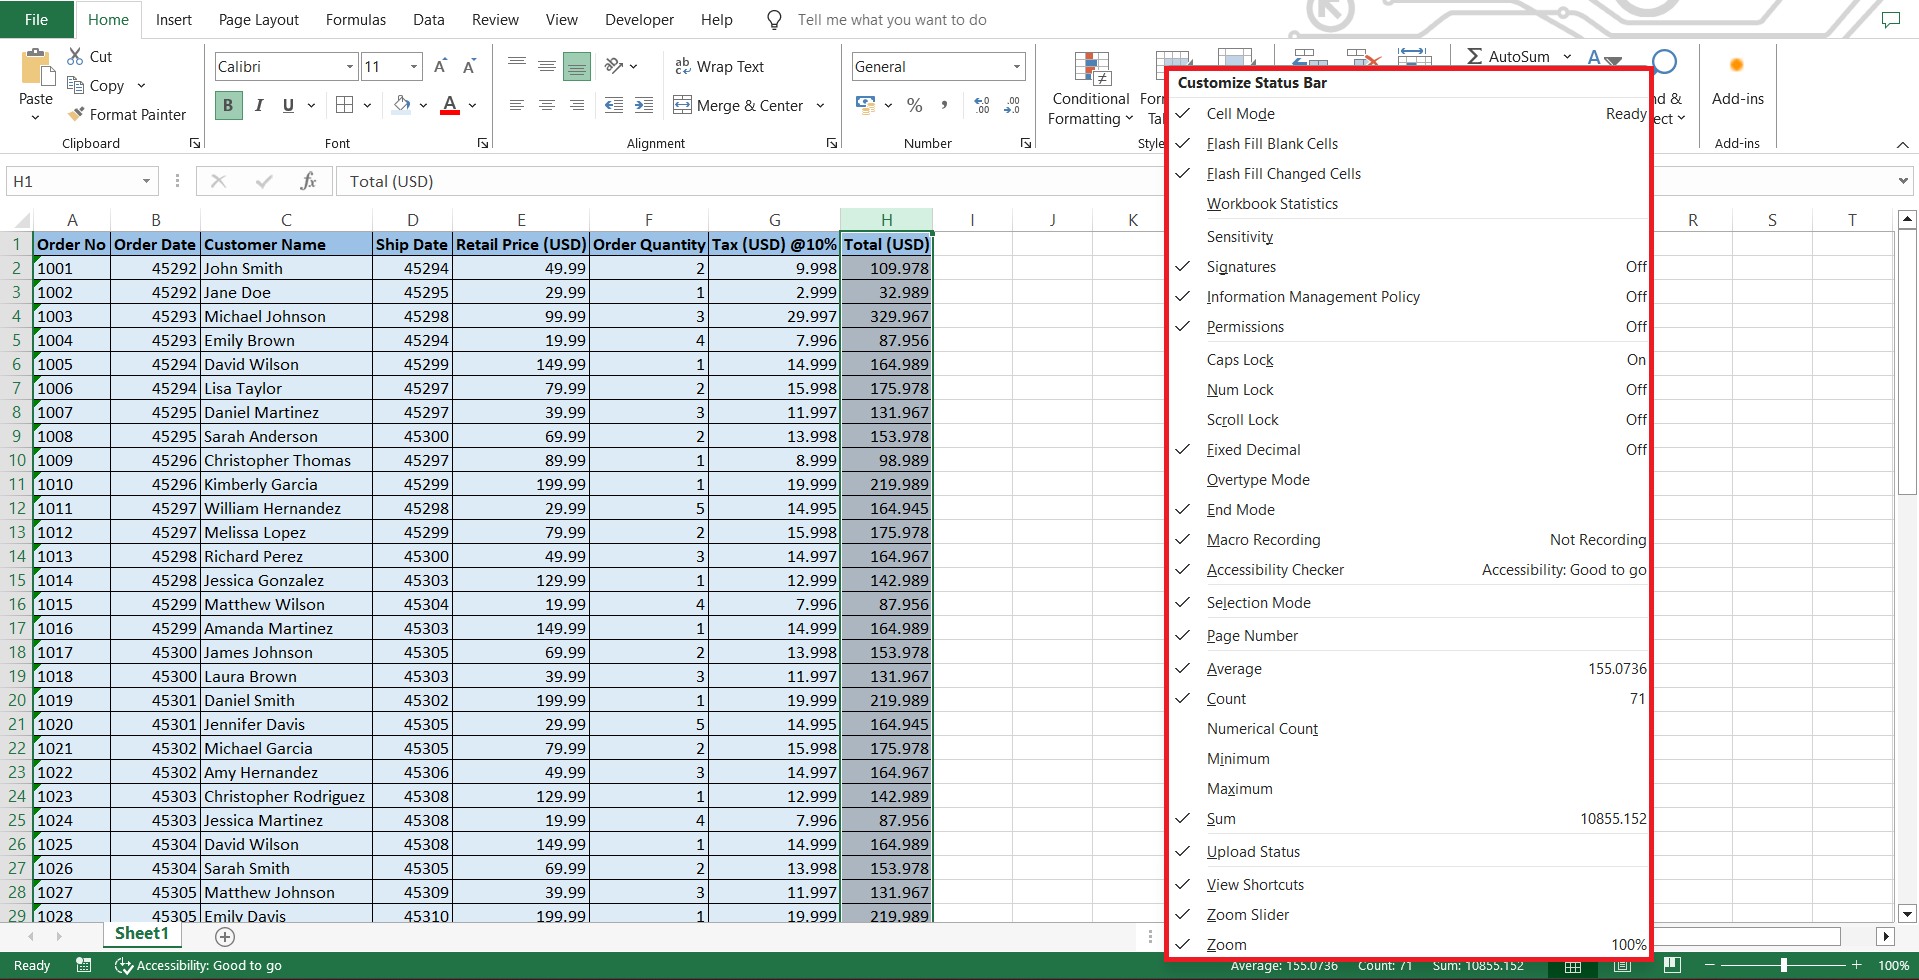
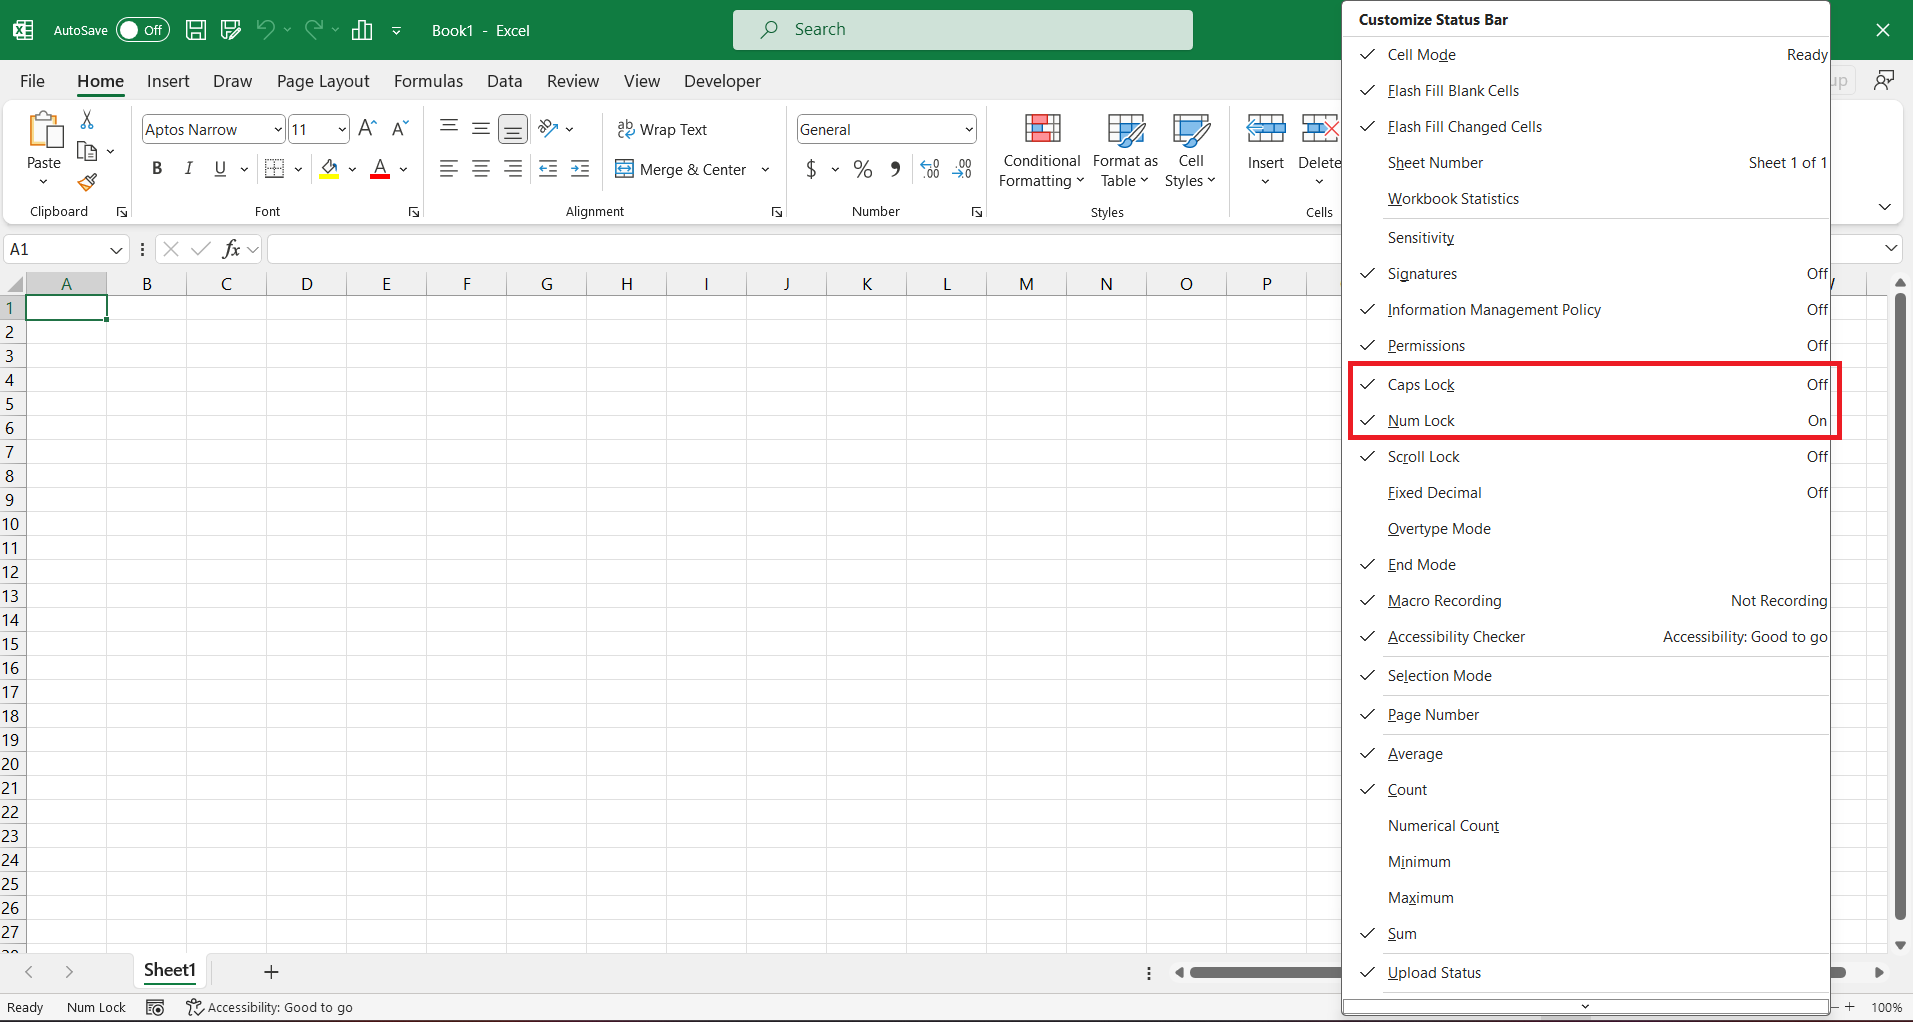
Tailoring the status bar to your liking can be a real game-changer in how you tackle your Excel workflow. Start by giving it a simple right-click. A menu brimming with options appears, each item flaunting a green checkmark to indicate its active status on the status bar.
Fancy seeing the numerical count or perhaps the cell mode at a glance? Just click to select or deselect these options, customizing the status bar to your heart’s content. It’s like personalizing a control panel for your most-used features so that everything you need is just a glance away.
To customize the status bar in Excel:
STEP 1: Right-click anywhere on the status bar at the bottom of the Excel window.
STEP 2: In the context menu that appears, check or uncheck the options you want to display or hide, such as “Average,” “Count,” “Sum,” “Caps Lock,” etc.
STEP 3: The status bar will immediately reflect your selections, showing only the chosen metrics or statuses.
Hiding and Unhiding the Status Bar for a Focused Interface
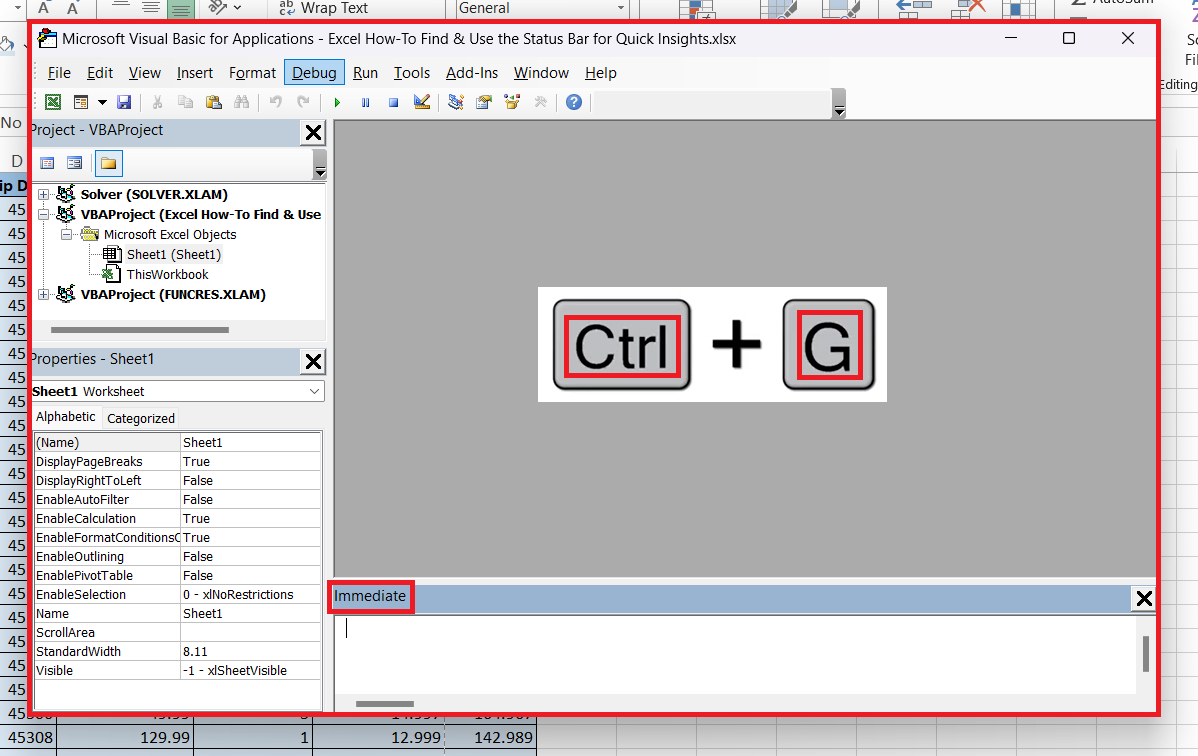
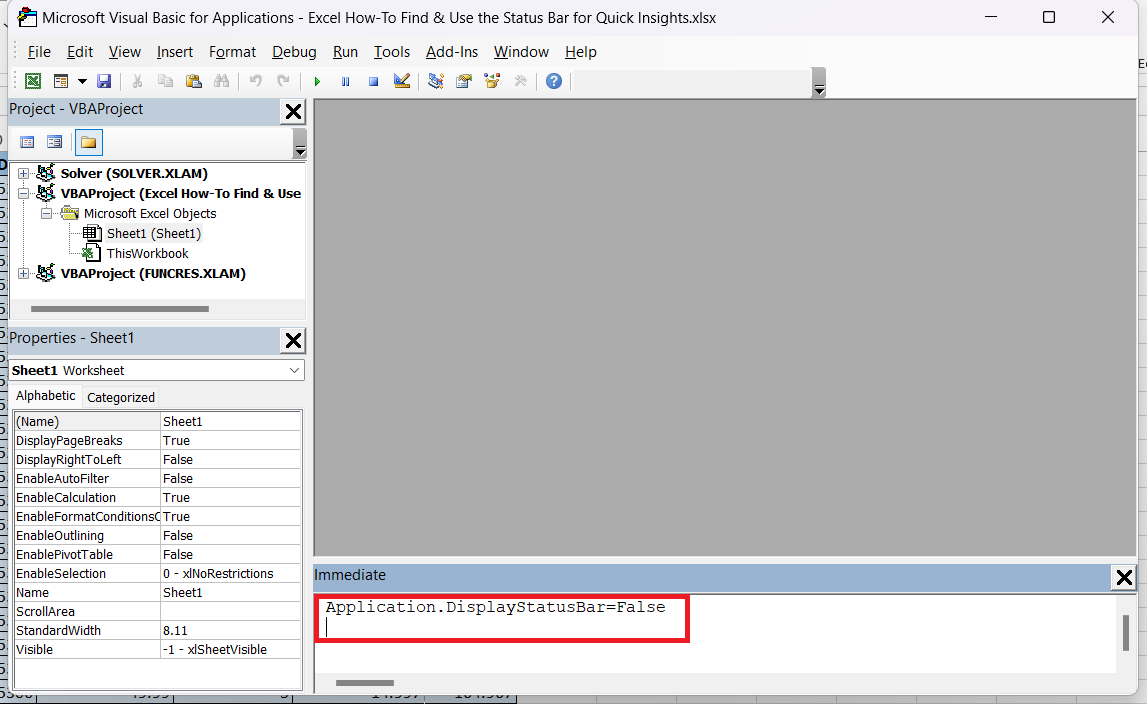
For times when simplicity is key, and you desire a clutter-free interface, hiding the status bar can be quite cathartic. Dive into the realm of VBA (Visual Basic for Applications) by pressing Alt + F11, followed by Ctrl + G to venture into the Immediate window.
Follow the steps below to hide the status bar;
STEP 1: Open your workbook. Press the shortcut key ALT+ F11.
STEP 2: The Visual Basic Application (VBA) Dialog Box Appears. Press the shortcut key, CTRL+ G. The immediate dialog box appears.
STEP 3: Type- Application.DisplayStatusBar=False in the Immediate dialog box. Press ENTER and CLOSE the dialog box.
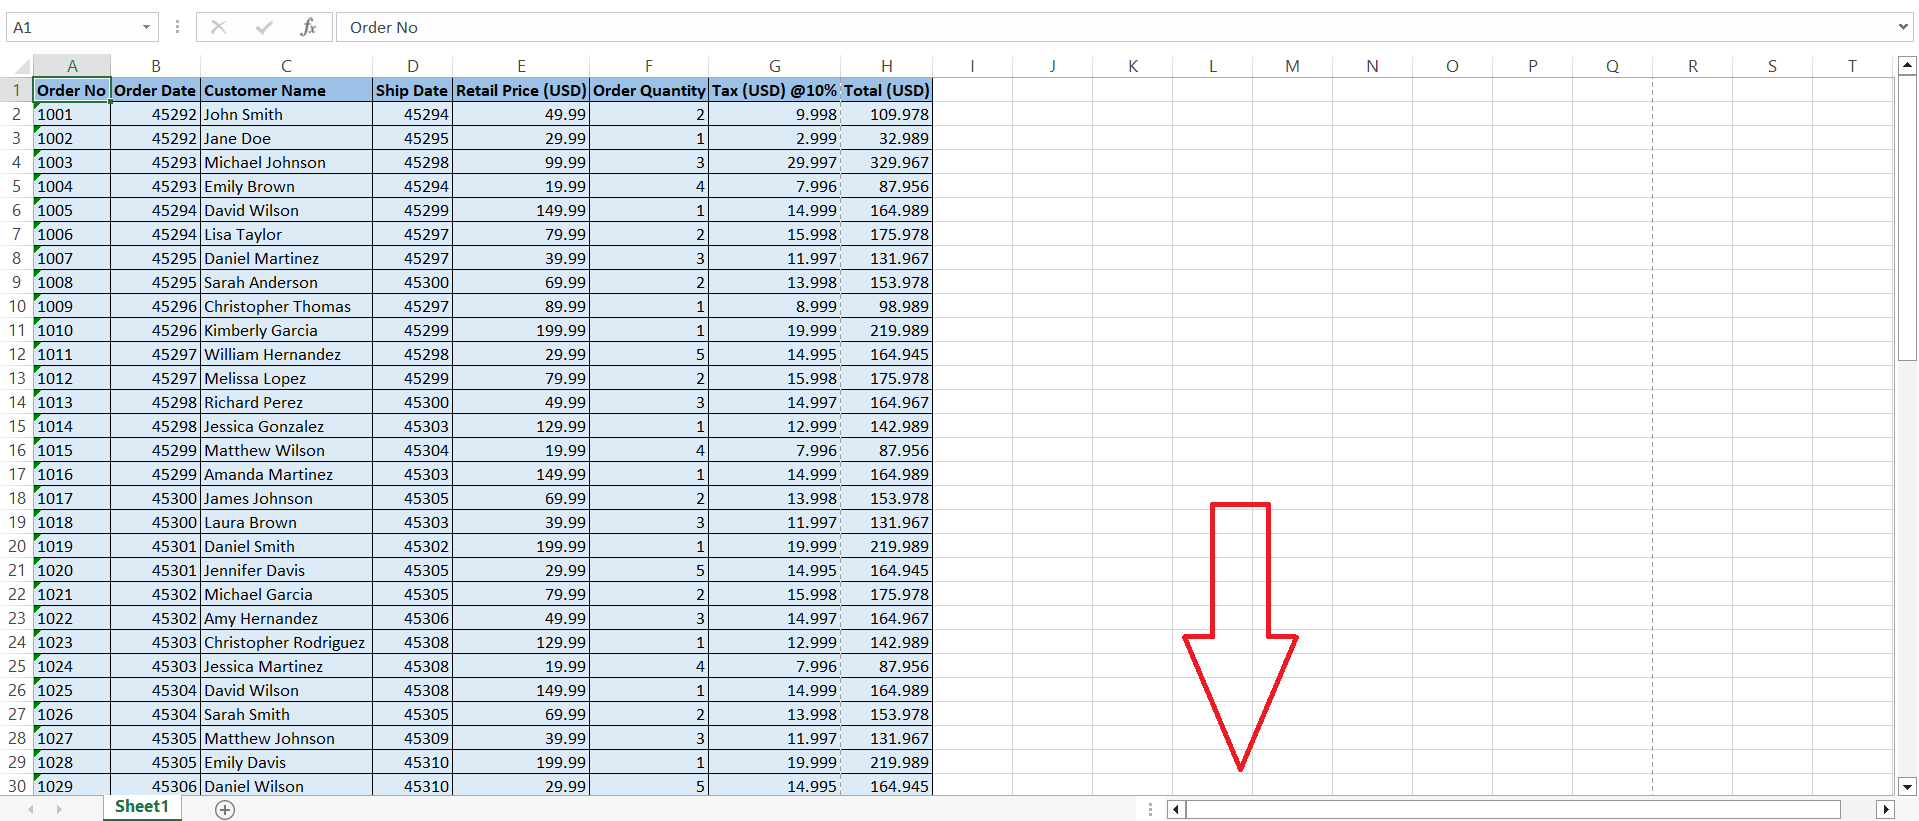
STEP 4: Finally, the status bar gets removed from the main workbook view.
To get the status bar back, follow the steps above and just type the below in the Immediate dialog Box:
“Application.DisplayStatusBar=True”
Remember, these tweaks are not permanent; closing Excel resets the status bar visibility. If you want a more lasting solution, consider saving these macros in your workbook, so that you can toggle the status bar visibility with a simple keyboard shortcut or button click.
Status Bar Secrets: Tools At Your Fingertips
Default Options and Hidden Gems in the Status Bar
You may already be familiar with commonly displayed indicators like average, count, and sum, but the status bar is akin to an iceberg with much beneath the surface. For instance, dive into its depths by right-clicking and discover options to track ‘Caps Lock’, ‘Num Lock’, and even ‘Scroll Lock’ indicators.
Then there are interactive functions like ‘Zoom Slider’ and ‘View Button’, each a hidden gem waiting to be tapped for more efficient navigation and data interpretation.
Whether you’re a data newbie or an Excel sage, these lesser-known features unlock a new realm of possibilities that streamline your spreadsheet tasks.
Using Macros to Manipulate the Status Bar for Efficiency
Harness the power of macros to make the status bar work even smarter for you. Did you know that you could display custom messages or vital information through it? It’s relatively simple: In your VBA editor, by setting Application.StatusBar = "Your message here" you can cue any important alerts or status updates for everyone to see.
For instance, while running a lengthy macro, you might want the status bar to reassure users with a “MyExcelOnline” message, preventing any premature panic that Excel has frozen over.
These VBA scripts are like tiny productivity potions — you just need a few drops (or lines of code) to automate and inform. And don’t fret if programming isn’t your forte; there are plenty of templates and guides that make it easy to start casting these Excel spells.
Streamline Tasks with Advanced Status Bar Functions
Copy Techniques for Transferring Summary Information
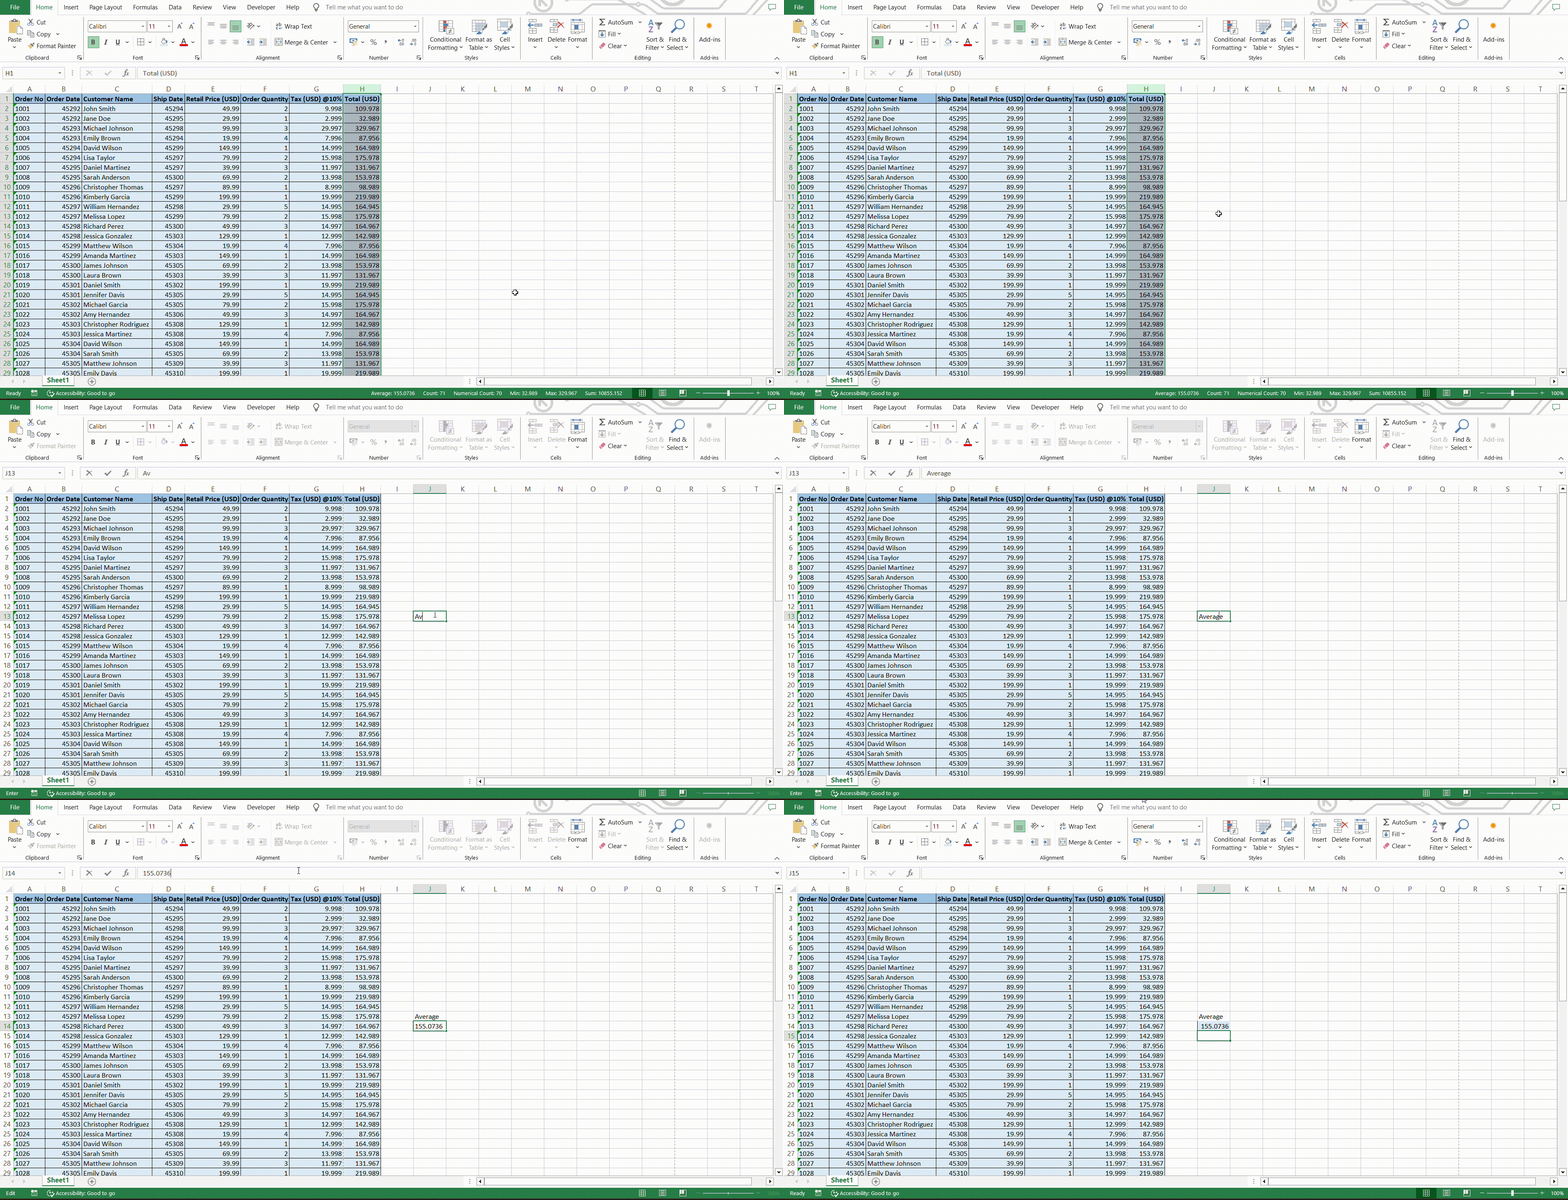
Copying summary information from the status bar is almost like performing a slick card trick with your data. Say you’ve got a selection of cells and the total, as shown on the status bar, is just the figure you need. Instead of reaching for the calculator, click directly on that sum, average, or count displayed, and it’s automatically copied to your clipboard.
Now, glide over to wherever you need this figure, within Excel or another Windows-based application, and paste effortlessly using Ctrl + V. This neat feature lets you transfer valuable insights without the hassle of manual entry, freeing up your time for more complex tasks or well-deserved coffee breaks.
Remember, these cool click-and-copy moves work because the values from the status bar go to the Windows Clipboard, opening up a world where Excel plays nice with other apps.
Frequently Asked Questions (FAQs)
Why Can’t I See My Status Bar in Excel?
You can’t see your status bar, likely because it’s been hidden by Excel’s full-screen view or a wayward macro. No need to worry, just press Ctrl + Shift + F1 to swap back to normal view, which should bring back both ribbon and status bar. If a macro has made it disappear, press Alt + F11, navigate to the Immediate Window with Ctrl + G, and enter Application.DisplayStatusBar = True. This should resolve your status bar blues and bring it back into view.
What does the status bar tell you?
The status bar is a treasure trove of insights, keeping you informed about selected cell ranges with real-time data like sum, average, count, numerical min/max, and more. It’s also a guide, signaling worksheet views, macro recording status, zoom level, and whether ‘Caps Lock’, ‘Num Lock’, or ‘Scroll Lock’ are activated. In essence, it’s your data dashboard, offering a snapshot of your sheet’s status and quick access to useful functions.
Can You Modify Which Features Appear on the Status Bar?
Absolutely, you can modify which features appear on the status bar just by right-clicking it. A contextual menu pops up, displaying a buffet of options, like averages, counts, or zoom controls. It’s your status bar, so tick what you want to see, and untick what you don’t. Tailor it to fit your workflow, and your status bar will display only the features that spark joy and productivity.
What if you want to calculate the minimum and maximum sales quickly?
To calculate the minimum and maximum sales quickly, use the status bar! First, make sure these features are enabled by right-clicking on the status bar and selecting ‘Minimum’ and ‘Maximum.’ Next, highlight the range of data for your sales figures. Instantly, your status bar will display the lowest and highest sales values. It’s like having a speed dial to essential stats, making crunch time all the more efficient.
Where is the normal button on the status bar in Excel?
The ‘Normal’ button on the status bar in Excel is the leftmost of the three view shortcuts, typically found at the bottom-right corner of your Excel window. It looks like a rectangle with lines representing text, and clicking it switches your worksheet to the ‘Normal’ view. This restores the default layout, making it easy to work on your data without the frills of page margins or print previews getting in the way. It’s your gateway to returning to the classic Excel look whenever you’re done exploring or printing.
John Michaloudis is a former accountant and finance analyst at General Electric, a Microsoft MVP since 2020, an Amazon #1 bestselling author of 4 Microsoft Excel books and teacher of Microsoft Excel & Office over at his flagship MyExcelOnline Academy Online Course.

