As someone who often works with dates in Excel, I find it incredibly helpful to have a date picker available. It makes data entry more efficient and minimizes errors that can occur when typing dates manually. In this article, I’ll guide you through the process of inserting an Excel date picker and a calendar in Excel, making your spreadsheet experience smoother and more user-friendly.
Key Takeaways:
- Using a date picker significantly speeds up data entry in Excel by allowing me to select dates instead of typing them, which reduces the risk of errors.
- The date picker minimizes the chances of entering dates in the wrong format or making typos, ensuring that my data remains accurate.
- By using a standardized method for entering dates, I maintain uniformity throughout my spreadsheets, making them easier to read and analyze.
- The process of enabling the Developer tab and inserting a date picker control is straightforward, making it accessible even for Excel users with limited experience.
- Creating a calendar from a template in Excel is simple and allows me to tailor it to my specific needs, whether for personal planning or tracking work-related events.
Table of Contents
Steps to Insert a Date Picker in Excel
To insert a date picker in Excel, you typically need to use a few specific features. Let’s go through the steps:
Enable the Developer Tab
If you don’t see the Developer tab in your Excel ribbon, you’ll need to enable it first. Here’s how:
STEP 1: Open Excel and go to the File tab.
STEP 2: Select Options.
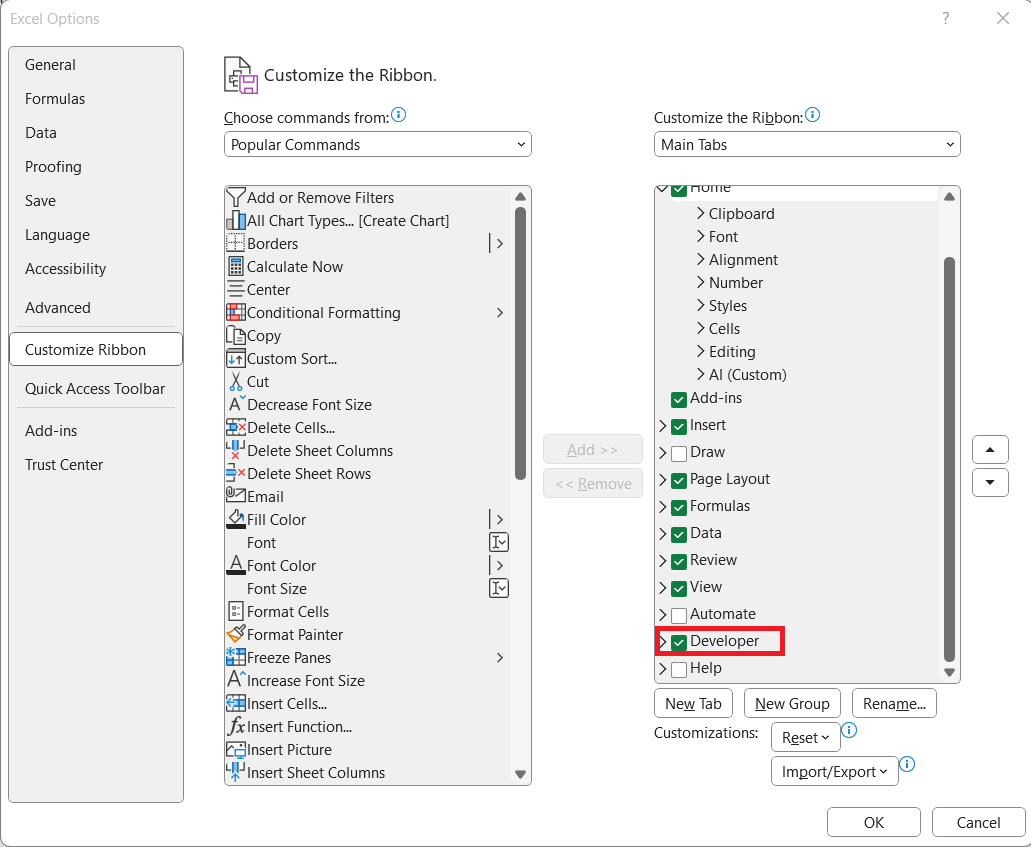
STEP 3: In the Excel Options dialog, click on Customize Ribbon. On the right side, check the box for Developer and click OK.
Now, the Developer tab should be visible in your ribbon.
Insert a Date Picker Control
With the Developer tab enabled, you can now insert a date picker control:
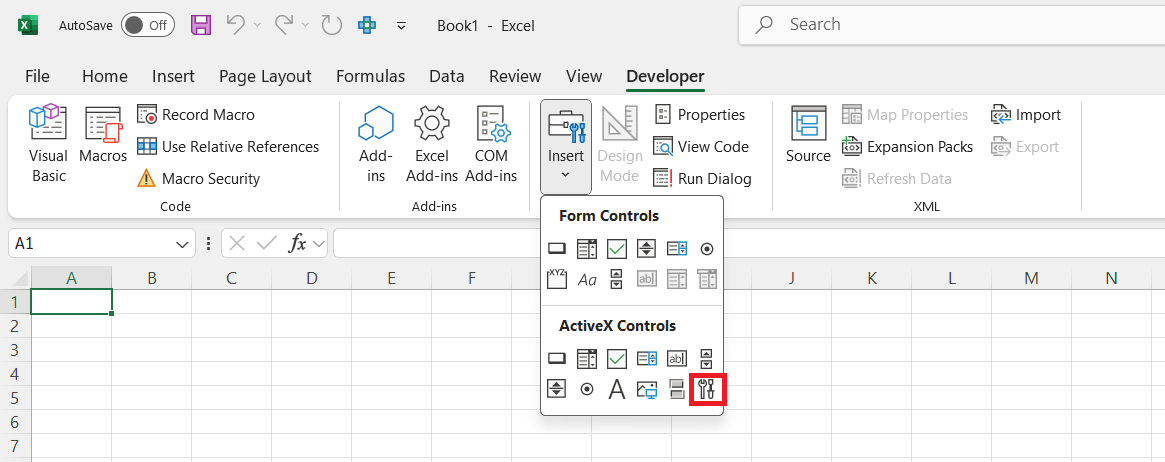
STEP 1: Go to the Developer tab on the ribbon. Click on Insert in the Controls group. From the ActiveX Controls, choose More Controls (it looks like a wrench and hammer icon).
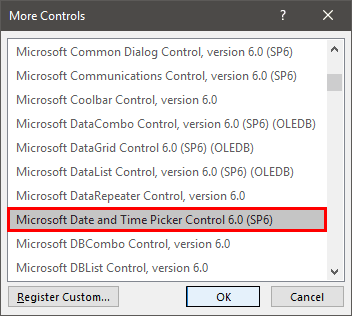
STEP 2: In the list that appears, find and select Microsoft Date and Time Picker Control. If you don’t see this option, it might not be available depending on your version of Excel.
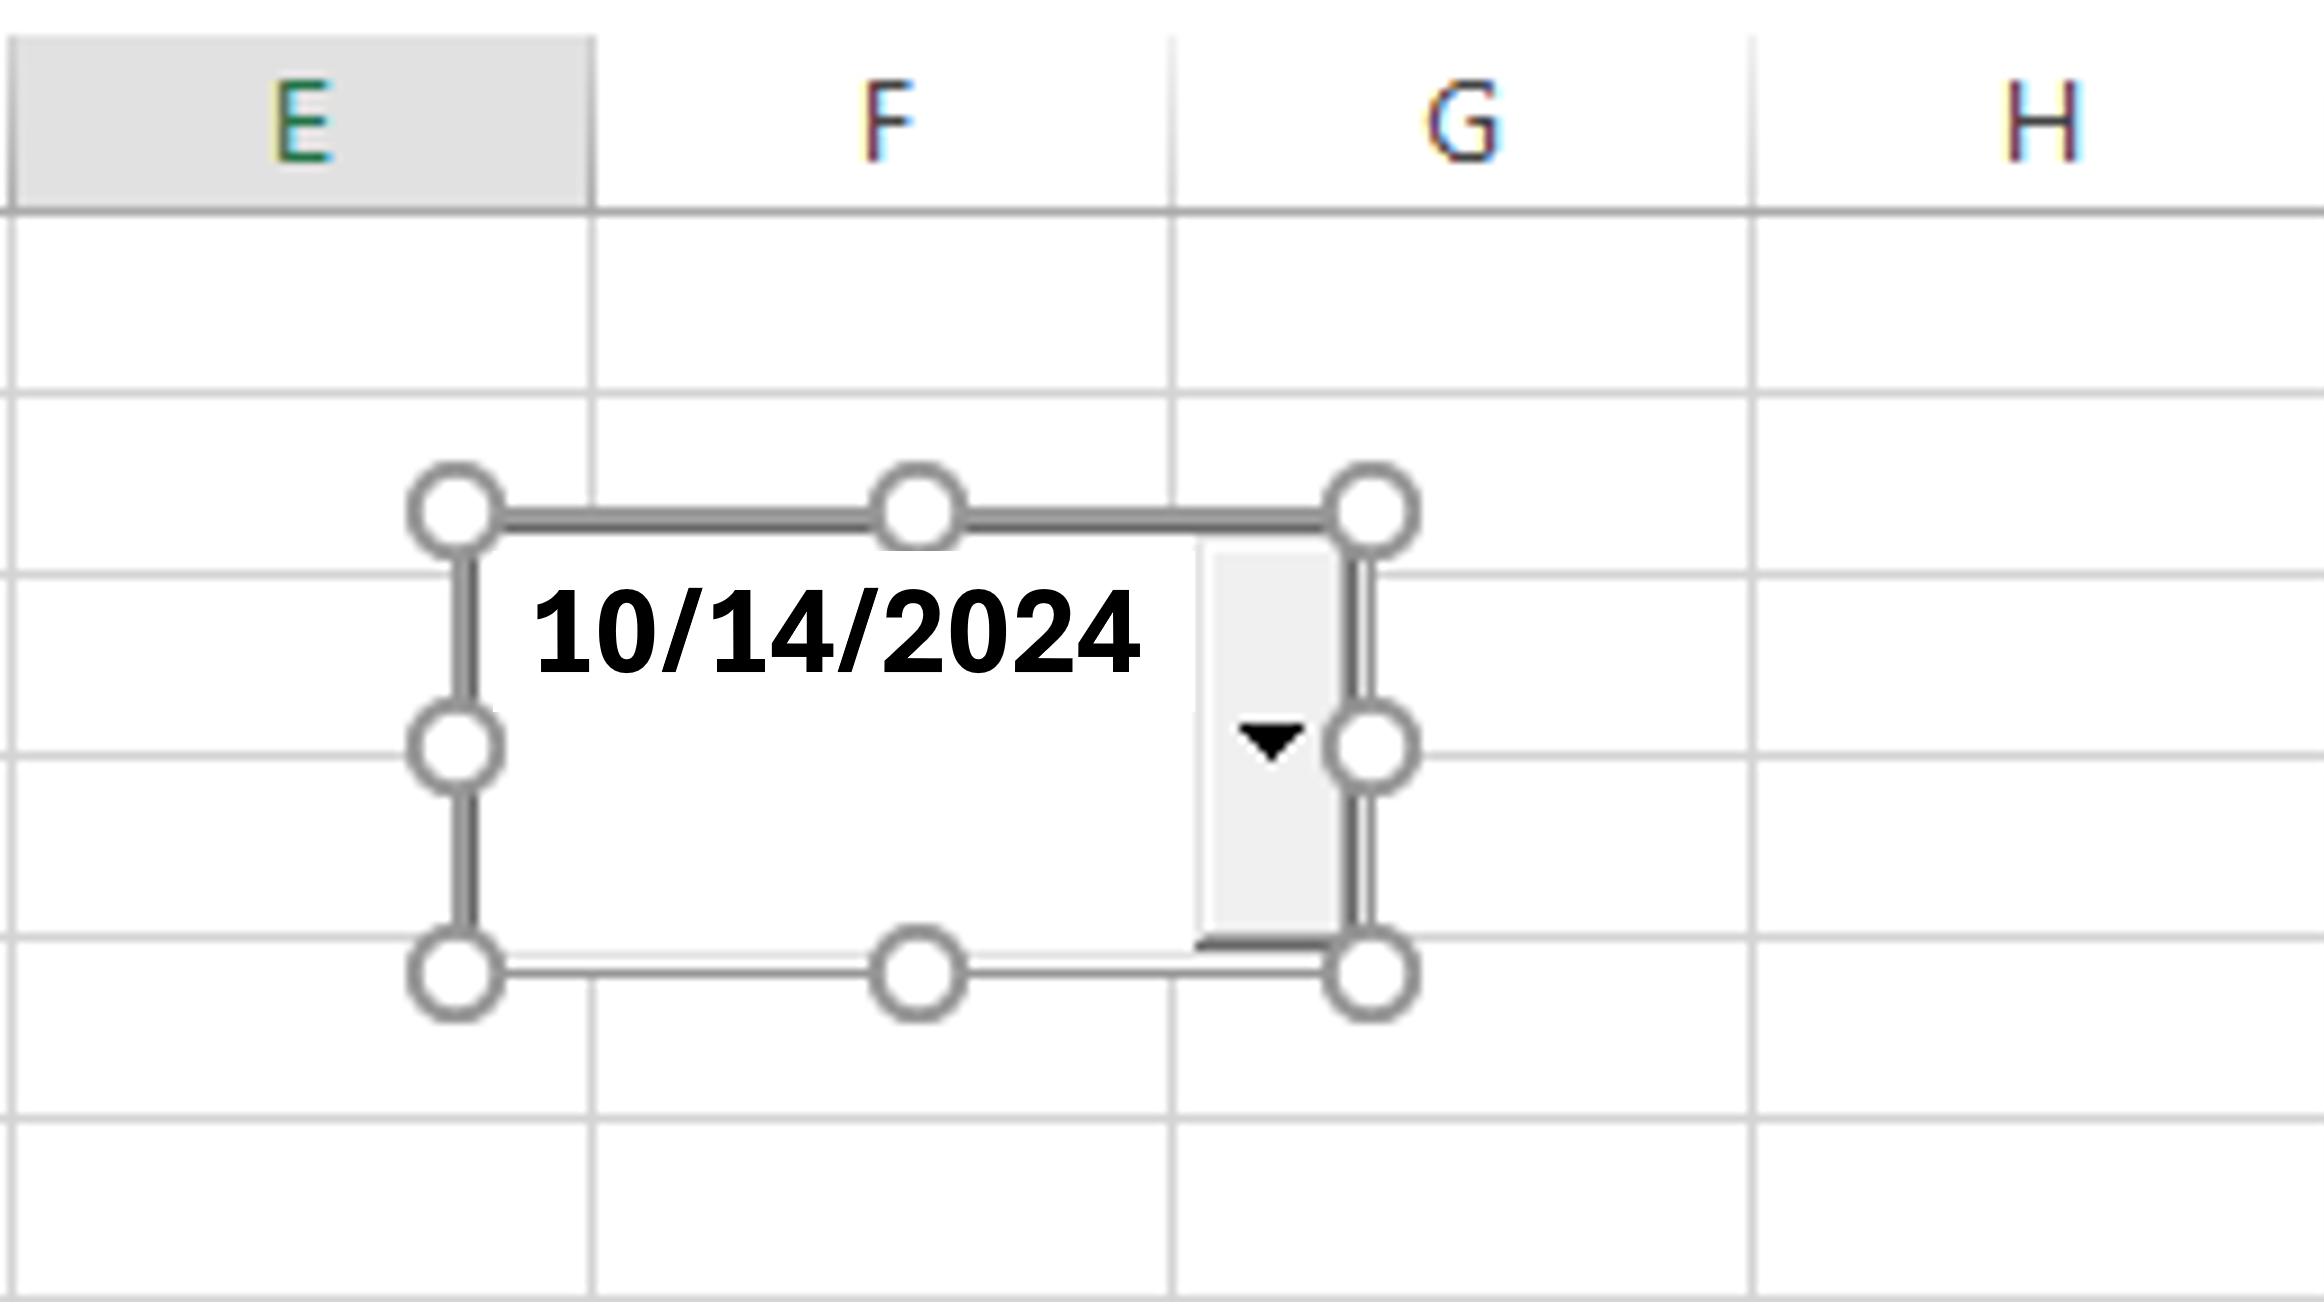
STEP 3: Click OK, then click and drag on your worksheet to draw the date picker control.
Why Use a Date Picker?
Using a date picker can streamline your workflow in several ways:
- Reduces Errors: It minimizes the chances of entering dates in the wrong format or making typos.
- Saves Time: Instead of typing out a date, you can simply select it from a calendar interface.
- Improves Consistency: Having a standard way of entering dates helps maintain uniformity throughout your spreadsheet.
Using Excel template to display Calendar
Creating a calendar in Excel using a template is a straightforward process that allows you to customize it to suit your needs. In this guide, I’ll walk you through the steps to create a functional calendar that you can use for planning, tracking events, or simply keeping organized.
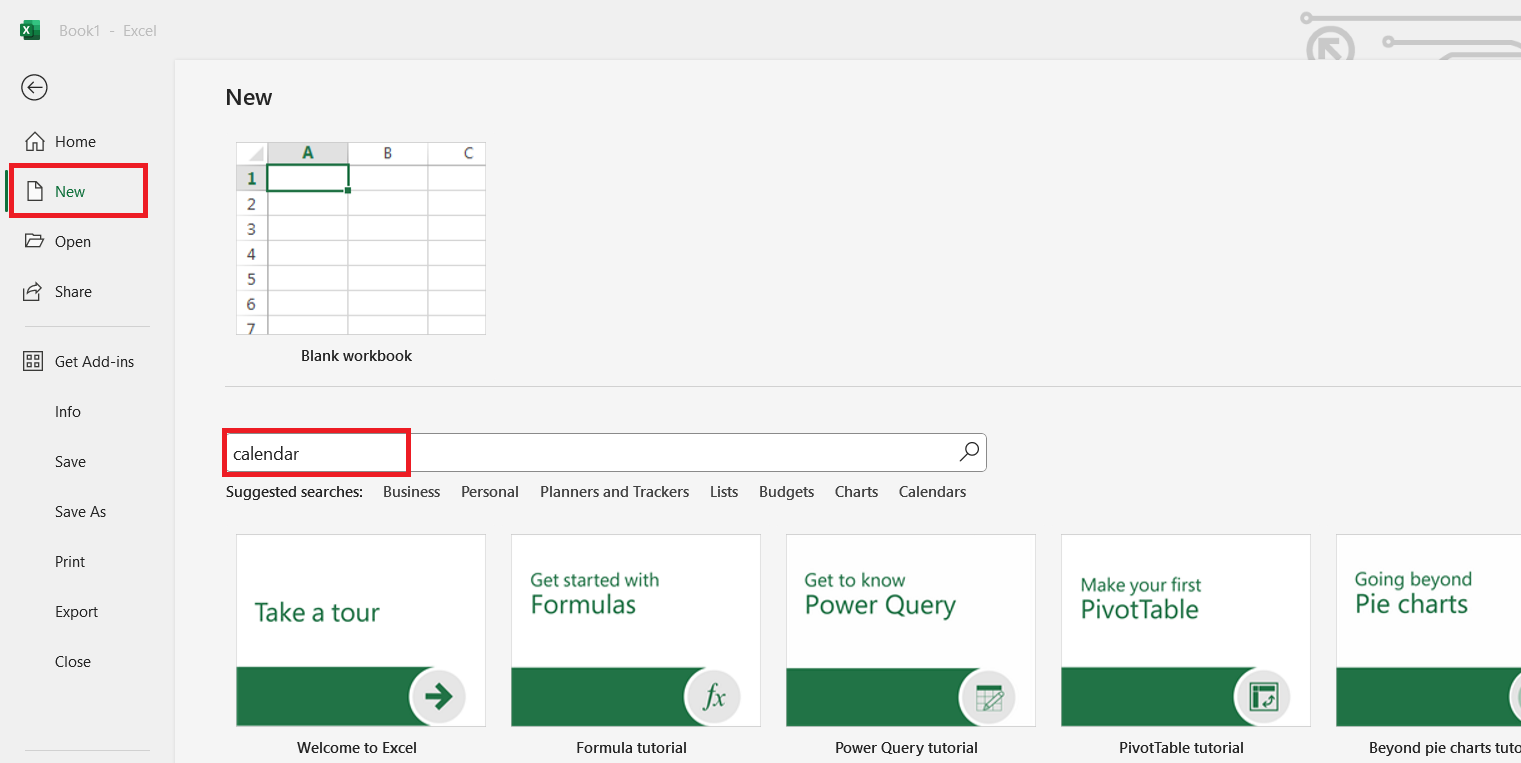
STEP 1: Search for Calendar Templates
In Excel, I click on File and select New. Then, I type “Calendar” in the search bar and hit Enter to see the available calendar templates.
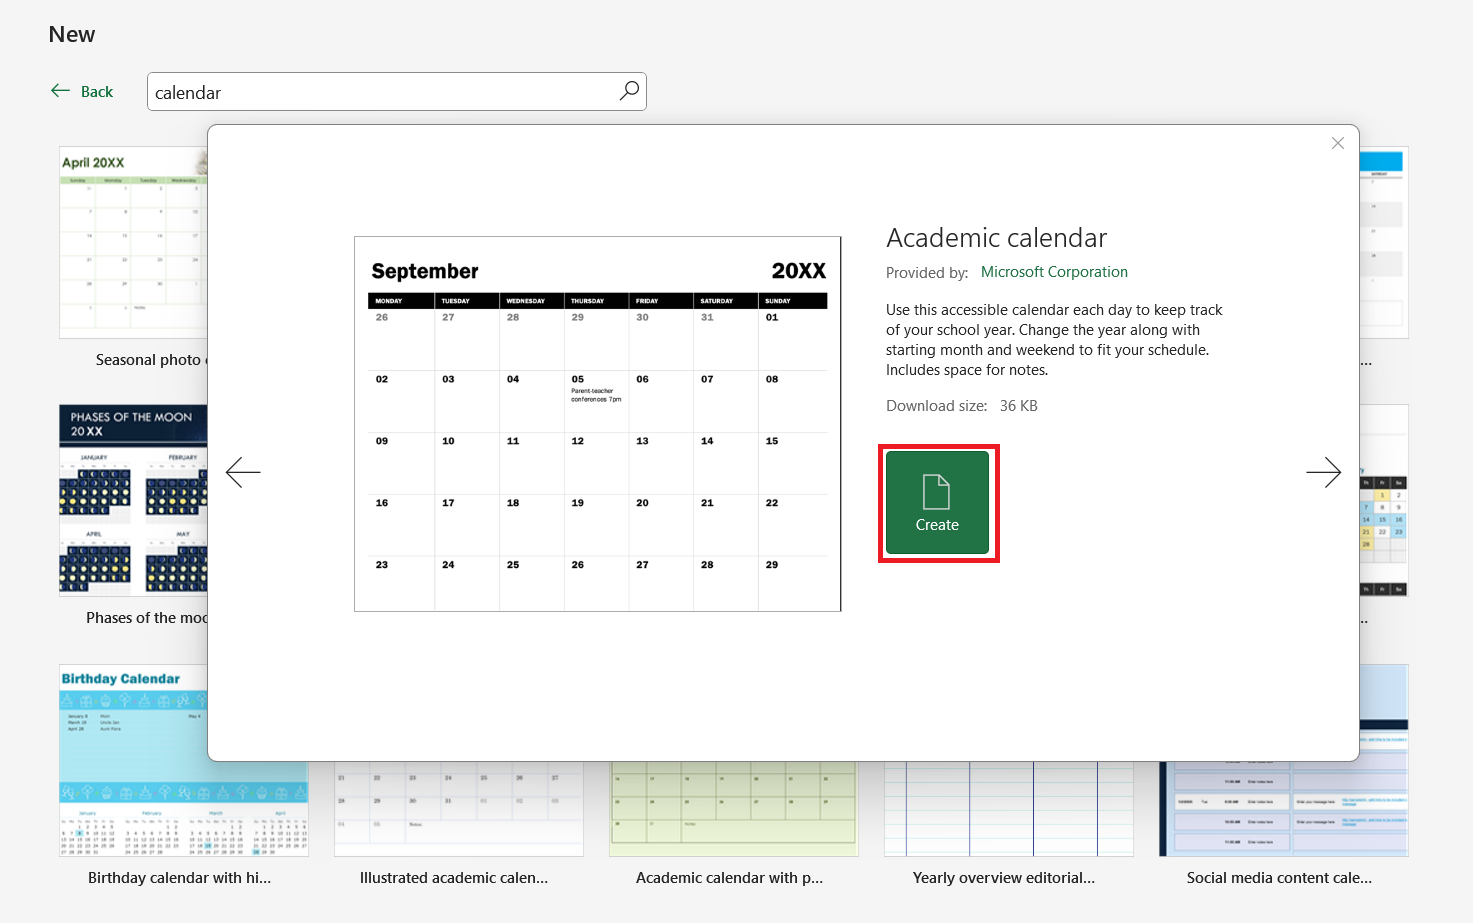
STEP 2: Choose a Calendar Template
I browse through the templates and click on one that fits my needs. After previewing it, I click the Create button to open it.
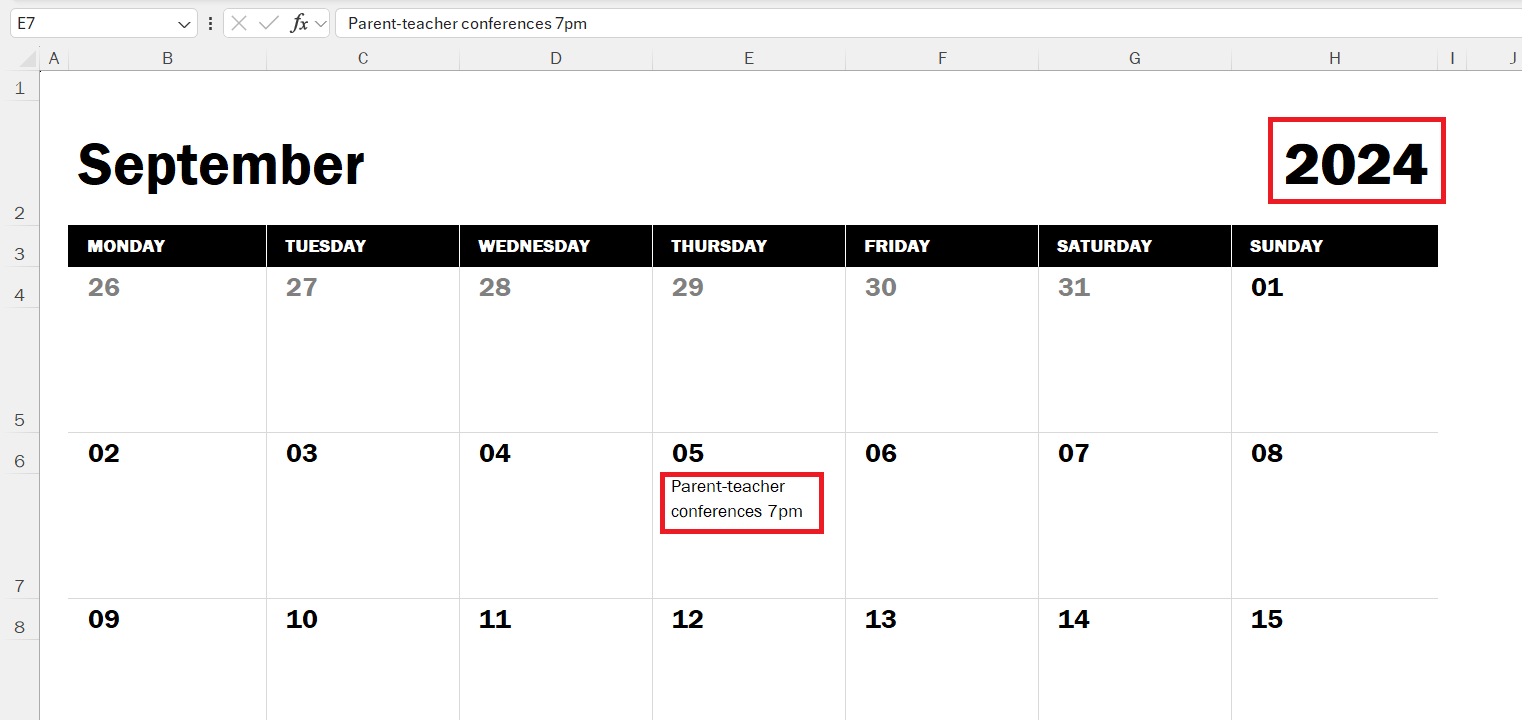
STEP 3: Customize the Calendar
With the calendar template open, I change the year if necessary and add my events by clicking on the corresponding dates and typing in the details.
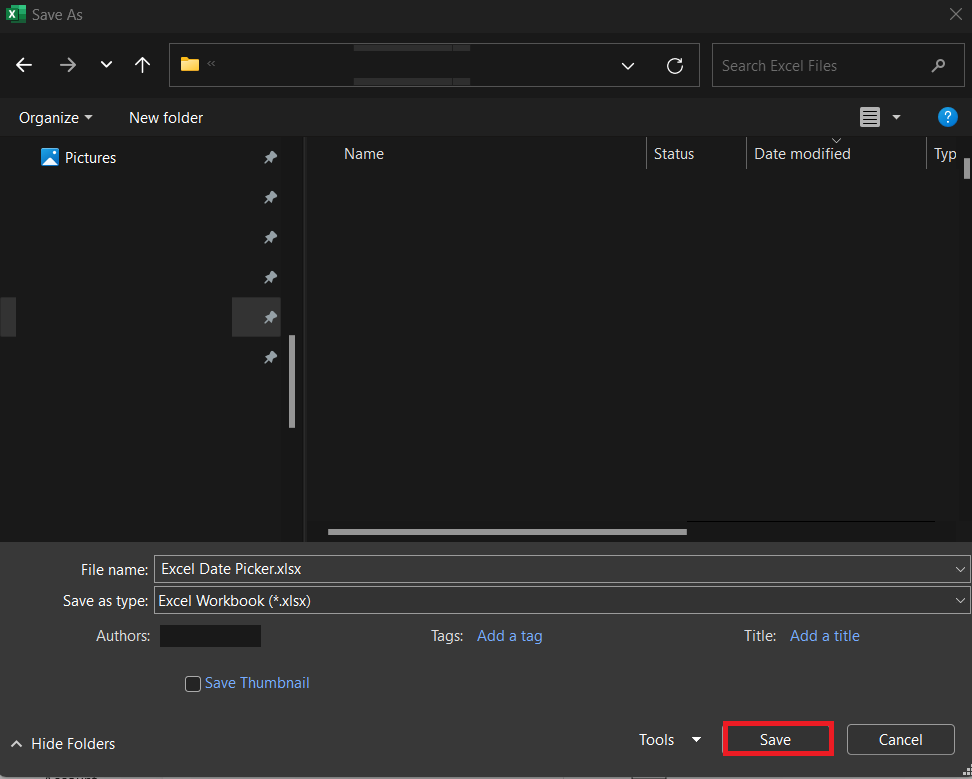
STEP 4: Save the Calendar
Once I’m satisfied with my customized calendar, I click on File, then Save As. I choose the location on my computer, give it a meaningful name, and select the file format before clicking Save.
STEP 5: Print or Share the Calendar
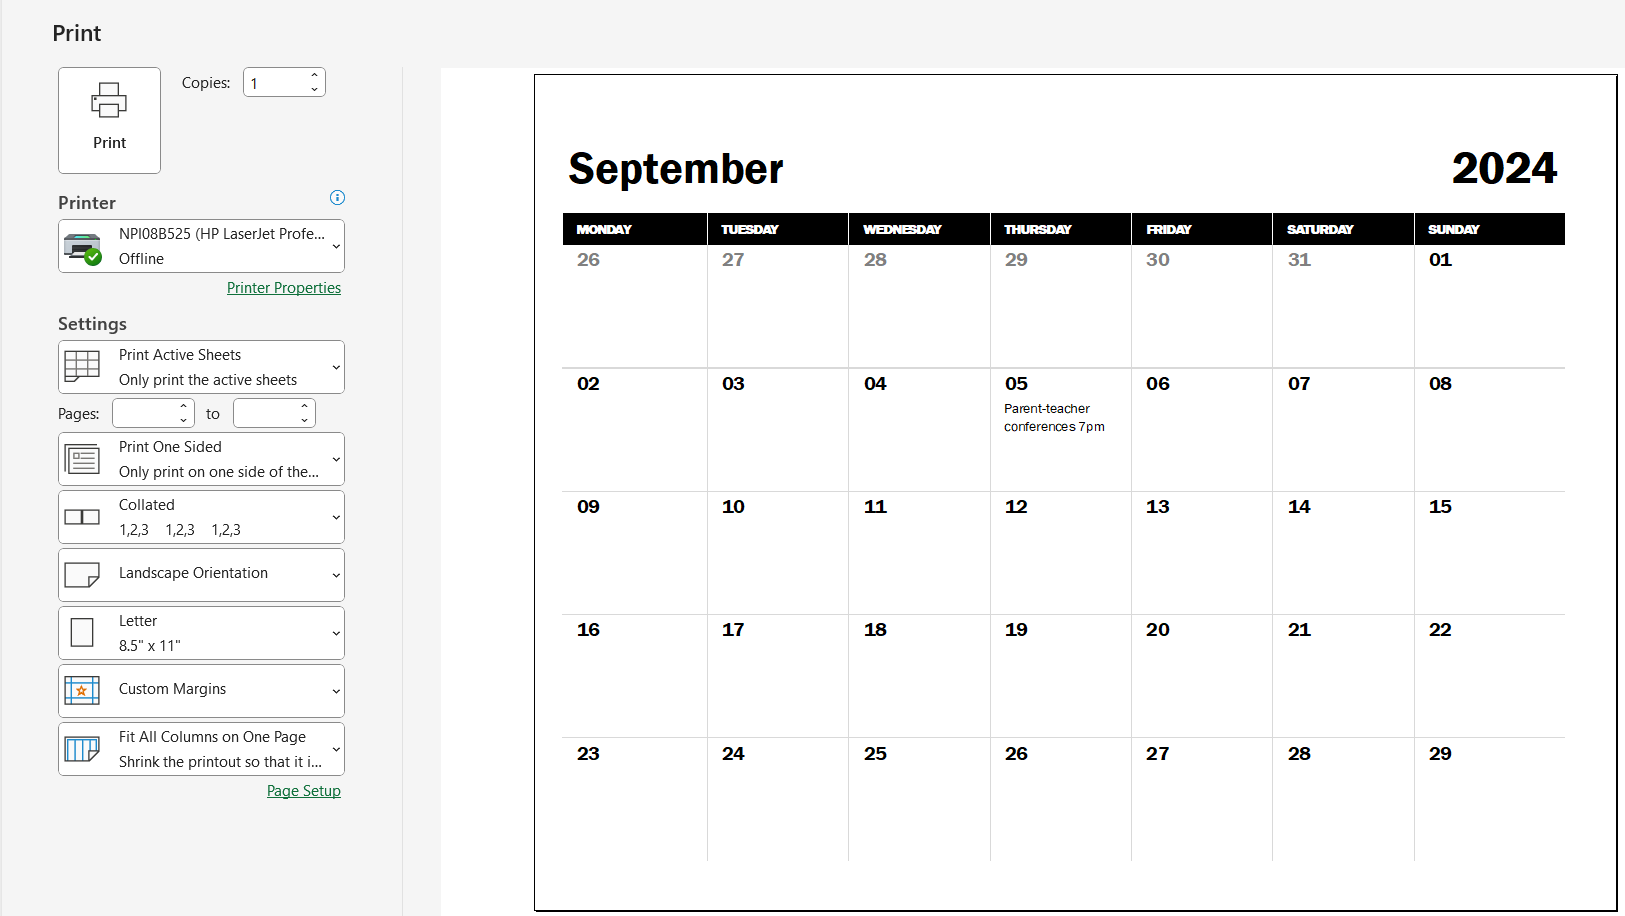
To get a physical copy, I click on File, then Print. I review the print settings and click the Print button when ready.
FAQs
1. What is a n Excel date picker?
A date picker is a control that allows users to select dates from a visual calendar interface. I find it helpful because it streamlines data entry and reduces errors associated with manual date entry.
2. How do I enable the Developer tab in Excel?
To enable the Developer tab, I go to the File menu, select Options, then Customize Ribbon, and check the box next to Developer. This makes the Developer tab visible on my Excel ribbon.
3. Can I insert a date picker in any version of Excel?
Not all versions of Excel include the Microsoft Date and Time Picker Control. If I don’t see it, it may not be available in my version. I can check the ActiveX controls under the Developer tab to confirm.
4. How do I create a calendar using a template?
To create a calendar using a template, I click on File, then New, and type “Calendar” in the search bar. After selecting a template, I customize it by adding events and saving it for future use.
5. Can I print the calendar I created in Excel?
Yes, I can print my calendar by clicking on File, then Print. I review the print settings to ensure everything looks good before clicking the Print button to get a physical copy.
John Michaloudis is a former accountant and finance analyst at General Electric, a Microsoft MVP since 2020, an Amazon #1 bestselling author of 4 Microsoft Excel books and teacher of Microsoft Excel & Office over at his flagship MyExcelOnline Academy Online Course.


