Today, let’s go over some OneDrive tips and tricks on your Phone, PC, or online. These tips will help you utilize the best of OneDrive in an efficient manner. You will also get more accustomed to using OneDrive on all your devices, making it an even more convenient tool for you.
Below are the Top 10 + 1 tips that you must know if you plan on using OneDrive:
- Backing Up Photos from Smartphone to OneDrive
- Scanning a Document From Smartphone to OneDrive
- Sharing Options via Email or Link from Your PC
- File Security Options from Your PC
- Managing Sharing Access to Files on Your PC
- PC Icon Explanation
- Using the Personal Vault on Your PC and on The Cloud
- Version History on Your PC and on The Cloud
- Generating Code for Embedding a File from The Cloud
- Using the Recycle Bin on The Cloud
- BONUS TIP
Watch Top 10 OneDrive Tips & Tricks on YouTube and give it a thumbs-up!
Tip 1: Backing Up Photos from Smartphone to OneDrive
You can easily sync photos from your camera roll to OneDrive via your smartphone. Let’s see how!
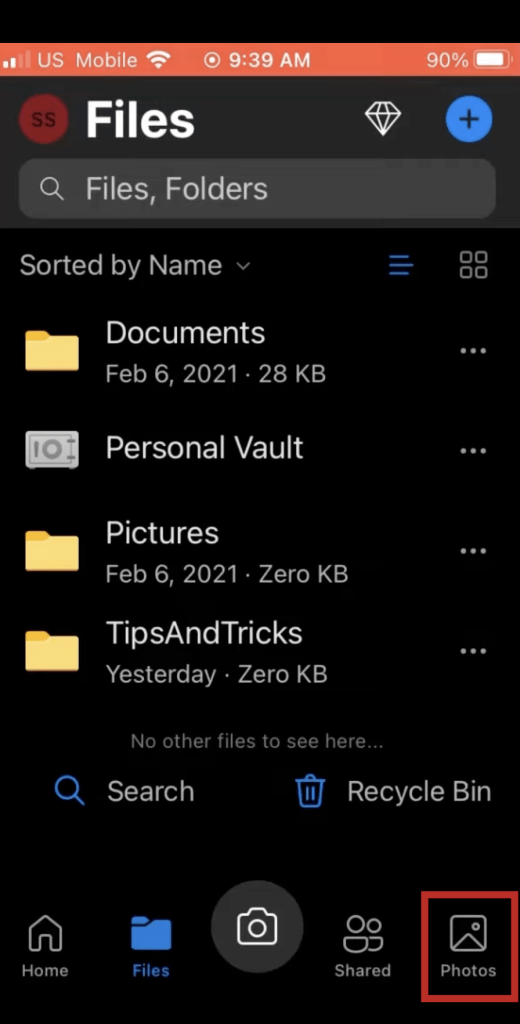
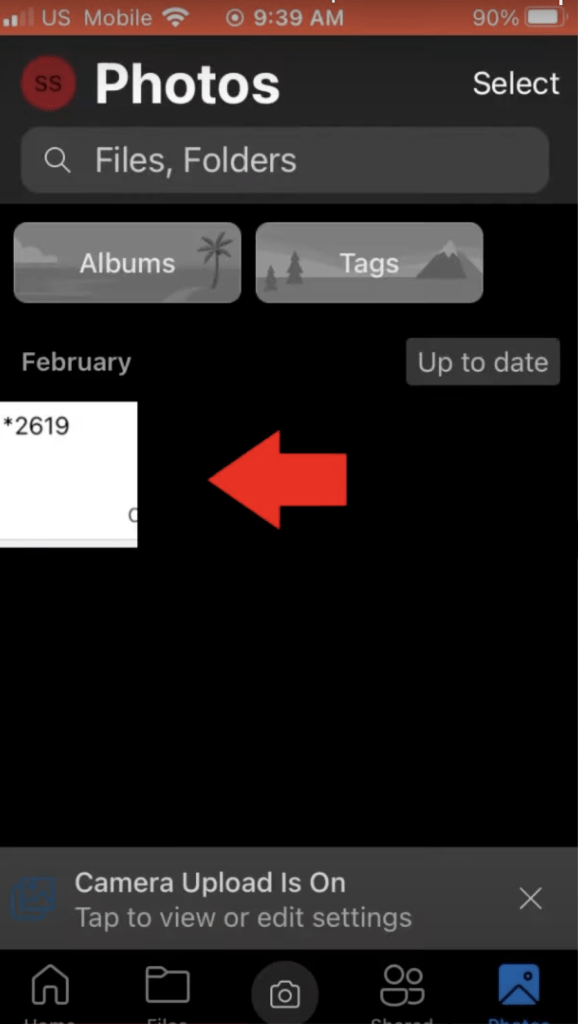
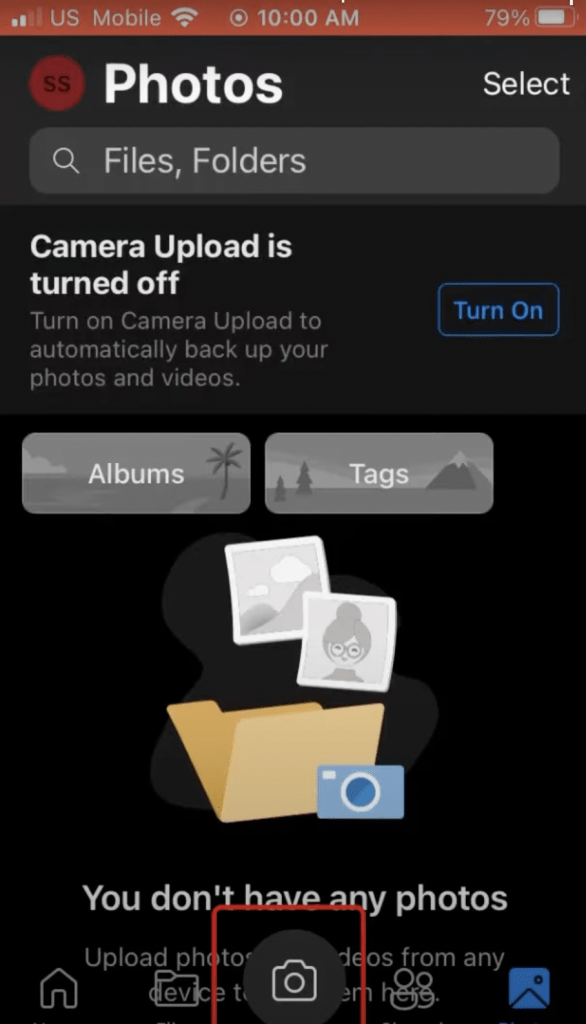
- On the OneDrive app, go to Photos.
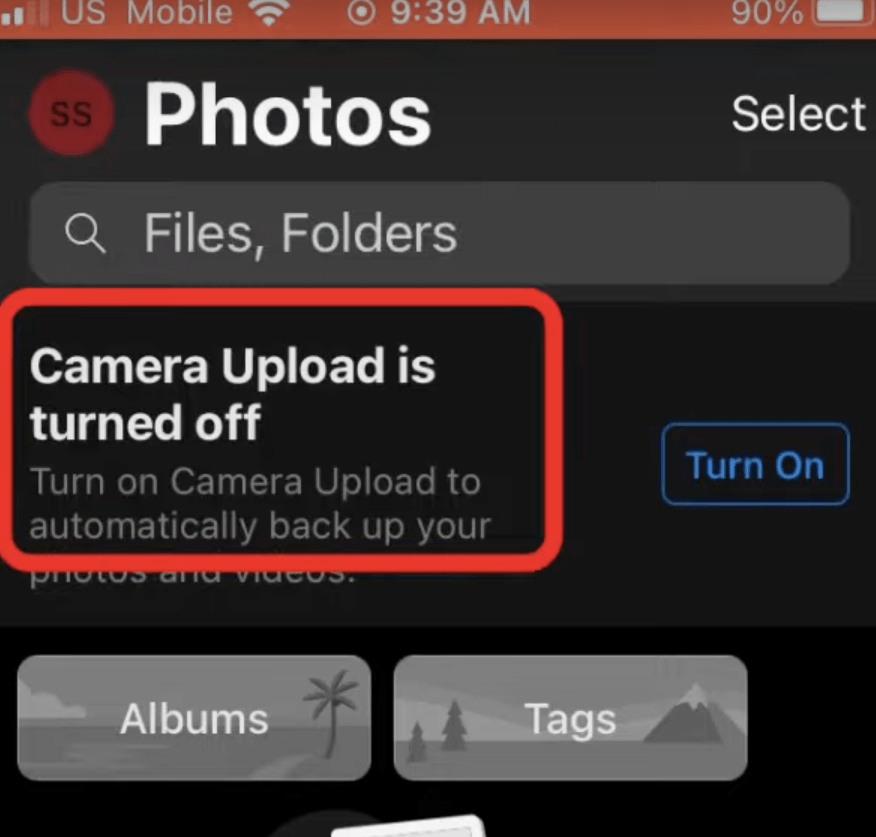
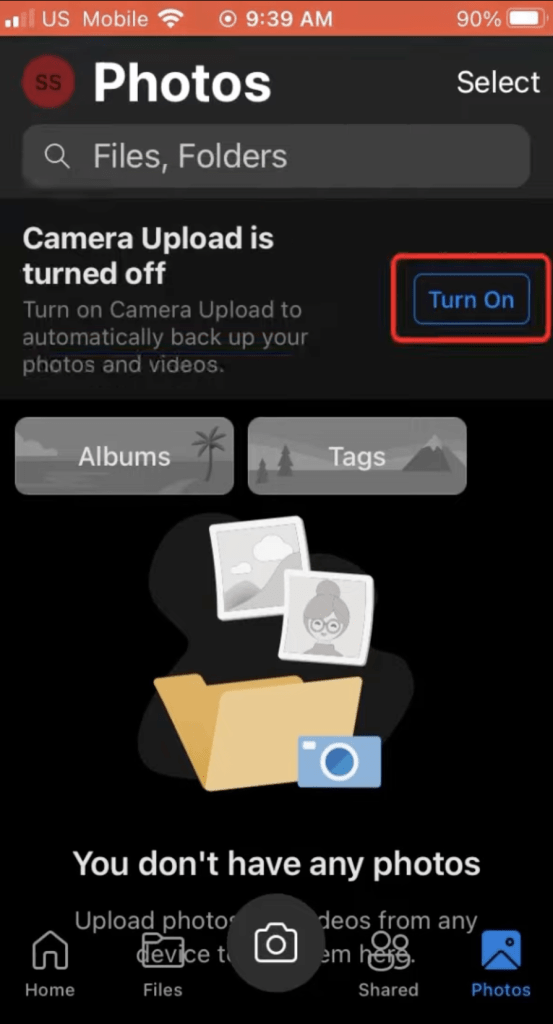
You will see that the Camera upload option is off.
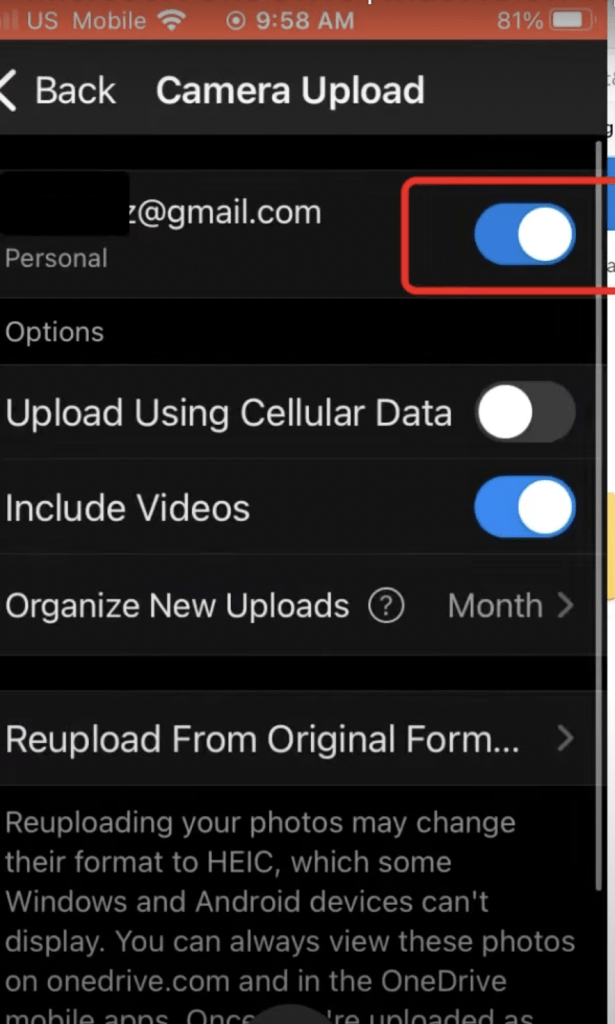
- Turn on the Camera Upload option.
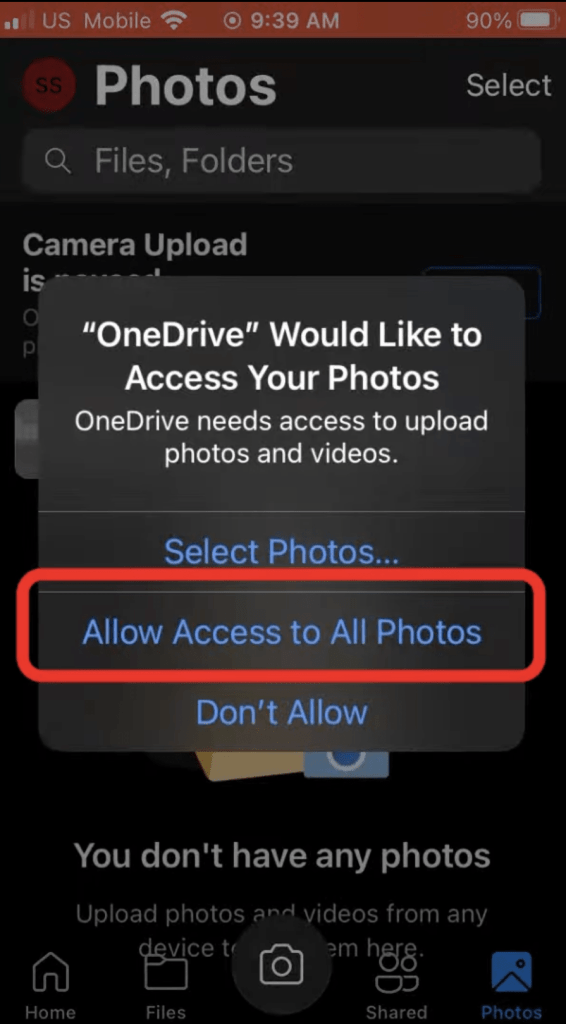
- Allow access to OneDrive when the pop-up window appears.
Upon doing the above steps, you will notice that your camera roll has backed up in OneDrive.
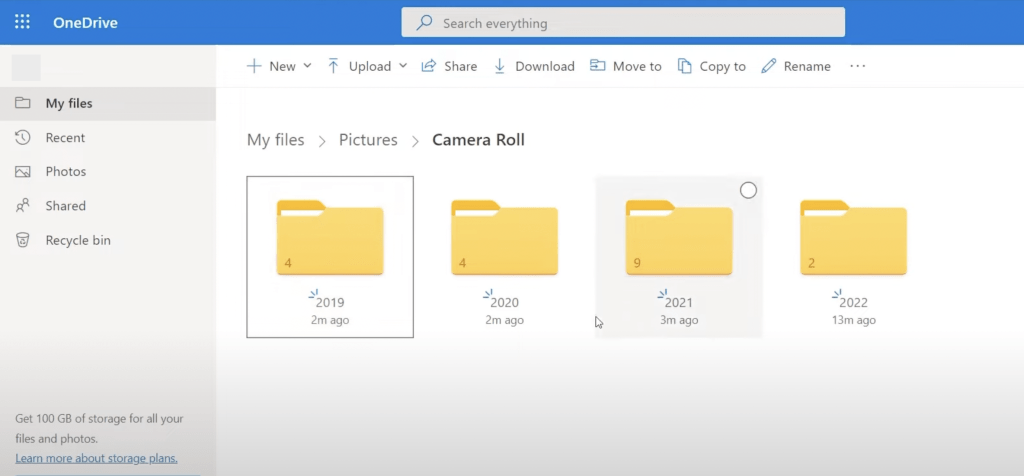
Now if you go to the Pictures folder in your OneDrive, you will find a folder named Camera Roll. You will notice that inside the folder, all your photos will be organized year-wise.
One thing to note is that OneDrive will not extract files from a different cloud such as iCloud. It will only back up photos that are physically present on your device.
You can also turn this feature off if you do not want to upload to the cloud. To turn off camera roll backup –
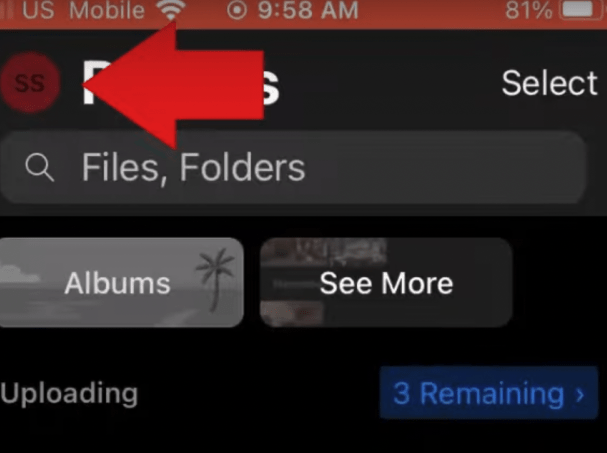
- Click on your profile icon.
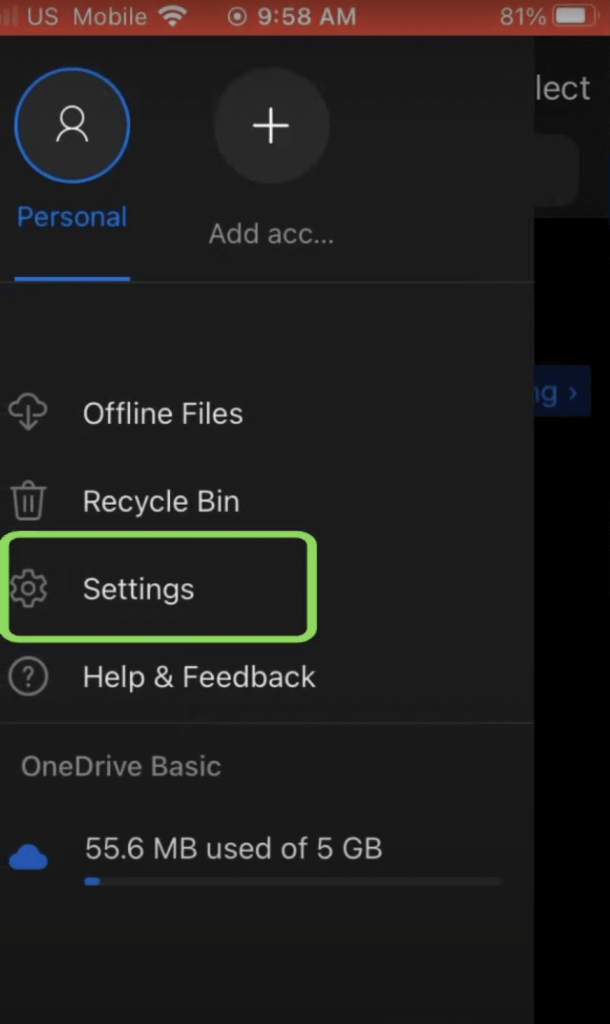
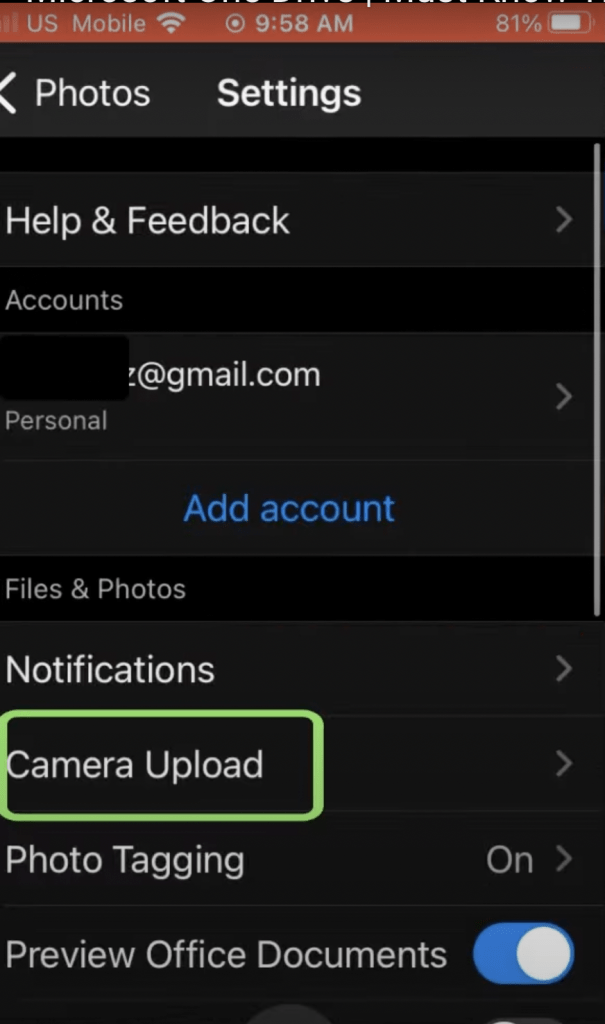
- Go to Settings.
- Go to Camera Upload.
- Turn off the sync from your account.
Tip 2: Scanning a Document From Smartphone to OneDrive
Making your work easier, this next OneDrive tip on your smartphone is pretty handy. If you want to click a picture of something important and upload it to the cloud, you can directly do that from the OneDrive app!
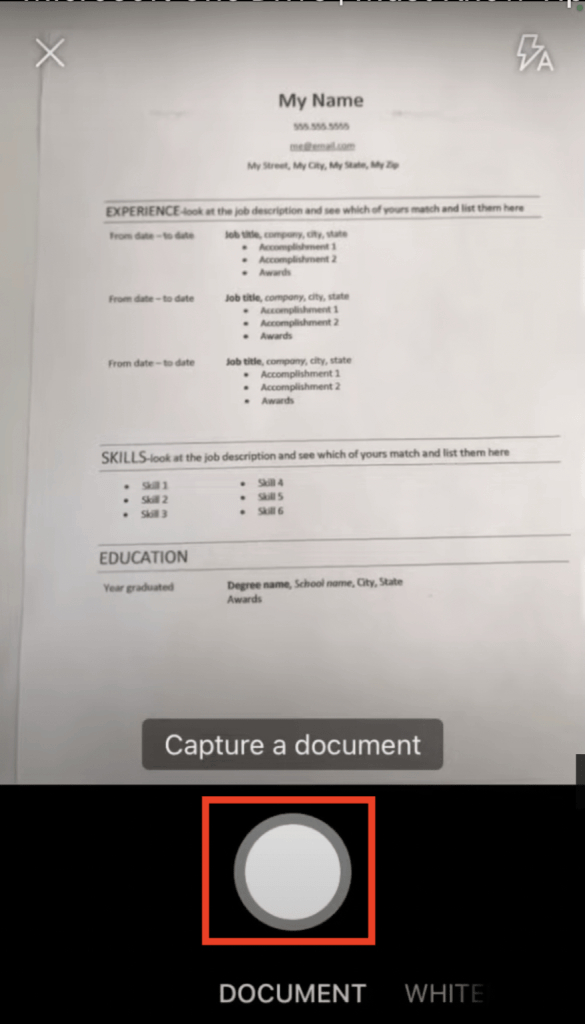
- Click on the camera icon in the OneDrive app.
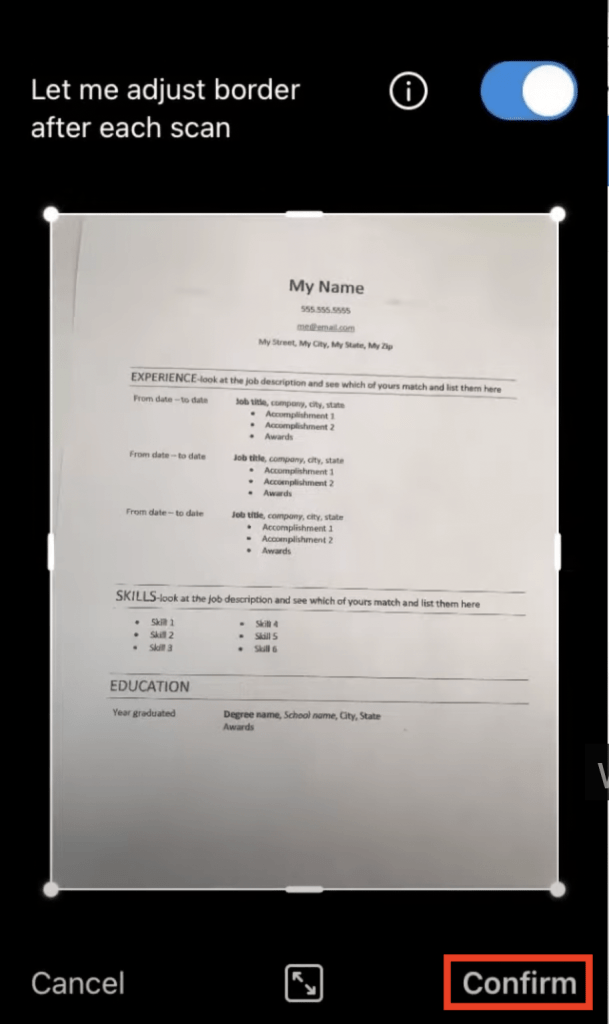
- Line up your document and click a photo.
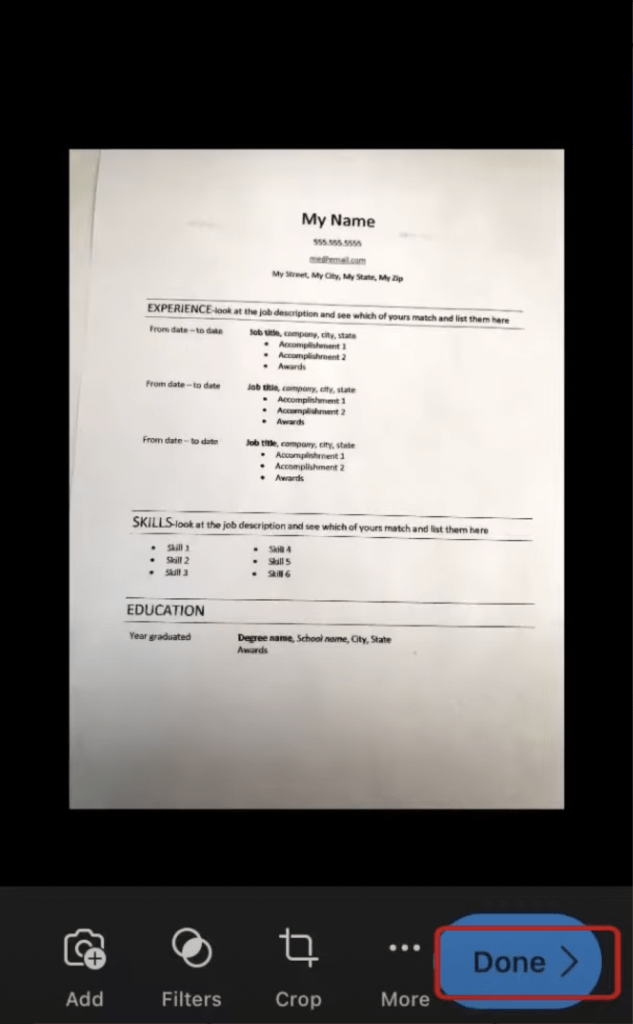
- You can edit and confirm those changes.
- Click on Done.
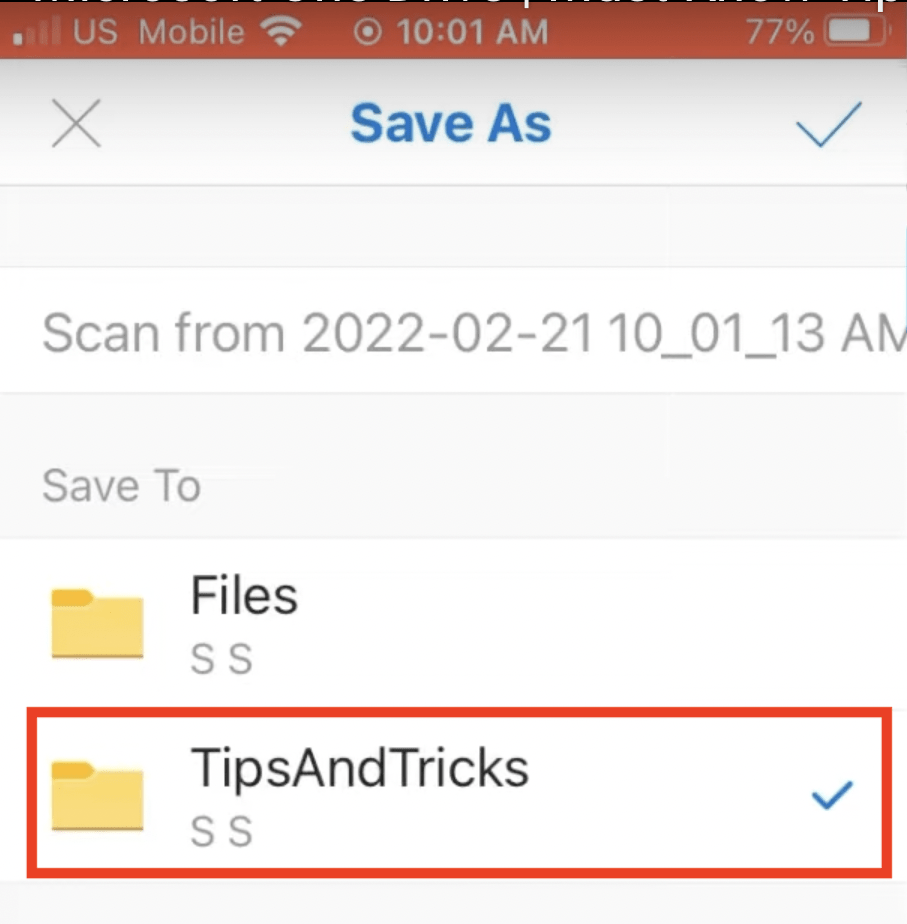
- Select the folder that you want to save the file to.
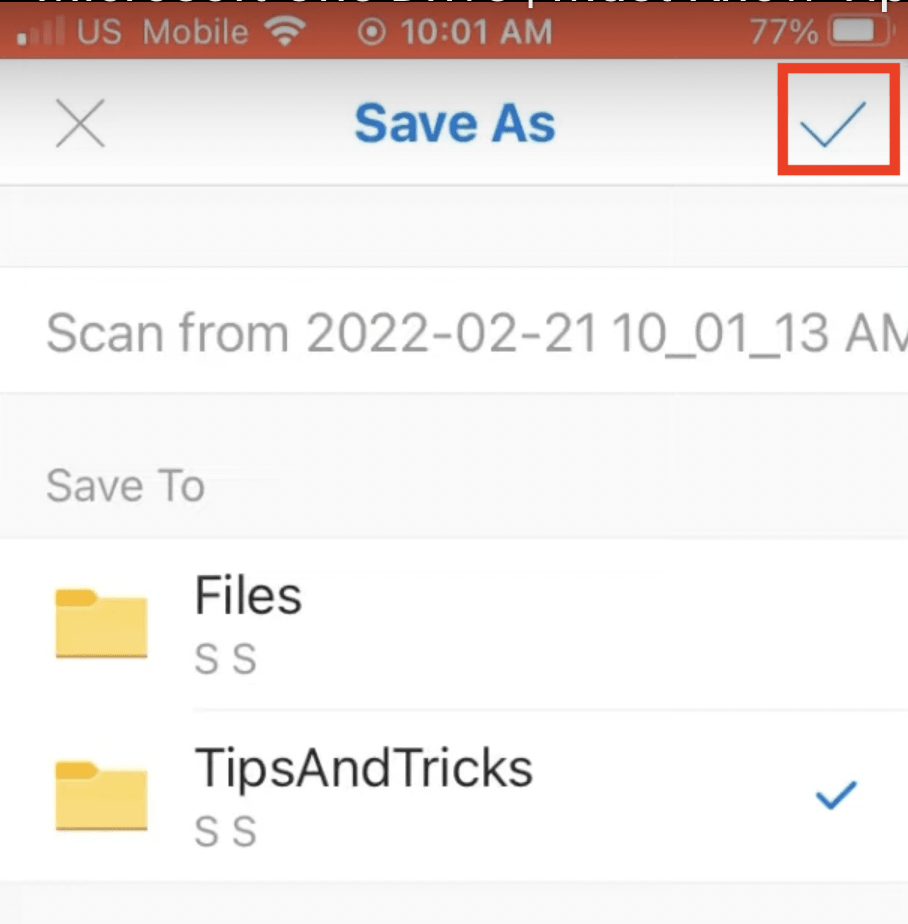
- Click on the check mark to confirm it.
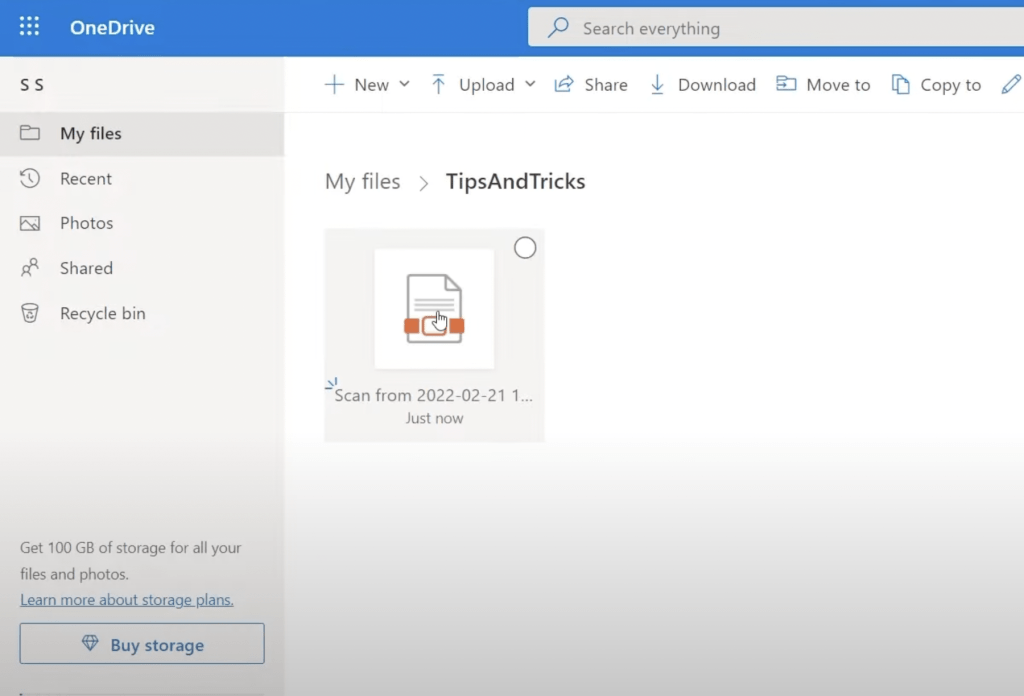
Now if you look into that folder, you will see that the photo you clicked has been uploaded as a document.
Tip 3: Sharing Options via Email or Link from Your PC
Let’s go over some OneDrtive tips on your PC. To open OneDrive –
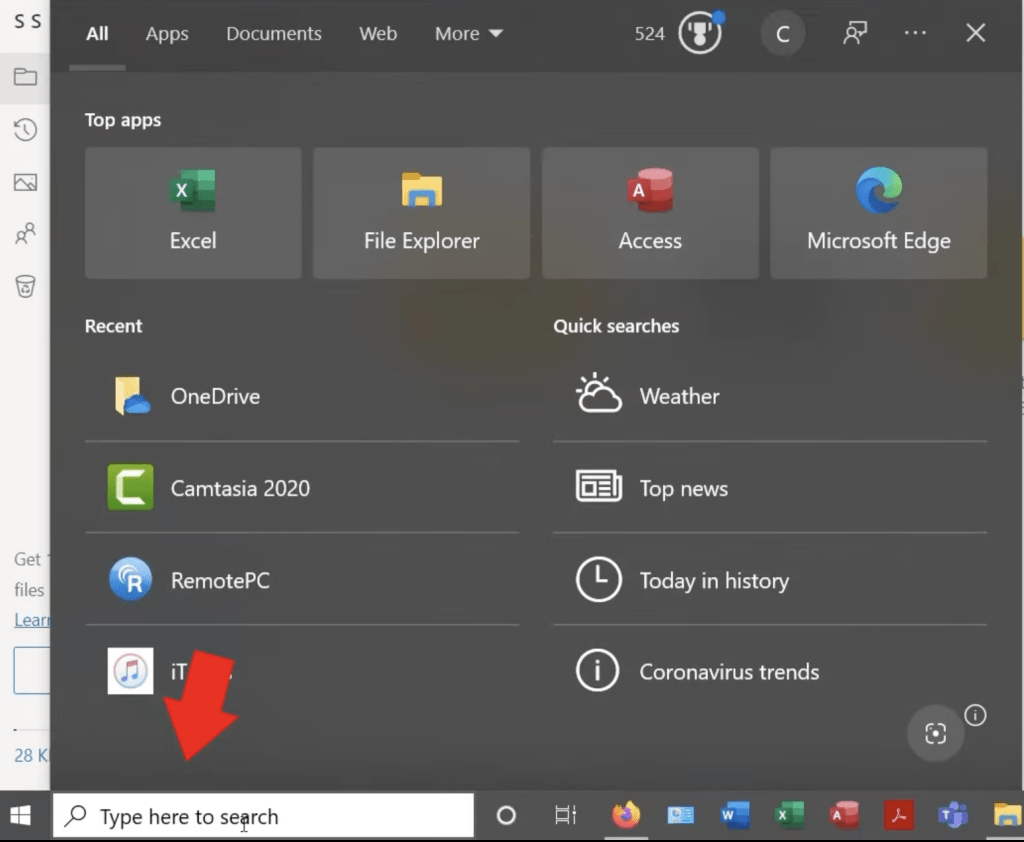
- Go to the search bar on your Taskbar.
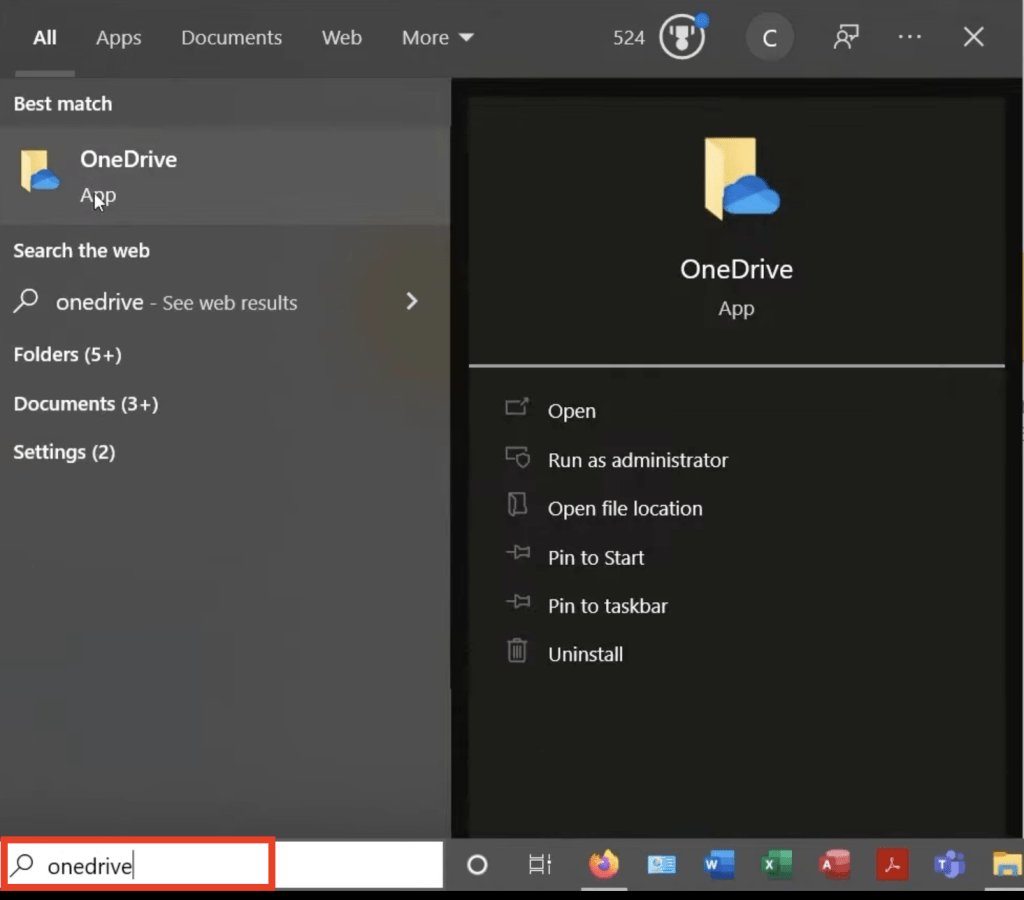
- Type OneDrive.
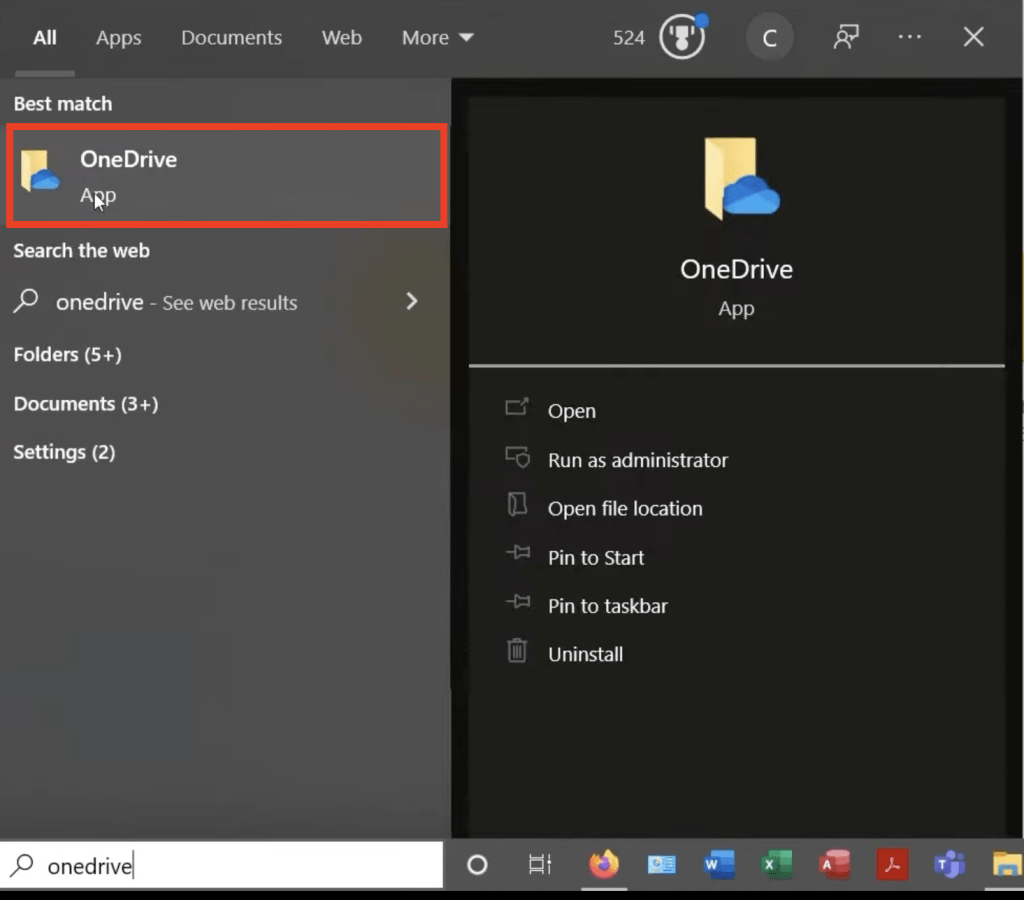
- Open the OneDrive folder.
Now we’ll explore the different possibilities offered when sharing a file with someone.
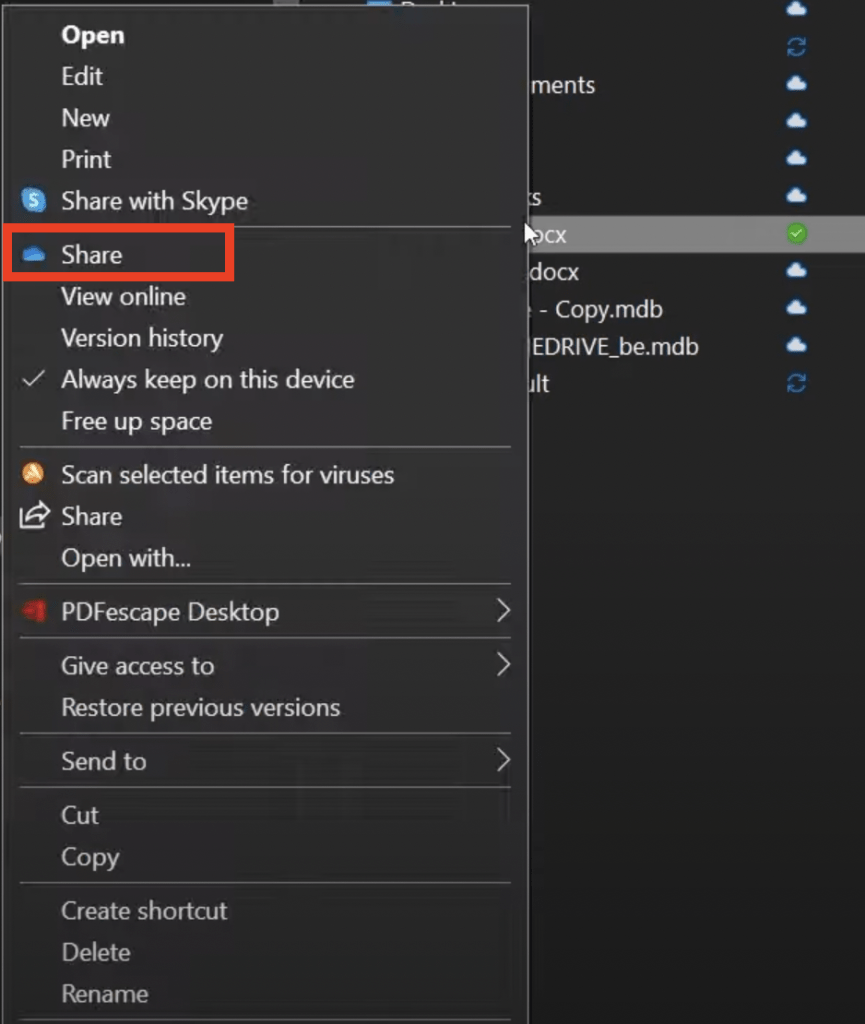
- Start by right-clicking on any file you want to share.
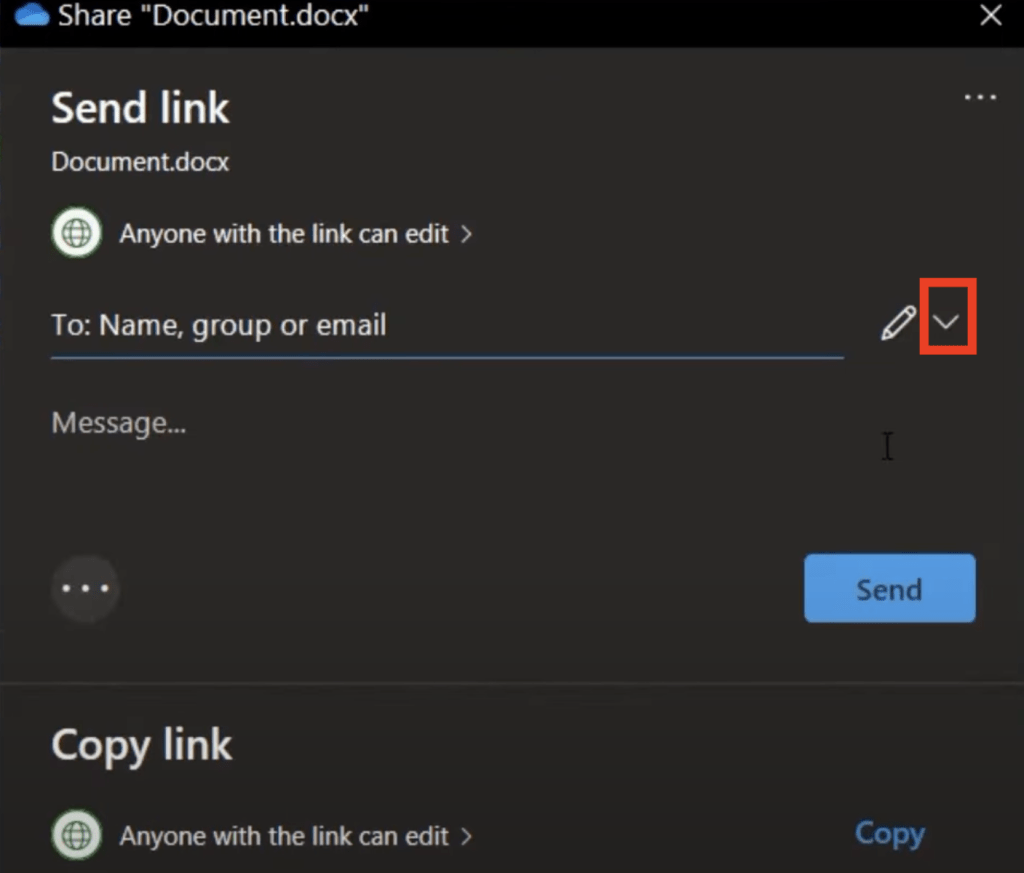
- Click on Share.
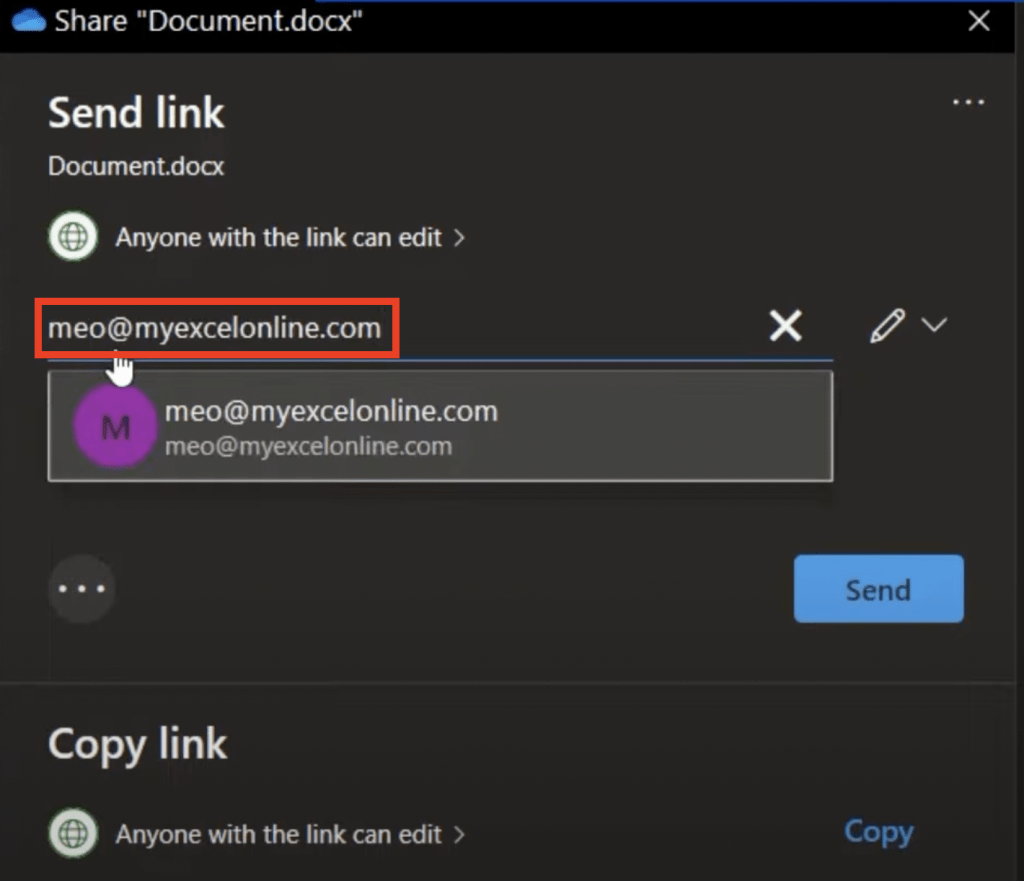
- In the pop-up window – you can directly enter someone’s email ID and share the file.
Or,
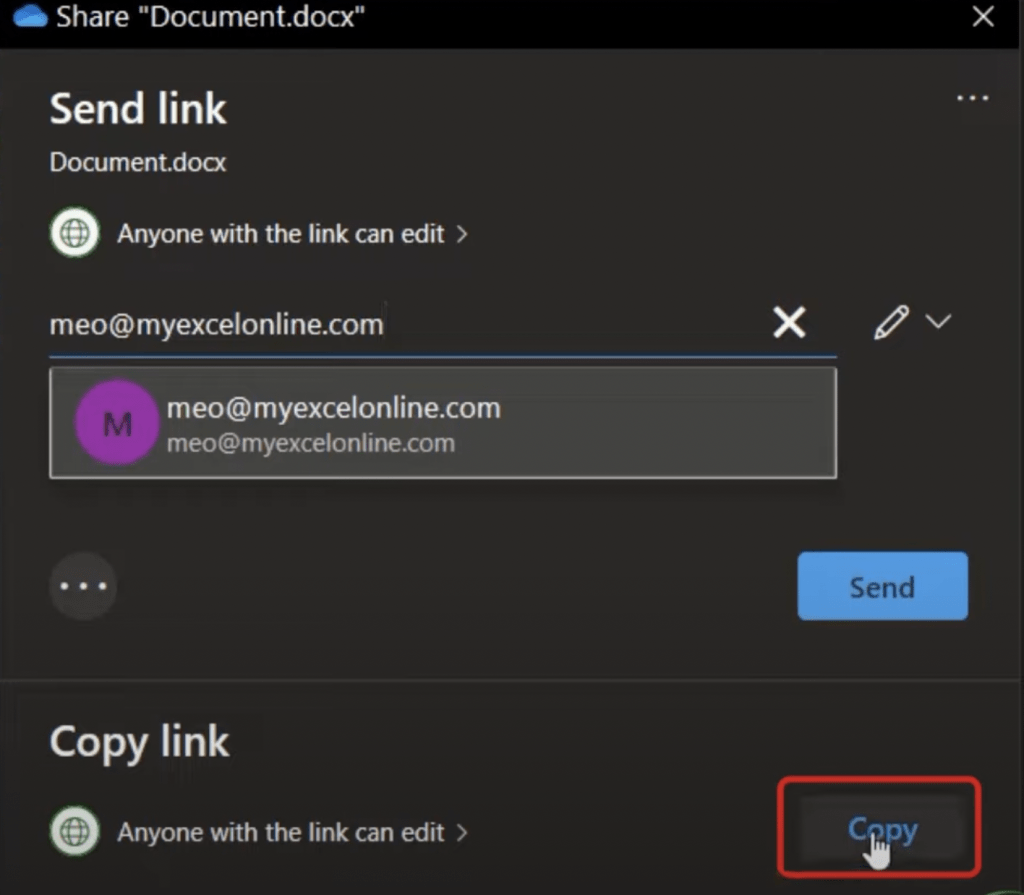
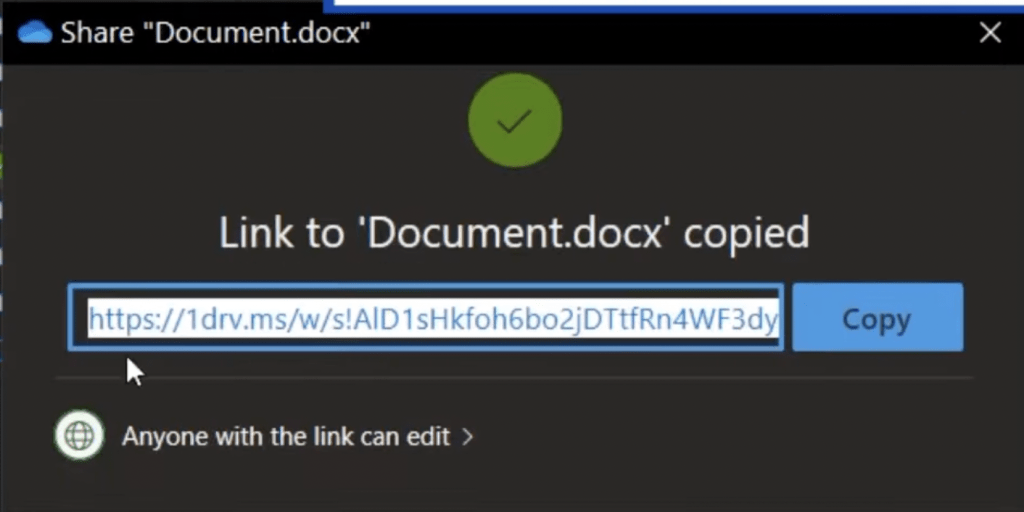
- At the bottom, click on copy
- It will create a link to the file which you can copy and send to someone. They will be able to see and edit the file through that link.
A nice feature is that here, the recipient is not only able to view the file but is able to view the file on your drive. This means that any updates that they make will be visible to you as well.
Tip 4: File Security Options from Your PC (expiration date and password)
You can even add different levels of security to your shared file.
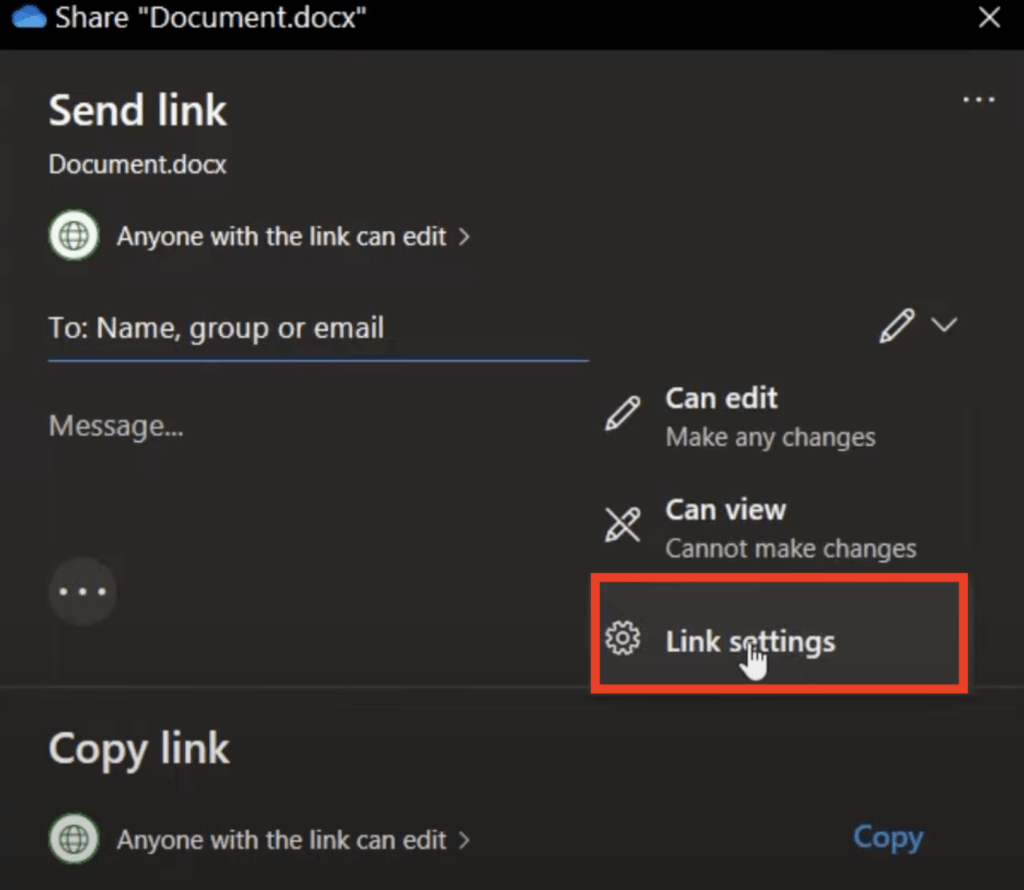
In the file-sharing pop-up window mentioned above, click on the arrow down button next to the edit icon.
Click on Link settings.
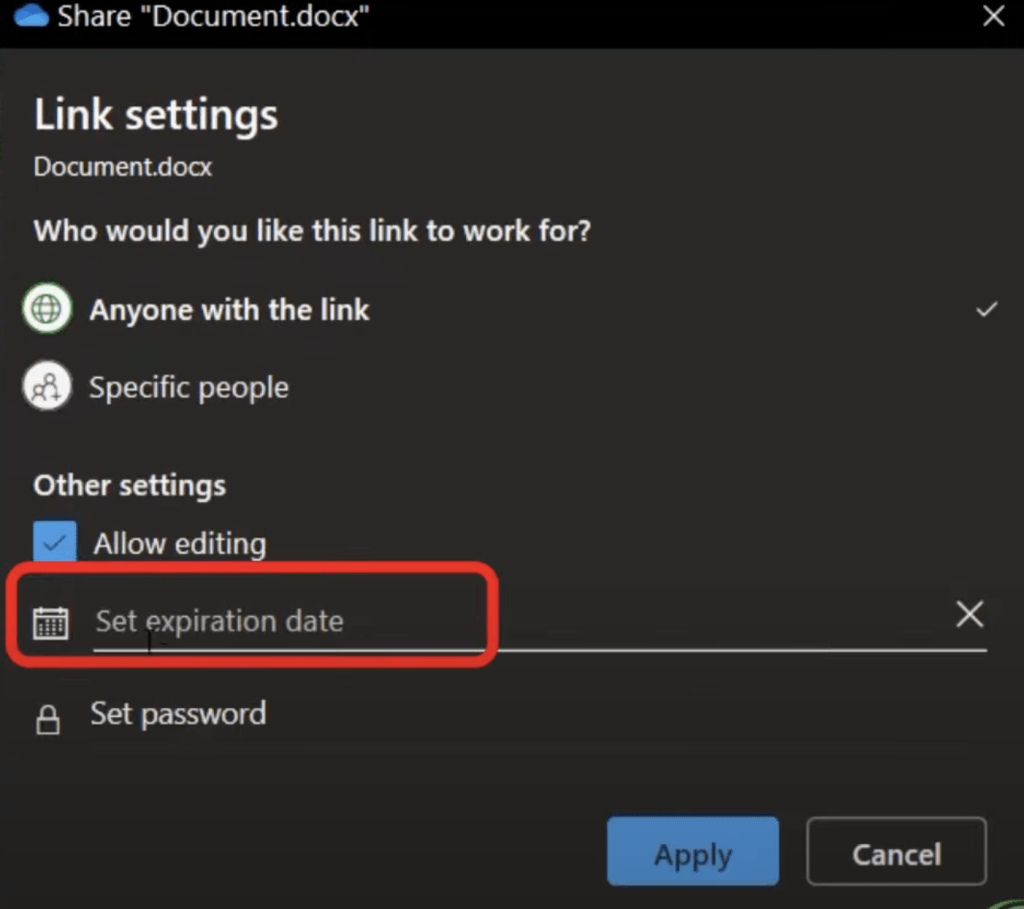
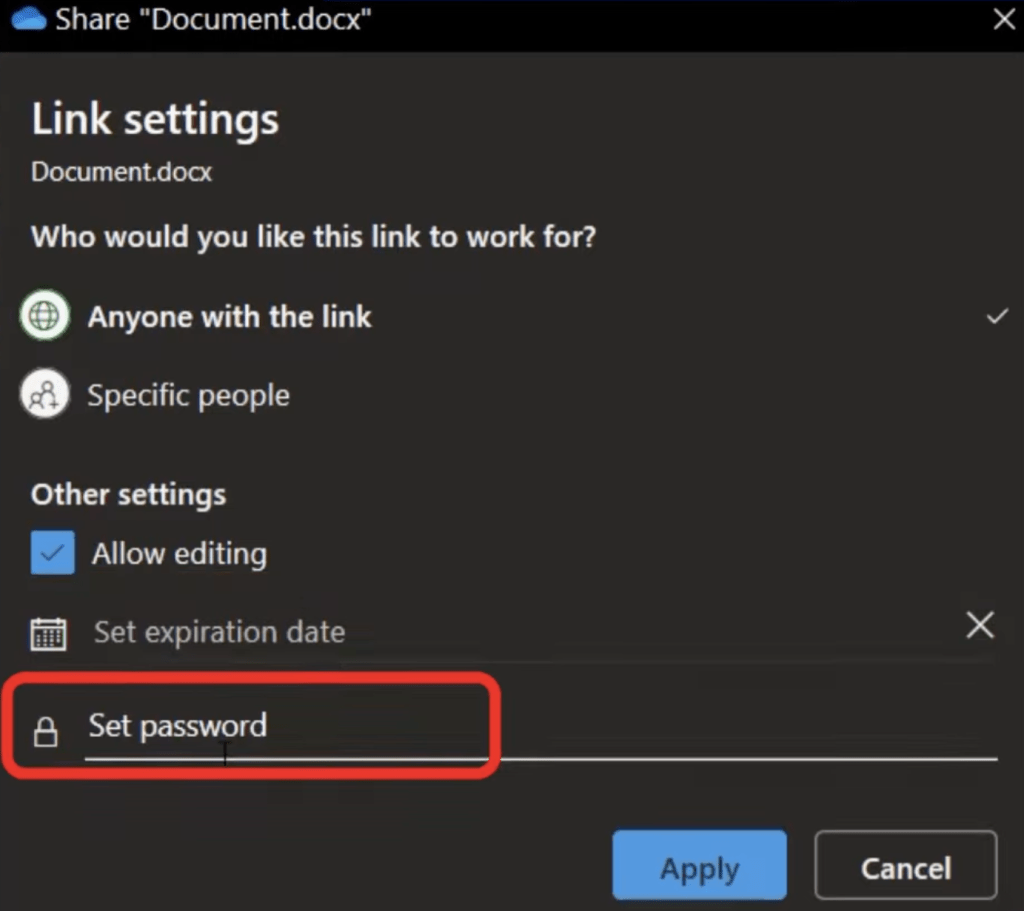
Here, under the Other settings area, you can set an expiration date. The other party with whom you have shared this document will only be able to edit this file till the date mentioned as the expiration date.
You can also set a password for additional security.
Tip 5: Managing Sharing Access to Files on Your PC
Now let’s see how you can manage the access of different people with whom you have shared any file.
1. Right-click on any file you want to manage access to.
2. Click on Share.
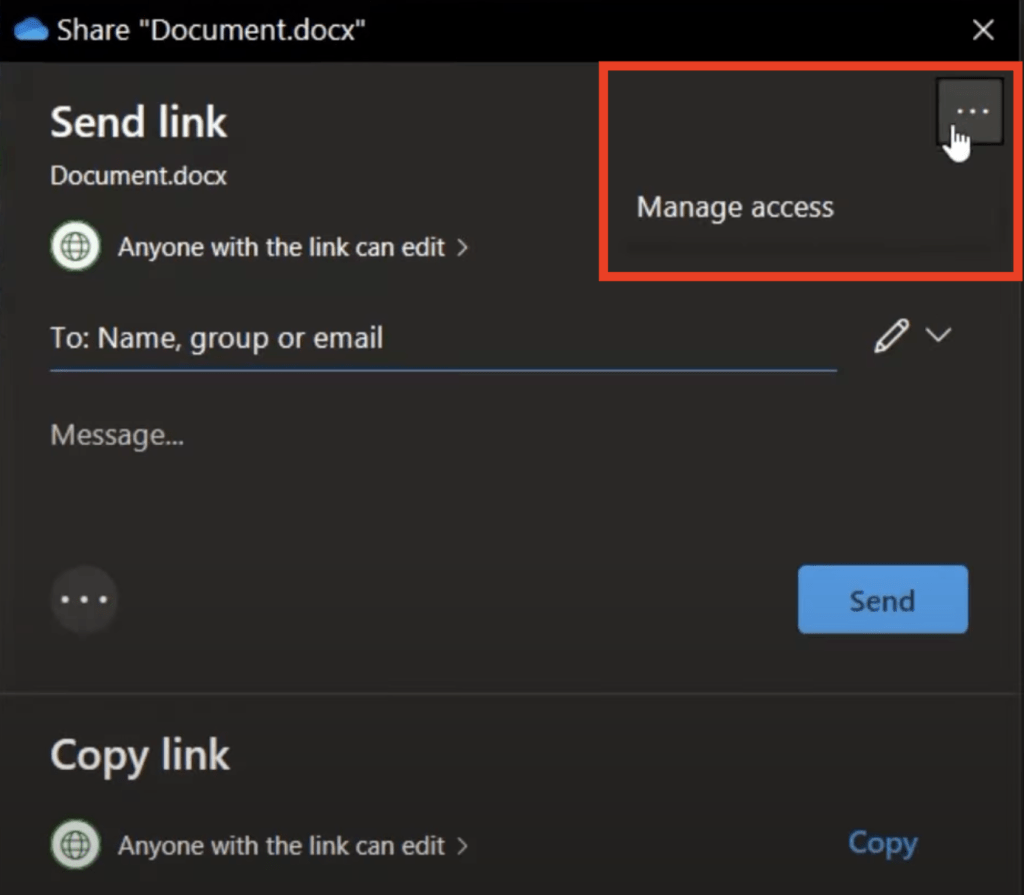
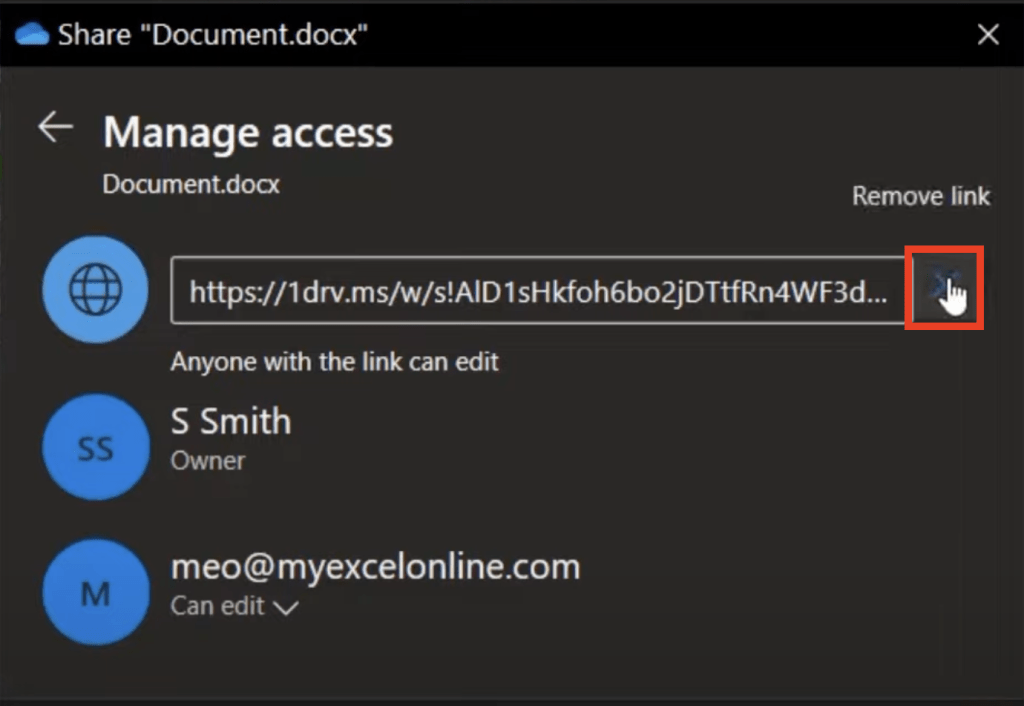
3. In the pop-up window, click on the three dots on the top and click on Manage access.
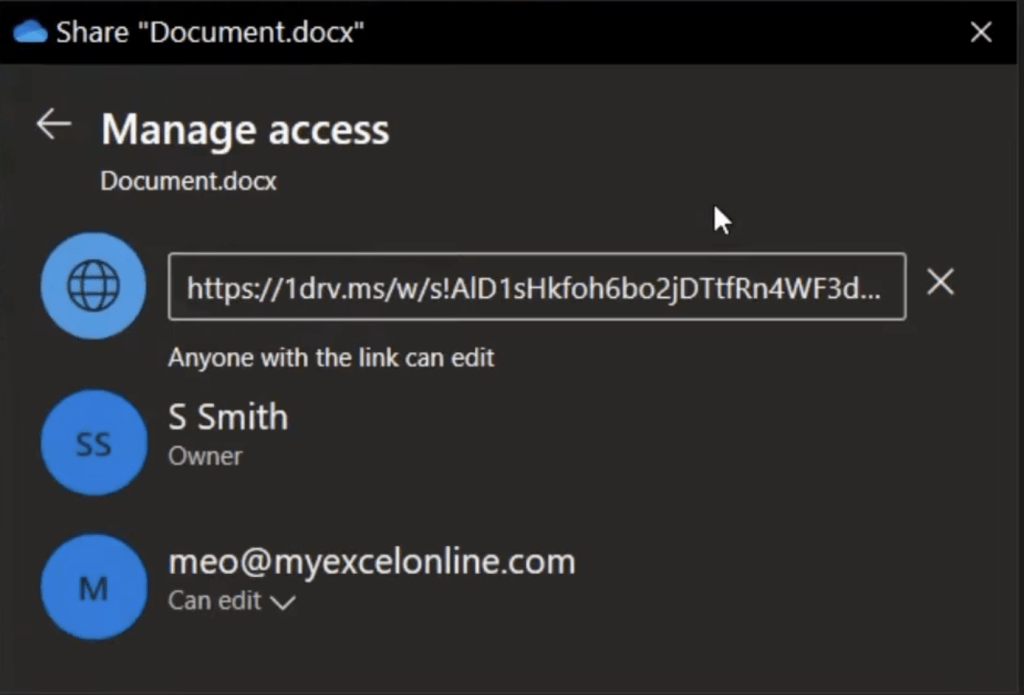
Here you can see everyone who has access to this file.
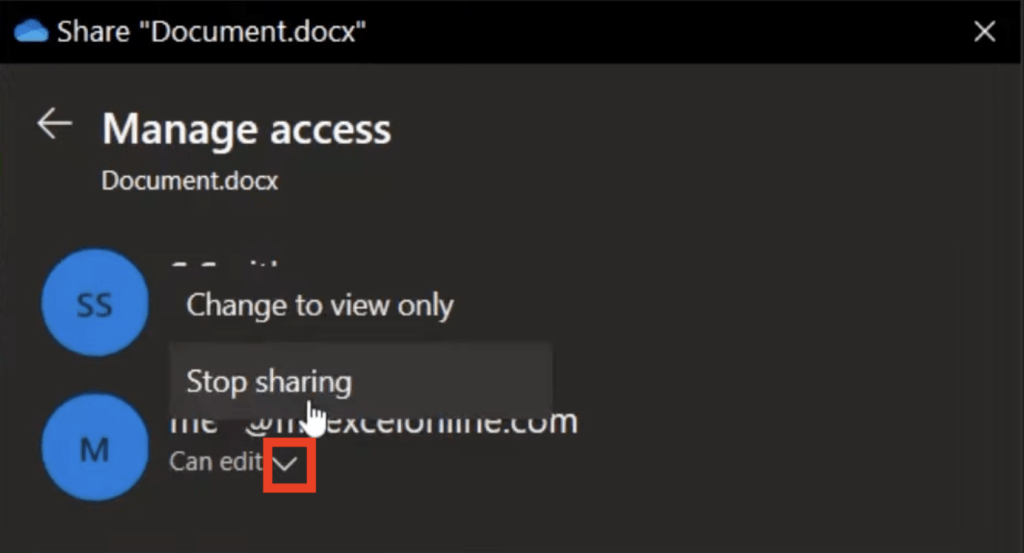
If there are certain people with whom you do not want to share this file, you can remove their access. To do so, simply click on the arrow under their name and select Stop sharing.
If you want the link that you shared to not exist anymore, simply click on the X icon next to the link and select Remove link.
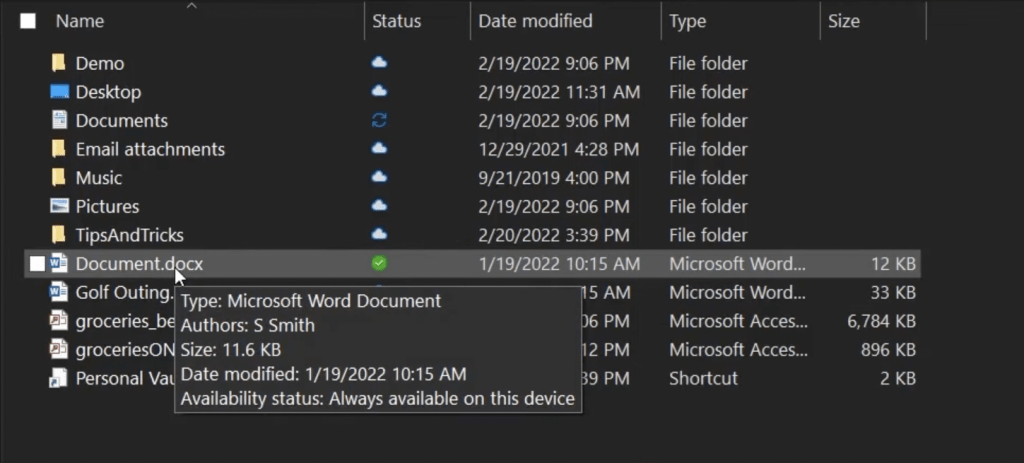
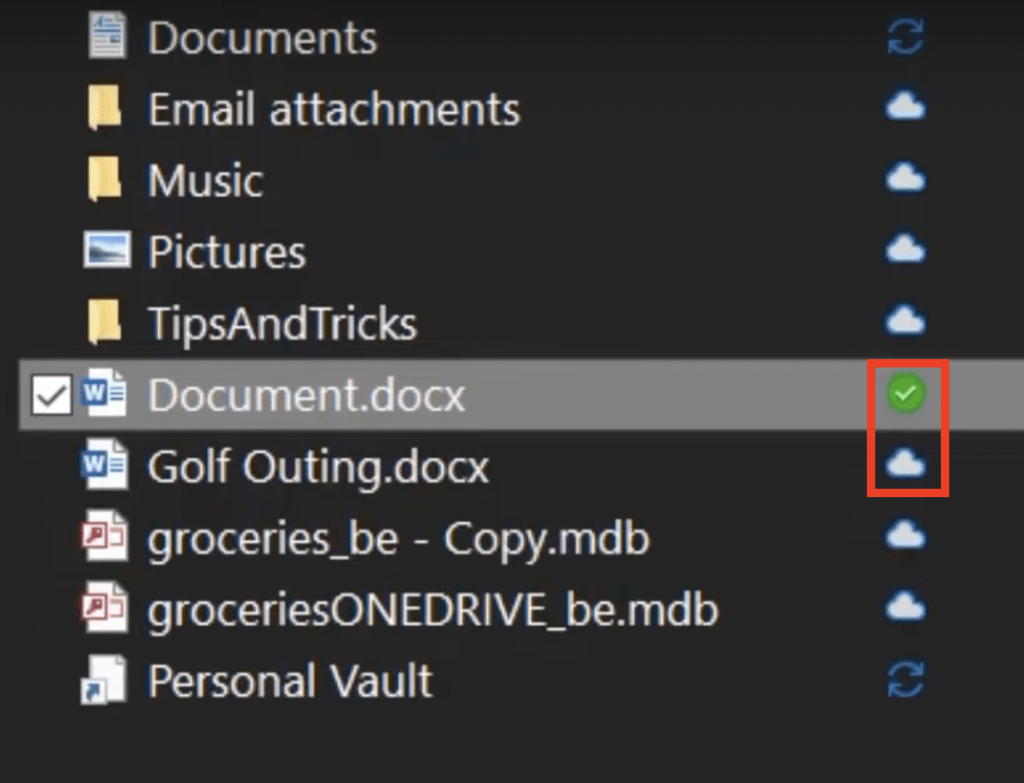
The next tip is one where the files in OneDrive actually reside. The different OneDrive icons can tell you the destination for the files –
- Green circle with white checkmark – It means that your file resides on both PC and cloud. These files are marked as “Always keep on this device”
- Blue Cloud – It means that your files are on the cloud only. It does not take up space on your device and to edit those files you need to be connected to WiFi.
Tip 7: Using the Personal Vault on Your PC and on The Cloud
One neat feature available in both mediums of Onedrive,i.e, PC as well as on the cloud is the Personal Vault.
It is a place where you would want to keep sensitive material. Personal Vault keeps these files extra safe as it requires two-factor authentication to access the vault.
You can keep important documents such as ID card pictures, social security number, your signed will, or anything that contains sensitive information.
Tip 8: Version History on Your PC and on The Cloud
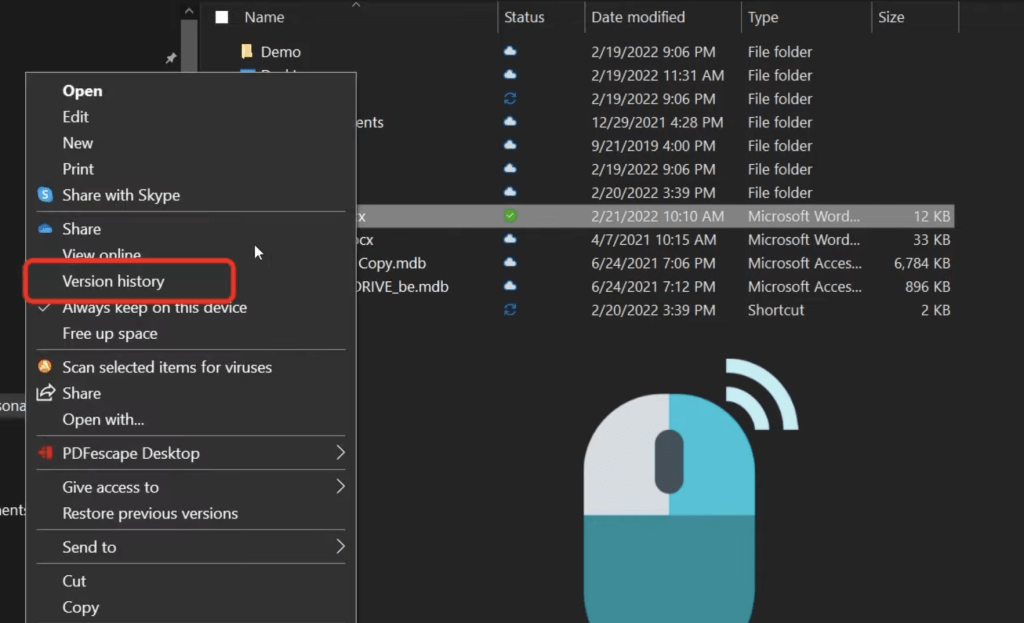
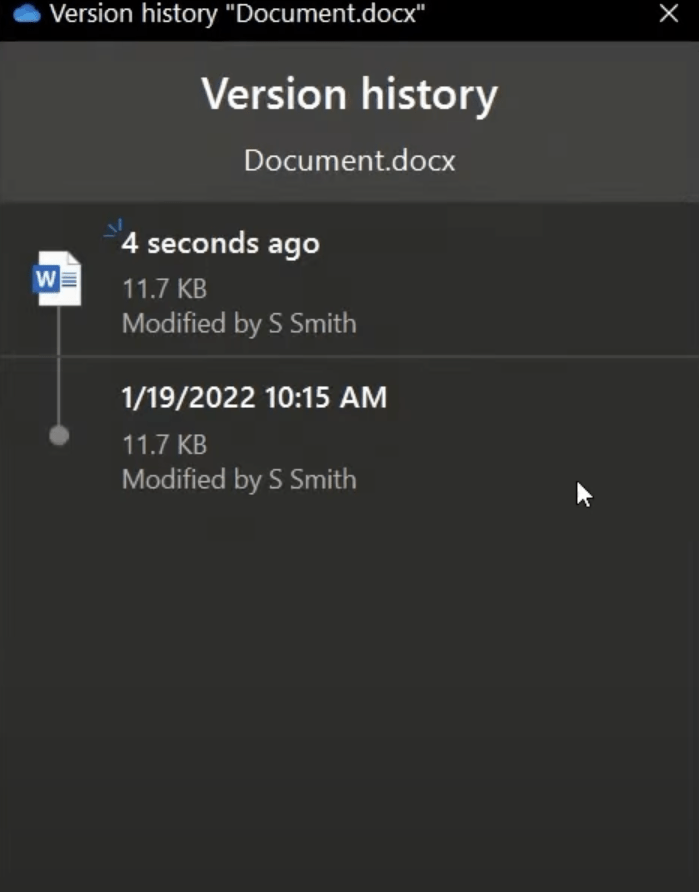
You can also right-click on any file and select Version history.
This will show all the previous versions of the file after which some changes might have been done in the file. In case of any error in the current file, you can restore the file to a previous version that does not contain the error.
Tip 9: Generating Code for Embedding a File from The Cloud
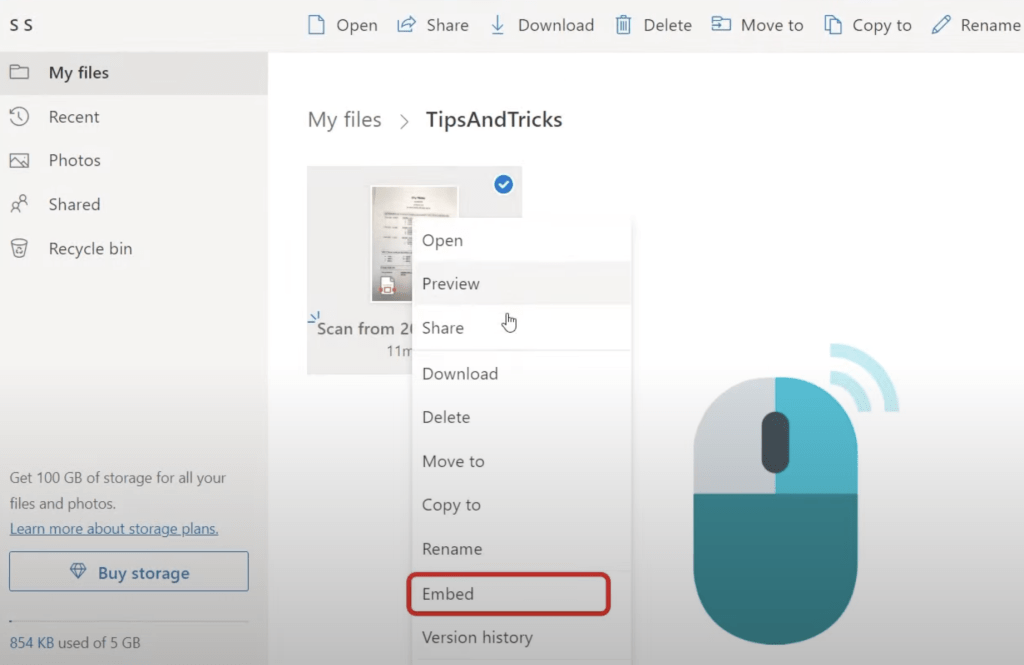
You can also right-click on any file, while using the online version of OneDrive, and click on Embed.
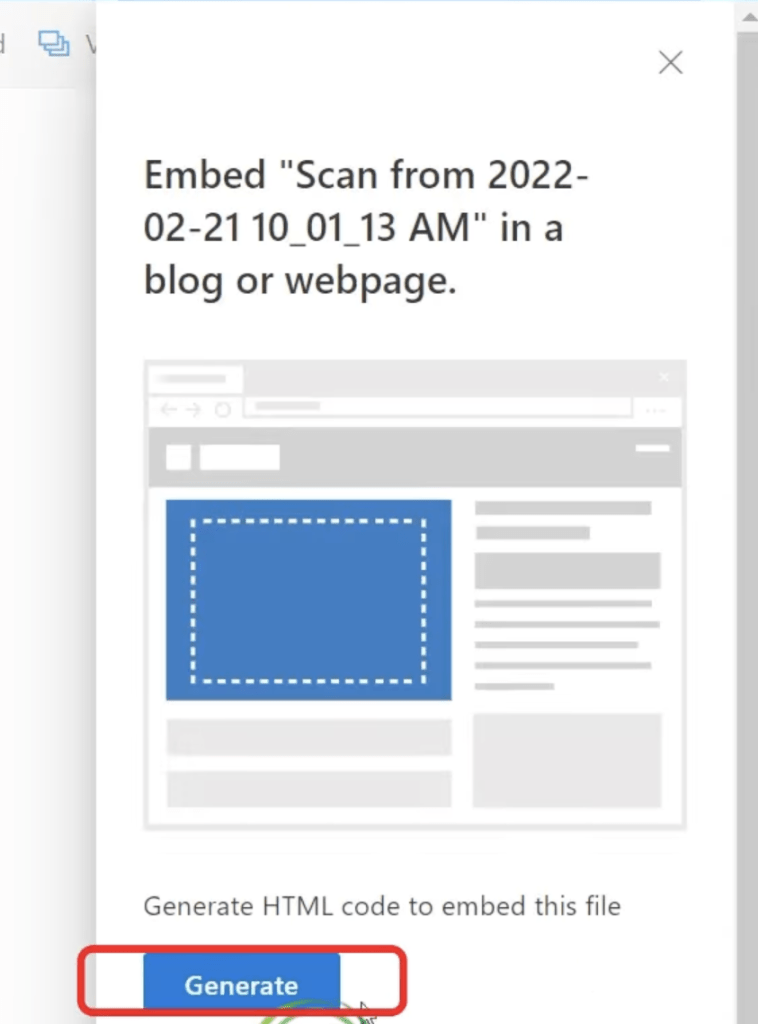
In the pop-up window, click on Generate.
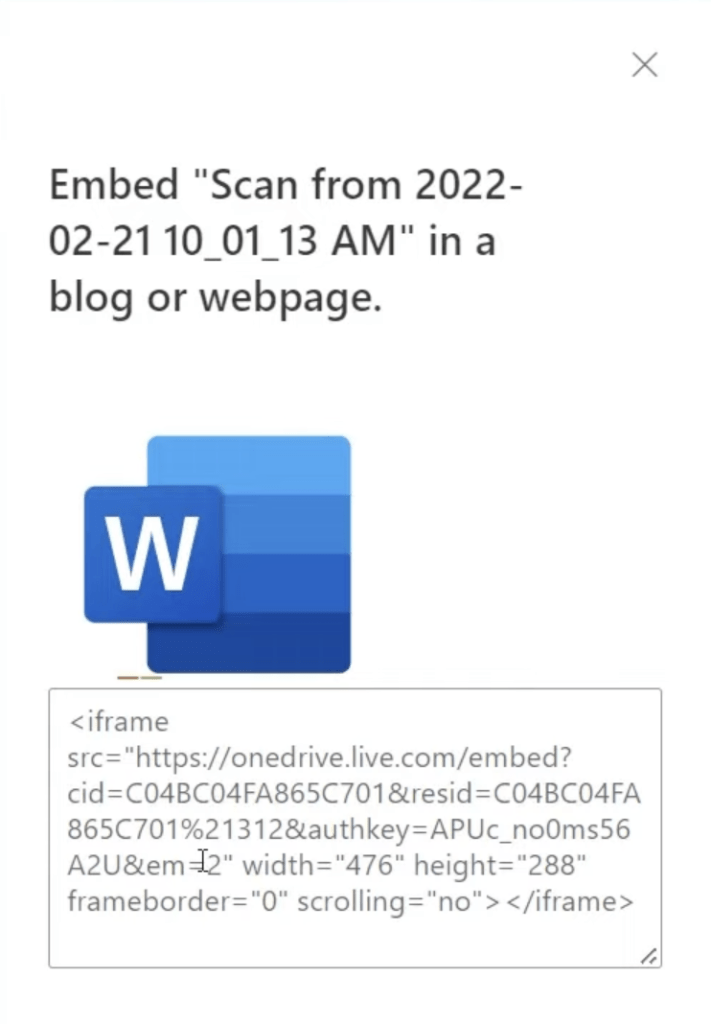
This will generate a link directly to this file which you can embed on a website.
Tip 10: Using the Recycle Bin on The Cloud
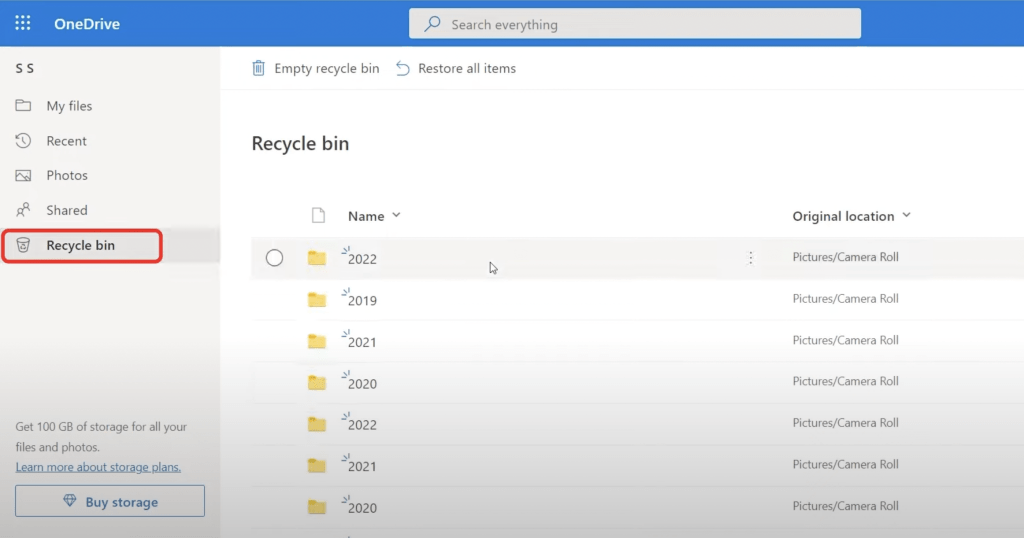
Lastly, the Recycle bin shows you files that have been recently deleted.
Just like your PC, OneDrive also keeps a recycle bin where deleted files are kept for 30 days before being deleted permanently. So if you accidentally delete any file, you can restore it easily from the Recycle bin.
BONUS TIP: Viewing the Number of Files in a Folder on The Cloud
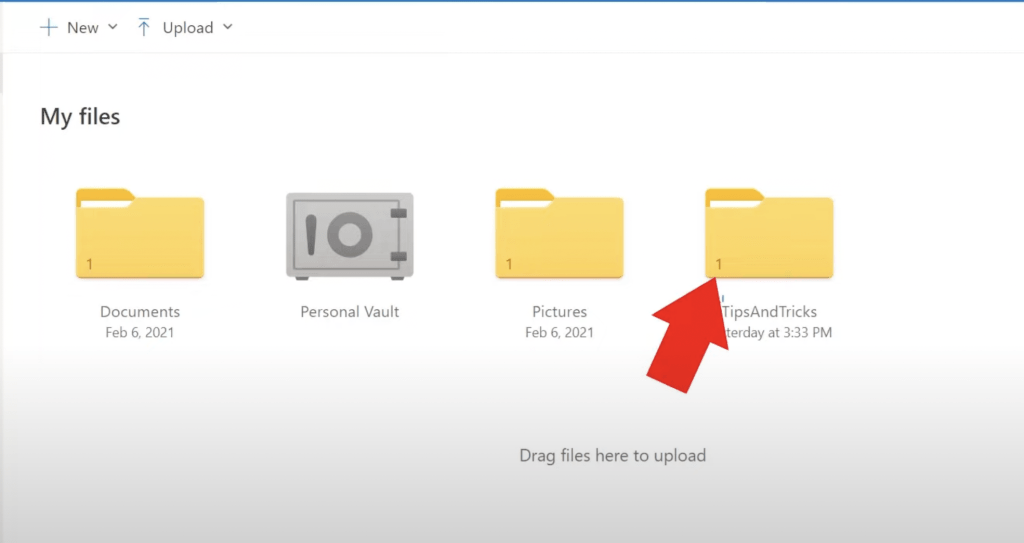
Before ending this article, here is a bonus OneDrive tip for you. On the OneDrive cloud, you can see small numbers on the bottom of your folder icons. That number indicates the number of files within that folder.
Hope this article has given you some new information on using OneDrive, on different mediums as well. Now you can start using OneDrive efficiently, and if you want to revise these OneDrive tips that went through today, you can always come back here!
Get access to 30+ Microsoft Excel & Office courses for ONLY $1.
Get 1,000 video training tutorials & support covering Formulas, Macros, VBA, Pivot Tables, Power Query, Power Pivot, Power BI, Charts, Financial Modeling, Dashboards, Word, PowerPoint, Outlook, Access, OneNote, Teams & MORE!!
John Michaloudis is a former accountant and finance analyst at General Electric, a Microsoft MVP since 2020, an Amazon #1 bestselling author of 4 Microsoft Excel books and teacher of Microsoft Excel & Office over at his flagship MyExcelOnline Academy Online Course.

