Enhancing Your Outlook Experience
Customizing how you receive and manage Outlook notifications can significantly enhance your productivity. Instead of being interrupted by a constant stream of alerts, imagine a workday where you receive only the most crucial notifications, allowing you to focus on your most pressing tasks. It’s all about harnessing the full potential of Outlook’s customizable features to work smarter, not harder.
Download our 141 Free Excel Templates and Spreadsheets!
Key Takeaways
- Navigate to Outlook’s Options menu, proceed to the email settings, and find the Tracking options. Here, unselect the “Automatic process meeting requests and responses to meeting requests and polls” to disable automatic receiving of meeting acceptance notifications.
- Instruct all meeting participants to adjust their individual Outlook settings in the same manner to ensure a unified approach among all attendees, avoiding confusion and multiple notifications.
- If using Outlook 2013, go to File > Options, then “Automatic Accept or Decline” settings, and toggle the selection to prevent Outlook from automatically accepting meeting invitations, thereby stopping the alerts.
Table of Contents
Navigating Alert Overload in Outlook
Understanding Meeting Acceptance Alerts
Meeting acceptance alerts are the notifications you receive when someone responds to your meeting invitation. These can quickly clutter your inbox, especially when making arrangements for larger groups. Understanding these alerts is key; they are designed to keep you informed about who will be attending your meetings, so you can plan accordingly.
Why You Might Want to Disable Them
You might want to turn off meeting Acceptance Alerts to reduce inbox clutter and distraction. By turning off these notifications, you can stay more focused on your work, avoid constant interruptions, and maintain a cleaner inbox, which can lead to increased productivity and decreased stress from email overload.
How to Turn Off Meeting Acceptance Emails in Outlook
Step-by-Step Guide for Disabling Alerts
To turn off meeting acceptance emails in Outlook, follow these steps:
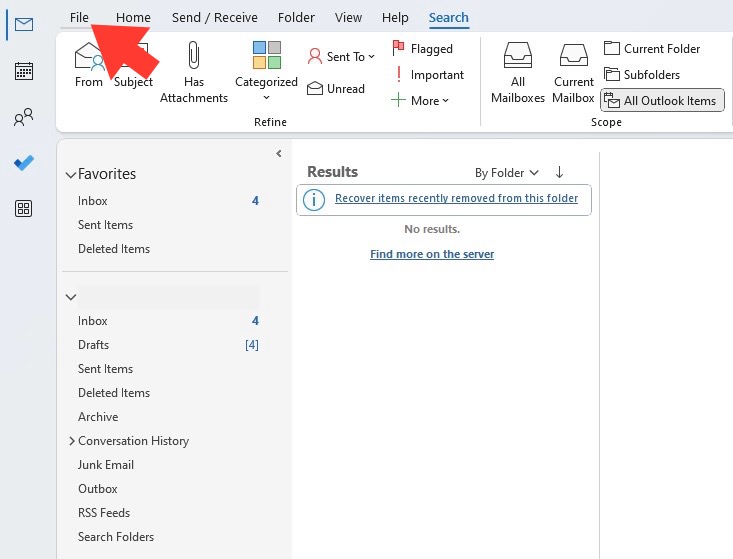
STEP 1: Open Outlook and click on ‘File’ in the top-left corner.
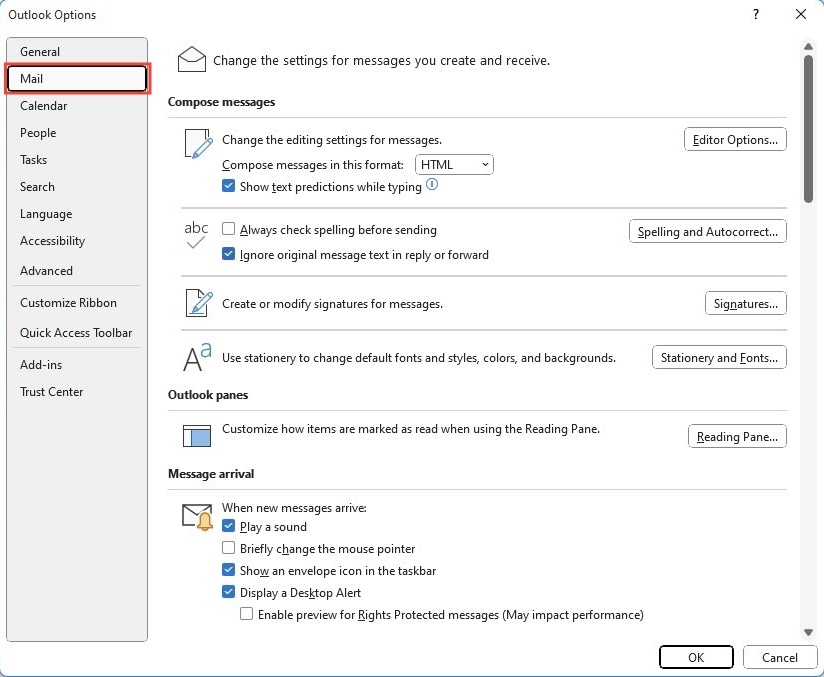
STEP 2: Select ‘Options’ to open the Outlook Options dialog box.
STEP 3: Navigate to the ‘Mail’ tab in the left pane.
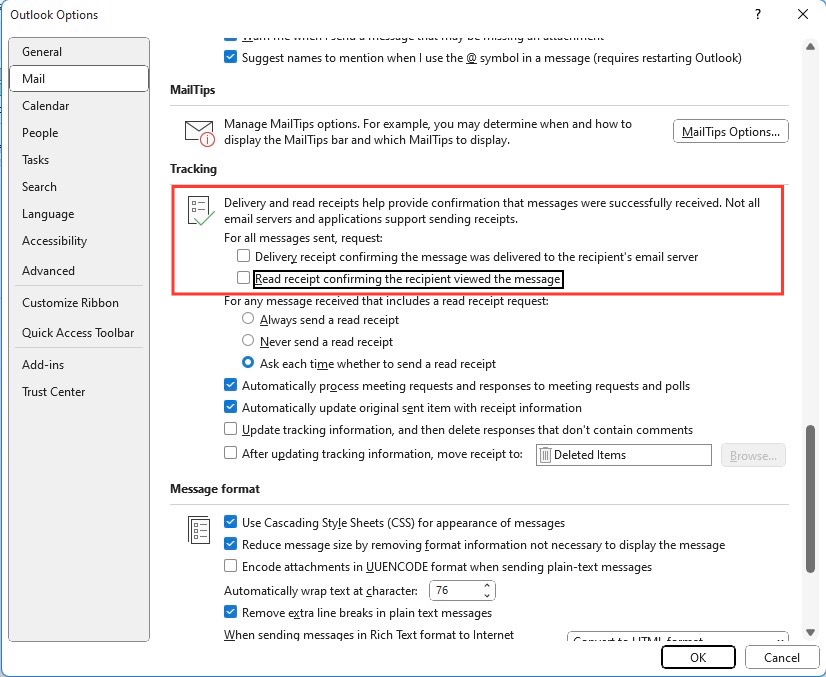
STEP 4: Scroll down to the ‘Tracking’ section.
STEP 5: Here, uncheck the boxes for ‘Delivery receipt confirming the message was delivered to the recipient’s email server’ and ‘Read receipt confirming the recipient viewed the message’.
STEP 6: Click ‘OK’ to save your settings.
This will stop Outlook from cluttering your inbox with those frequent meeting acceptance emails.
Alternatives to Consider Before Turning Off Alerts
Before turning off alerts completely, consider these alternatives:
- Create a Rule to Move Notifications: You can create a rule that automatically directs these alerts to a specific folder. This keeps your primary inbox clean while still retaining all notifications for review when convenient.
- Adjust Email Rules for Specific Contacts: If you expect important notifications from particular individuals, you can customize rules to allow only their acceptance notices to hit your inbox.
- Customize Notifications for Large Meetings: For meetings with many attendees, consider setting alerts to receive notices only when a few key stakeholders respond.
These methods provide a balance between staying informed and maintaining an uncluttered inbox.
Managing Your Calendar Without Interruptions
Best Practices for a Clean and Efficient Outlook Inbox
To maintain a clean and efficient inbox, consider implementing these best practices:
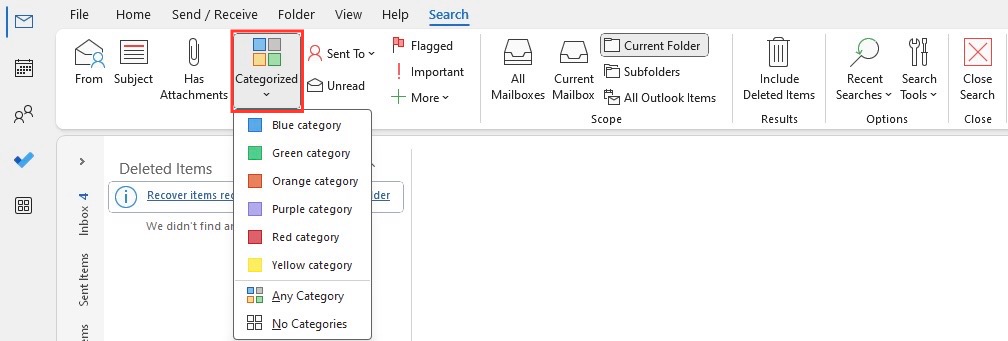
Prioritize and Categorize: Use Outlook’s categorization features to prioritize emails so that the most important ones catch your eye.
Unsubscribe from Unwanted Mails: Regularly clean up your inbox by unsubscribing from newsletters or promotions you no longer want to receive.
Use Clean Up tools: Use Outlook’s ‘Clean Up’ feature to remove redundant emails from conversations with just a single click.
Archive Regularly: Don’t let old emails pile up. Archive them to keep your inbox manageable and organized.
Set Aside Time for Email Management: Dedicate specific times to manage your email, so it doesn’t become a constant interruption.
By incorporating these habits into your routine, you can reduce distractions and increase efficiency in your email management.
Additional Settings to Optimize Your Email Workflow
Optimizing your email workflow in Outlook can be a game-changer. Here are additional settings to consider:
- Focused Inbox: This feature separates your inbox into two tabs—Focused and Other. Important emails go into the Focused tab, while the rest are easily accessible but out of the way.
- Email Templates: Save time by creating templates for emails you frequently send.
- Conditional Formatting: Highlight emails from specific senders or with certain subjects to quickly identify them.
- Quick Steps: Automate repetitive tasks such as moving emails to a specific folder or forwarding to a specific person with Quick Steps.
- Delay Delivery: Schedule emails to be sent later, helping you manage your outbox and send messages at the most opportune times.
By tailoring these settings, you’ll create a more fluid and customized email experience that caters to your workflow needs.
Advanced Tips for Outlook Users
Streamlining Communication with Customized Settings
Streamline your communication by tailoring Outlook settings to fit your preferences:
- Signature: Create a personalized email signature that auto-appends to your messages for a professional touch.
- Conversation View: Enable this to group emails by subject, reducing the time it takes to track email threads.
- Mobile Email Management: Sync settings across devices so you have a consistent experience whether you’re at your desk or on the go.
Personalized settings can transform your email routine into a smooth and efficient process, giving you more time for the rest of your day.
Troubleshooting Common Issues
What to Do If Notifications Persist
If you’ve followed all the steps to disable alerts but notifications keep popping up, there’s a plan of action to resolve it:
- Check Windows Notification Settings: Your operating system controls can override app settings, so ensure they’re configured correctly.
- Review Outlook’s Notification Settings Again: Sometimes settings may not save properly, or a recent update could have reset them.
- Consider Focus Assist: Use Windows’ Focus Assist feature to minimize or mute notifications during specific times of the day for fewer disturbances.
By addressing these areas, you can regain control over your notifications and create a more disturbance-free environment.
Ensuring Your Changes Are Saved Properly
To ensure that your changes in Outlook are saved properly:
- Apply Before Closing: Always click ‘OK’ or ‘Apply’ to confirm any changes you’ve made before closing the options window.
- Restart Outlook: After making changes, close and reopen Outlook to let the changes take effect.
- Confirm Changes: Go back to the settings to confirm that your preferences have been saved correctly.
Double-checking these steps will help make sure that your updates to Outlook’s settings won’t revert and will stay in place as you intended.
FAQ: Mastering Your Outlook Experience
Can I Disable Meeting Acceptance Notifications for Specific Meetings Only?
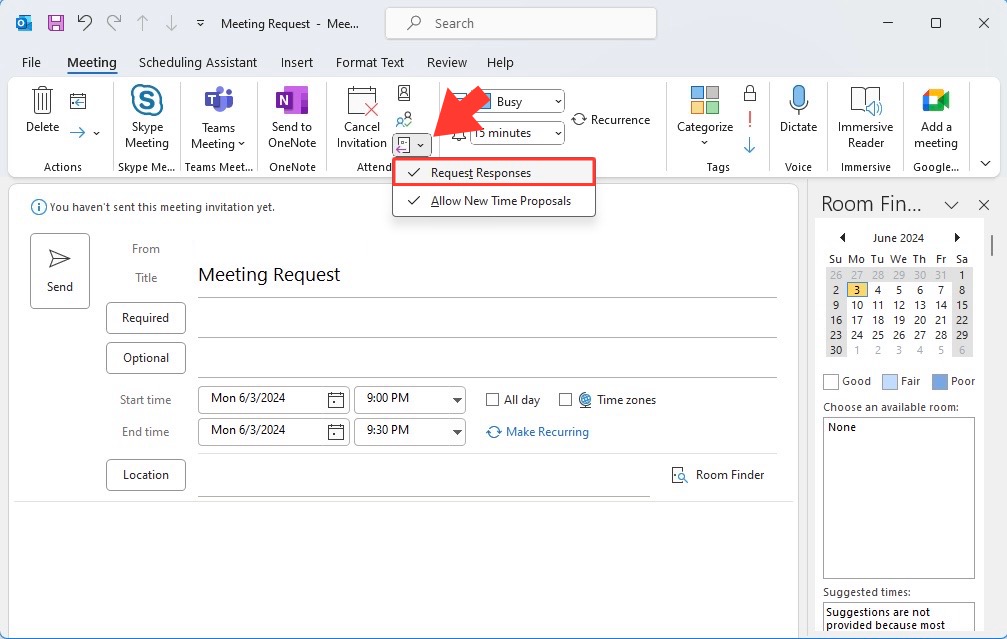
Yes, you can. While creating a meeting request in Outlook:
STEP 1: Go to the ‘Response Options’ drop-down.
STEP 2: Uncheck ‘Request Responses’.
STEP 3: Finish setting up your meeting and send it out.
This tells Outlook not to track RSVPs for this specific event, thus no acceptance notifications will be sent to you. Use this when dealing with large meetings or when responses are not necessary.
How Can I Quickly Find Important Emails After Disabling Alerts?
To quickly find important emails after disabling alerts:
Use ‘Search Folders’: Create custom search folders for important emails.
Apply Filters: Use filters to sort by date, sender, or keywords.
Leverage Flags and Categories: Flag emails for follow-up and categor.ize them for quick access.
Implementing these strategies will help you stay on top of critical communications without the need for immediate alerts.
Will These Changes Affect My Mobile Outlook Notifications Too?
No, these changes won’t automatically affect your mobile Outlook notifications. You’ll need to adjust notification settings directly in your mobile app or device settings to align with your desktop Outlook preferences for a cohesive experience. Remember, each device operates its notification system independently.
John Michaloudis is a former accountant and finance analyst at General Electric, a Microsoft MVP since 2020, an Amazon #1 bestselling author of 4 Microsoft Excel books and teacher of Microsoft Excel & Office over at his flagship MyExcelOnline Academy Online Course.

