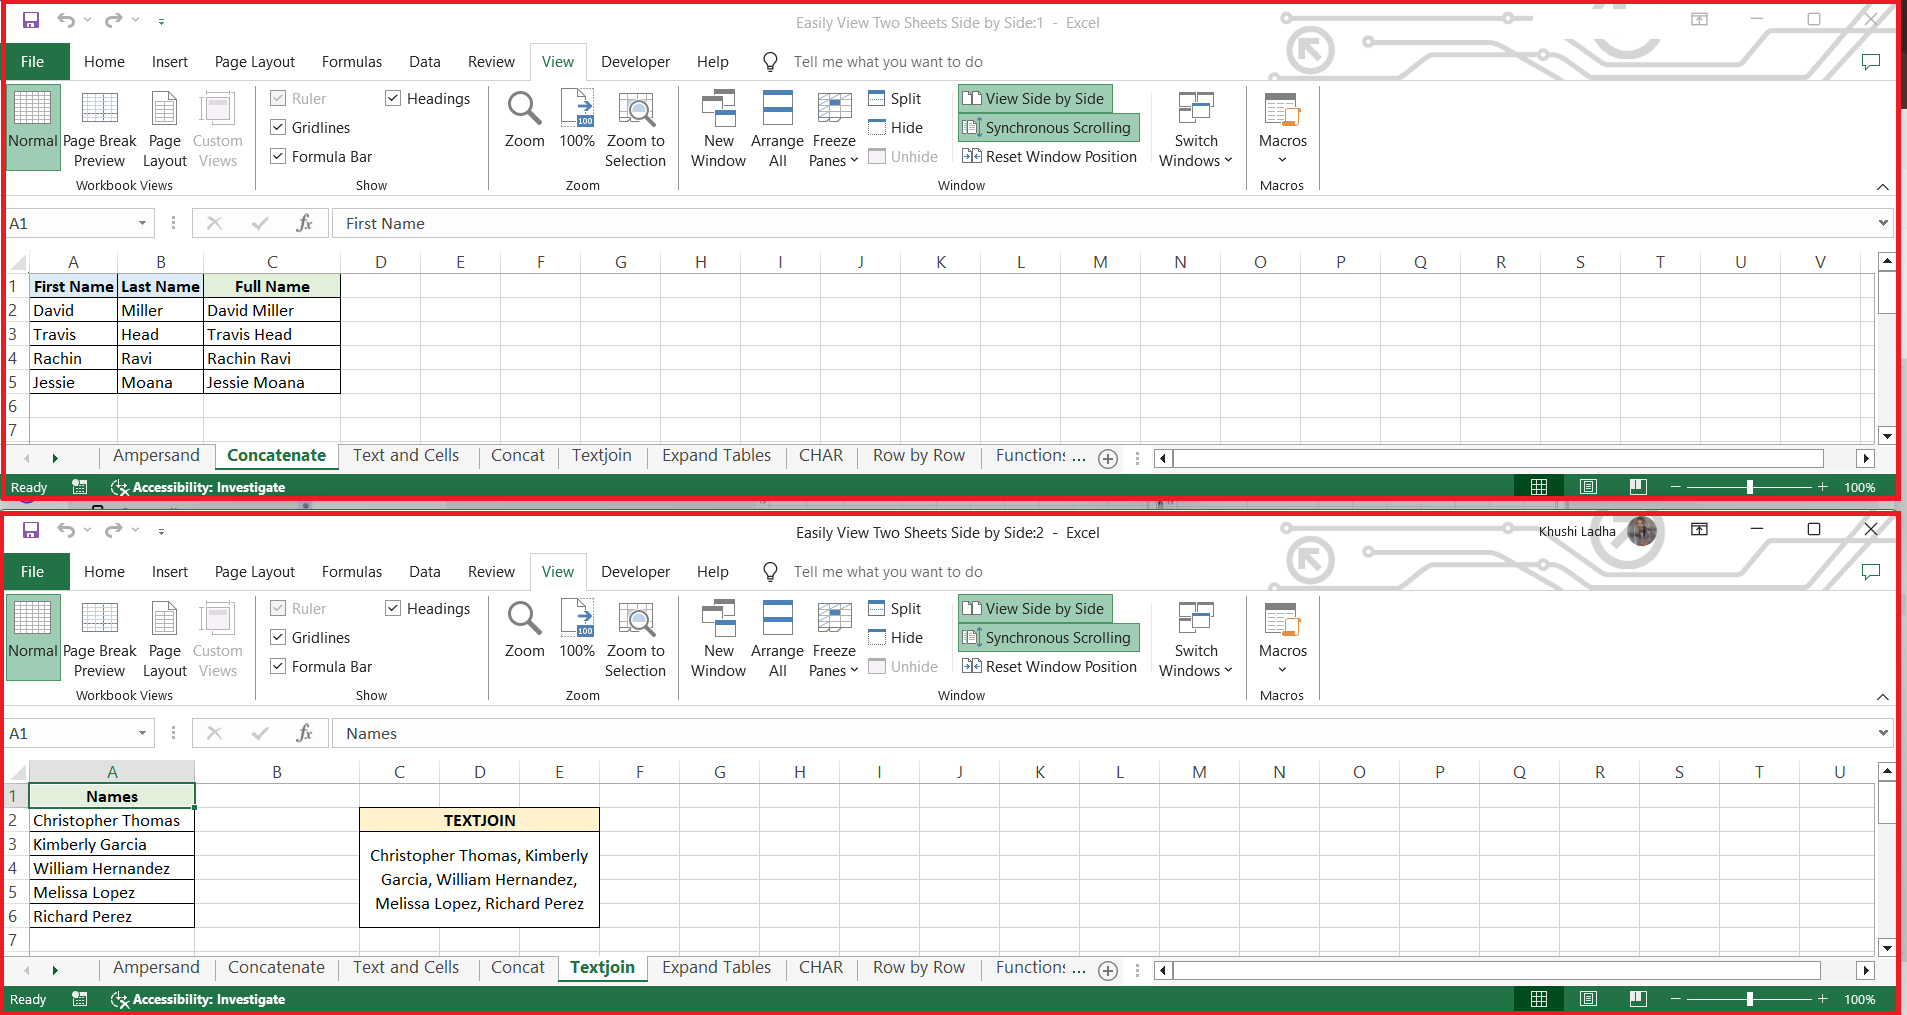
Exploring the versatility of Microsoft Excel‘s Side by Side feature can significantly boost your productivity. Picture effortlessly comparing, editing, and transferring data between two sheets without the need for constant switching. With just a few clicks, you can arrange your workspace to display two sheets from the same workbook side by side, allowing for more efficient and accurate work.
Key Takeaways:
- Easy Setup for Dual Sheet Viewing: With just a few steps, you can activate the Side by Side feature in Excel, allowing simultaneous viewing of two sheets within the same workbook.
- Flexible Arrangement Options: Excel offers the ability to arrange sheets vertically or horizontally, tailoring the workspace to your preference for optimal data comparison.
- Enhanced Data Comparison: Utilize synchronous scrolling to compare data line-by-line across two sheets, ensuring precision and efficiency in your analysis.
- Practical Applications: Dual sheet views are invaluable in various professional scenarios, such as comparing sales figures, reconciling transactions, and aligning project timelines.
Unveiling Excel’s Side by Side Feature
The Power of Dual Sheet Viewing for Productivity
Discovering the flexibility of Excel’s Side by Side feature can be a real game-changer when it comes to productivity. Imagine effortlessly comparing, editing, and transferring data between two sheets without the constant back-and-forth. That’s precisely what dual sheet viewing unlocks for you. With a couple of clicks, you can set up your workspace to show two sheets from the same workbook, side by side, enabling you to work efficiently and with fewer errors.
A Step-by-Step Guide to View Sheets Side by Side
To View Sheets Side by Side in Excel, follow these steps:
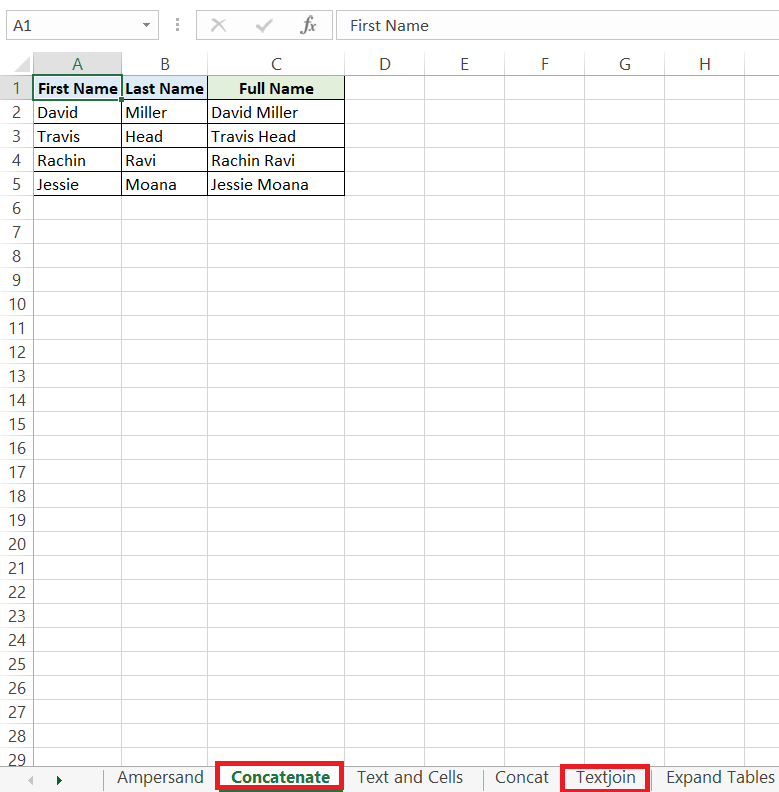
STEP 1: Open the workbook with the sheets you want to compare.
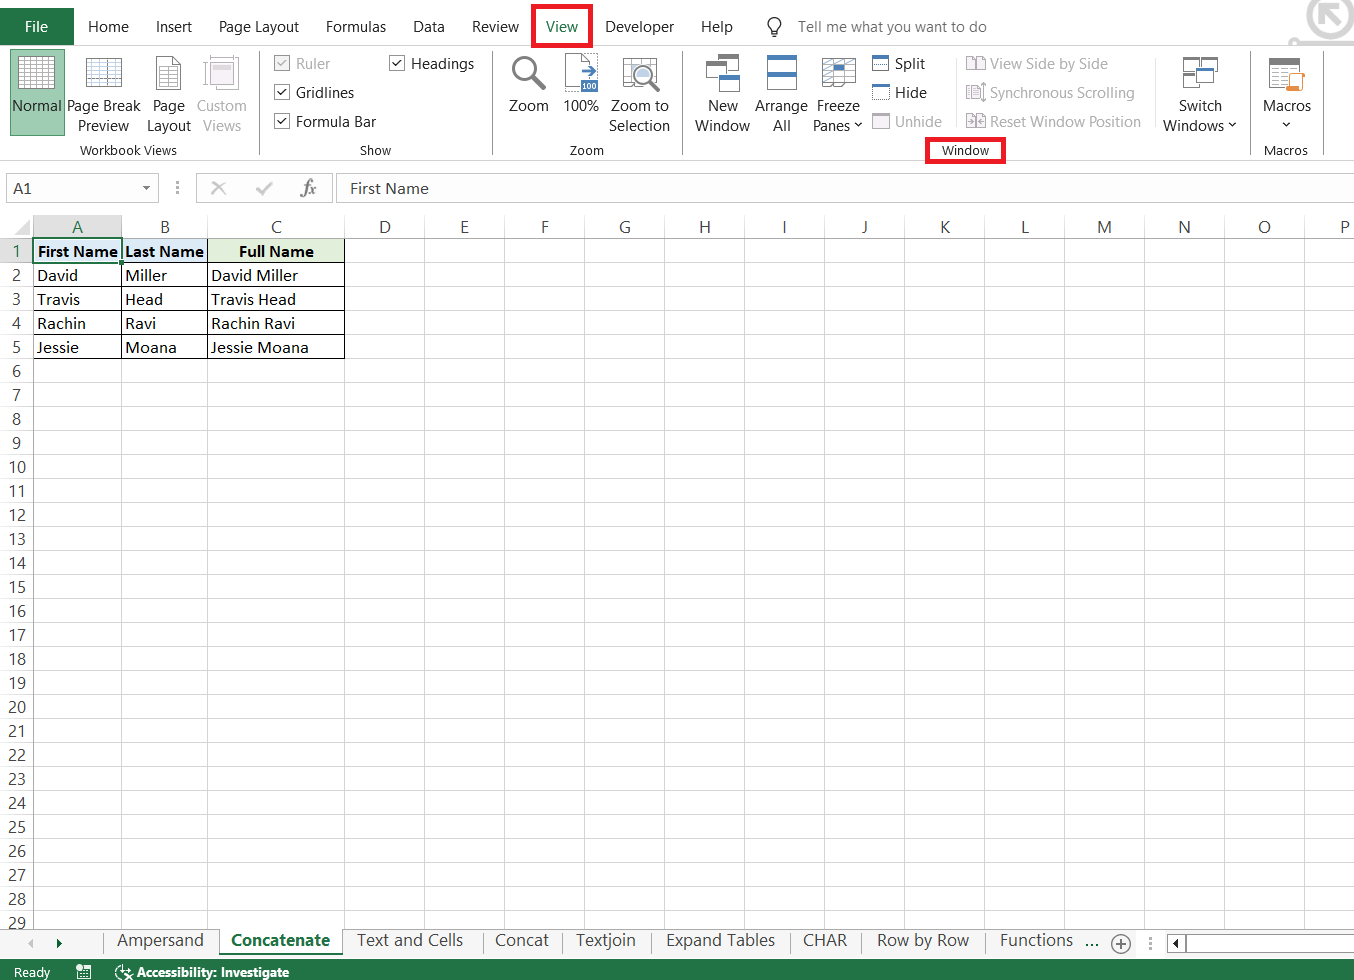
STEP 2: Navigate to the View tab and locate the Window group.
STEP 3: Click on New Window to open a second instance of your workbook.
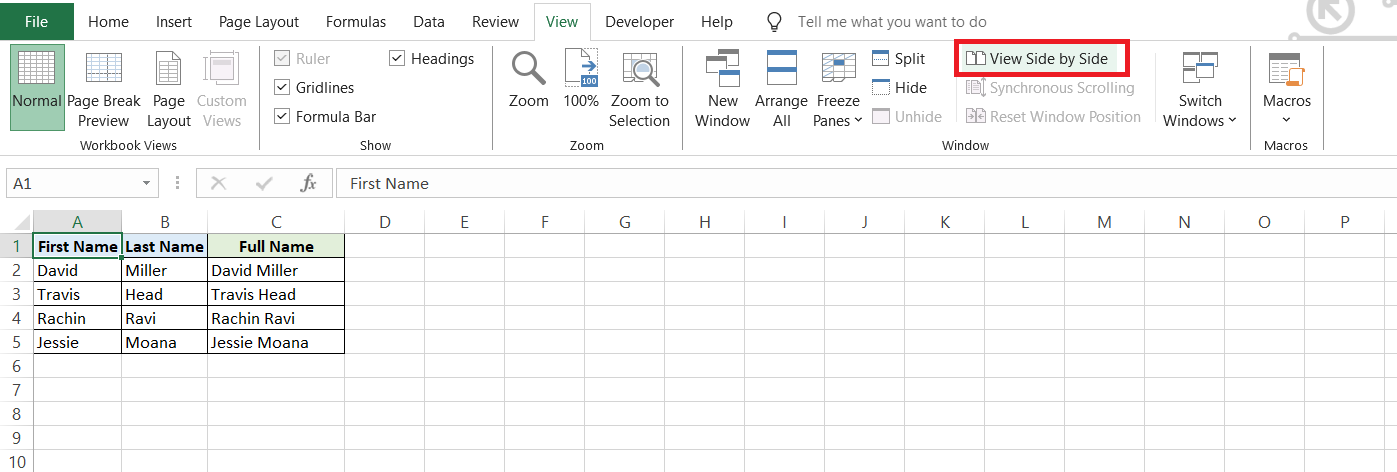
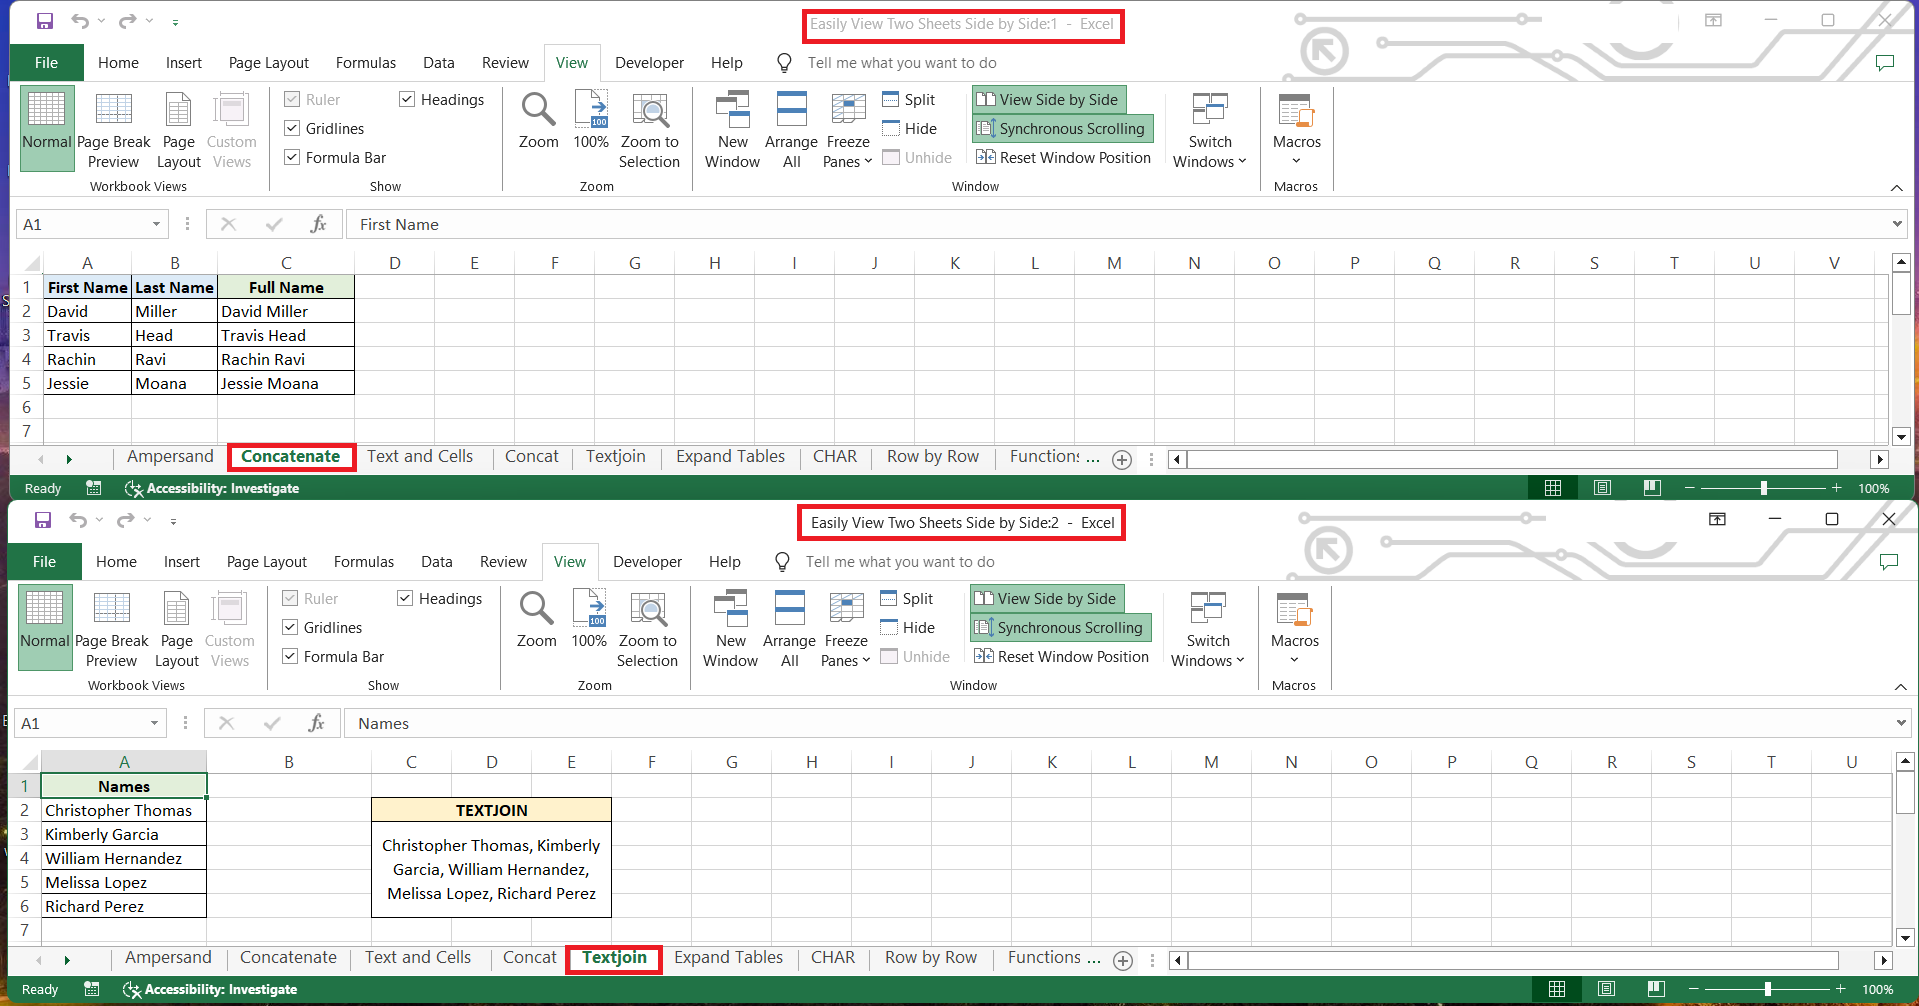
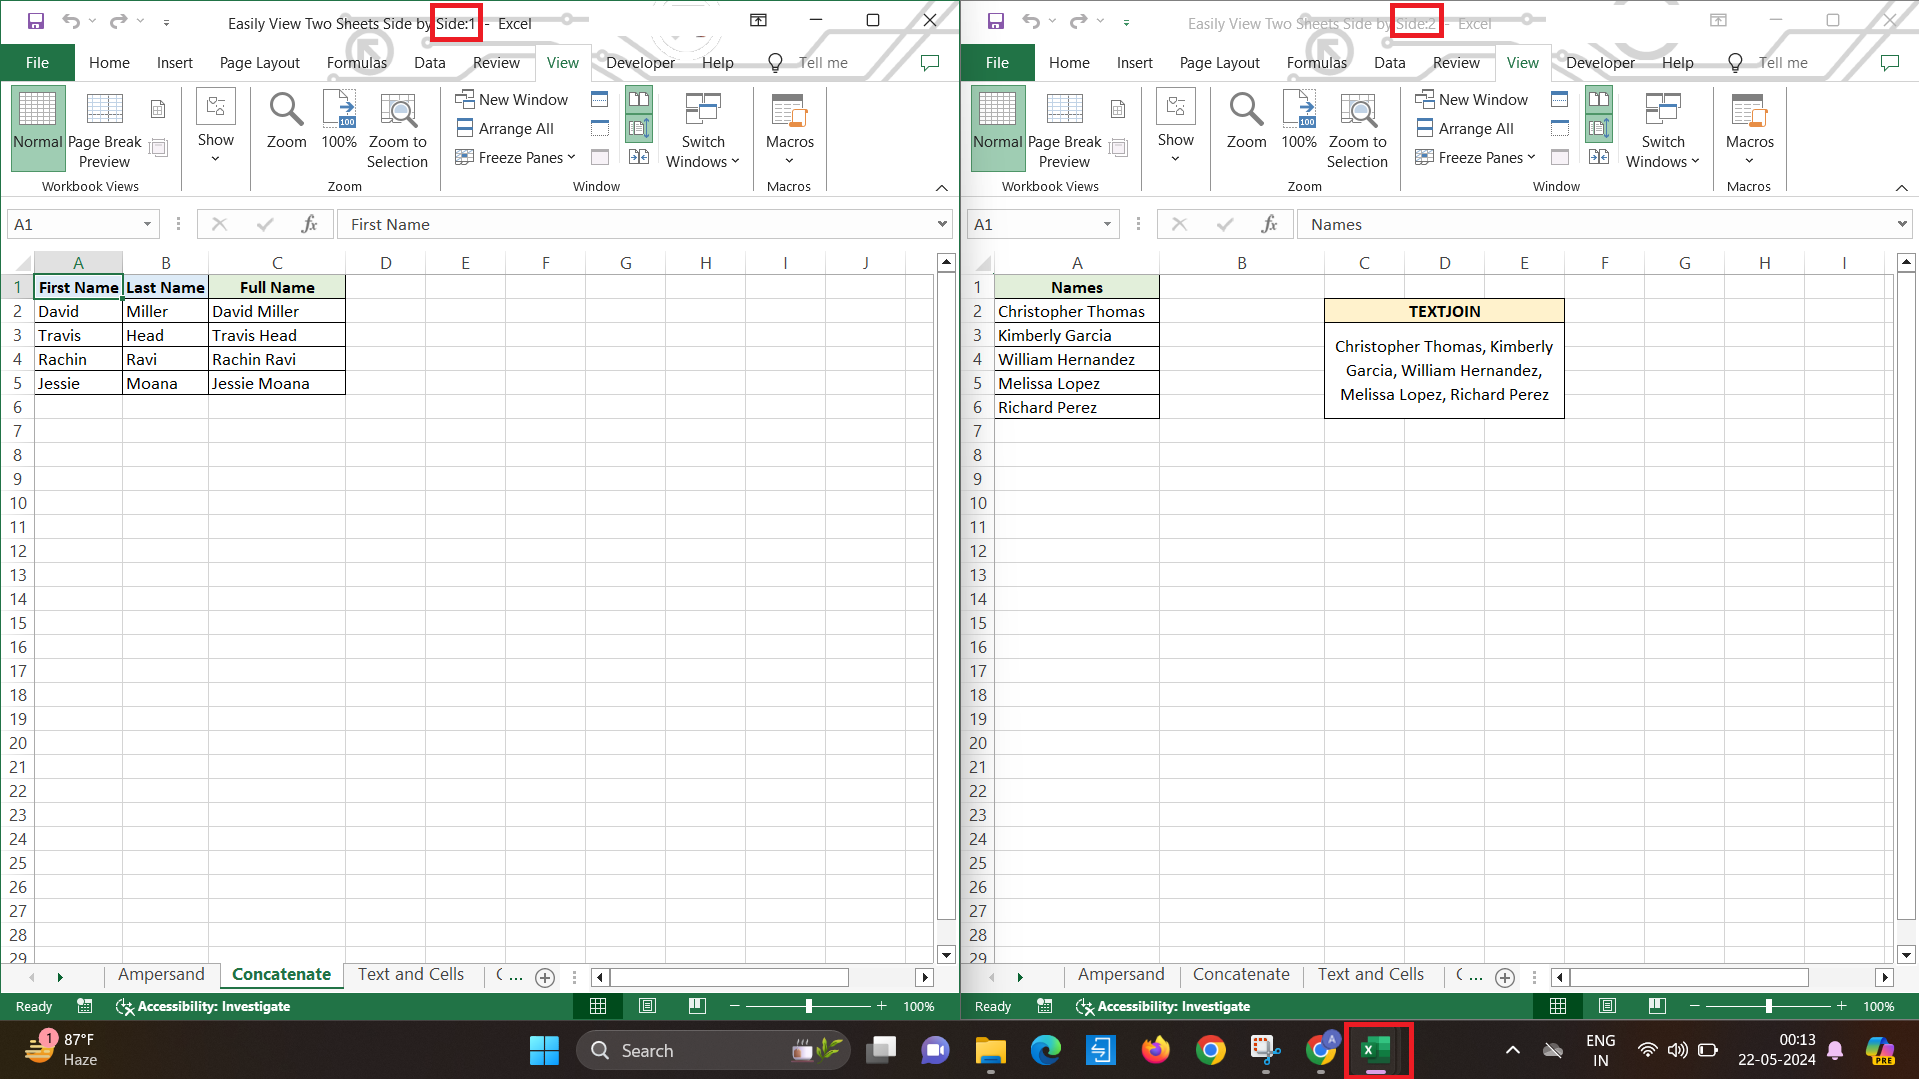
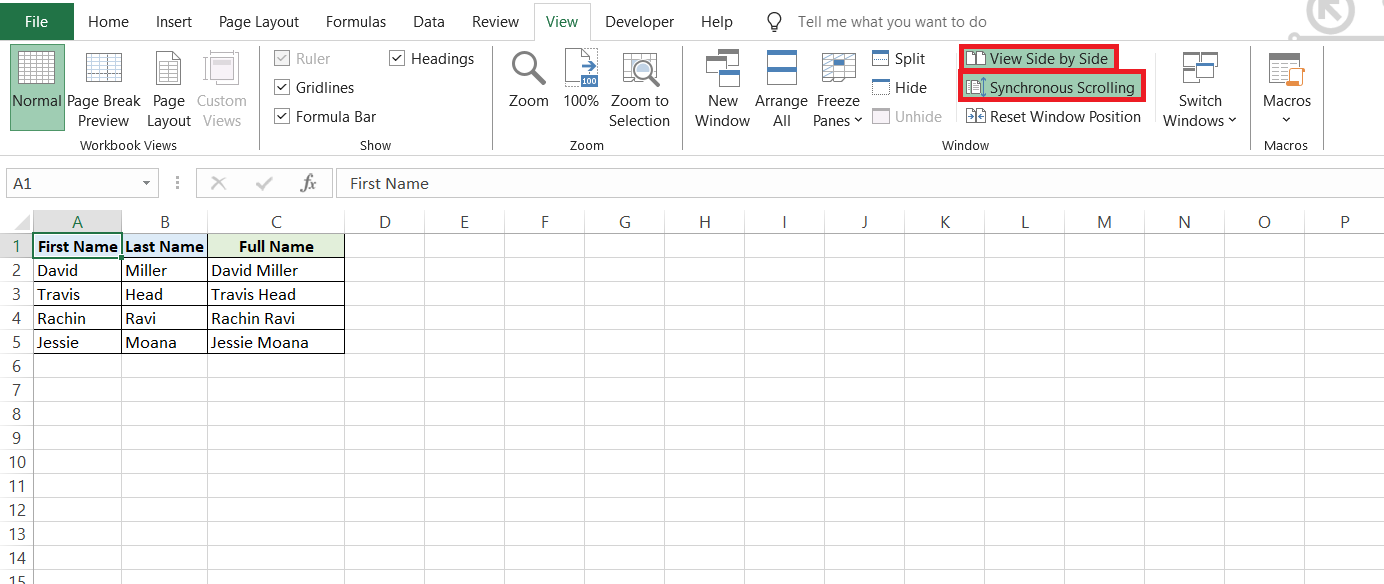
STEP 4: With both windows open, click on View Side by Side. This lets you look at two worksheets simultaneously.
STEP 5: To choose the specific sheets you wish to compare, select them in each window.
Now, you’re set to analyze data across sheets with ease.
Customizing Your View for Maximum Efficiency
Arranging Sheets Vertically or Horizontally
To tailor your workspace to your preferences, Excel allows you to arrange sheets either vertically or horizontally. Here’s how you can adjust your view:
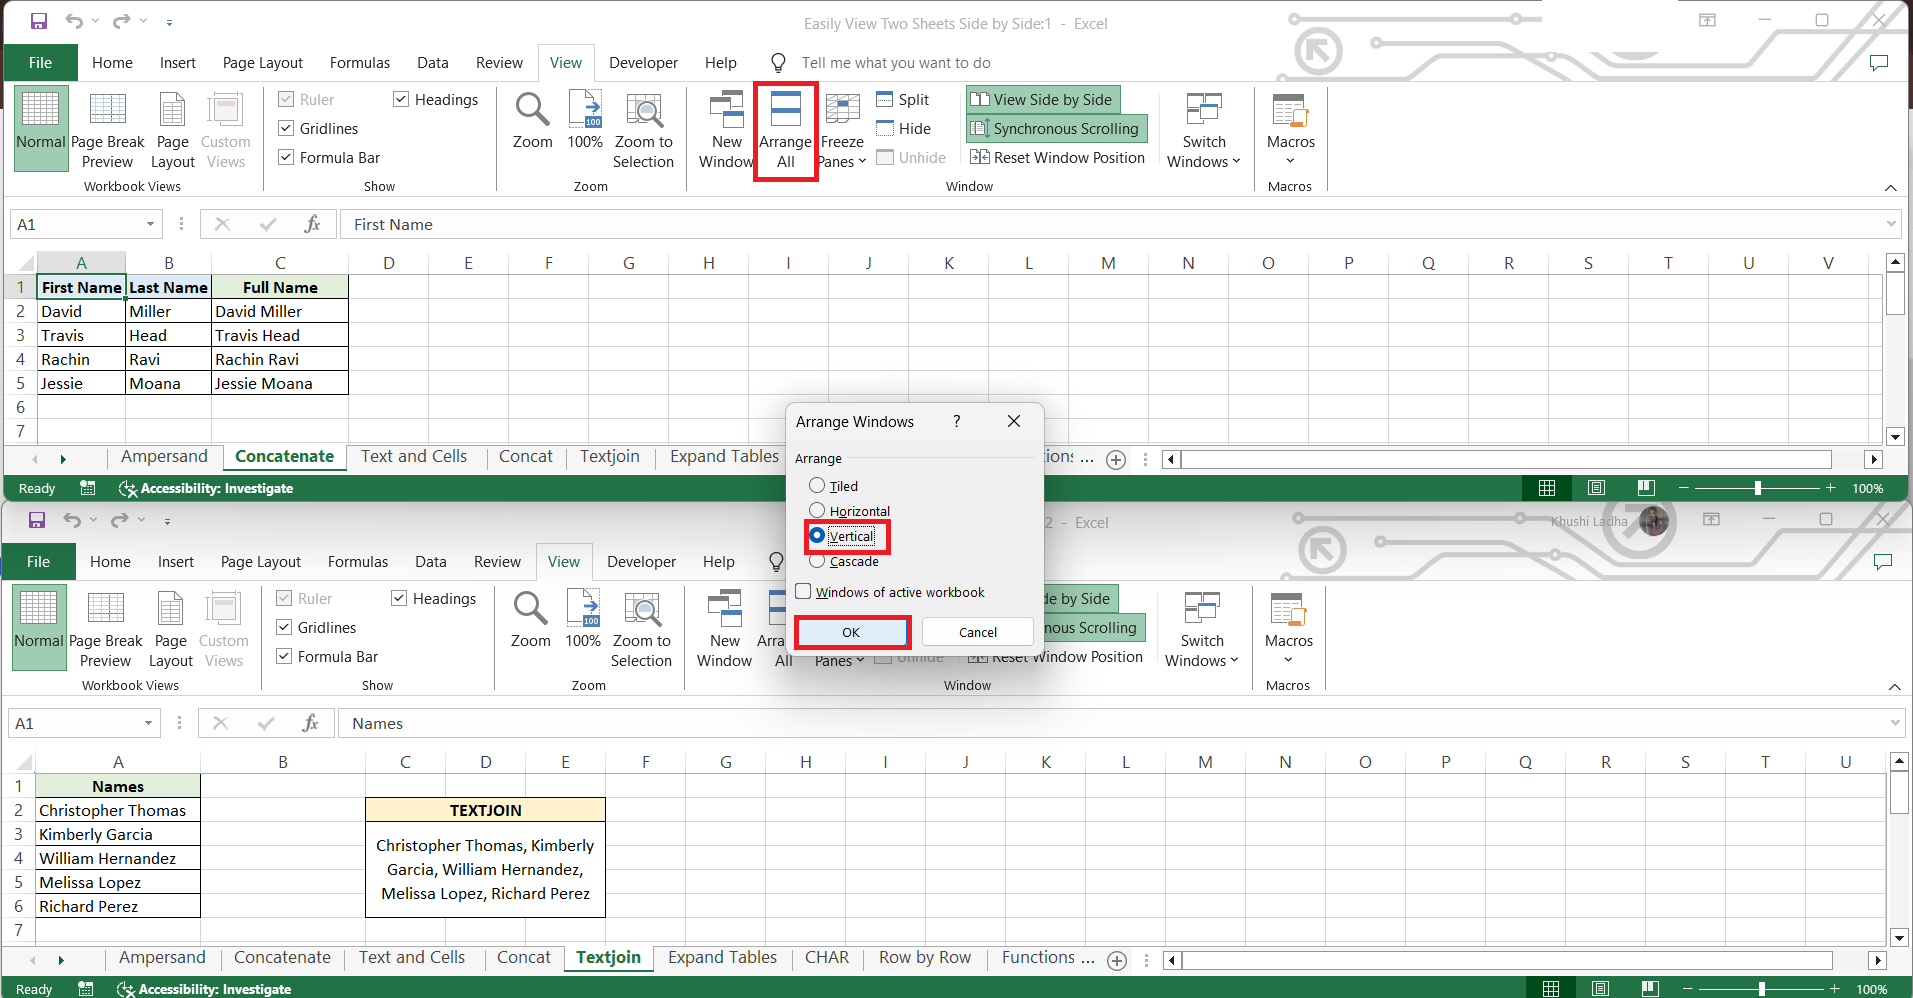
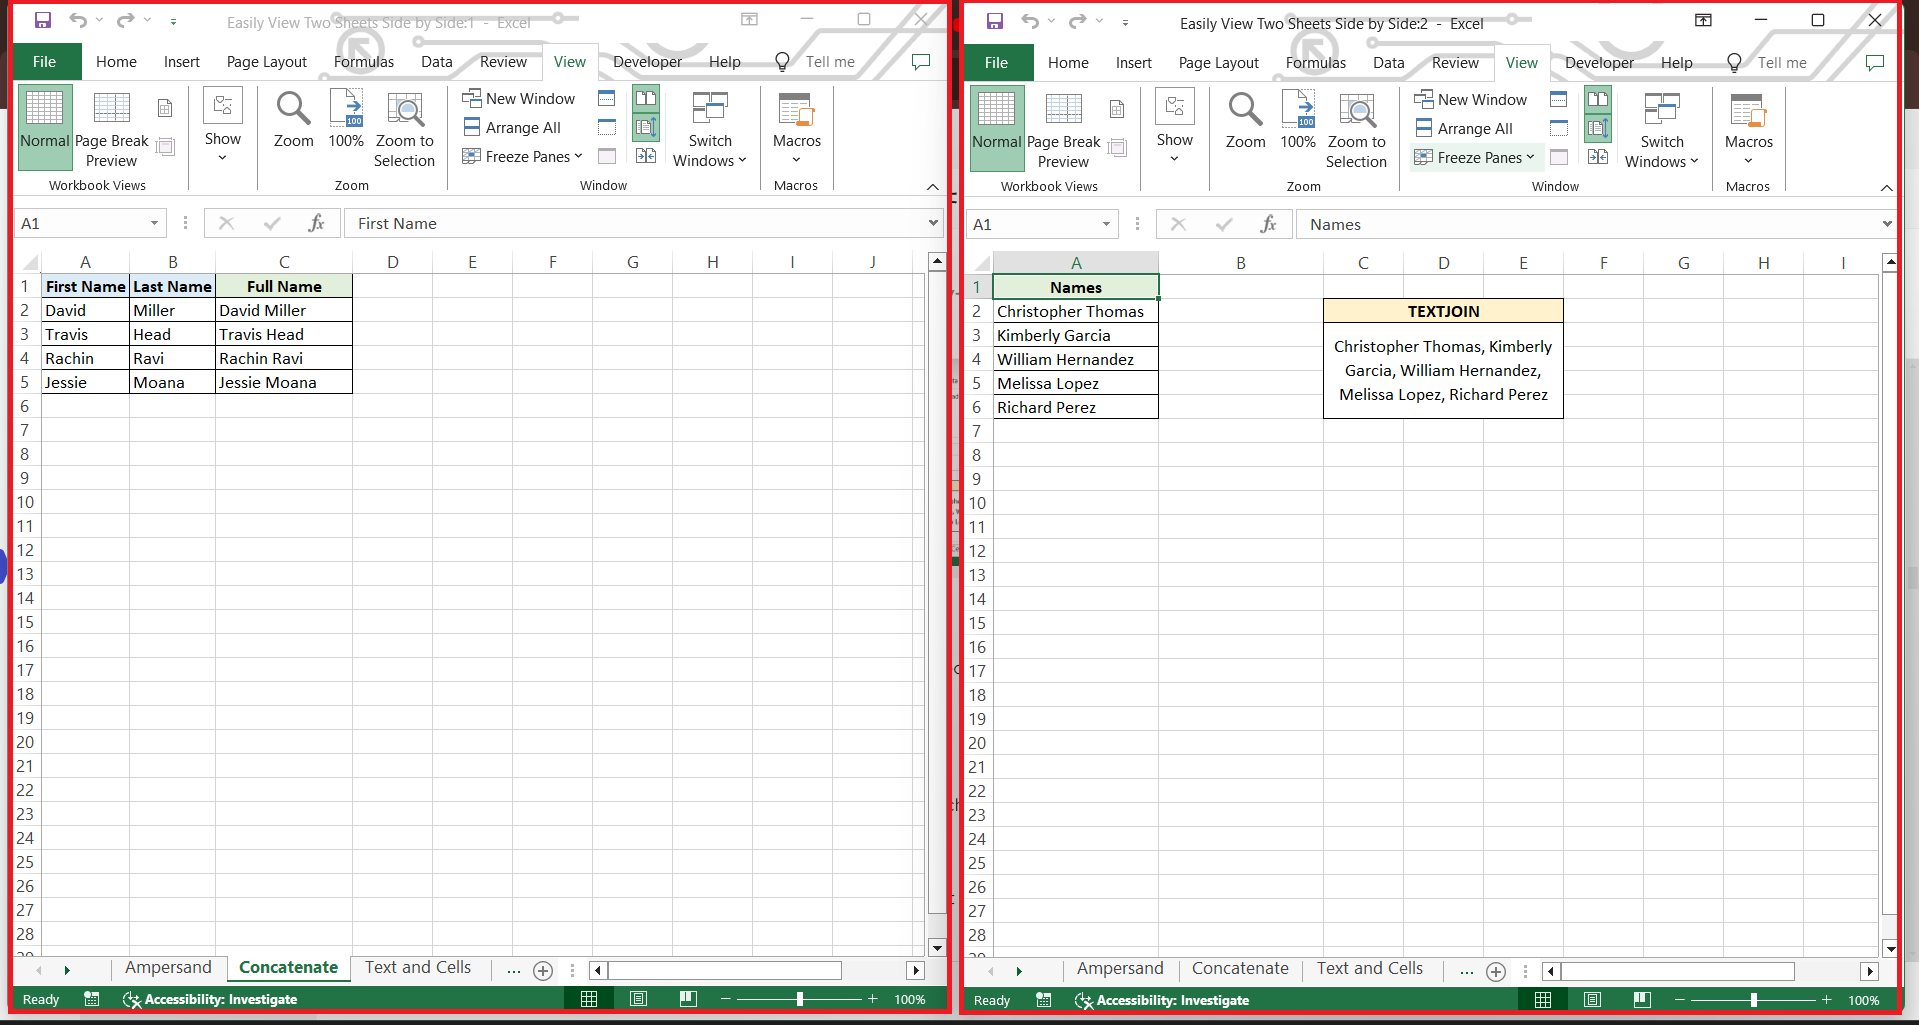
- If you prefer a vertical layout, putting sheets side by side like pages in a book, then after clicking View Side by Side, head over to Arrange All and select Vertical. This aligns your sheets next to each other, making comparisons straightforward.
RESULT:
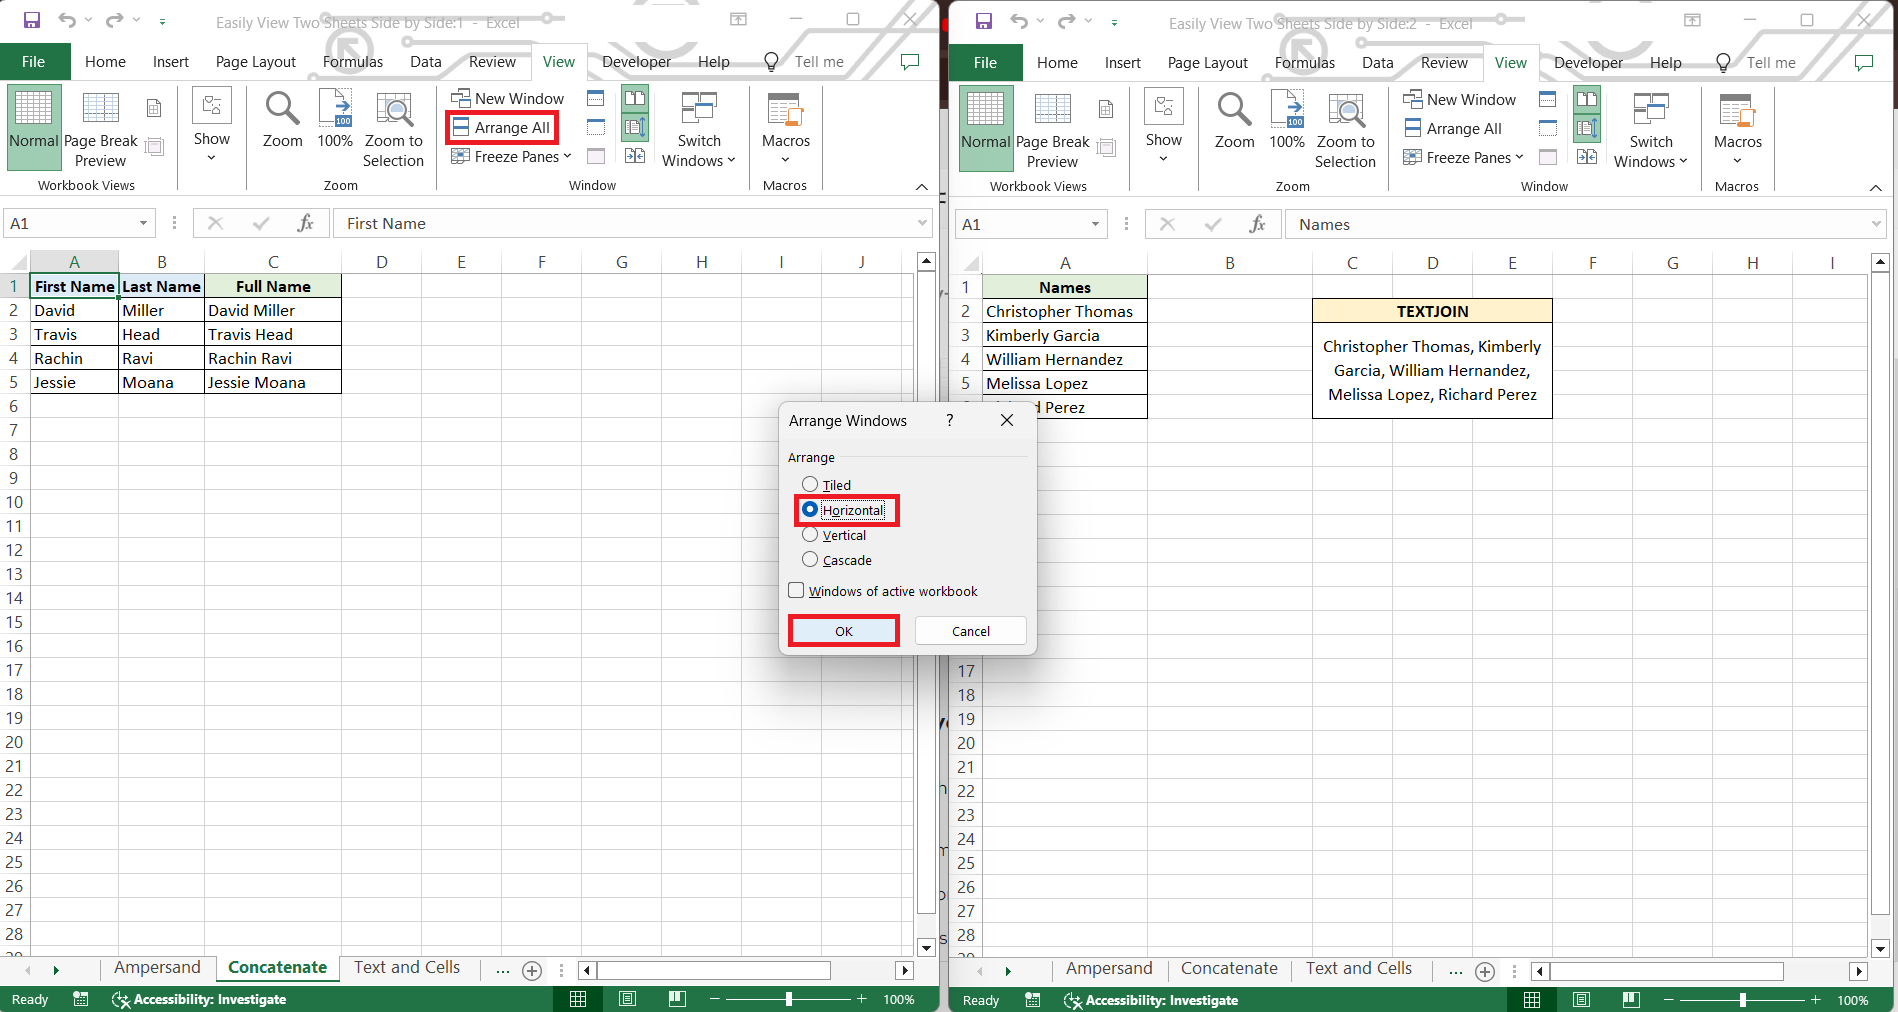
- For a horizontal arrangement, where one sheet is directly above the other, select Horizontal instead. This setup works wonders when you’re working with rows that span wide across the screen.
RESULT:
Advanced Techniques for Comparing Data
Making the Most of Synchronous Scrolling
Maximizing the benefit of synchronous scrolling in Excel enhances your ability to compare and contrast data with precision. Once you’ve set up Side by Side viewing:
- Ensure you have clicked View Side by Side in the View tab.
- Notice that Synchronous Scrolling activates automatically with this feature.
- If it is not active, click the Synchronous Scrolling button to toggle it on.
- As you scroll through one sheet, the other sheet will mirror the movement, allowing a line-by-line comparison.
It’s worth noting that synchronous scrolling can be used across different workbooks too, multiplying its utility. Just be mindful that the rows and columns align for the most effective data comparison.
Practical Uses for View Side by Side Excel Sheets
Real-world Scenarios Where Dual Views Are Essential
In the real world, dual views in Excel become essential in a variety of scenarios, such as:
- Data analysts compare weekly sales figures across two different time periods to identify trends or anomalies.
- Accountants reconcile transactions by viewing ledger entries side by side to ensure accuracy and consistency.
- Project managers align project timelines, comparing planned versus actual progress on tasks by having Gantt charts displayed concurrently.
These practical applications illustrate the necessity for dual views in enhancing accuracy, efficiency, and informed decision-making in professional environments.
Expanding Your Excel Skills Beyond Viewing
Quick Shortcuts to Switch Between Sheets and Windows
Speeding up your Excel workflow is easy with quick keyboard shortcuts to switch between sheets and windows:
- To jump between different sheets within the same workbook, use
CTRL + PgUpto navigate to the previous sheet andCTRL + PgDnfor the next one. - To switch quickly between open Excel windows,
ALT + TABremains a universal shortcut that lets you toggle across different applications, including multiple Excel workbooks.
Arming yourself with these shortcuts can save you valuable time, allowing you to navigate with agility and keep the data analysis momentum going.
Excel Tips for Enhancing Sheet Comparisons
To enhance your sheet comparison experience in Excel, consider implementing these handy tips:
- Freeze Panes: Use the ‘Freeze Panes‘ feature to keep headers visible as you scroll through sheets, ensuring you never lose context.
- Conditional Formatting: Apply conditional formatting to highlight differences automatically between two sets of data, making discrepancies stand out at a glance.
- Named Ranges: Assign names to cell ranges for easier reference during comparison, especially when dealing with complex formulas or large datasets.
- Cell Styles: Standardize cell styles for similar data points across sheets to visually streamline comparison and minimize confusion.
- Comments and Notes: Add comments or notes to cells that require further action or investigation during the comparison to keep track of findings.
Dispensing these tips can significantly improve the precision and speed with which you compare data across sheets, strengthening your overall Excel proficiency.
FAQ: Mastering Excel’s Dual View Functionality
How Do I Activate Side by Side Viewing for Two Worksheets?
To activate Side by Side viewing for two worksheets in Excel, follow these steps:
- Open your workbook and go to the View tab.
- Click on New Window to open a second instance of the workbook.
- Then click View Side by Side in the Window group.
- Select the specific sheets you want to compare in each window.
This will line up your worksheets so you can view and compare them simultaneously.
What is the shortcut for view side by side in Excel?
The shortcut to activate the view side by side feature in Excel is not a single key combination. But to quickly enable it:
- Press
ALT + Wto select the View tab. - Then press
Bto choose the View Side by Side option.
Remember to have both workbook windows open before using this shortcut.
Can I Scroll Sheets Synchronously in Split Screen Mode?
Yes, you can scroll sheets synchronously in split screen mode. Just make sure to:
- Click on View Side by Side in the View tab to enable it.
- Click the Synchronous Scrolling button if it’s not automatically activated.
This allows you to scroll through both sheets at the same time, a handy feature for comparison tasks.
How to view side by side in Excel vertically?
To view Excel sheets side by side vertically:
- Open your sheets and go to the View tab.
- Click New Window to open a second instance.
- Click View Side by Side.
- Then, click Arrange All and select Vertical.
Now your sheets will be displayed vertically next to each other.
How do I split screen side by side in Excel?
To split your Excel screen side by side:
- Click on the View tab.
- Choose the Split option, which will divide your screen into two parts.
- Adjust the split bar to position the screens as needed.
This lets you view different parts of the same sheet or workbook side by side within a single Excel window.
John Michaloudis is a former accountant and finance analyst at General Electric, a Microsoft MVP since 2020, an Amazon #1 bestselling author of 4 Microsoft Excel books and teacher of Microsoft Excel & Office over at his flagship MyExcelOnline Academy Online Course.

