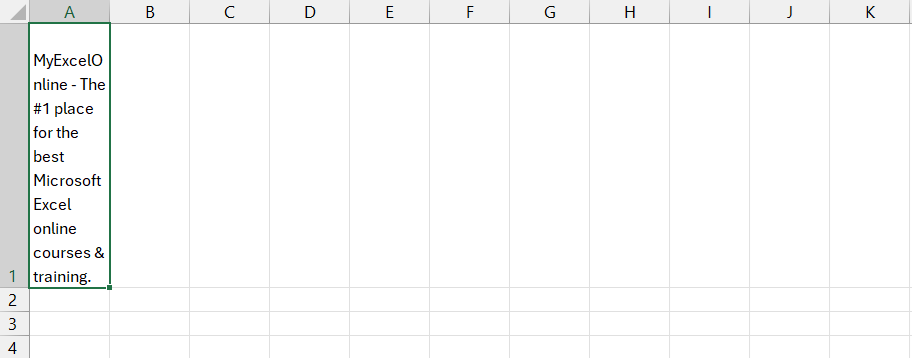
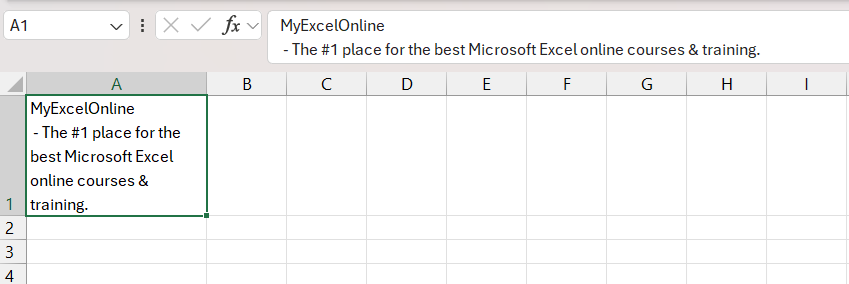
Wrap is a formatting technique used in Excel to control the way text flows and display multiple lines in a single cell. It allows the text to be visible within the cell without being cut off. When you apply text wrapping to a cell, Excel automatically adjusts the height of the cell to accommodate the entire text, ensuring that it is visible within the cell.
This feature is particularly useful when dealing with lengthy text entries or when you want to improve the readability and appearance of your spreadsheet.
In this comprehensive guide, we will explore four distinct methods of wrapping text in Excel.
Let’s look at each of these methods!
Wrap Text using Keyboard Shortcuts
Text wrapping can be quickly applied using a keyboard shortcut in Excel. Follow the steps below –
STEP 1: Select the cell containing the text you want to wrap.
STEP 2: Press Alt + H + W in sequence.
By executing this keyboard shortcut, the cell height dynamically adjusts to accommodate the wrapped text, ensuring that all content remains visible within the cell.
Wrap Text using Ribbon
If you are not a fan of using shortcuts, you can also wrap text using the Excel ribbon located at the top of the Excel worksheet. Follow the steps below to wrap text using ribbon –
STEP 1: Select the cell containing the text you want to wrap.
STEP 2: Navigate to the Home tab and locate the Wrap Text button under the Alignment group.
By clicking the Wrap Text button, Excel will automatically adjust the cell height to fit the wrapped text, providing a seamless and efficient solution.
Wrap Text using Format Dialog Box
You can use the Format Cells dialog box for more advanced formatting options. Follow these steps –
STEP 1: Select the cell containing the text you want to wrap.
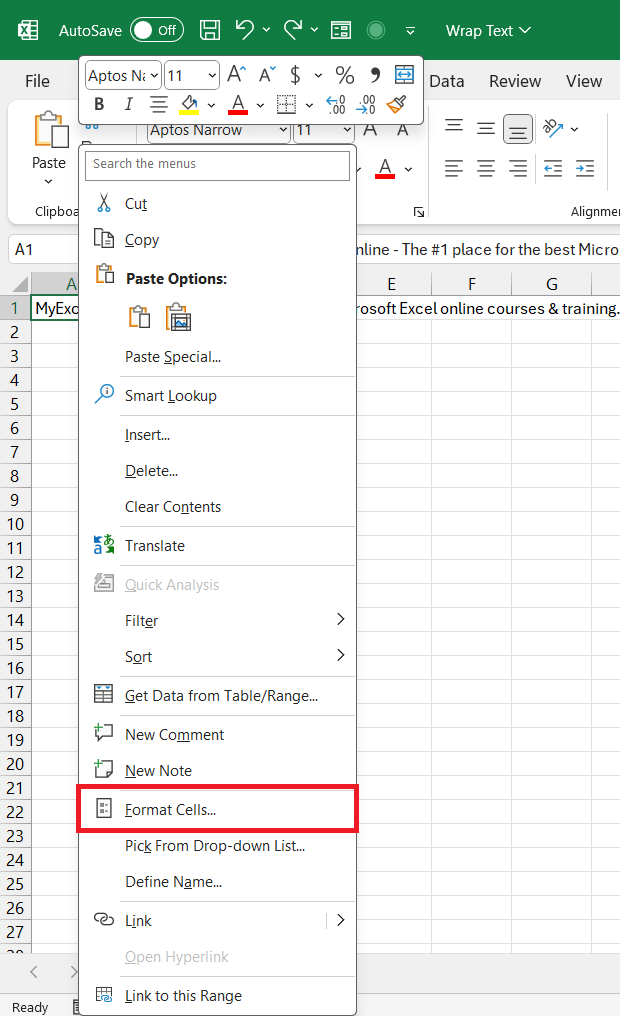
STEP 2: Right-click on the cell and select Format cells.
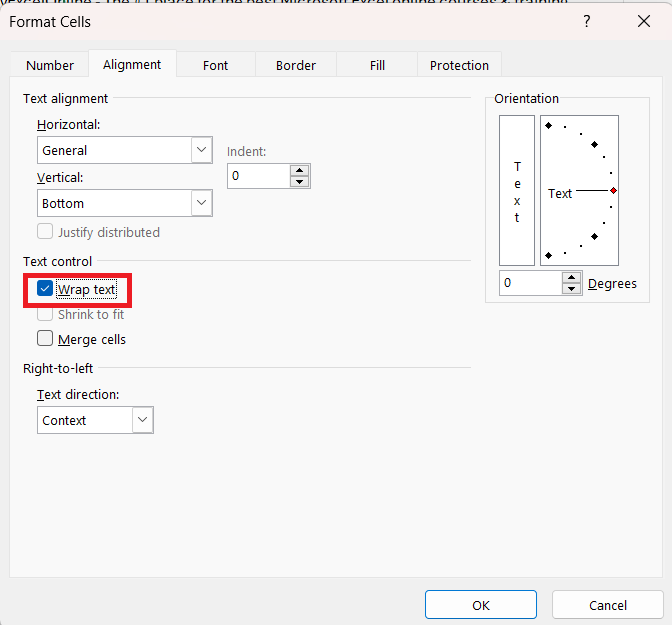
STEP 3: In the Format Cells dialog box, under the Alignment tab check the Wrap text checkbox.
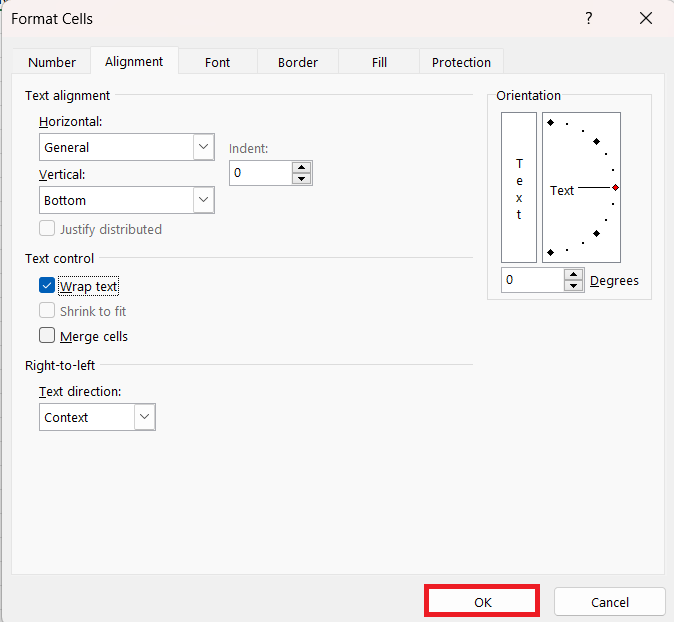
STEP 4: Click OK to apply the changes.
This method allows you to customize additional formatting options while wrapping text, such as horizontal and vertical alignment.
Wrap Text using Line Break
A line break is a formatting element that indicates the end of a line of text and the beginning of a new one. This can be used to fit multiple lines within a cell and you want more control over where the text wraps within a cell.
You can wrap text with the help of line break by following the steps below –
STEP 1: Select the cell where you want to insert a line break.
STEP 2: Press Alt + Enter at the point where you want the text to wrap.
This is how the wrapped text with a line break will look like –
This method is useful when you want to force a line break at a specific location within the text.
Conclusion
To sum up, Excel’s Wrap Text feature is a handy tool for neatly showing long text in cells, giving your spreadsheet a polished and professional look. Whether you prefer shortcuts, the ribbon, format dialog box, or line breaks, mastering these techniques helps you customize your data display, ensuring it is clear and easy to read in any Excel project.
John Michaloudis is a former accountant and finance analyst at General Electric, a Microsoft MVP since 2020, an Amazon #1 bestselling author of 4 Microsoft Excel books and teacher of Microsoft Excel & Office over at his flagship MyExcelOnline Academy Online Course.


