Power Query in Excel can let us perform a lot of complex steps with our data.
However wouldn’t it be fun if you could understand better what is happening under the hood? Come join me as we take a look into the Advanced Editor!
We will use the Index Column Post as our starting point. Please download the Excel Workbook below.
Table of Contents
Advanced Editor In Power Query
Download excel workbookAdvanced-Editor.xlsx
Let’s go through the steps in detail:
STEP 1: For us to view the existing Power Query steps:
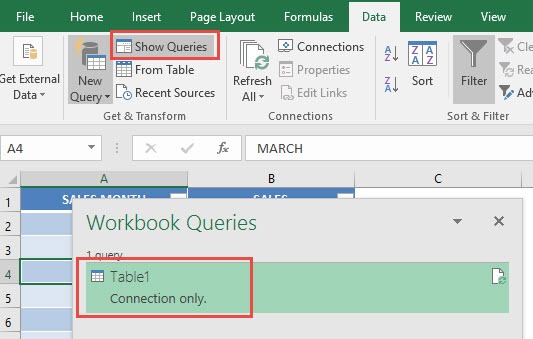
Go to Data > Get & Transform > Show Queries (Excel 2016) or
Go to Data > Get & Transform > Show Pane (Excel 2013 & 2010)
Now double click on the Table1 query.
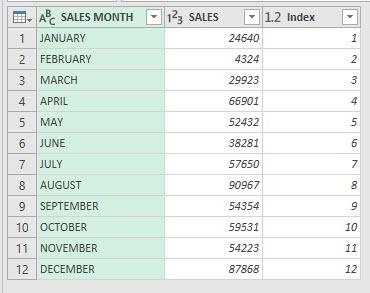
STEP 2: This will open up the Power Query Editor.
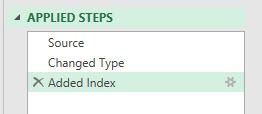
You can see the Applied Steps we have with the Index Column workbook you downloaded above. The steps are broken down as follows:
- SOURCE: Get the Source Table
- CHANGED TYPE: Changed the type of columns in the Table
- ADDED INDEX: Added an Index Column
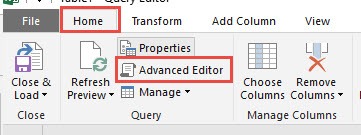
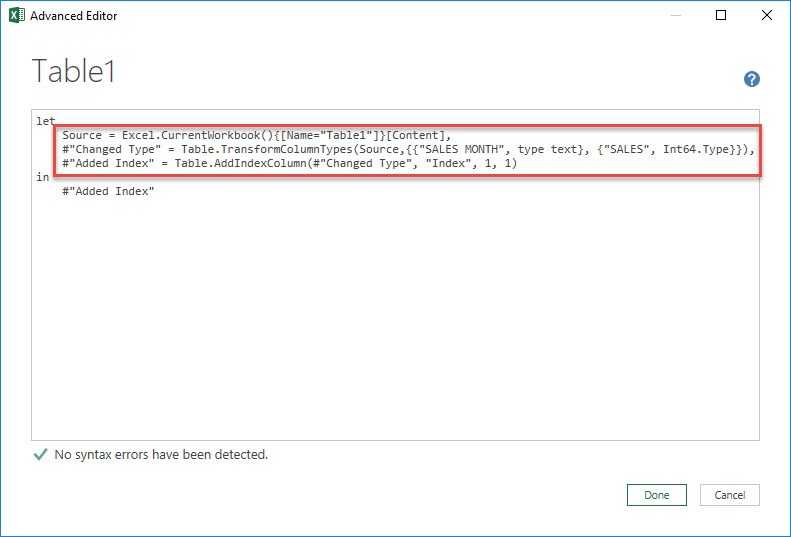
STEP 3: Now the fun part! Go to Home > Advanced Editor
You will now see our exact 3 steps, in detailed form!
- Get the Table1 as the Source
- Change the Column Type of Sales Month to text, and Sales to number
- Add a new index column called Index that starts at 1 and increments by 1
You are now able to see what’s happening under the hood of your Power Query transformations!
Stay tuned as you join me in editing through the Power Query Advanced Editor next time!
HELPFUL RESOURCE:
Bryan
Bryan is a best-selling book author of the 101 Excel Series paperback books.

