When working with timelines and schedules, converting weeks to years can be an essential calculation. Whether you’re planning long-term projects or tracking growth over extended periods, Microsoft Excel provides tools to transform weeks into years effortlessly. This article will guide you through the process of utilizing Excel to convert your weekly data into annual terms with ease.
Key Takeaways
- Use a formula dividing the number of weeks by 52.1428571 to convert weeks into years in Excel.
- Ensure proper formatting of cells to reflect decimal years or years and months for clarity in your data analysis.
- Utilize the conversion result to perform further time-based calculations or to aid in timeline visualization.
- Use VBA to create custom formula to convert weeks to years.
Download the Excel workbook and follow along with the tutorial on How to convert Weeks to Years in Excel – Download excel workbookWeeks-into-Years-in-Excel.xlsm
Table of Contents
Introduction
Navigating Time in Excel
Microsoft Excel is a powerhouse for managing time-related data, frequently used for tracking dates, deadlines, and milestones across various industries and personal applications. Its capabilities allow users to manipulate and represent time frames in insightful ways, simplifying planning and analysis.
The Need for Conversion between Weeks and Years
Understanding the flow of time is essential for project management, planning events, human resources, and even personal life management. Often, time periods are given in weeks, such as project lengths or pregnancy terms, but understanding these periods in terms of years can offer a broader perspective and align with annual planning and reporting. Converting weeks into years can streamline communication, assist in long-term planning, and harmonize data with systems or documents where years are the standard time unit. Excel, with its versatile tools, plays a pivotal role in making these conversions simple and accurate for an array of professional and personal needs.
Understanding Excel Date and Time Functions
How Excel Handles Dates and Time
In Excel, dates and times are not just plain text or numbers; they are special data types that are interpreted according to the built-in date and time system. Essentially, Excel stores dates as serial numbers where each integer represents a unique day counting from January 1, 1900, known as the “date system” starting point. Time is represented by fractional numbers, with 0.5 equating to 12 noon, as it’s half of a day.
This systematic approach enables Excel to perform complex date and time calculations with precision. For instance, subtracting one date from another yields the number of days between them. This unique handling of time-related data underpins all of Excel’s date and time functions, allowing users to engage in advanced date manipulation and analysis.
Overview of Relevant Functions for Conversion
When it comes to converting weeks to years in Excel, understanding the relevant functions is crucial. Here are some functions you might employ:
- DATEDIF: This function calculates the difference between two dates and can return the result in days, months, or years.
- YEARFRAC: It gives the fraction of the year represented by the number of whole days between two dates. This can be quite useful for precise conversions involving part of a year.
- WEEKNUM: Although this function primarily returns the week number of a specific date within the year, it can be utilized in reverse to help with conversions from weeks back to specific dates, which can then be used to calculate years.
- DATE: Creates a date from individual year, month, and day components, which can be helpful in constructing dates from week numbers.
- NETWORKDAYS: This function can calculate the number of working days between two dates, often used in a business context.
Step By Step Guide to Converting Weeks to Years
Using Simple Division for Quick Conversion
For a quick and straightforward conversion from weeks into years in Excel, a simple division method can be employed. Since a standard year consists of approximately 52.14285714 weeks, you can convert weeks into years by dividing the number of weeks by this value.
Here is how you can perform this simple calculation:
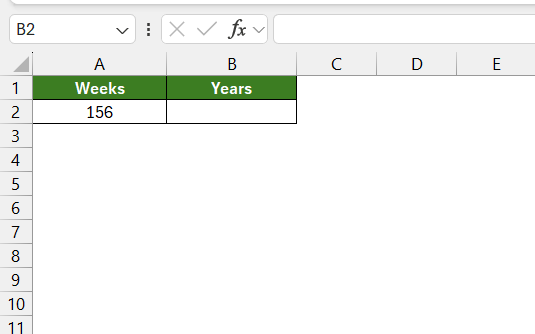
STEP 1: Enter the number of weeks you want to convert in a cell (let’s say A2).
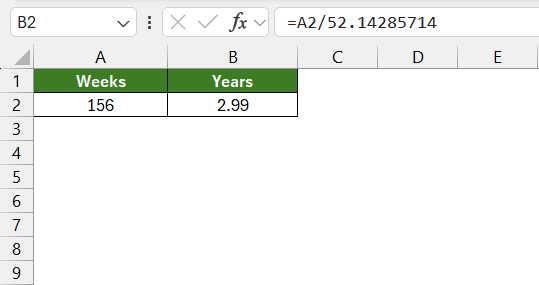
STEP 2: In another cell, input the conversion formula: =A2/52.1428571 and press enter, and Excel will display the result, converting the number of weeks into years expressed in a decimal format.
It’s as simple as that! Now, you can quickly determine the year equivalent for any number of weeks you’re working with. This method is particularly useful when you’re looking for a speedy conversion without the need for extremely detailed precision.
Creating User-Defined Formulas (UDFs)
For those who frequently encounter complex scenarios that standard Excel functions cannot address directly, creating User-Defined Functions (UDFs) via VBA (Visual Basic for Applications) offers a tailored solution. UDFs are custom formulas you can write in Excel to perform operations that go beyond built-in capabilities.
Steps to Create a UDF in Excel:
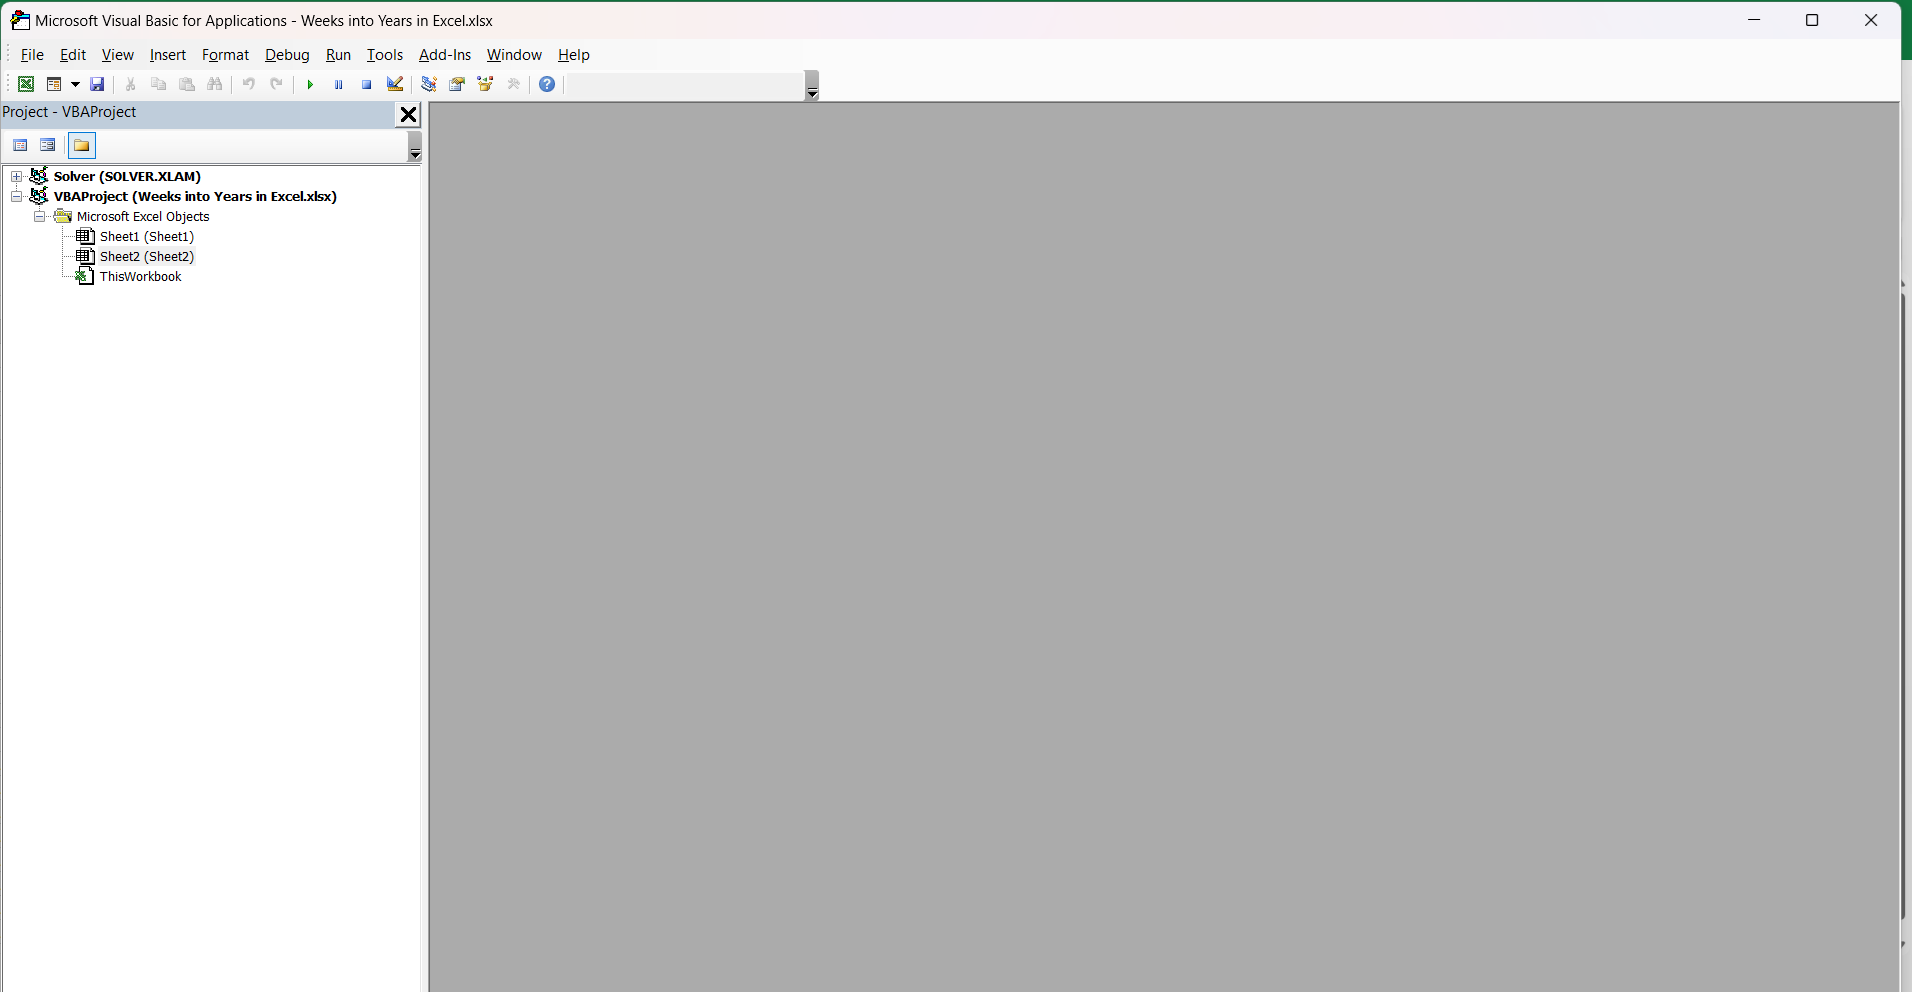
STEP 1: Access the VBA Editor.
Press ALT + F11 to open the VBA editor.
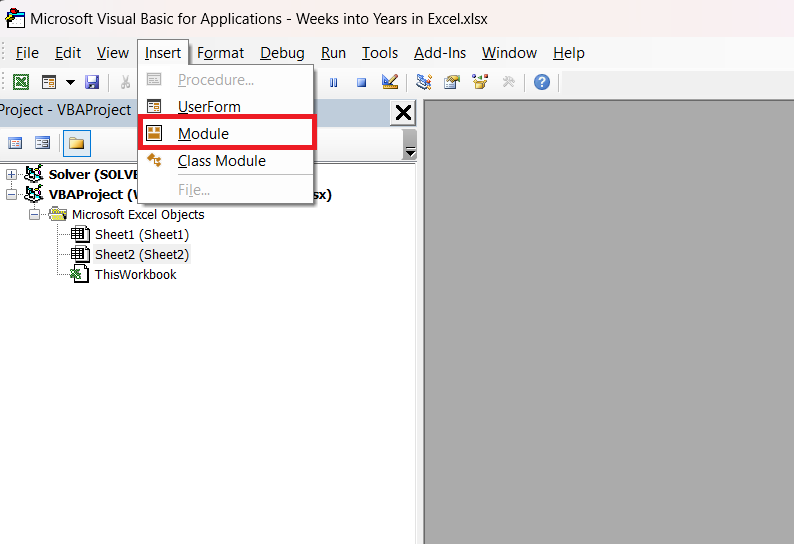
STEP 2: Insert a Module.
In the VBA editor, select ‘Insert’, and then choose ‘Module’. This will open a blank module window.
STEP 3: Write the UDF Code.
In the module window, define your UDF using VBA syntax. Here’s an example UDF for converting weeks to years, accounting for leap years:
Function WeeksToYears(Weeks As Double) As Double
Const WeeksPerYear As Double = 52.177457
Dim LeapYears As Integer
Dim CurrentYear As Integer
CurrentYear = Year(Now)

' Count leap years between the current year and the target number of weeks ahead
For i = CurrentYear To CurrentYear + CInt((Weeks / WeeksPerYear))
If (i Mod 4 = 0 And i Mod 100 <> 0) Or (i Mod 400 = 0) Then
LeapYears = LeapYears + 1
End If
Next i

' Convert weeks to years and adjust for leap years
WeeksToYears = (Weeks + LeapYears) / WeeksPerYear
End Function
STEP 4: Close the VBA Editor.
Once you’ve written and saved your UDF, you can use it in your Excel sheet just like any other function. For instance, if you have the number of weeks in cell A1, you could use =WeeksToYears(A1) to get the number of years.
Advantages of UDFs:
- Customization: UDFs can be tailored to specific requirements and can perform calculations that are not possible with standard Excel functions alone.
- Simplicity for Repeat Use: Once created, UDFs simplify repetitive complex calculations by encapsulating the logic in a single, reusable function.
- Integration: UDFs work seamlessly within the Excel environment, just like built-in functions, making them a natural extension of Excel’s toolkit.
Creating UDFs requires some familiarity with VBA, but they can significantly enhance productivity and provide custom solutions that precisely meet your needs.
Convert Week Number to Date
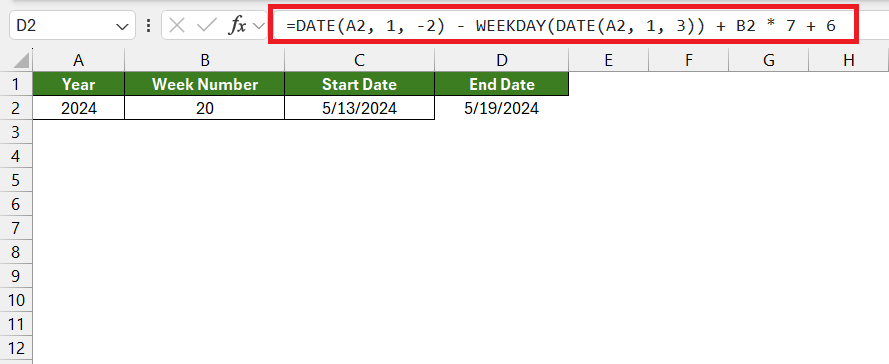
To convert a week number to the corresponding start and end date in Excel, you can follow these steps:
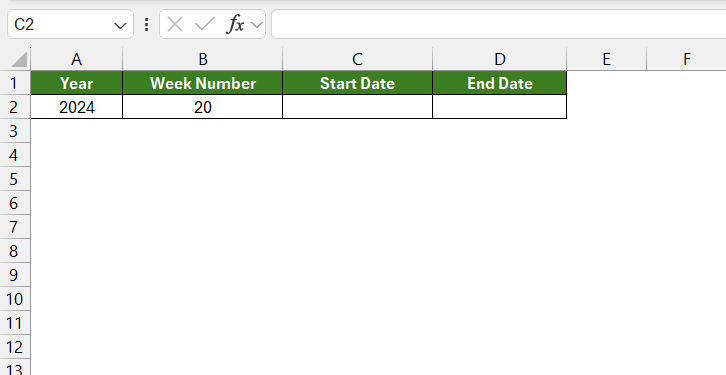
STEP 1: First, ensure you have the year and week number in two separate cells (for example, year in A2 and week number in B2).
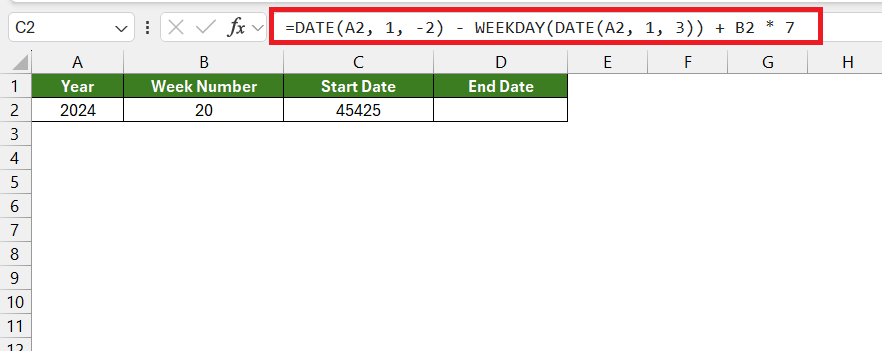
STEP 2: Click on the cell where you want the start date to appear. Enter the following formula to calculate the start date of the week:
=DATE(A2, 1, -2) – WEEKDAY(DATE(A2, 1, 3)) + B2 * 7
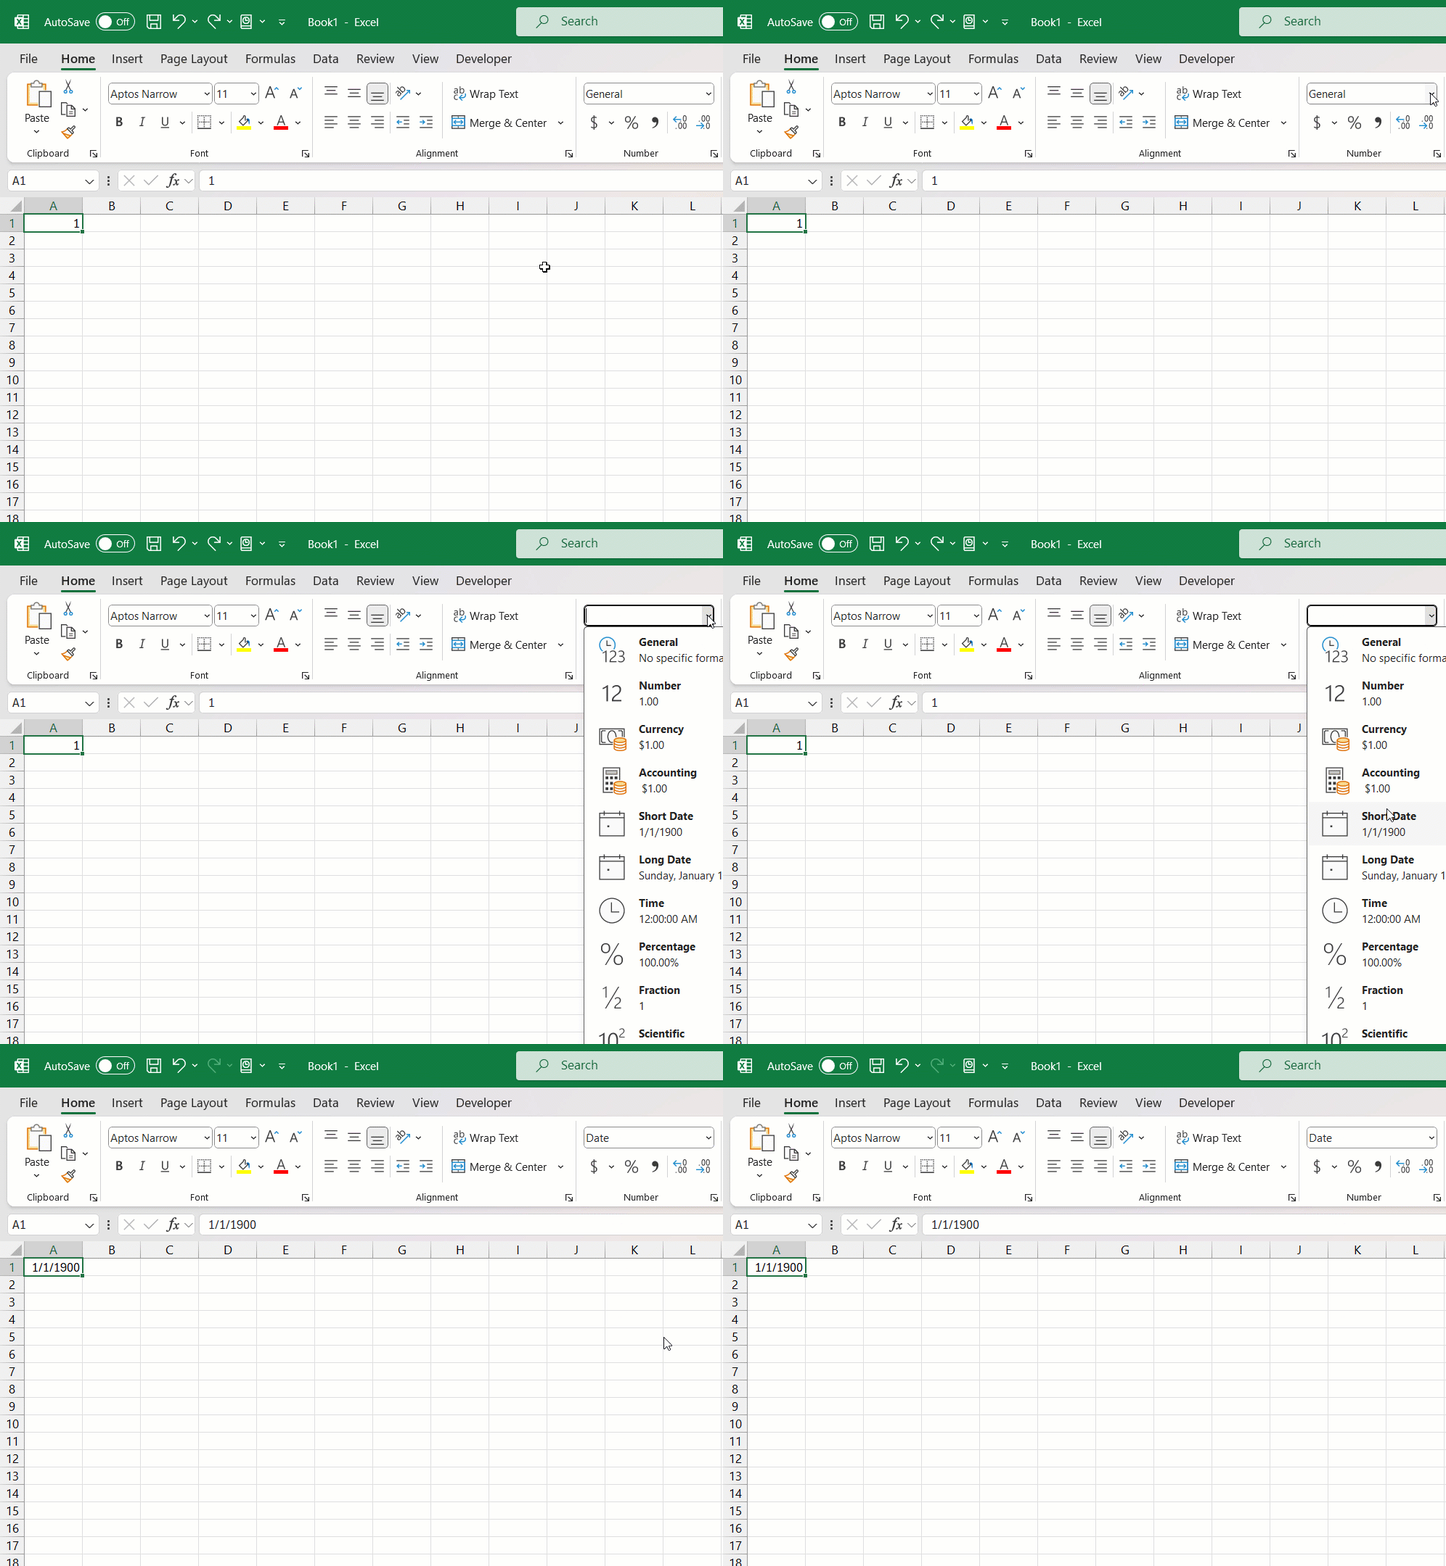
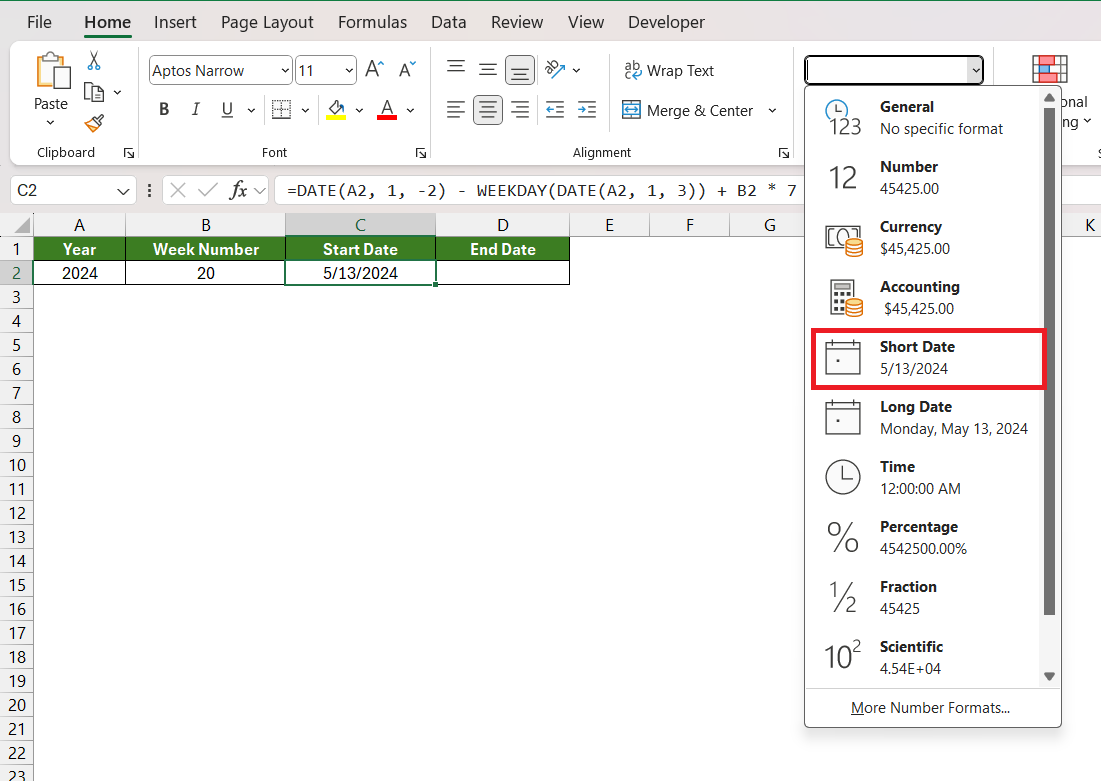
STEP 3: After entering the formula, press Enter to get the start date. If the result shows as a serial number, you should format the cell to display a date. You can do this by going to the Home tab and then selecting ‘Short Date’ from the dropdown.
STEP 4: Click on the cell where you want the end date to appear. Enter the following formula to calculate the end date of the week (Sunday of that week):
=DATE(A2, 1, -2) – WEEKDAY(DATE(A2, 1, 3)) + B2 * 7 + 6
The above method calculates the start and end dates of the specified week number for the given year automatically.
Remember, these formulas are based on the ISO week date system, which assumes that a week starts on a Monday.
Troubleshooting Common Conversion Errors
When working with time conversions in Excel, several common errors can occur. Identifying and correcting these issues will ensure your data’s integrity and the accuracy of your conversions from weeks to years. Here are some common errors and tips for troubleshooting:
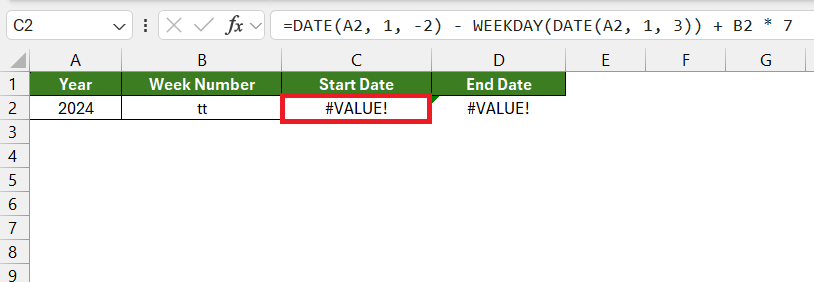
Problem 1: #VALUE! Error
- This error usually occurs when a formula expects a number or date but finds text or an incorrect data type instead.
- To correct this, ensure that all cells referenced in your formula contain the appropriate data type.
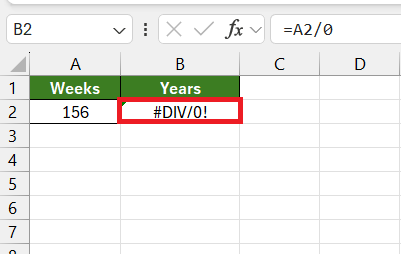
Problem 2: #DIV/0! Error
- Seen when a formula attempts to divide by zero. In the context of weeks to years conversion, this would result when the cell containing the number of weeks is blank or zero.
- Avoid dividing by zero by ensuring that the cell contains a valid number of weeks.
Problem 3: Misinterpreted Week Numbers
- Excel starts counting weeks from the beginning of the year, and depending on the system settings, Week 1 might not always fall on January 1st.
- To ensure proper interpretation of week numbers, verify the system’s week number settings, or use explicit dates to avoid confusion.
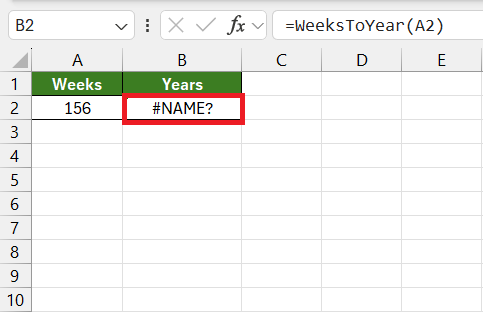
Problem 4: Incomplete Formulas
- A formula not producing results or showing an error like #NAME? could mean it’s not recognized by Microsoft Excel or incomplete.
- Check for typos, ensure all parentheses are closed, and review Excel’s function syntax to ensure everything is entered correctly.
FAQ
How do I ensure the accuracy of my conversion from weeks to years?
To ensure the accuracy of your conversion from weeks to years, use the precise conversion factor of 0.019165 years per week in your calculations. Double-check your work by entering the number of weeks into the calculation (weeks multiplied by 0.019165) using a reliable calculator or software, and verify the results by comparing them with a secondary source or converter tool to rule out the possibility of errors.
How to convert week number to date in excel?
To convert a week number to a date in Excel, use the formula `=DATE(year, 1, -2) – WEEKDAY(DATE(year, 1, 3)) + week_number * 7` where “year” is the cell reference with the year and “week_number” is the cell reference with the week number you’re converting. After entering the formula, format the cell to display the result as a date. Ensure the week starts on Monday for the formula to work correctly.
How do you calculate years from weeks?
To calculate years from weeks, divide the number of weeks by 52.14285714 or multiply the number of weeks by 0.019165. For example, to convert 5 weeks to years, you would perform the calculation 5 × 0.019165, which equals approximately 0.095827 years.
How do you calculate weeks from years?
To calculate weeks from years, you would essentially reverse the process used to convert weeks into years. You need to multiply the number of years by the number of weeks in a typical year. Here’s a step-by-step guide to perform the conversion:
- Determine the number of years you want to convert into weeks.
- Use the conversion ratio, recognizing that one year typically equals 52.14285714 weeks, given that a standard year consists of approximately 52 weeks plus an additional day (and two additional days on leap years).
- Multiply the number of years by 52.14285714 to get the equivalent number of weeks.
John Michaloudis is a former accountant and finance analyst at General Electric, a Microsoft MVP since 2020, an Amazon #1 bestselling author of 4 Microsoft Excel books and teacher of Microsoft Excel & Office over at his flagship Academy Online Course.
