XML (or Extensible Markup Language) is a text-based formatting language that is just like HTML. It is used to store and transport data in a structured format. It is a great tool to transfer data without the loss of data integrity. It has custom tags that define different data elements. Whereas, Excel is a powerful spreadsheet program that is widely used for data organization, analysis, and visualization. It is a user-friendly program that provides various tools for handling data efficiently and generating meaningful insights.
XML is a language that is easily understood by machines and if you need to make any changes in the data it can be a bit challenging. So, it is crucial to convert XML to Excel in order to easily work with the data.
You can import data from an XML file saved in your system or from the web in Excel. This can be done using an extremely versatile tool called the Power Query. It accesses, cleans, and transforms all messy data and displays it in a way that Excel loves and can work with.
Click here to be blown away by the data transformation potential of Power Query in Excel!
In this article, we will be covering 2 easy and quick hacks to convert XML to Excel –
Let’s dive in!
First, you need to have Microsoft Office 2010 or above. If you do not have this then you will need to upgrade to Office 365 using this link: https://products.office.com/en-us/home
Download the Excel Workbook below to follow along and understand how to XML to Excel –
XML file saved on your system
If your XML file is saved on your system, you can easily import data from XML into Power Query.
Follow the steps below to convert XML to Excel –
STEP 1: Open a Blank Excel Workbook.
STEP 2: Go to the Data tab located at the top ribbon.
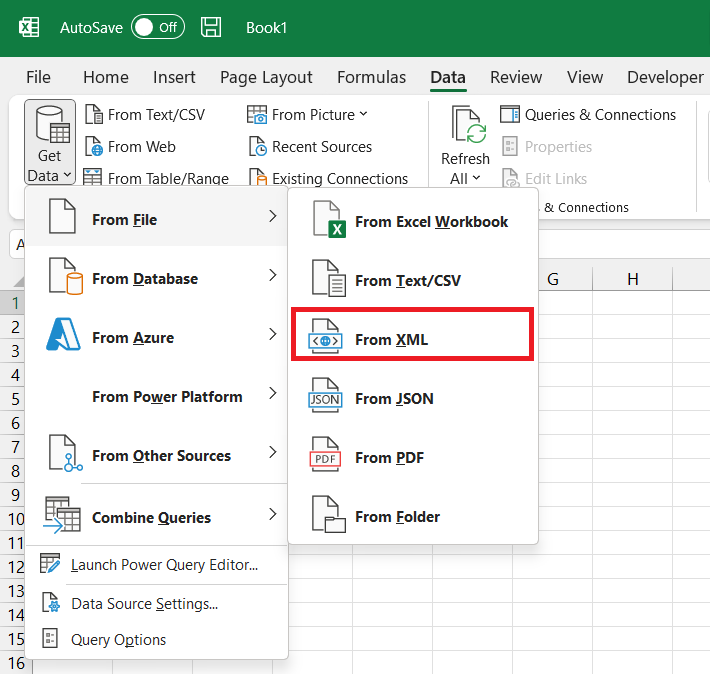
STEP 3: Go to Get Data > From File > From XML.
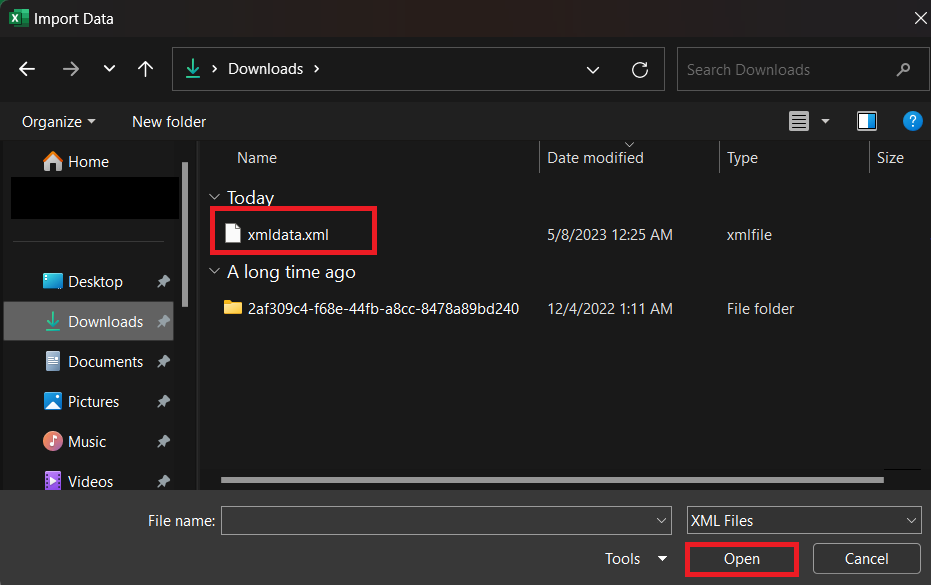
STEP 4: In the Import Data dialog box, browse and select the XML file and click Open.
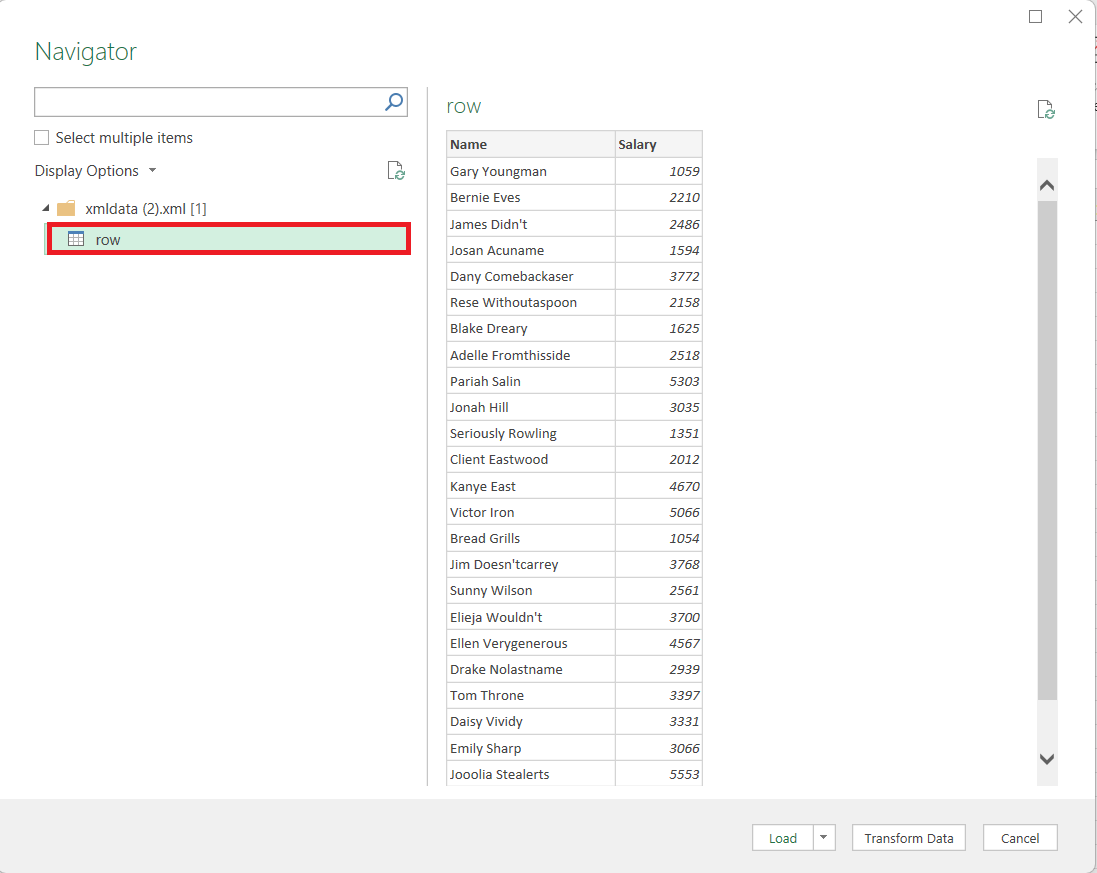
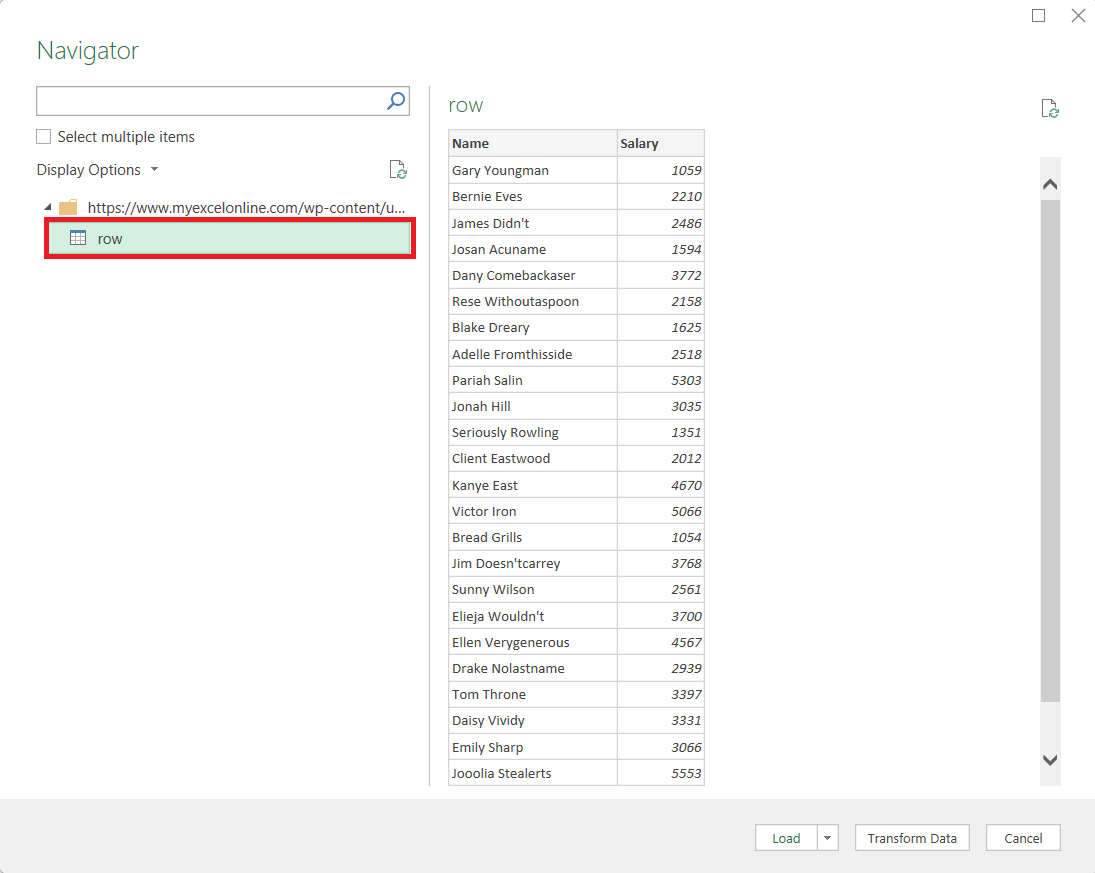
STEP 5: Select the XML Data Source in the left panel. Here, we will click on “row”.
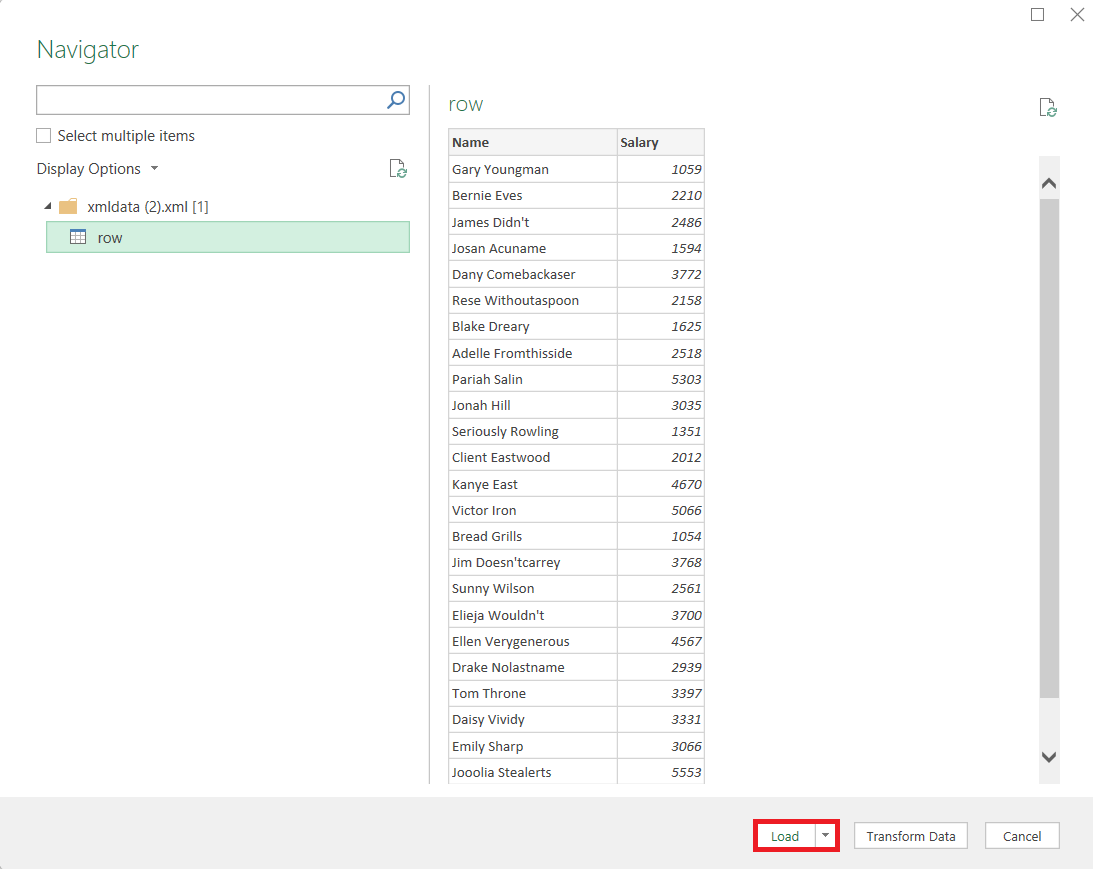
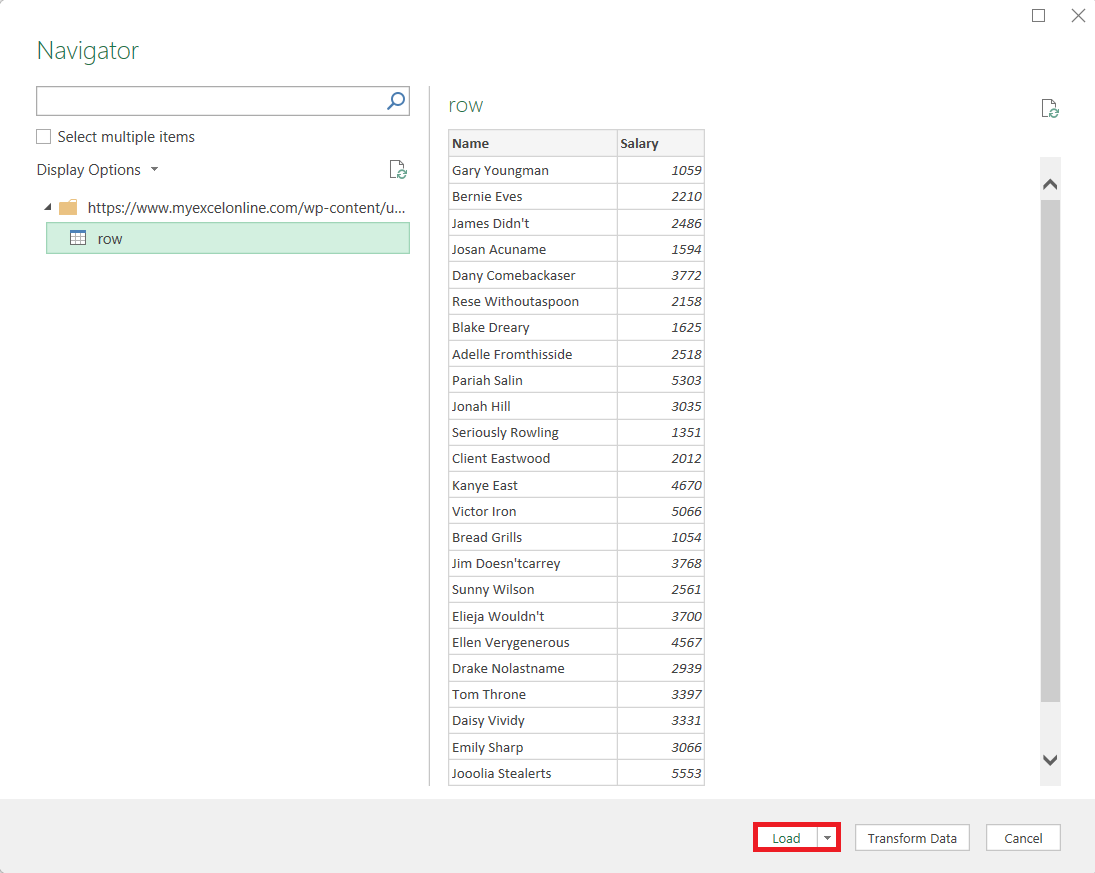
STEP 6: A preview will be shown, if it looks good click Load.
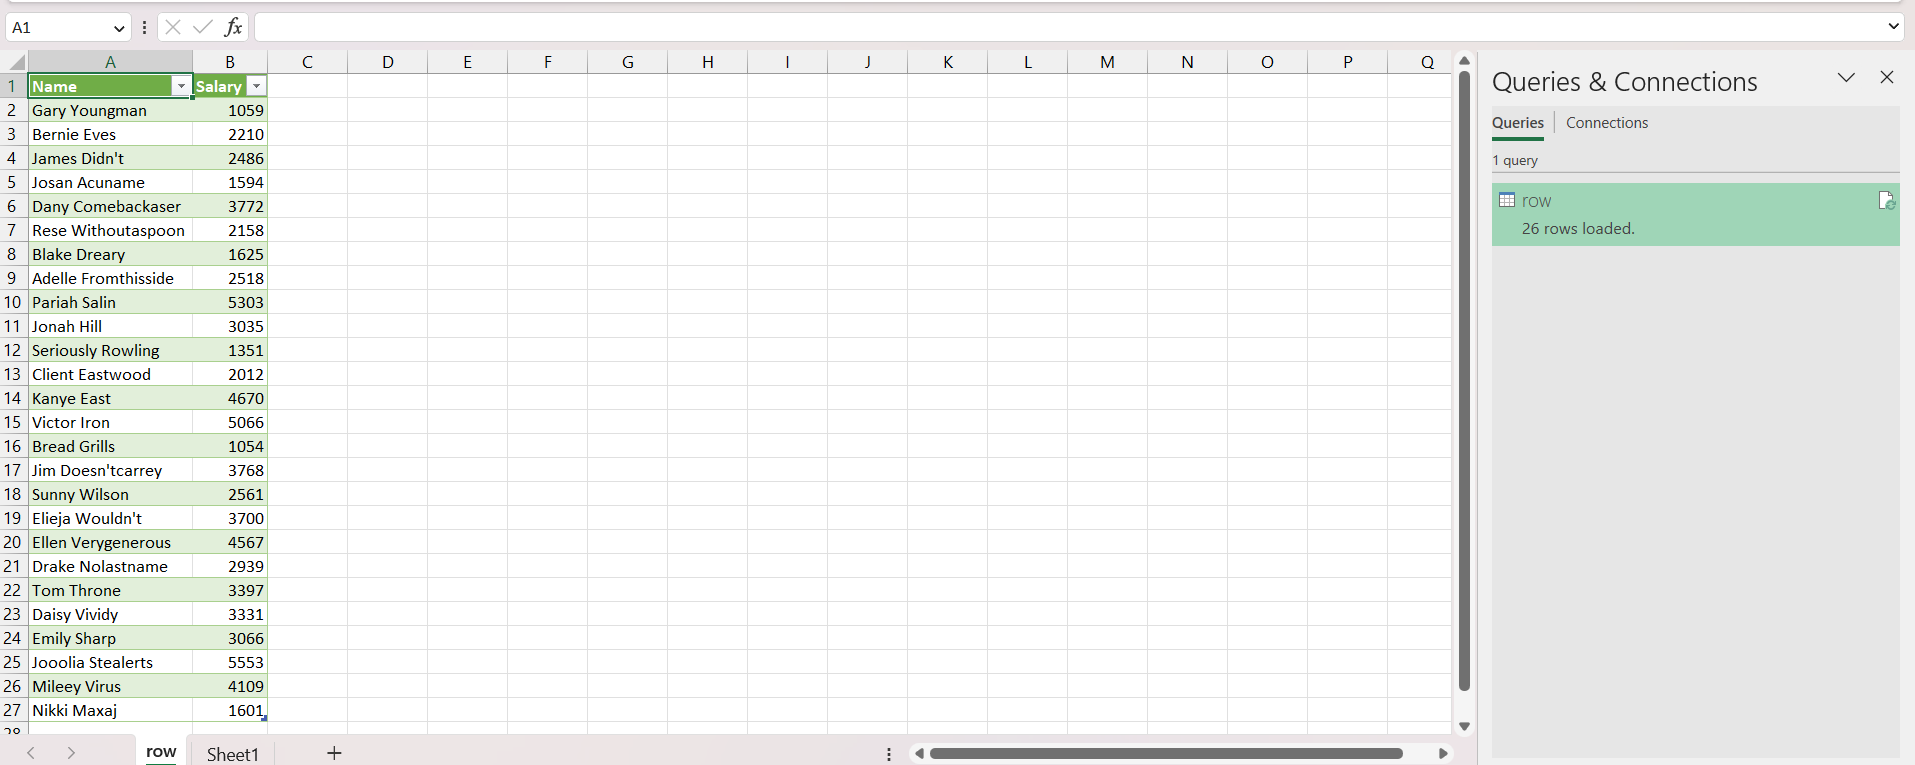
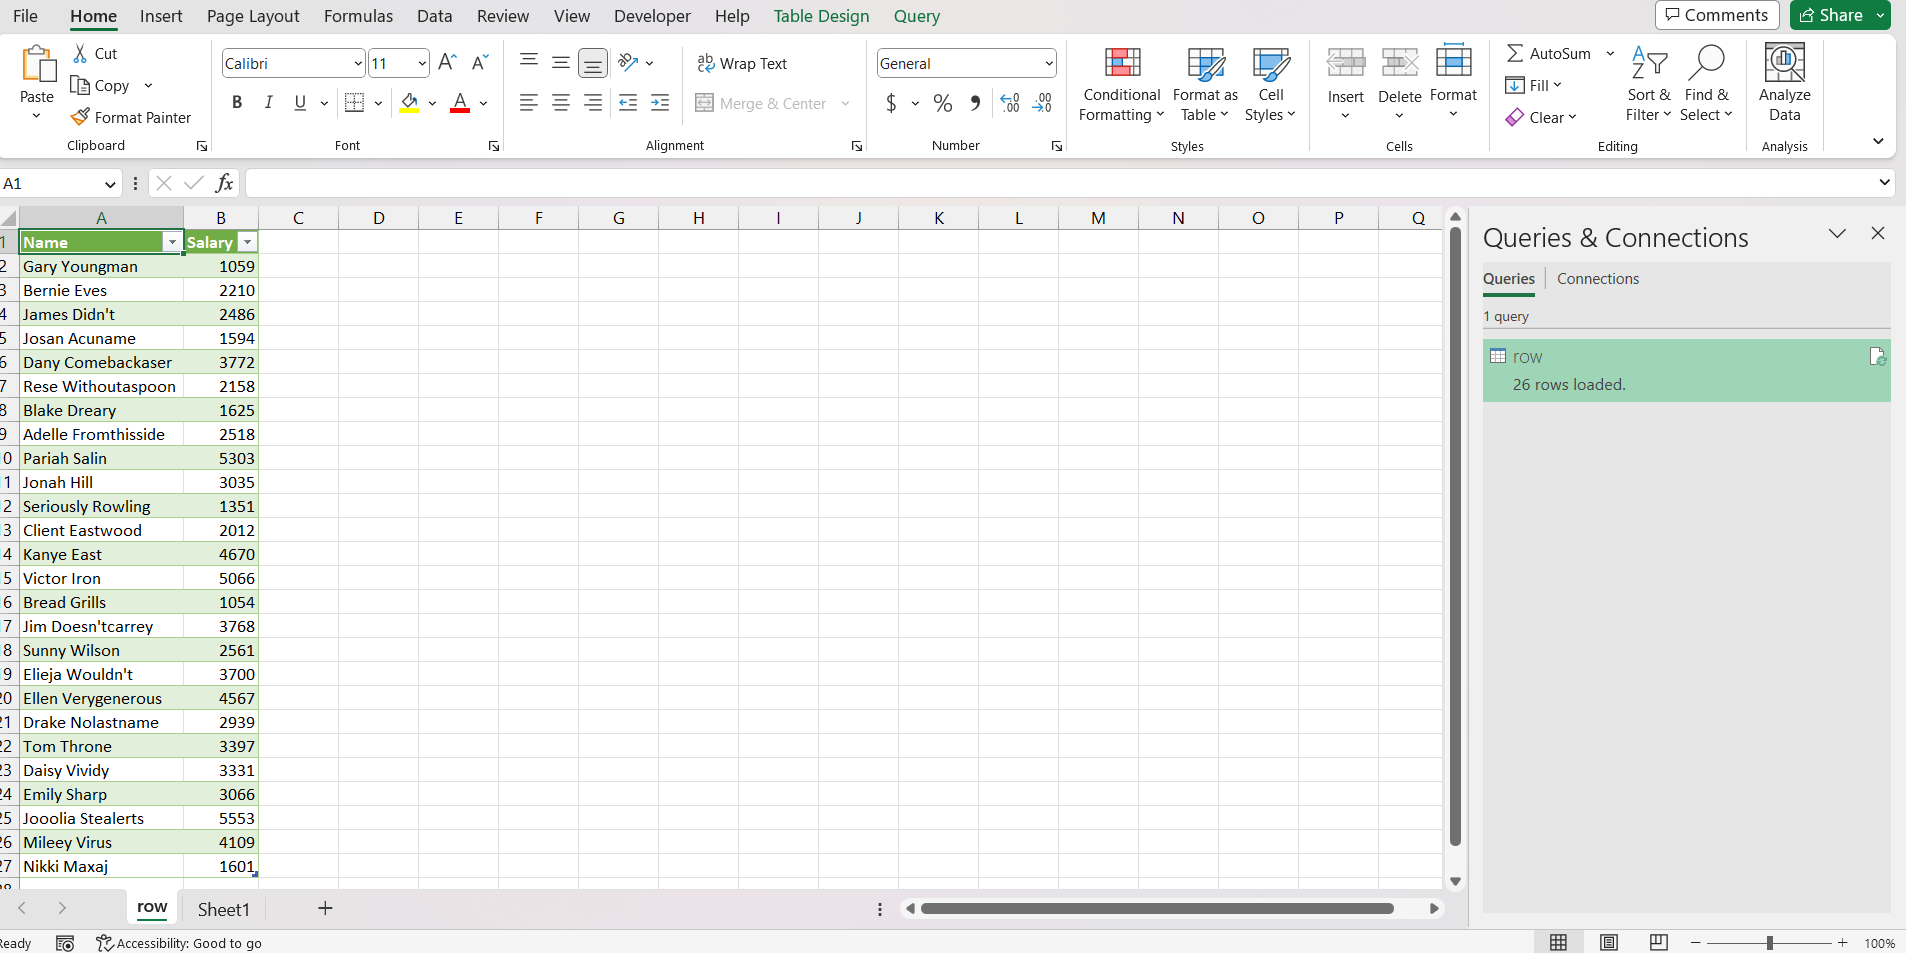
STEP 7: A new worksheet will be added with the XML data in it.
STEP 8: Press Ctrl + S to save the file.
You have successfully converted XML to Excel from a file saved in your system.
Using Web URL
What if we have XML data on a webpage and we want to import it into Excel? Power Query can do that as well. Follow the steps below to know how –
STEP 1: Open a Blank Excel Workbook.
STEP 2: Go to the Data tab located at the top ribbon.
STEP 3: Select From Web.
STEP 4: In the From Web dialog box, enter the URL, and click OK.
STEP 5: In the Access Web Content, Click on Connect.
STEP 6: Select the XML Data Source in the left panel. Here, we will click on “row”.
STEP 7: A preview will be shown, if it looks good click Load.
STEP 8: A new worksheet will be added with the XML data in it.
STEP 9: Press Ctrl + S to save the file.
This will successfully convert XML to Excel from a web URL.
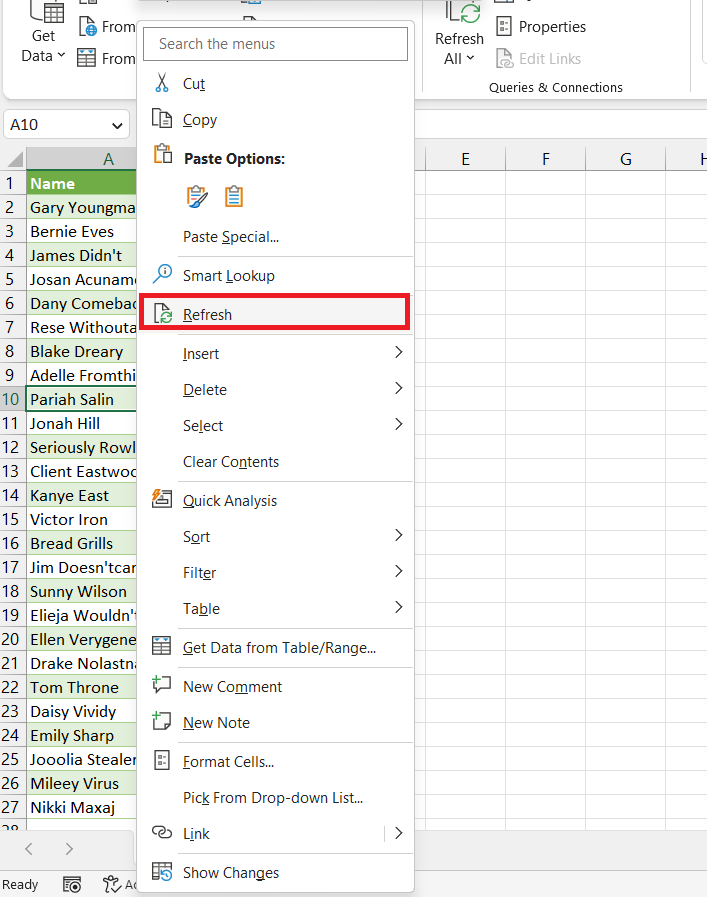
Bonus tip – Whenever data is updated in the XML file, the same will be reflected in the Excel file. You just need to right-click on the Excel table and select Refresh.
Power Query can easily extract data from XML files and convert them into Excel. The file can either be saved on your system or available on a webpage. In the first example, the data was downloaded into your system but in the second example, the data was extracted directly from the webpage.
John Michaloudis is a former accountant and finance analyst at General Electric, a Microsoft MVP since 2020, an Amazon #1 bestselling author of 4 Microsoft Excel books and teacher of Microsoft Excel & Office over at his flagship Academy Online Course.
