Data Entry Forms is an extremely useful feature if inputting data is part of your daily work.
It can help you avoid the mistakes and make the data entry process faster. It also helps you focus on one record at a time!
It is a convenient and faster way to input records in Excel by displaying one row of information at a time without having to move from one column to another.
In this tutorial, we will show you How to Create Form in Excel for Data Entry.
Whenever I wanted to enter data in Excel, it would take me a very long time to input these records one by one, but I discovered a handy trick that can turn my Excel Table into a handy Excel Data Entry Form!
Say goodbye to inputting entering data into this Table row by row by row by row….
Make sure to download the Excel Workbook below and follow along:
Download excel workbookTop-11-Data-Entry-Form-Tips-and-Tricks.xlsx
Want to know how to use the Data Entry Form?
*** Watch our video and step by step guide below with free downloadable Excel workbook to practice ***
Watch it on YouTube and give it a thumbs-up!
Watch it on YouTube and give it a thumbs-up!
Watch it on YouTube and give it a thumbs-up!
Table of Contents
1. Create Form in Excel
I will show you how easy it is to Create Form in Excel for Data Entry with the following quick video below (scroll further down to see the step by step instructions after you watch this awesome video).
*** Watch our video below on How to Create Form in Excel in 5 minutes!***
–
In this tutorial, you have learned how to create form in Excel with minutes without using VBA!!
Follow the steps below:
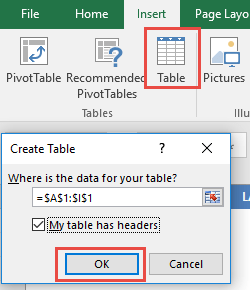
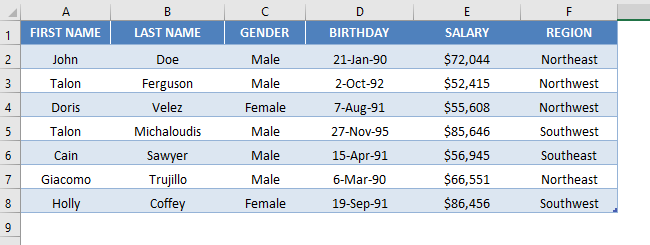
STEP 1: Convert your Column names into a Table, go to Insert> Table
Make sure My table has headers is also checked.
STEP 2:Let us add the Form Creation functionality to understand how to make a fillable form in Excel.
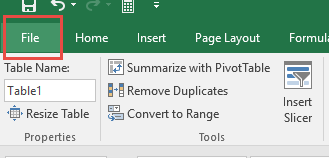
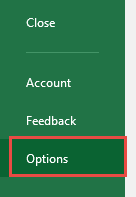
Go to File > Options
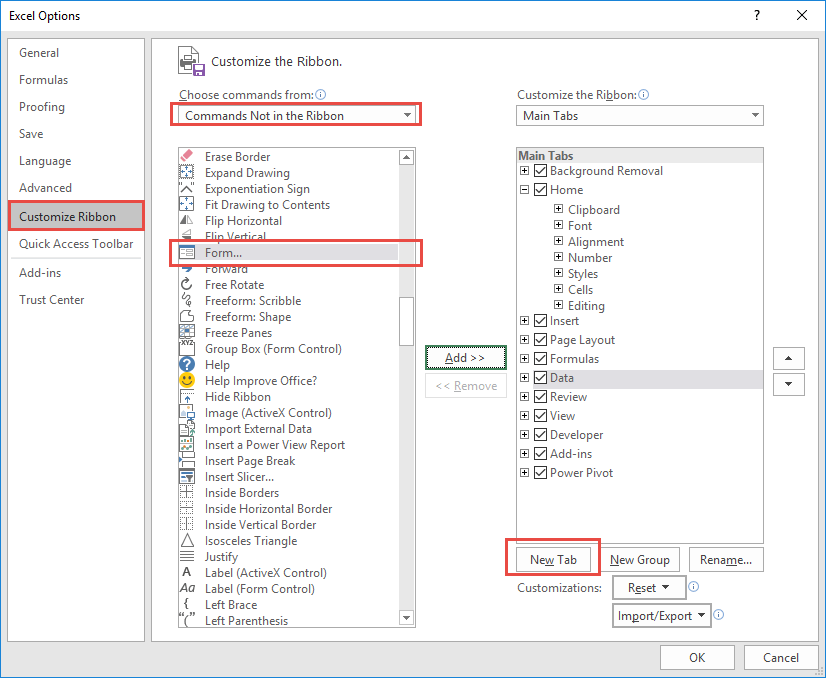
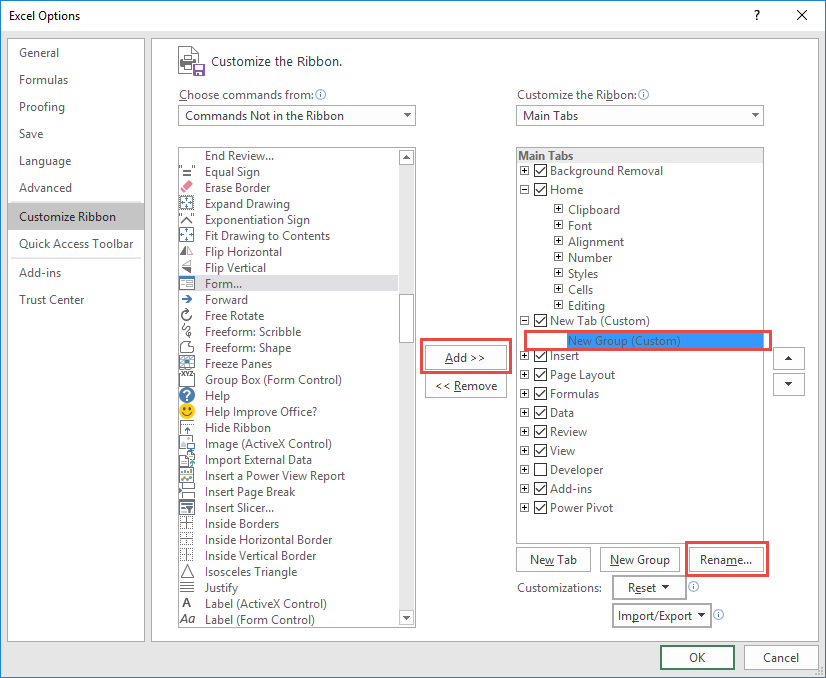
STEP 3:Go to Customize Ribbon.
Select Commands Not in the Ribbon and Form. This is the functionality we need.
Click New Tab.
STEP 4:Under the New Tab, select New Group, and click Add.
This will add Forms to a New Tab in our Ribbon.
Notice that there is also a Rename button, you can use it to rename the New Tab and New Group into something more descriptive, like Form:
STEP 5:Select your Table, and on your new Form tab, select Form.
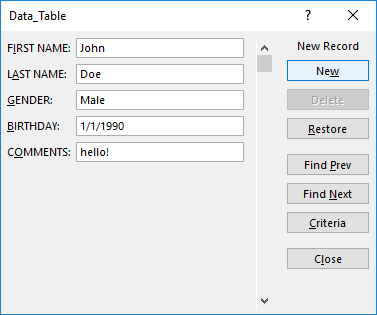
STEP 6: A new Form dialogue box will pop up!
Input your data into each section.
Click New to save it. Repeat this process for all the records you want to add.
Press Close to get out of this screen and see the data in your Excel Table.
You can now use this new form to continually input data into your Excel Table!
2. Add to Quick Access Toolbar (QAT)
Now that you have learned how to create form in Excel, lets put them on your QAT for easy access.
To add to the quick access toolbar, follow the steps below:
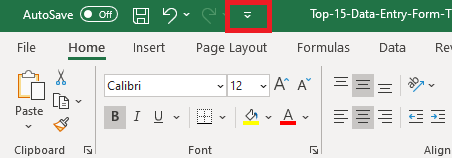
STEP 1: Click on the small arrow right next to QAT.
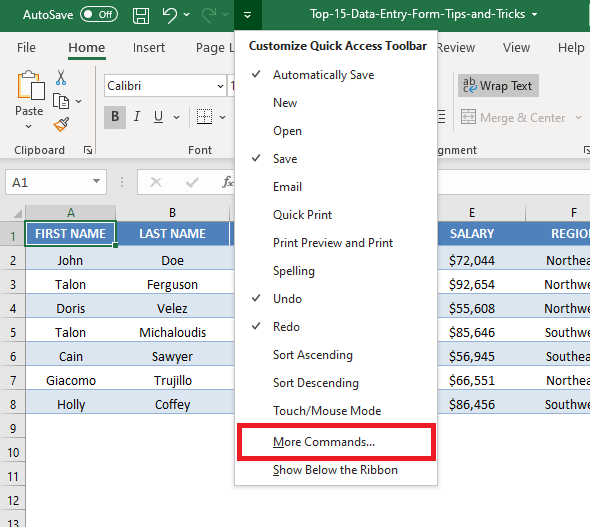
STEP 2: Click on More Commands from the dropdown list.
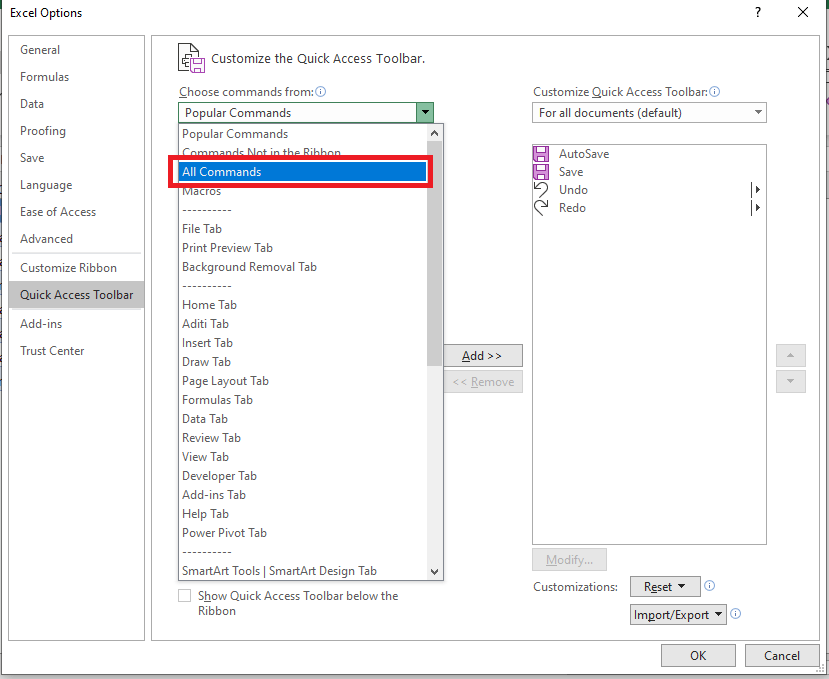
STEP 3: In the Excel Options dialog box, select All Commands from Choose commands from list.
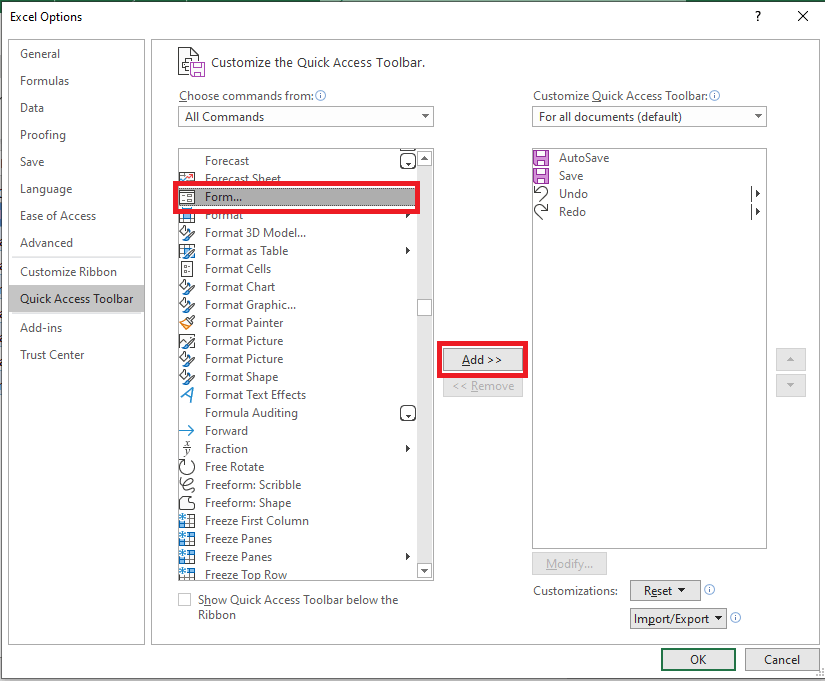
STEP 4: Select Form from the list and then click on Add>>.
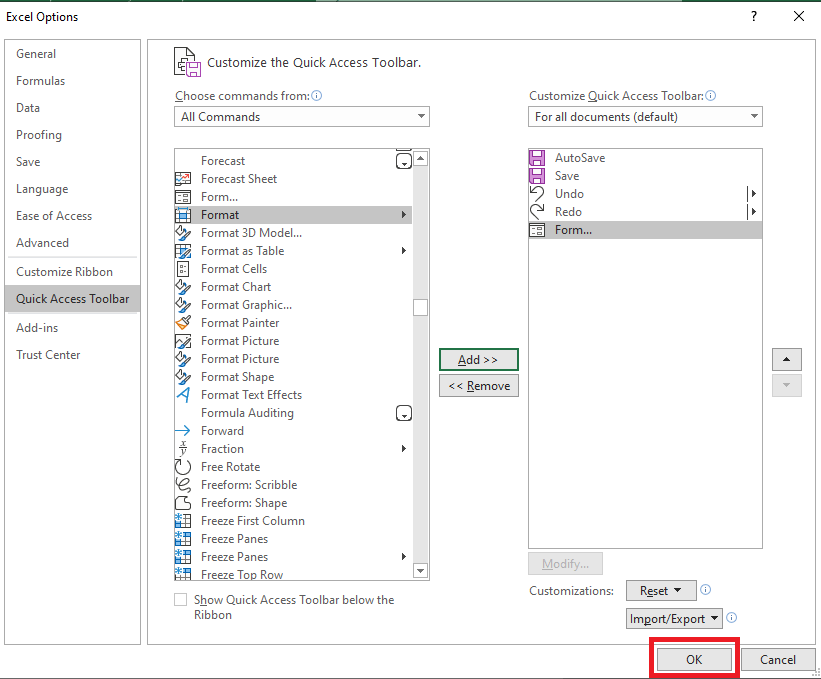
STEP 5: Form is now available in the Customize Quick Access Toolbar. Click OK.
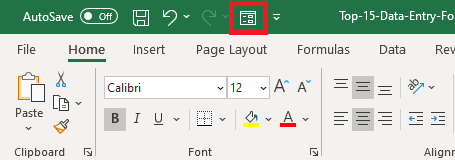
Data Entry Form is now part of your Quick Access Toolbar.
3. Access the Form anytime
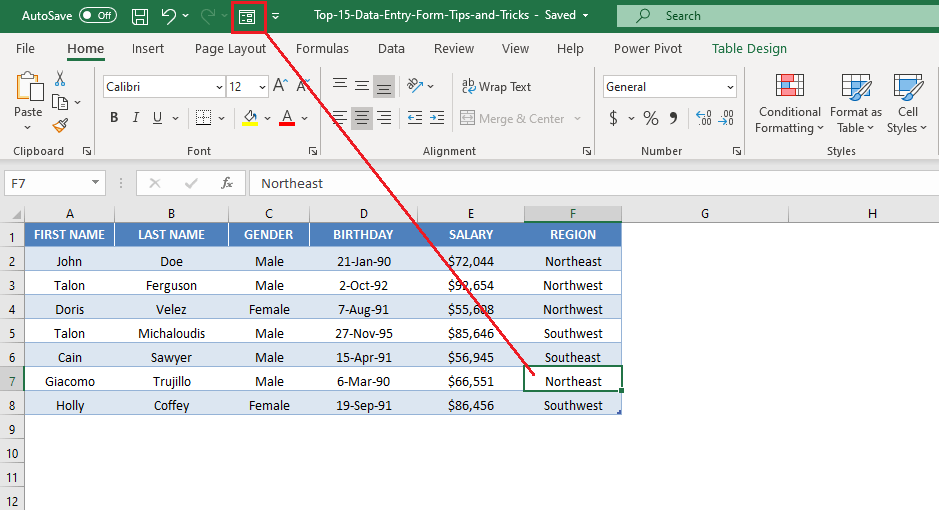
To access the Excel Data Entry Form, click on any cell in the table and click on the Form icon in Quick Access Toolbar.
If you try to access the form when you haven’t selected a cell within the data table, you will receive an error message like the one shown below:
4. Browse through Records
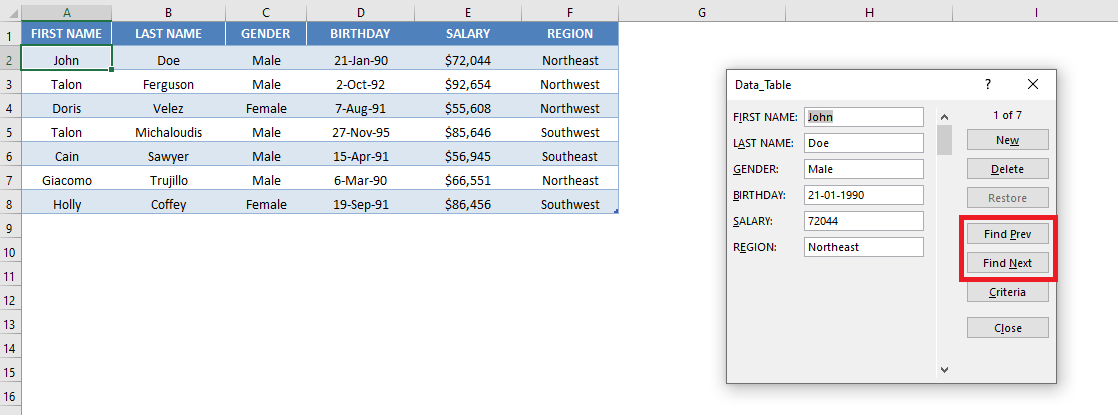
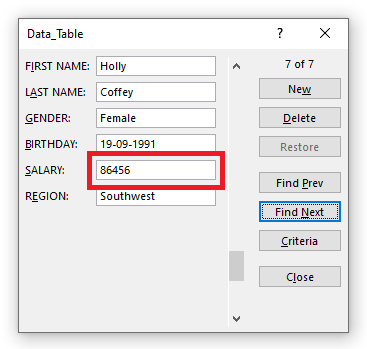
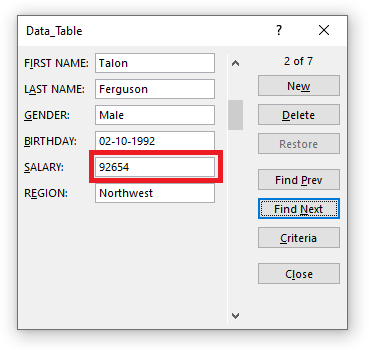
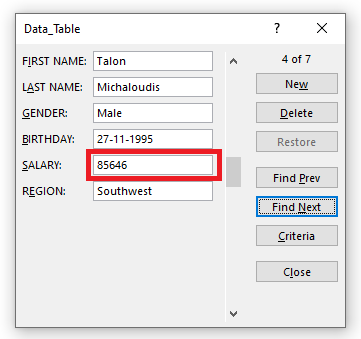
To navigate through the existing records, simply use the Find Previous and Find Next buttons available on the Data Entry Form.
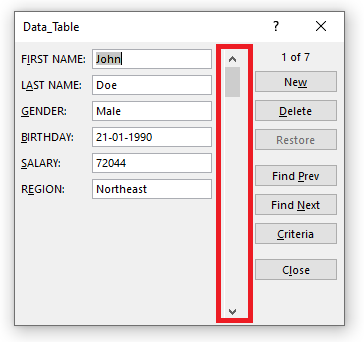
You can also use the scroll bar to go through the records one after the other.
This will save time when you have a data with multiple columns and records.
5. Edit Existing Record
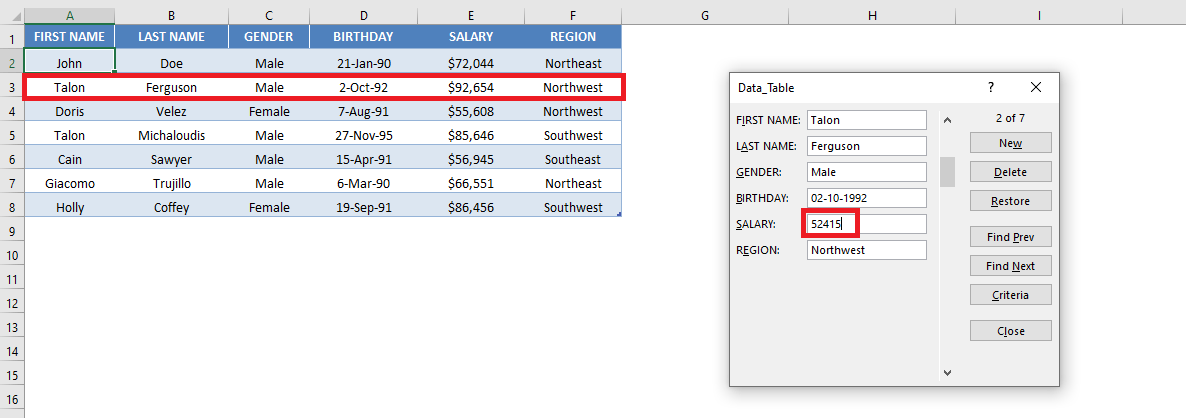
Use the Find Previous and Find Next buttons to search for the record to want to edit.
Once you find the desired record, simply make the necessary edit and hit Enter in Excel.
The data table will be updated with the changes made.
6. Search Criteria
Using Wildcards
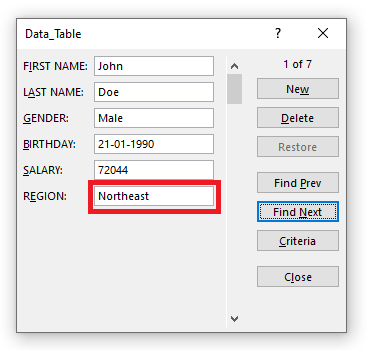
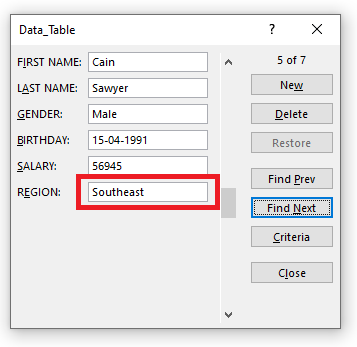
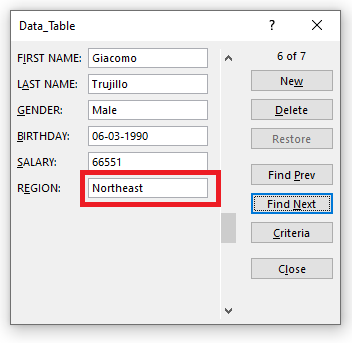
If you wish to search all entries containing the word “east” in the Region Column, you can do that by using the wildcard asterisk (*).
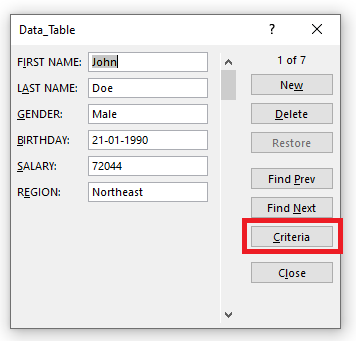
STEP 1: In the Data Entry Form, click on the Criteria button
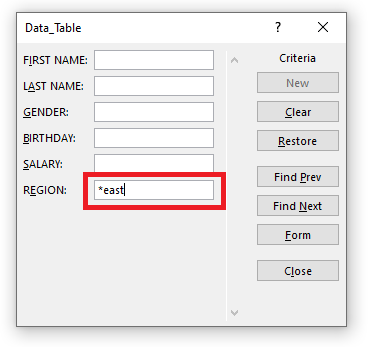
STEP 2: In the Region field, type *east (to search all-region containing the word east)
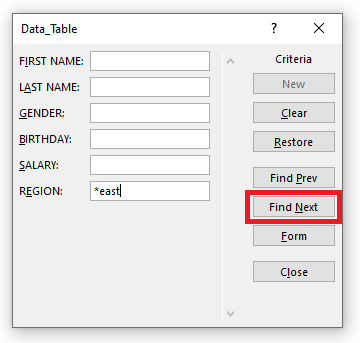
STEP 3: Click Find Next to find the entries containing the word east.
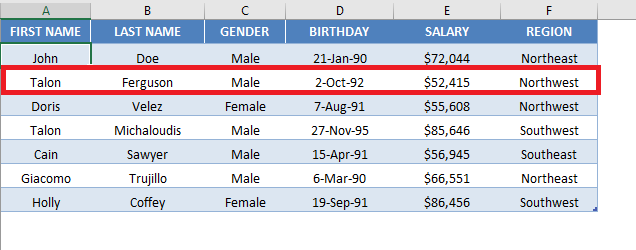
Excel Data Entry Form will find the three entries for you in this scenario!
Using greater or less than sign
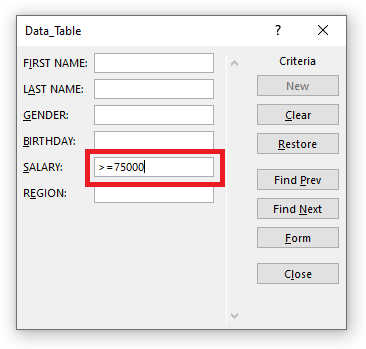
If you want to search for persons having a salary greater than or equal to $75,000, you can do so by following the steps below:
STEP 1: In the Data Entry Form, click on the Criteria button
STEP 2: In the Salary field, type >=75000.
STEP 3: Click Find Next to find all entries with a salary greater than or equal to $75,000.
7. Restore a Record
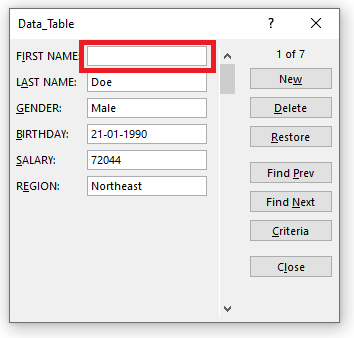
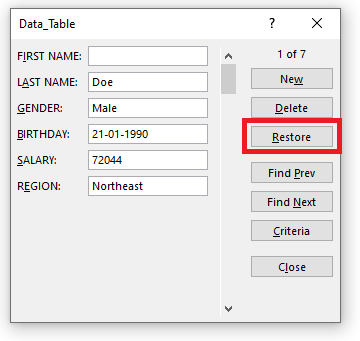
Suppose you have accidentally deleted the first name of a record.
And you don’t remember what was written in that field! Don’t panic.
You can use the Restore button in the Excel Data Entry Form and retrieve the data lost accidentally.
The data will reappear in the respective field.
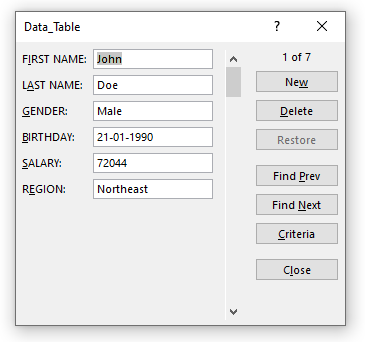
One thing you need to keep in mind is that the Restore button is only useful if you haven’t hit Enter.
The moment you press the Enter button, the Restore button will become inactive and you won’t be able to revert back to the original data.
8. Data Validation in Forms
Even though you cannot directly add any data validation to the form. Any restriction created on the data table will still be in effect in the Forms.
Let’s see how!
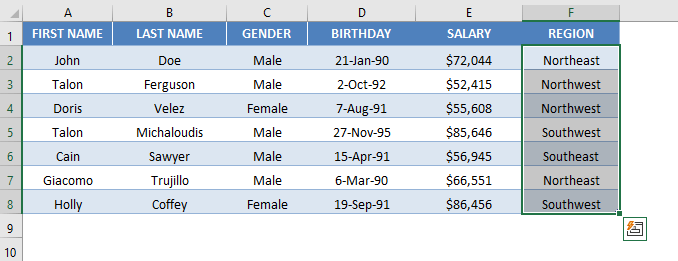
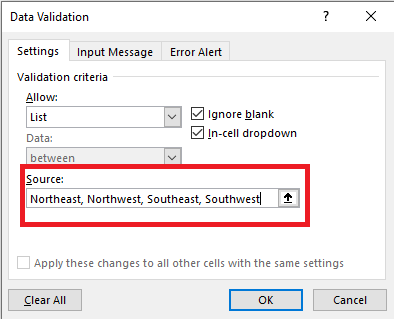
Say, you add a list rule to the Region Column using Data Validation.
STEP 1: Select the Region Column.
STEP 2: Go to Data Tab > Data Tools (Group) > Data Validation.
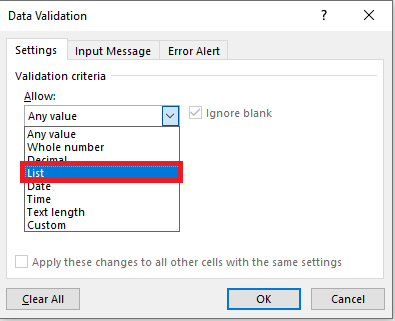
STEP 3: In the Data Validation dialog box, click on the Allow dropdown and select List.
STEP 4: In the Source field, type Northeast, Northwest, Southeast, Southwest, and click OK.
Data Validation has now been inserted in the Region Column where you are only allowed to enter values present in the list (Northeast, Northwest, Southeast, Southwest).
STEP 5: Click on the Forms icon in QAT.
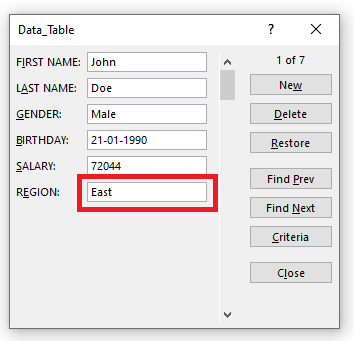
STEP 6: Change the Region for Record 1 from Northeast to East and Click OK.
Once you click OK, you will see an error message as below:
9. Delete a Record
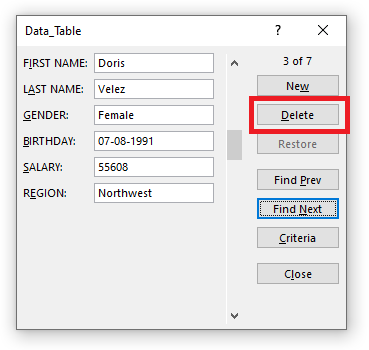
STEP 1: Use the Scroll Bar to navigate to find the entry you want to delete.
STEP 2: Simply, click on the Delete button.
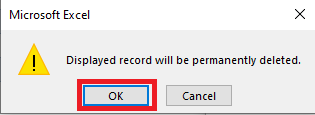
STEP 3: A confirmation message will appear on your screen, Click OK.
The desired entry will be removed from the data table.
10. Close the Form
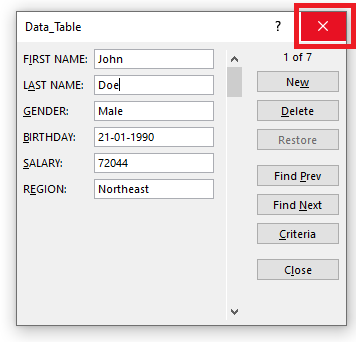
To close the dialog box for Data Forms, simply click on the Close button (X) on the top-right corner of the bix.
11. Keyboard Shortcuts for Data Entry Forms
You can use the following keyboard shortcuts to work faster when using Data Entry Forms:
- Press Tab to go to the next field in the Excel Forms.
- Press Enter to go to the next record in the Excel Forms.
- Hit the Esc button on your keyboard to close the Excel Form.
Conclusion
This completes our tutorial on the Top 11 things you should know if Data Entry is what you do in Excel. It will not only make the process faster but also a lot more easier and fun!
Few things to keep in mind when using the Excel Data Entry Form are:
- You can add a maximum of 32 fields per record.
- You cannot print a data form record.
- Before you hit Enter, you can restore any changes made to the data.
So, give it a try! I am sure you are gonna love it!!
You can know more about How to Create Form in Excel by going through this tutorial by Microsoft.
You can continue to learn more about dependent dropdown lists, data validation, and logical formulas.
Bryan
Bryan is a best-selling book author of the 101 Excel Series paperback books.


