Download our 141 Free Excel Templates and Spreadsheets!
Key Takeaways
- To crop two images to same size in PowerPoint, first insert all images, note the dimensions of the image you want to match, then use the crop tool to adjust each image individually by setting the Crop position values under Format Picture.
- Utilize the Picture Layout dropdown in PowerPoint to select a consistent layout for multiple images, ungroup the layout twice, and remove any additional elements to ensure all images are cropped to the same size.
- For further customization, after using the Picture Layout tool to match size, you can optionally adjust each photo’s X and Y crop offsets and even change the picture shape if desired to fine-tune the appearance of the images.
Overview of the Crop Tool and Its Capabilities
The crop tool in PowerPoint is impressively powerful and intuitive, allowing you to trim unwanted parts of your images and focus on what’s important. Not only can you cut images down to size, but you can also use the tool to shape your images to better fit your content. Beyond just cropping to rectangles, you can crop to circles, arrows, stars, or any of the other diverse shapes PowerPoint offers. With the crop tool, you’re not just resizing; you’re reshaping and refining your images to create a more dynamic and customized presentation.
Table of Contents
Getting Started with Basic Cropping Techniques
Step-by-Step Guide to Cropping an Individual Image
To crop an image in PowerPoint, you need to:
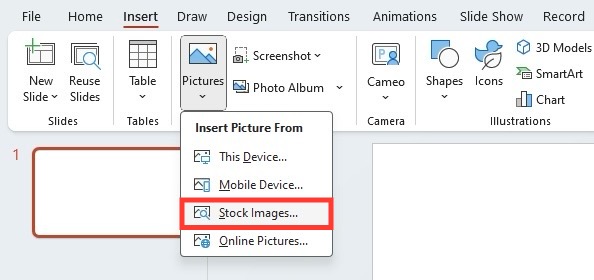
STEP 1: Insert the desired image into your presentation by picking the “Insert” tab and selecting “Pictures.” Choose the image source from the drop-down menu.
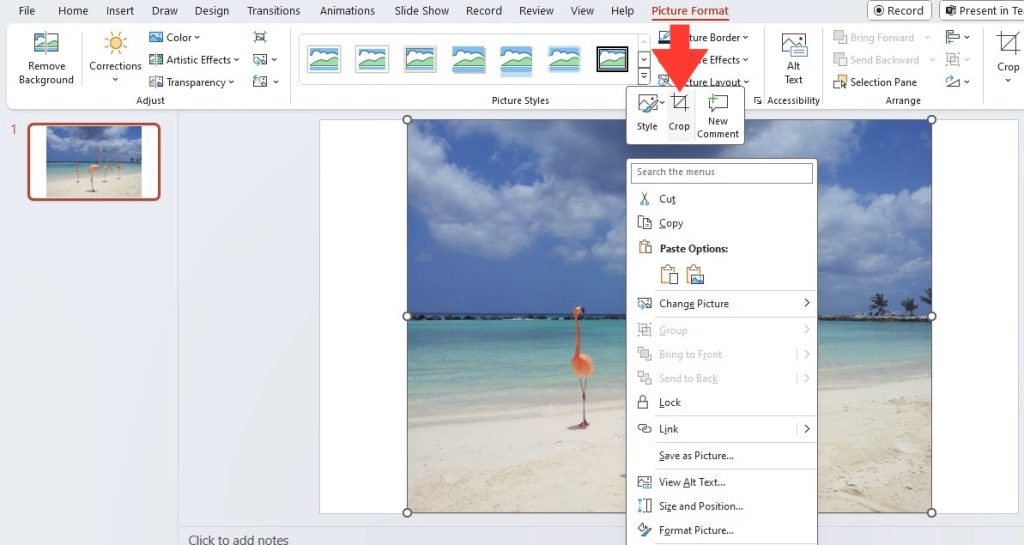
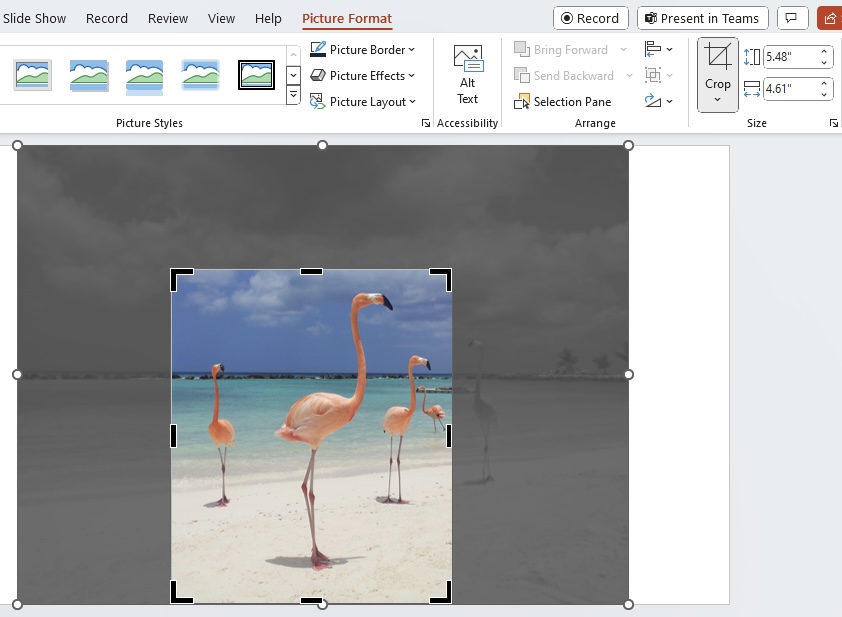
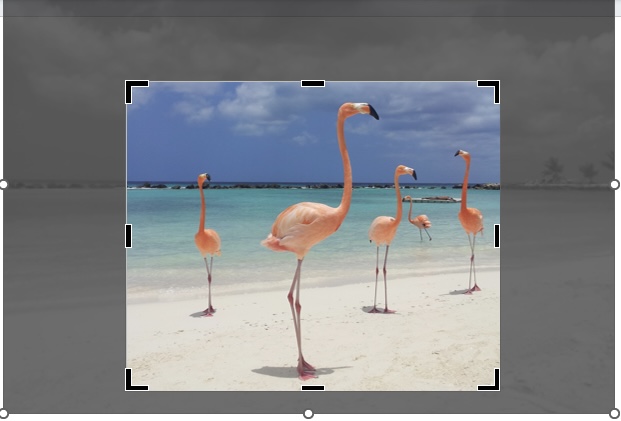
STEP 2: Click on the image and right-click to access a pop-up menu where you will find the “Crop” option, which brings up black crop handles around the edges of the image.
STEP 3: Adjust the crop area by clicking and dragging the handles. You can crop from any side or corner of your image, and to maintain the aspect ratio, press and hold the ‘Shift’ key while dragging a corner handle.
STEP 4: Once you’re satisfied with the new boundaries, click anywhere outside the image or press the “Enter” key to apply the crop.
Adjusting Crop Size to Maintain Aspect Ratio
Maintaining the aspect ratio is key when adjusting images to ensure they don’t stretch or skew. Here’s how to do it:
STEP 1: After selecting the image, go to the ‘Picture Format’ tab.
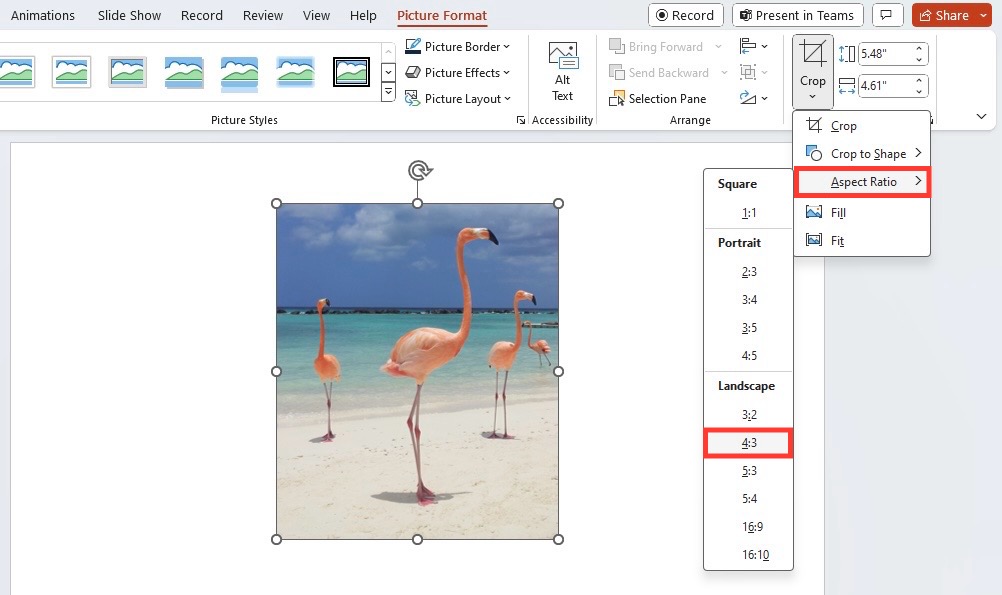
STEP 2: Click on the ‘Crop’ button, then choose ‘Aspect Ratio’ from the dropdown menu.
STEP 3: Select your preferred ratio, such as 16:9 for widescreens or 4:3 for standard screens.
STEP 4: The image will adjust to the chosen aspect ratio, displaying a preview of the crop.
STEP 5: Resize the crop frame if needed by dragging the edges or corners.
STEP 6: Reposition the image within the frame by clicking and dragging it to ensure the most important parts are included.
STEP 7: To finalize the crop with the maintained aspect ratio, click on the ‘Crop’ button again or press the ‘Esc’ key.
Remember, using aspect ratios is ideal when you’re working with images that need to fit certain display dimensions or when consistency across multiple images is required.
Advanced Cropping: Matching Two Images
Selecting and Preparing Images for Uniform Cropping
Before diving into the uniform cropping process, select and prepare your images with care:
- Choose images that are similar in resolution and quality. This ensures that when they are cropped to the same size, they maintain clarity and sharpness.
- Consider the subject and composition of each image. Ensure they can be cropped without losing essential elements.
- For a batch of images to be cropped uniformly, group them together in one slide or across multiple slides for easier access and visualization.
By preparing your images thoughtfully, the uniform cropping will be both efficient and effective in creating a professional and polished presentation.
Using PowerPoint’s Picture Layout for Consistent Sizing
PowerPoint’s Picture Layout tool offers a quick solution to consistent sizing:
STEP 1: Select the images you want to size uniformly by holding down the ‘Ctrl’ key and clicking on each image.
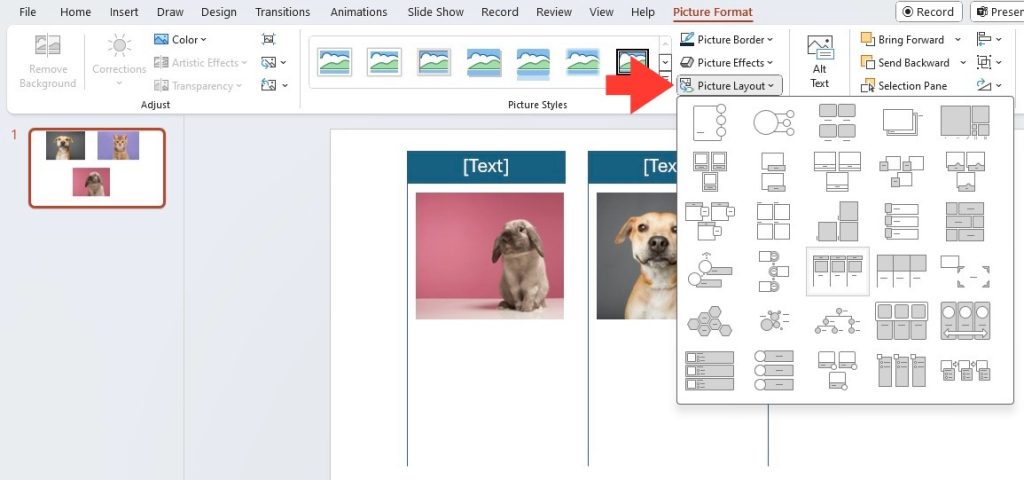
STEP 2: Navigate to the ‘Picture Format’ tab and click on ‘Picture Layout’ in the ‘Picture Styles’ group.
STEP 3: From the gallery of styles, choose one that best suits your design needs. ‘SmartArt’ styles offer a variety of layouts that accommodate multiple images with text.
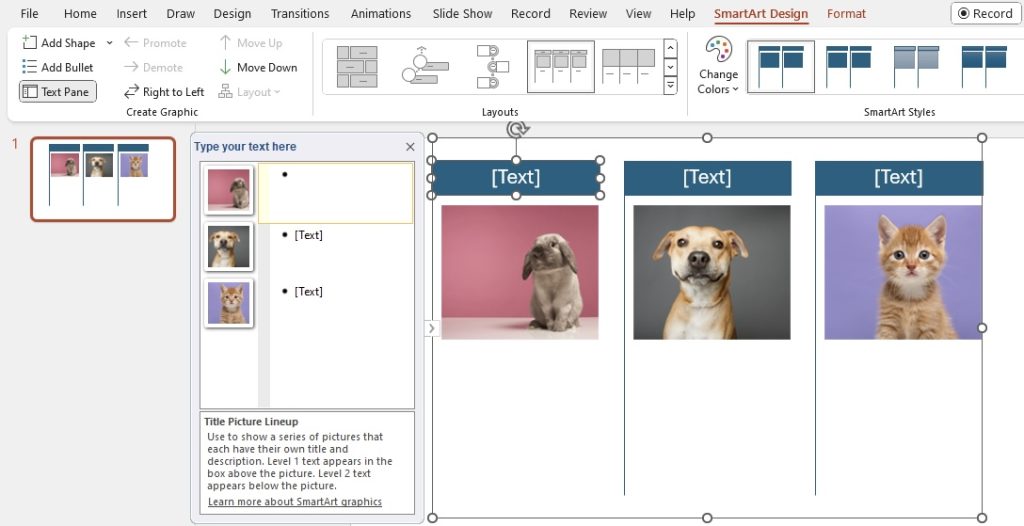
STEP 4: Once a layout is selected, PowerPoint automatically resizes and aligns images to fit the chosen structure. You can customize the SmartArt to fine-tune the appearance.
This method not only sizes your images consistently but can also add a professional touch with minimal effort.
Fine-Tuning Your Cropped Images
Aligning and Positioning Images After Cropping
After you’ve finished cropping, aligning, and positioning images takes precision. Here’s what to do for a picture-perfect slide:
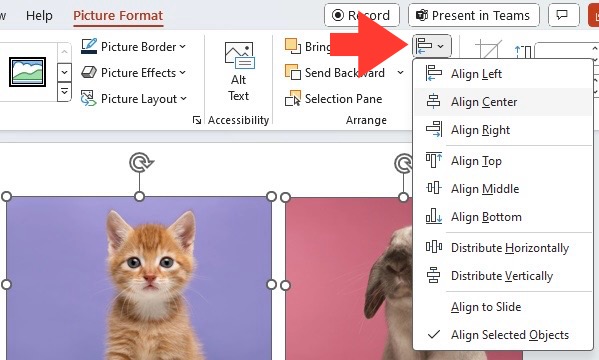
STEP 1: Utilize the ‘Align’ tool under the ‘Picture Format’ tab, selecting options like ‘Align Left,’ ‘Align Center,’ or ‘Align Right’ to tidy up the general placement.
STEP 2: Use the ‘Position’ option to place your images at an exact location on your slide, which is particularly useful if you’re aligning images across multiple slides.
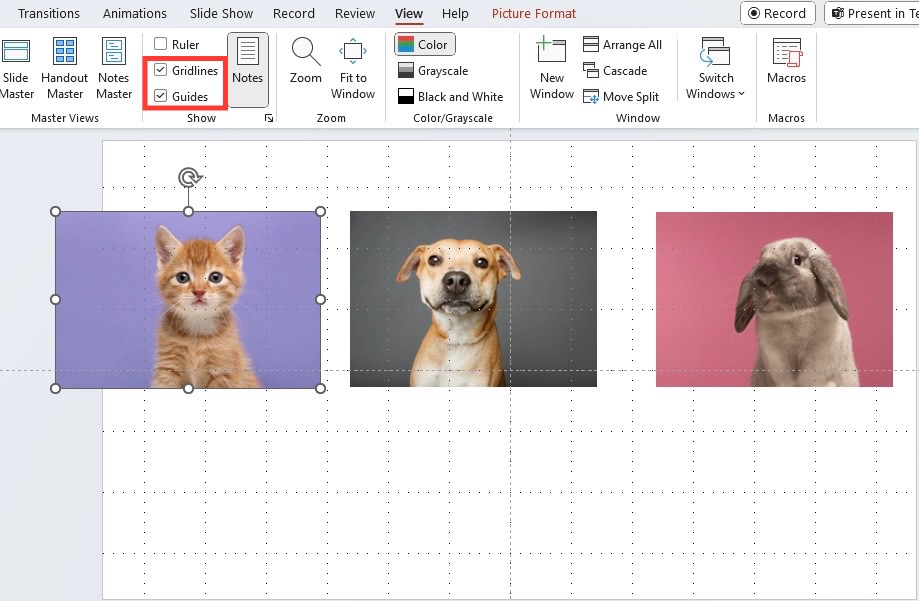
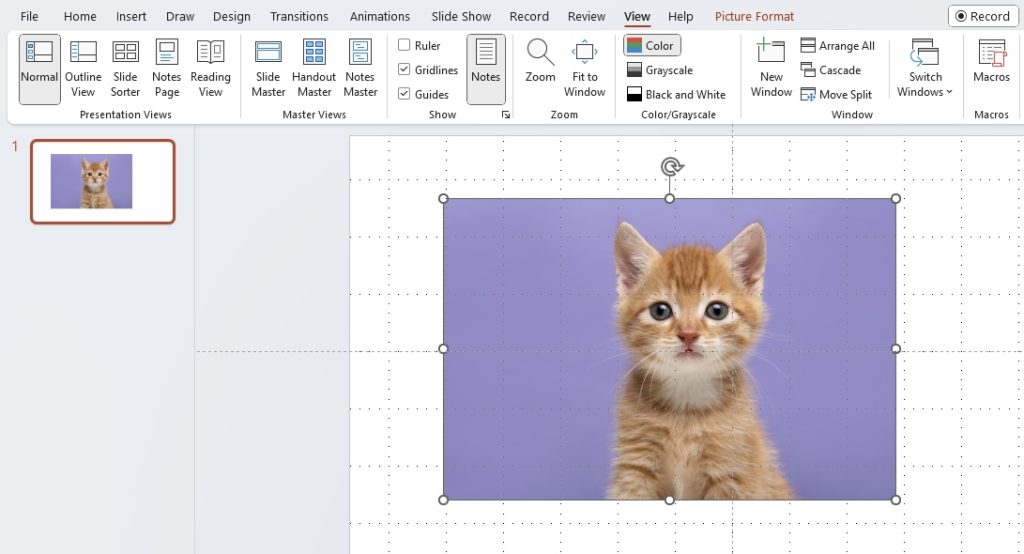
STEP 3: Turn on the ‘Grid and Guides’ feature by going to the ‘View’ tab and checking the ‘Grid and Guides’ box for assistance in manual alignment.
Fine-tuning the position of your images post-cropping helps enhance the sense of harmony and balance in your presentation’s layout.
Resizing Handles and Precision Tools for Perfect Fit
For those delicate adjustments, resizing handles and precision tools in PowerPoint are your best friends. By following these steps, you can ensure your images are resized just right:
STEP 1: To start with general resizing, select your image and use the corner handles. They allow you to scale the image proportionally, so you don’t distort its original aspect ratio.
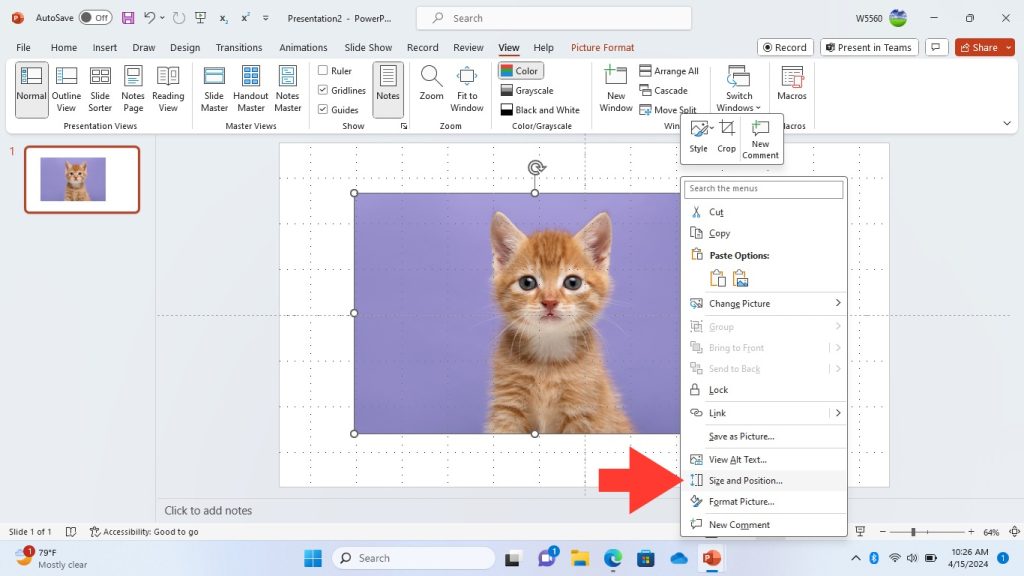
STEP 2: For more precise control, right-click the image and choose ‘Size and Position.’ Here, you can enter the exact dimensions or scale percentage.
STEP 3: Use the “Alt” key while dragging resize handles for finer control of your adjustments—this lets you move the handles in smaller increments for a perfect fit.
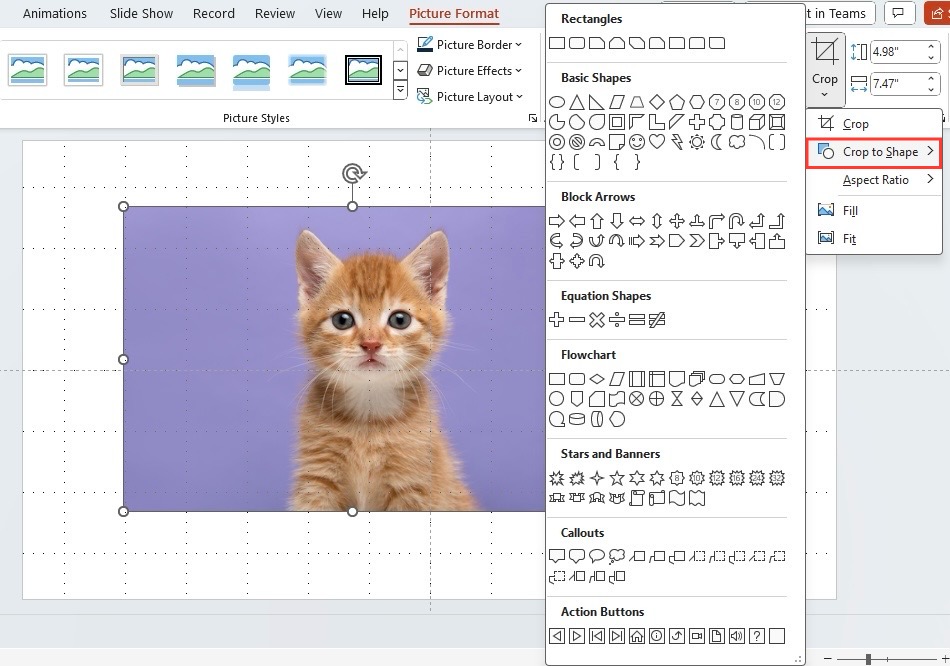
STEP 4: Additionally, under the ‘Picture Format’ tab, you can utilize ‘Crop to Shape’ and other detailed tools that give you full control over the final appearance of your images.
These features ensure that your images look as though they’ve been custom-fitted to your slides, right down to the last pixel.
Filling a Shape with a Cropped Image
For a more impactful visual, you can fill a shape with a cropped image. Here’s the method:
STEP 1: After inserting your shape into the slide, right-click on it and choose ‘Format Shape’ from the context menu.
STEP 2: In the ‘Format Shape’ pane, select the ‘Fill’ option and choose ‘Picture or texture fill’.
STEP 3: Click ‘Insert’ to choose an image file that will fill the shape.
STEP 4: Use the ‘Offset’ settings under the ‘Fill’ options to adjust the position of the image inside the shape.
This technique is perfect when you want your graphics to be more than just images; they become integral parts of your design scheme.
Common Issues and Troubleshooting Tips
Managing Cropped Areas and File Size
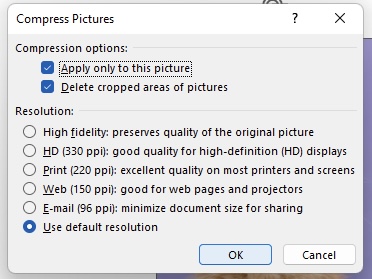
Managing cropped areas of your images in PowerPoint is vital for both aesthetics and file size efficiency. When you crop an image, the cropped-out portions aren’t deleted right away; they’re just hidden. To manage them and reduce your file size:
STEP 1: Click the image you’ve cropped to select it.
STEP 2: On the ‘Picture Format’ tab, click ‘Compress Pictures’.
STEP 3: Tick the ‘Delete cropped areas of pictures’ checkbox to permanently remove the hidden parts.
STEP 4: You can also select ‘Selected pictures only’ to apply this compression to certain images and not all images in the document.
Remember, deleting cropped areas can’t be undone, so ensure you’re completely satisfied with your image crops before you remove these areas.
FAQ: Frequently Asked Questions
How Do I Ensure Images Stay the Same Size After Cropping?
To ensure images stay the same size after cropping in PowerPoint, use the ‘Size’ group options in the ‘Picture Format’ tab to manually set the height and width for all selected images, which maintains dimensions exactly as intended. Remember to keep them uniform and proportional for a consistent look.
Can I Crop Multiple Images at Once in PowerPoint?
Yes, you can crop multiple images at once in PowerPoint by selecting all the images you want to crop, then using the ‘Picture Layout’ tool in the ‘Picture Format’ tab to apply a uniform SmartArt style, which automatically resizes them to a consistent shape and size.
How do I Format pictures to the same size in PowerPoint?
To format pictures to the same size in PowerPoint, select all images, right-click and choose ‘Size and Position.’ Enter the same height or width for each picture to ensure uniformity. Alternatively, use the ‘Picture Format’ tab to specify exact dimensions for a group of images at once.
John Michaloudis is a former accountant and finance analyst at General Electric, a Microsoft MVP since 2020, an Amazon #1 bestselling author of 4 Microsoft Excel books and teacher of Microsoft Excel & Office over at his flagship Academy Online Course.
