Mastering date formats in Microsoft Excel is crucial for effective data management. Excel’s powerful date functionality facilitates efficient sorting, filtering, and analysis, but improper formatting can cause issues. Understanding and customizing date formats ensures your data is clear, consistent, and compatible with various systems. By grasping Excel date essentials, you can avoid pitfalls and enhance data handling efficiency.
Key Takeaways:
- The YYYY-MM-DD format, aligned with the ISO 8601 standard, ensures data clarity, consistency, and international recognition, facilitating sorting and filtering.
- Excel treats dates as sequential serial numbers from January 1, 1900, which can lead to ambiguities based on regional settings, highlighting the need for precise date entries.
- Customize date formats via the Format Cells dialog (Ctrl + 1 or the Home tab). Using YYYY-MM-DD ensures consistency and readability, improving data management.
- Convert dates to YYYY-MM-DD easily if recognized by Excel. Use the DATEVALUE function or Text to Columns wizard for text strings.
Table of Contents
Introduction to Excel Date Formats
Navigating the Intricacies of Excel Dates
Diving into Excel’s world can often feel like you’re navigating a complex calendar, especially when it comes to dates. You might find yourself asking why certain dates display oddly or why they don’t seem to match up with your regional settings. Understanding the intricacies of Excel dates means mastering how they’re stored and represented, which is key to managing data effectively and avoiding common pitfalls that come with date formatting.
Why YYYY-MM-DD Format is Essential for Data Management
Adopting the YYYY-MM-DD date format in data management isn’t just about preference; it’s a strategic move for clarity and consistency. This format aligns with the ISO 8601 standard, ensuring that your data is not only easily understandable but also internationally recognized. It comes in handy for sorting and filtering, as starting with the year places all dates in chronological order.
Moreover, space-saving and avoiding confusion between regional date formats are significant advantages that can streamline processes, especially when transferring data across different systems. In the realm of data management, settling on the YYYY-MM-DD format is a game-changer.
Understanding Default Date Settings in Excel
How Excel Interprets Date Inputs
When you feed dates into Excel, it uses its own internal system to interpret and store this information. Excel sees dates as sequential serial numbers, with each number representing a single day since the base date, January 1, 1900. So, whenever you type a date, Excel crunches it into an integer and then displays it according to the date formatting you’ve chosen.
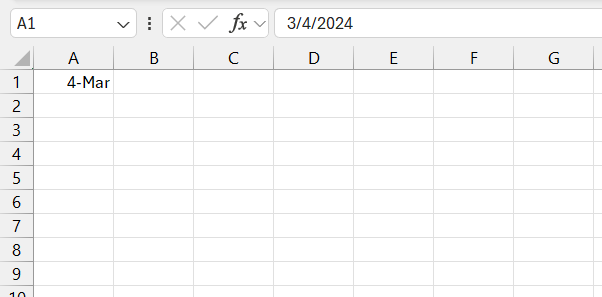
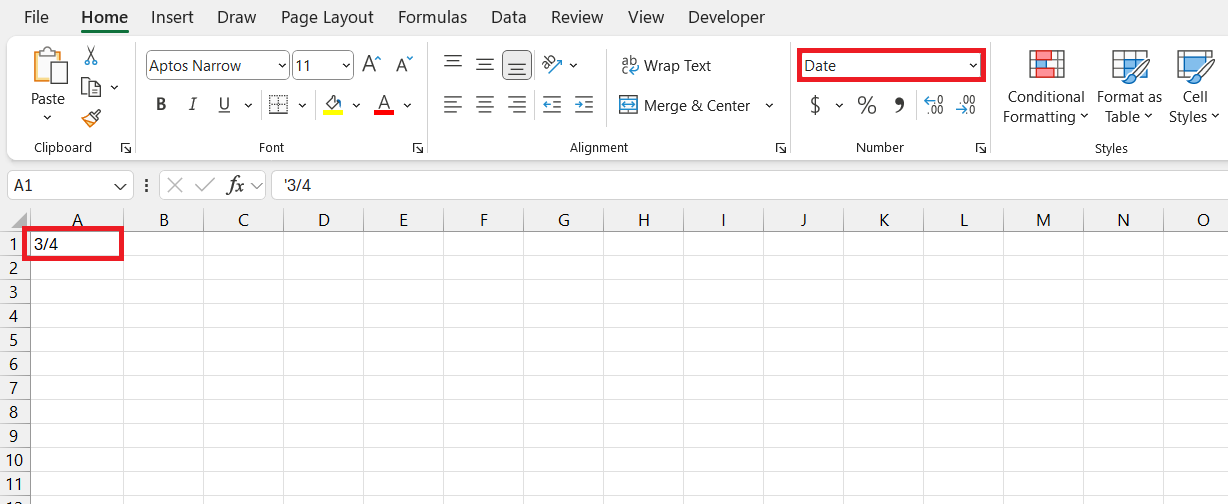
This might lead to some unexpected surprises if your input is ambiguous. For instance, typing “3/4” could be interpreted as March 4th or April 3rd, depending on your regional settings. That’s why it makes a world of difference to ensure you’re crystal clear when entering dates and Excel knows exactly how to handle them.
Step-by-Step Guide to Setting Up YYYY-MM-DD Format
Accessing the Format Cells Dialog Box
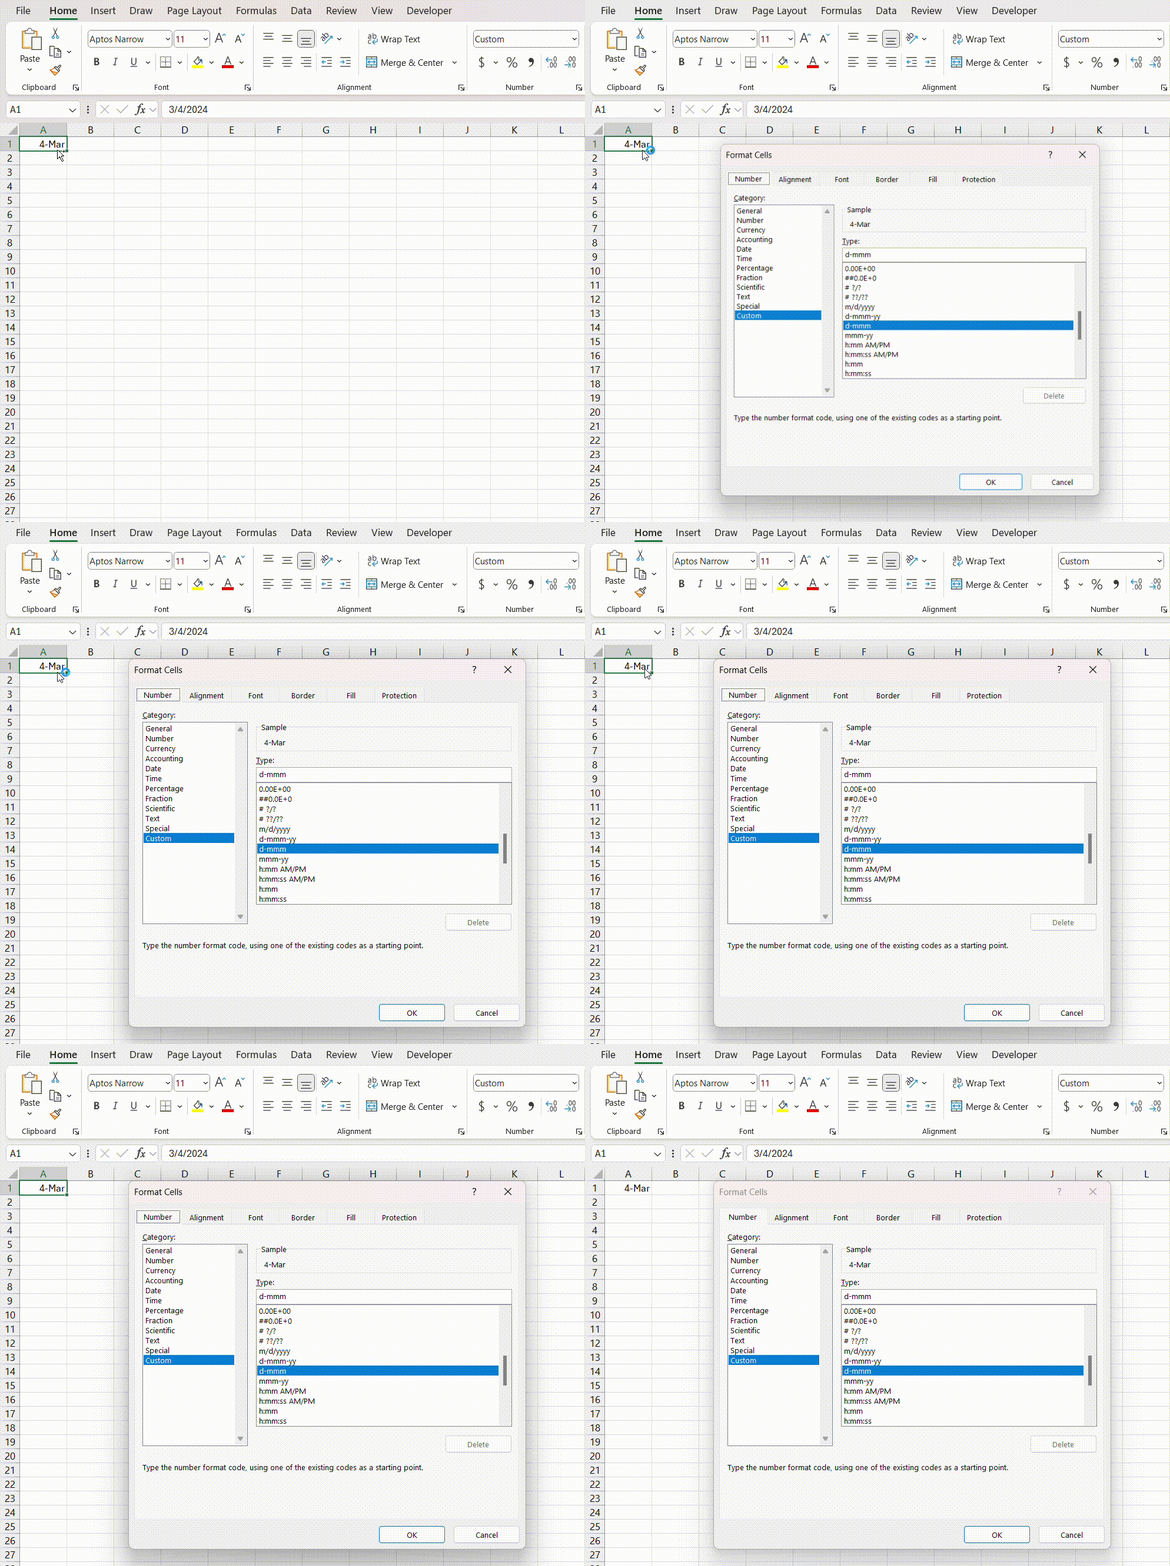
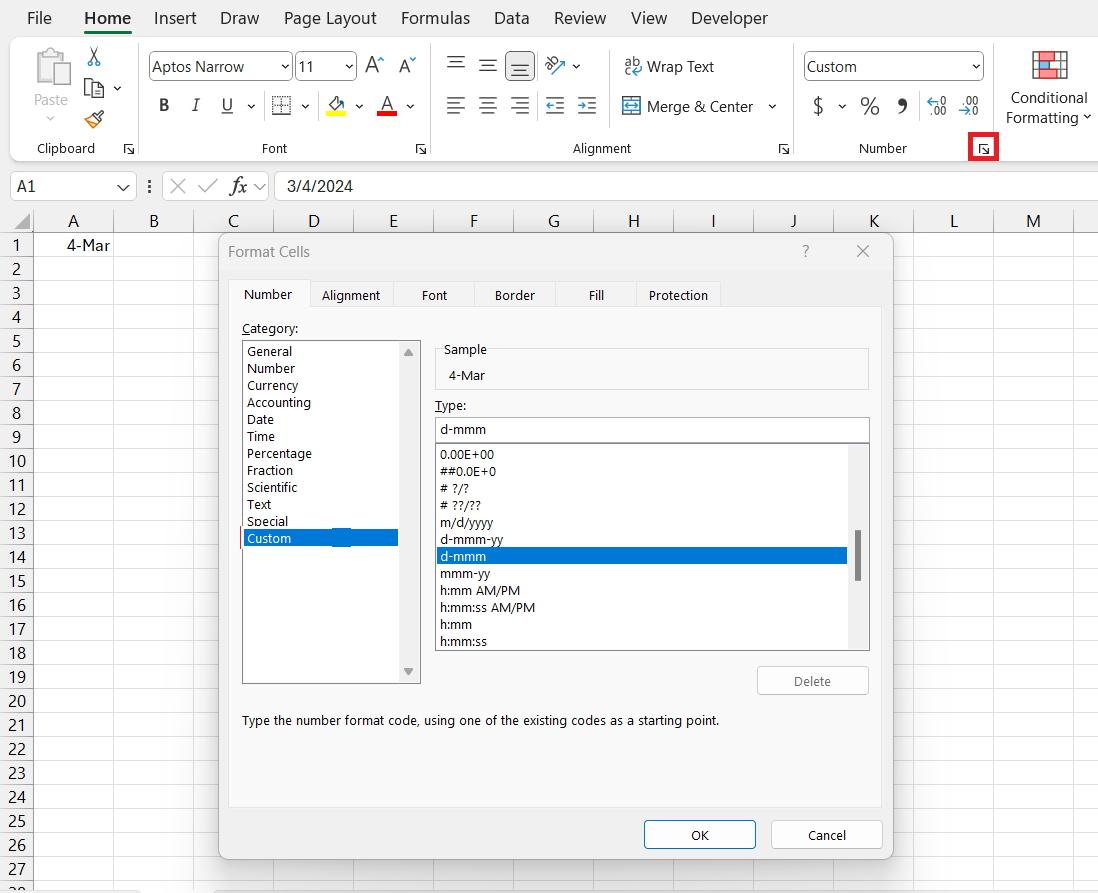
Getting to the Format Cells dialog box is your first step to date format mastery in Excel, and it’s not much of a leap. Simply select the cells that need a new date format and then tap ‘Ctrl + 1’. This nifty shortcut whisks you away to the land of formatting.
Or, for those who prefer a scenic route, click on the Home tab and find the little arrow in the corner of the Number group to open the same dialog box. Once you’re there, a world of formatting options is just a click away, waiting to transform your data presentation.
Crafting the Perfect Custom Date Format
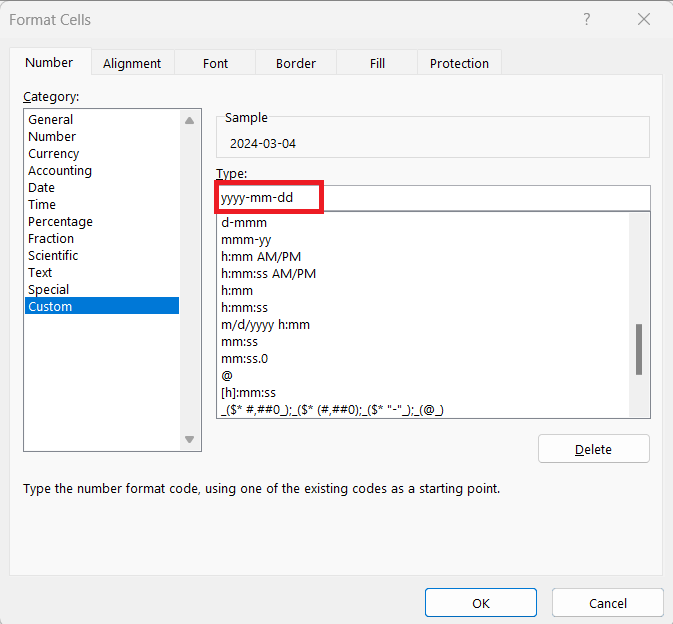
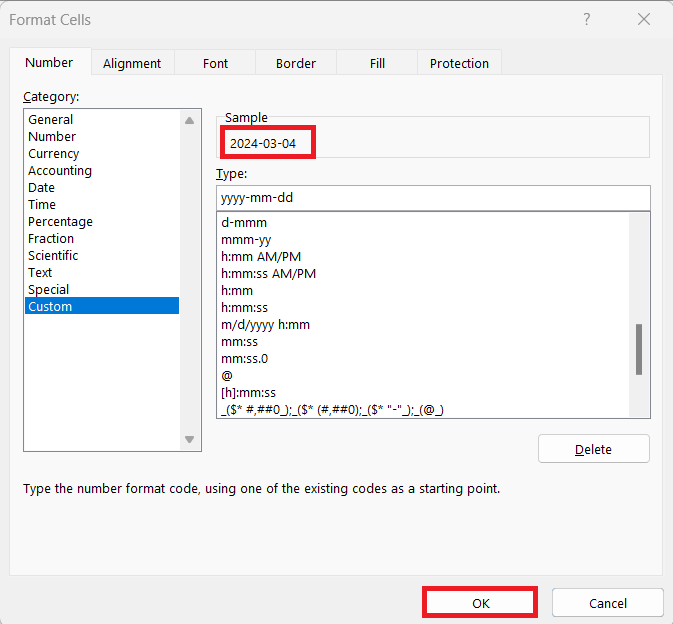
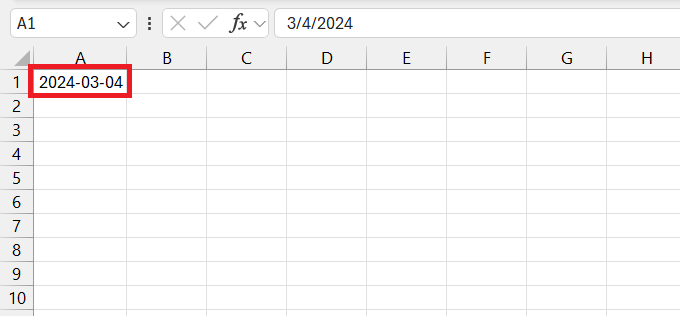
To craft the perfect custom date format, especially the practical YYYY-MM-DD, you’ll play a bit of code-matching in the Format Cells dialog. In the ‘Number’ tab, steer towards ‘Custom’ to tweak the format. Here, you’ll plug in the magical string of letters “yyyy-mm-dd”, where ‘yyyy’ renders the four-digit year, ‘mm’ delivers a two-digit month, and ‘dd’ wraps it up with the day.
Excel responds instantaneously with a live preview, showing exactly how your dates will appear.
Confirm the changes and, voilà, your date column is now a beacon of consistency, readability, and order.
Remember, once you’ve set a custom format, it stays in your Excel workbook, ready to be applied whenever you need it.
Tips and Tricks for Date Formatting in Excel
Converting Existing Data to the New Format
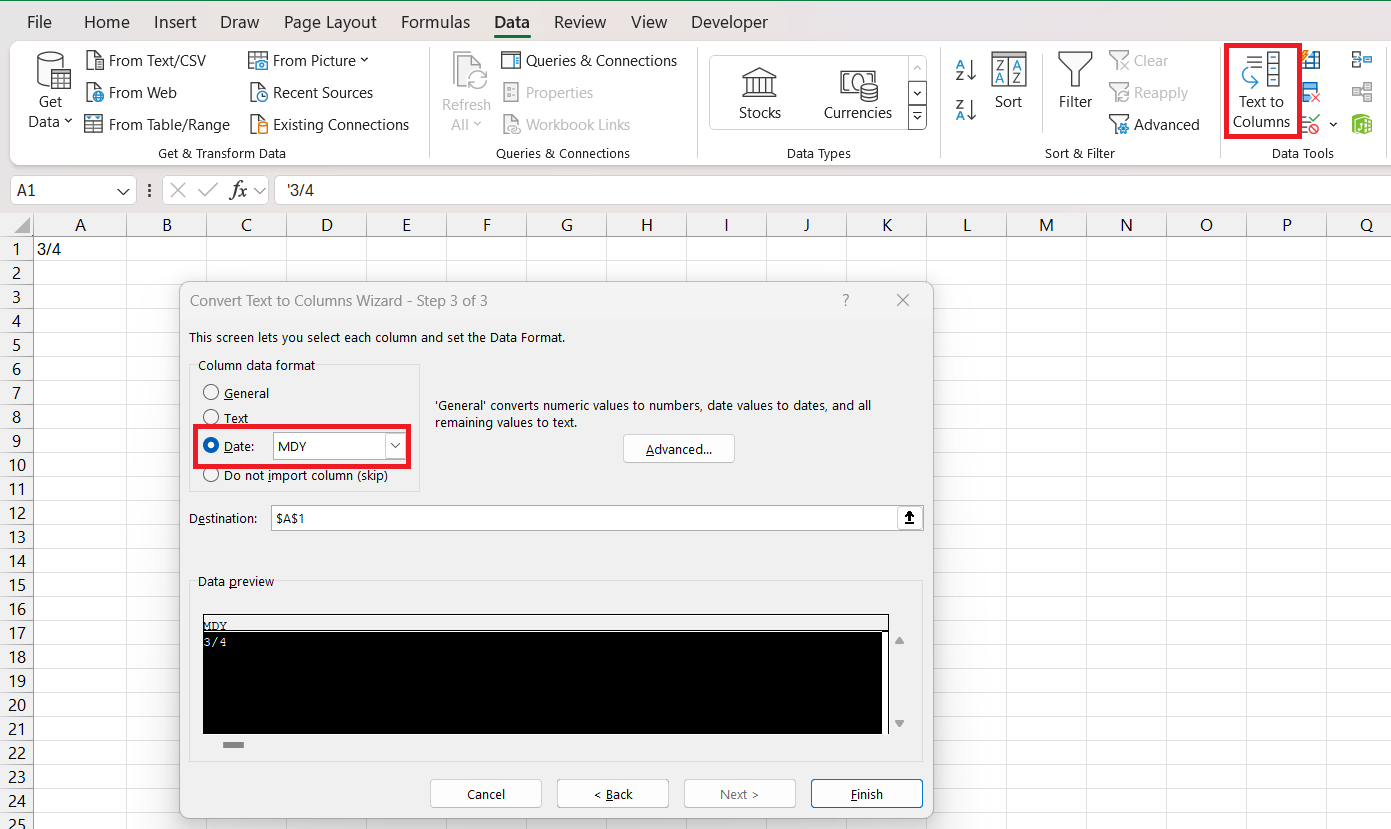
If you’re looking to convert existing data in Excel to the new YYYY-MM-DD format, the process can be a walk in the park—provided the dates are already recognized by Excel as dates. Just select your dates, follow the path to ‘Format Cells,’ and define your custom date format. But wait, what if they’re strings of text posing as dates? No panic needed.
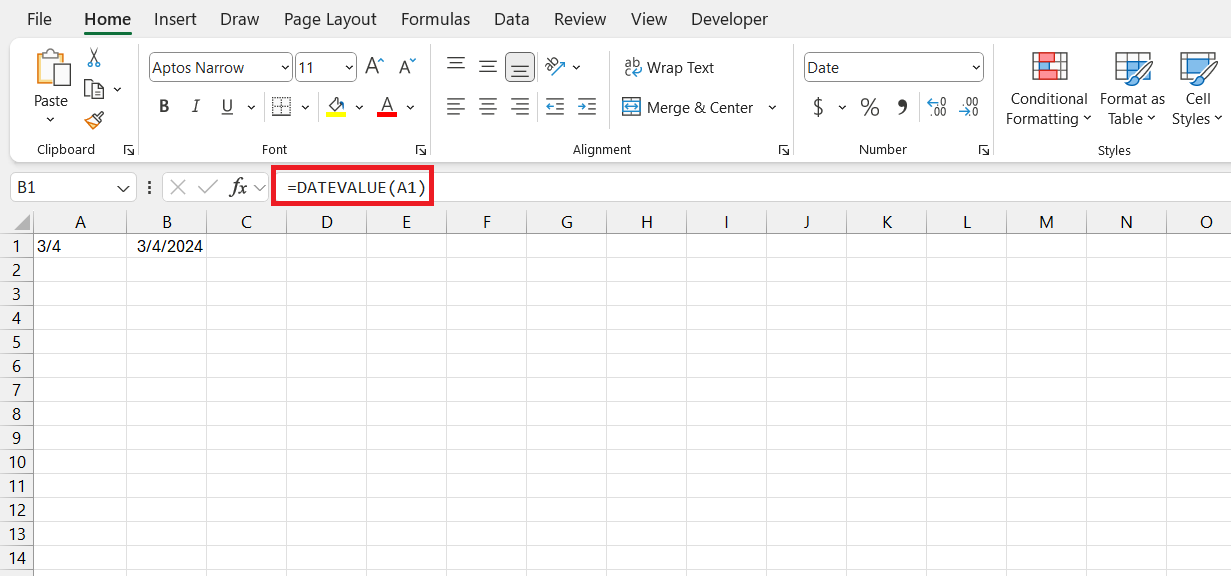
Use the DATEVALUE function to guide Excel into seeing the light.
Or, go with the tried-and-true Text to Columns wizard, choosing ‘Delimited’ and ‘MDY’ when prompted.
You’ll transition your data into the new format gently as a summer breeze.
Ensuring Consistency Across Your Spreadsheets
Consistency is the name of the game when it comes to spreadsheets. To maintain a uniform date format across multiple sheets, start by setting the YYYY-MM-DD as your go-to format for all date columns. This means being vigilant whenever you enter new data, import datasets, or copy dates from one spot to another.
Remember, Excel can be quite the mischief-maker, switching formats when you least expect it. To keep this in line, consider using ‘Paste Special’ with ‘Values’ and ‘Formats’ when populating cells. Additionally, Excel templates with preset formats can be real timesavers for your future work. Share your formatting guide with collaborators to ensure that everyone sings from the same hymn sheet.
Enhancing Productivity with YYYY-MM-DD Format
The Benefits of Using International Date Standard
Leaning into the international date standard (YYYY-MM-DD) could be one of the smartest moves you make with your spreadsheets. You get to wave goodbye to confusion since this format is recognized worldwide, making it ideal for global collaboration. There’s no second-guessing what “03-04-2023” means—with the year first, there’s no mixing up days and months.
Sorting, filtering, and maintaining records becomes a breeze, and when it comes to data analysis, those organized rows and columns are a beautiful sight. Plus, this format plays nicely with IT systems and databases everywhere—no translation needed. Embracing YYYY-MM-DD is like giving your data a universal passport!
Incorporating Date Formats into Excel Formulas and Functions
The true potential of Excel’s date formats is unlocked when you blend them with formulas and functions. Whether you’re calculating deadlines or tracking durations, combining date formats with functions like TODAY(), EDATE(), and WEEKDAY() can elevate your spreadsheet game. Need to highlight upcoming deadlines? Pair the YYYY-MM-DD format with conditional formatting to color-code them. As for project timelines, use EDATE() to compute end dates based on a start date and a set time span, displayed neatly in your chosen date format.
The powerful duo of format and function ensures your data doesn’t just sit pretty—it works hard, too. They enable you to create dynamic reports, dashboards, and automated updates, making your spreadsheets valuable tools that respond in real-time to the ever-spinning clock
FAQs on Excel Date Formats
Why Does Excel Change My Date Format Automatically?
Excel tends to change your date format automatically because it’s trying to match your system’s regional settings. If you’ve ever entered a date and found it looking different than expected, it’s likely because Excel has a feature where it recognizes dates according to the locale of your system. To maintain the format you prefer, you might need to delve into custom formatting or adjust your system’s date settings, ensuring that Excel and your computer share the same date formatting language.
How Can I Make YYYY-MM-DD the Default Date Format in Excel?
To set YYYY-MM-DD as your default date format in Excel, you’ll sadly find no direct switch in the program’s settings. But, you can create a template with the date format set as you like and use this as the default workbook for new Excel files. Another way is to adjust the short date format in your computer’s regional settings to the desired YYYY-MM-DD format, which will influence how Excel automatically formats dates. Remember though, this changes the date display for your entire system.
What Should I Do If My Dates Are Stuck in Text Format?
If your dates are masquerading as text, fear not! You can coax them back to their true date format with the DATEVALUE function, which converts text to a date in Excel’s eyes. Alternatively, try the Text to Columns wizard found under the Data tab. It’s like a magic wand that can transform text into the correct date format with a few clicks, especially when dealing with multiple cells. Don’t let text-formatted dates bog you down; with the right Excel tricks up your sleeve, they’ll be stepping out in their proper date format attire in no time.
Can I Use Different Date Formats Within the Same Excel Worksheet?
Yes, you most certainly can use different date formats within the same Excel worksheet. Each cell in Excel can be formatted individually, so you’re free to display dates in various formats side-by-side if needed. This can be particularly useful for reports or data that will be viewed by an international audience, or if you need to show specific dates in a format that’s customary for certain types of data. Just remember to keep your data organized and be clear about the reasoning behind using multiple formats, to avoid any confusion.
How do I change the date format in Excel to mmm dd yyyy?
To change the date format to “mmm dd yyyy” in Excel, select the cells containing dates, and either press ‘Ctrl + 1’ to open the Format Cells dialog box or right-click and choose Format Cells. Under the ‘Number’ tab, pick the ‘Date’ category and scroll to find the “Mar 14 2012” format, which corresponds to “mmm dd yyyy.” If it’s not there, go to ‘Custom’ and type “mmm dd yyyy” in the Type input field. Hit ‘OK’ to apply the change—all set, your dates will now be stylishly displaying the month in letters!
John Michaloudis is a former accountant and finance analyst at General Electric, a Microsoft MVP since 2020, an Amazon #1 bestselling author of 4 Microsoft Excel books and teacher of Microsoft Excel & Office over at his flagship Academy Online Course.
