Microsoft Excel‘s date-time functionality is a pivotal feature for performing complex calculations, managing schedules, and analyzing time-sensitive data, significantly enhancing productivity. Understanding and utilizing Excel’s diverse date systems and functions allows for accurate and efficient time management and data analysis.
Key Takeaways:
- Excel supports two date systems (1900 and 1904), affecting calculations based on the chosen system.
- Functions like EDATE and EOMONTH facilitate accurate monthly calculations, accounting for months’ varying lengths.
- The EOMONTH function is crucial for determining month-end dates, aiding in financial reporting and project management.
- The DAY function allows for precise day counting within a month, essential for budgeting and daily rate calculations.
Download the spreadsheet and follow along with the tutorial on How to calculate how many days in 3 months – Download excel workbookDays-in-3-Months.xlsx
Table of Contents
Introduction to Excel Date Calculations
The Essentials of Excel’s Date-Time Functionality
Excel shines as a versatile tool, and among its robust features, date-time functionality is incredibly useful for a variety of tasks. Excel’s built-in date and time functions allow you to perform complex calculations, manage schedules, and analyze time-sensitive data efficiently.
Why Date Calculations are Vital for Productivity
Date calculations in Excel are indispensable for enhancing productivity, especially when dealing with deadlines, scheduling, and time-sensitive financial data. By automating date-related processes, you eliminate the room for error, save time, and can focus on analysis instead of manual calculations.
Understanding Excel’s Date Systems
Exploring the 1900 and 1904 Date Systems
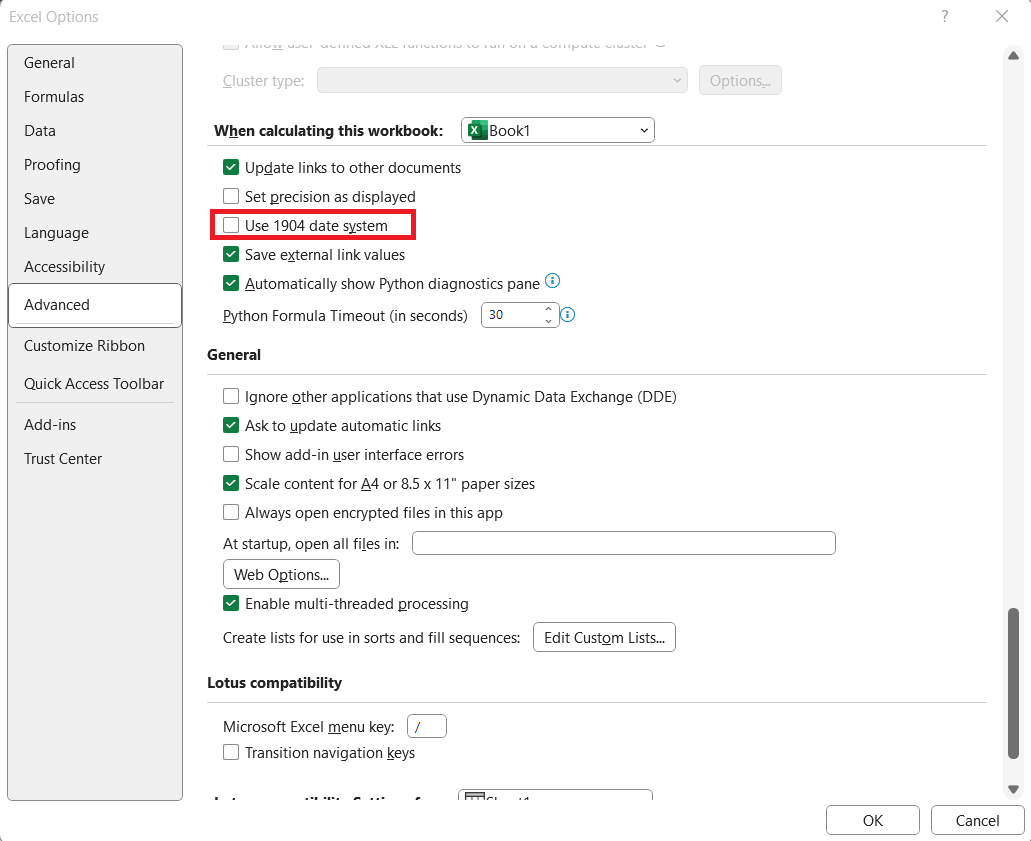
Excel operates on two different date systems—the 1900 and the 1904 date system. The 1900 system, which is the default system for Excel on Windows, starts on January 1, 1900. The 1904 system, used by Excel on Mac, starts on January 1, 1904. These systems can affect date calculations, as the same date will have a different serial number depending on the system you use.
Remember to check your Excel settings to know which date system you’re working with, as it could impact the results of your date calculations, particularly across different platforms.
How Excel Handles Months in Date Calculations
Understanding how Excel interprets months in date calculations is essential. Given that months vary in length and that Excel stores dates as serial numbers, calculating time spans that include months can be a bit complex. Excel doesn’t inherently recognize a month as a consistent unit, but using functions like EDATE and EOMONTH can help standardize monthly calculations.
Using these functions, Excel can account for the varying days in each month, ensuring accurate and dynamic date calculations that update automatically when the original dates are modified.
Simple Formulas to Calculate Days in a Month
Using EOMONTH to Determine Month-End Dates
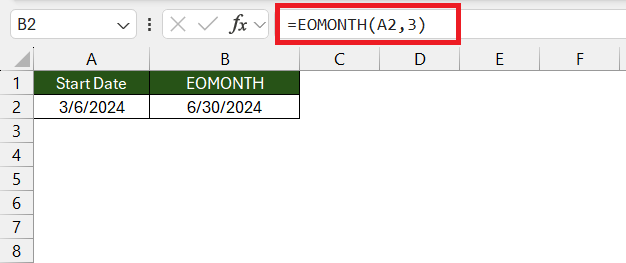
The EOMONTH function is a powerful feature that lets you determine the last day of a month, which can be particularly useful for financial reporting and project timeline management. When using EOMONTH, you provide a starting date and specify the number of months to move forward or backward. By setting the second argument to 3, you get the end date of 3 months from the start date.
This function streamlines the process of finding month-end dates, enabling you to set up automated tracking sheets, billing cycles, or compliance reports efficiently.
The DAY Function: Counting Days Accurately
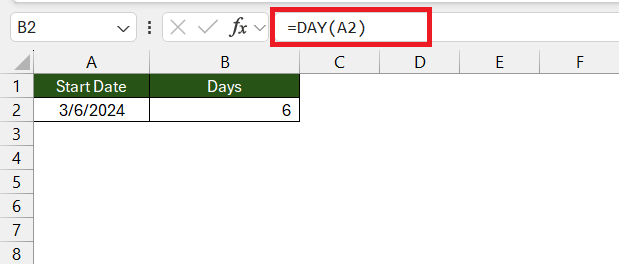
The DAY function in Excel is straightforward yet invaluable. It extracts the day of the month from a given date, returning a value between 1 and 31. Using the DAY function, you can easily count the days elapsed in a month, which is particularly useful when you need to calculate daily rates or pro-rate charges based on the exact number of days.
This function comes in handy when you’re working on budgets, scheduling, or any scenario where an accurate day count is crucial.
Utilizing the EDATE Function for Month Addition/Subtraction
The EDATE function is a straightforward way to navigate through months while working with dates in Excel. It allows you to add or subtract a specified number of months to a given start date. This function is not only simpler than manipulating the DATE function for similar purposes but also crucial when maintaining consistent intervals over large datasets or during long-term planning.
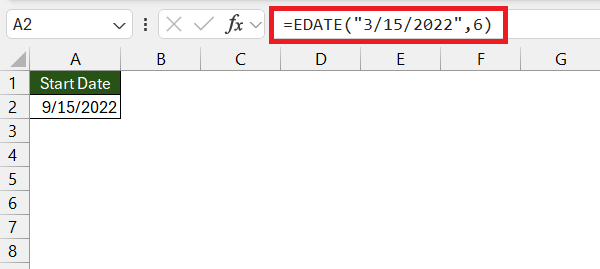
For instance:
=EDATE(“3/15/2022”, 6)
This formula adds six months to March 15, 2022, resulting in September 15, 2022.
Or for subtracting months:
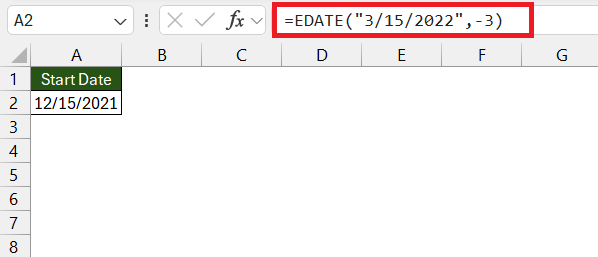
=EDATE(“3/15/2022”, -3)
This subtracts three months, giving you December 15, 2021.
The EDATE function keeps date-based workflow smooth and accurate, especially when forecasting future dates or backtracking past ones.
Step-by-Step Guide: Calculating How many days in 3 Months
Calculating the days in 3 months requires accuracy since the number of days can vary depending on the month and year (considering leap years). Here’s a step-by-step guide to help you do it easily:
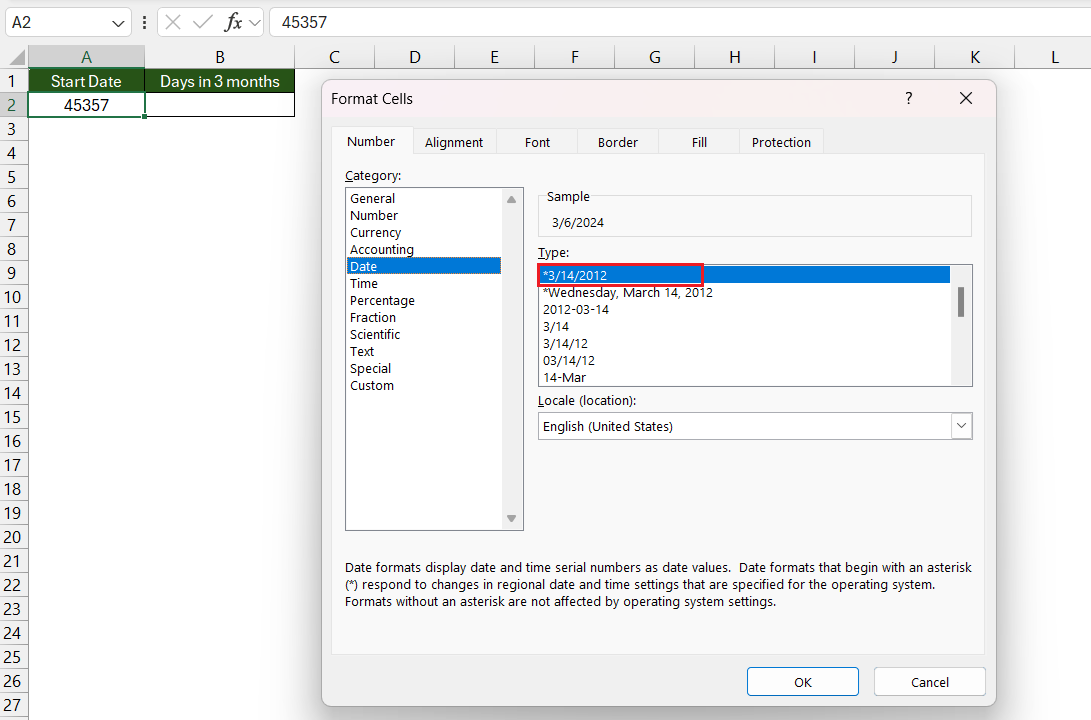
STEP 1: Ensure Proper Date Format: Click on your starting date cell, press Ctrl + 1, and select ‘Date’ under the Number tab to make sure your starting date is correctly formatted.
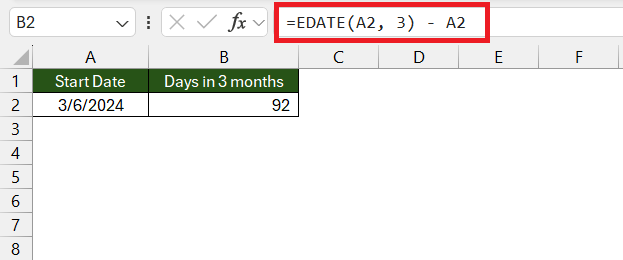
STEP 2: Apply EDATE Formula: Use the following formula: =EDATE(A1, 3) - A1, where A1 is your starting date cell. This calculates the end date, 3 months ahead, and subtracts the starting date to give you the total days in between.
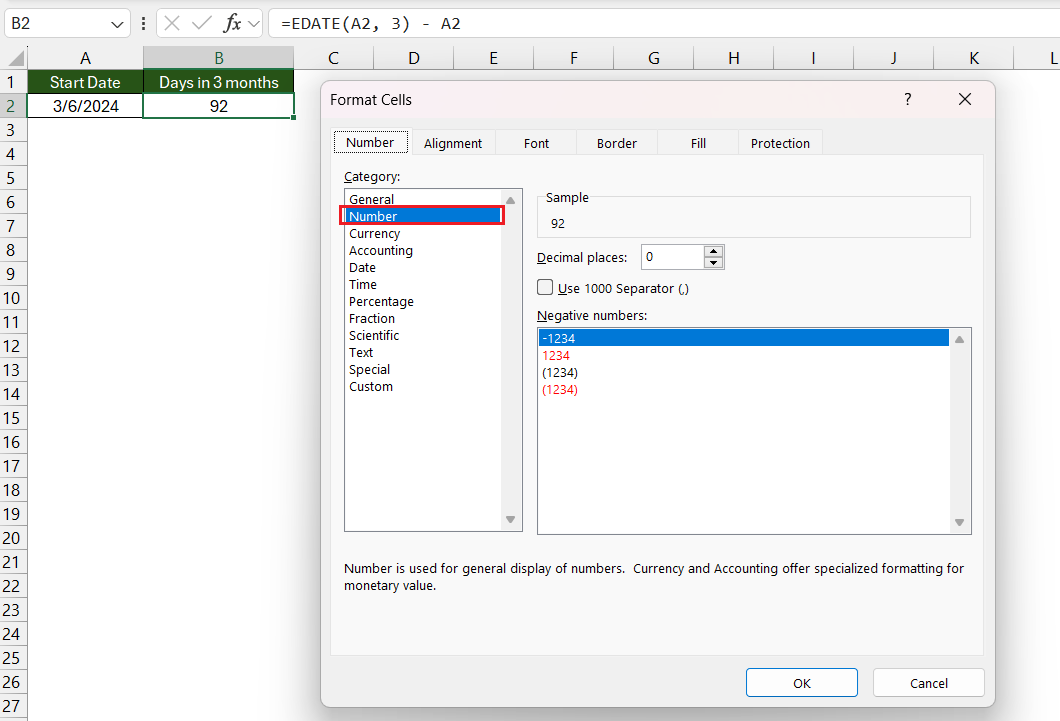
STEP 3: Format the Output Cell: Make sure your output cell is formatted to show a number, not a date.
By performing these simple steps, you can leverage Excel to quickly calculate a precise number of days in a three-month period for any given start date.
Common Mistakes and How to Avoid Them
When calculating dates in Excel, even seasoned users can stumble upon common pitfalls. To steer clear of these, be mindful of the following:
Mismatched Date Systems: As mentioned earlier, Excel has two date systems. Ensure consistency by checking which system your spreadsheet is using, especially when sharing files with users on different platforms.
Incorrect Date Formats: Entering dates as text or in the wrong format can result in errors. Use Excel’s date formatting options to prevent such issues.
Overlooking Leap Years: Forgetting about February 29th in a leap year can skew your calculations. Utilize functions that inherently account for leap years like EDATE.
Ignoring Excel’s Date Serial Number: Excel stores dates as serial numbers. Refrain from performing arithmetic directly on formatted date cells, and use date functions instead.
To avoid these mistakes, always validate your data, use appropriate functions, and understand how Excel represents dates.
Practical Applications for Date Calculations in Excel
Project Management and Deadline Tracking
Date calculations in Excel are a boon for project management and deadline tracking. When you manage projects, you often need to determine the due dates for various tasks and monitor overall progress against a timeline.
Using functions such as WORKDAY, EDATE, and NETWORKDAYS, you can:
- Set task deadlines: Add specific numbers of working days to a start date, accounting for weekends and holidays.
- Track project milestones: Calculate future dates for project milestones by adding months or days to the project start date.
- Monitor time to completion: Employ
NETWORKDAYSto find out how many working days are left until a task’s deadline.
By mastering these date calculations, you can create dynamic project timelines that automatically update, helping keep your team on track.
This way, you mitigate the risk of overshooting deadlines, and you can prioritize tasks more effectively, ultimately propelling project success.
Financial Analysis and Budget Planning
In financial analysis and budget planning, precise date calculations are integral. Excel serves as a powerful tool for tracking financial performance over time, planning budgets, setting fiscal calendars, and determining payment schedules.
- Forecasting and Trend Analysis: By calculating the number of days between periods, you can analyze trends and seasonal effects on financial performance.
- Budget Cycles: Determining the start and end dates of budget cycles helps in spreading costs and allocating funds accurately.
- Dividend or Coupon Payment Schedules: Calculate payment dates for investors using date functions, keeping everyone informed about when they can expect returns.
Using functions such as EOMONTH to find the last day of the financial month or EDATE to project future financial periods ensures that your financial documents are precise and reliable.
Excel’s flexibility with date calculations streamlines the entire financial planning process, empowering you to maintain up-to-date and actionable fiscal plans.
FAQ on Excel Date Formulas
What If My Date Calculations Don’t Match Expectations?
If date calculations don’t match your expectations, double-check the cell’s date format and ensure it’s set correctly. Verify the accuracy of your formulas and the date system used by your Excel version. Also, consider whether leap years or different month lengths might be impacting your results.
Can These Formulas Account for Leap Years?
Yes, formulas like EDATE and YEARFRAC take leap years into account, correctly calculating the days in February whether it’s a leap year or not. Ensure to use date functions that adapt to leap years for accurate results.
How Can I Automatically Update Calculations with Today’s Date?
By using the TODAY function in your Excel formulas, you can ensure that your calculations always reflect the current date. This function requires no arguments and updates your worksheet upon each opening or refresh, making your date calculations dynamic and up-to-date.
How do I calculate 3 months in Excel?
To calculate 3 months from a specific date in Excel, you can use the EDATE function: =EDATE(start_date, 3). Replace start_date with the cell reference or exact date from which you want to add 3 months. Excel will return the date that is exactly three months later.
How do you get 3 months from today in Excel?
Utilize the EDATE function alongside the TODAY function to get a date 3 months from the current date: =EDATE(TODAY(), 3). This will automatically calculate and update the date to reflect 3 months from the current day each time the spreadsheet is opened or refreshed.
John Michaloudis is a former accountant and finance analyst at General Electric, a Microsoft MVP since 2020, an Amazon #1 bestselling author of 4 Microsoft Excel books and teacher of Microsoft Excel & Office over at his flagship Academy Online Course.
