Autofilling dates in Microsoft Excel boosts productivity by eliminating the need for manual entry. This feature quickly creates an accurate date series, ensuring consistency and saving time. Whether organizing a timeline, tracking schedules, or managing logs, mastering Autofill streamlines your workflow. This guide on how to autofill dates in Excel offers techniques and tips to help you autofill dates efficiently and error-free.
Key Takeaways:
- Use the Fill Handle to quickly create a series of dates. Simply input the start date, click and drag the Fill Handle to cover the desired range, and Excel will automatically populate the dates.
- If you have adjacent data, double-clicking the Fill Handle autofills the dates down the column, aligning them perfectly with your existing data without overshooting.
- Use the WORKDAY and WORKDAY.INTL functions to create date sequences that skip weekends and holidays, ensuring your timeline reflects actual working days.
- Generate dynamic date series using the SEQUENCE function, which automatically updates based on the parameters you set, providing a flexible solution for evolving datasets.
- Enhance your efficiency with keyboard shortcuts like Ctrl + ; for entering today’s date instantly, saving time and reducing errors in date entries.
Table of Contents
Introduction: Mastering Date Autofill in Excel
Understanding the Power of Excel’s Autofill Feature
Imagine you’ve been tasked with entering dates into an Excel spreadsheet, and you’re staring down the barrel of inputting them one by one. Sounds like a tedious afternoon, right? Well, fear no more because Excel’s Autofill feature has got your back! This nifty tool is your fast pass to zoom through data entry with style and precision.
Not just limited to repeating patterns, Autofill can recognize and populate your sheet with a sequence based on the pattern you provide. It’s not just a timesaver; it’s a lifesaver, especially when dealing with complex datasets.
Why Learning to Autofill Dates Makes You More Productive
Learning to autofill dates in Excel isn’t just about avoiding the monotony of manual entry; it’s a smart strategy that catapults your productivity to new heights. By mastering this feature, you’re saving valuable time that can be redirected to more complex, analytical tasks.
Think of it as having an assistant who takes care of the repetitive work while you focus on the big picture. Your projects will move faster, you’ll reduce the risk of input errors, and your overall workflow will be smoother. It’s like giving yourself a productivity power-up that helps you do more in less time.
Simple Techniques on How to Autofill dates in Excel
Using the Fill Handle for Rapid Date Series Creation
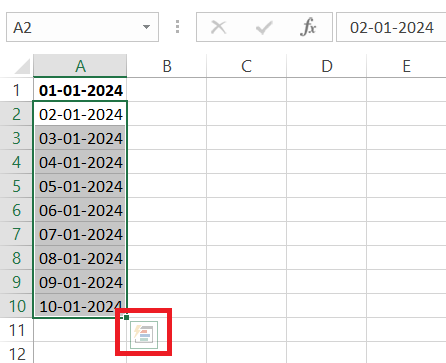
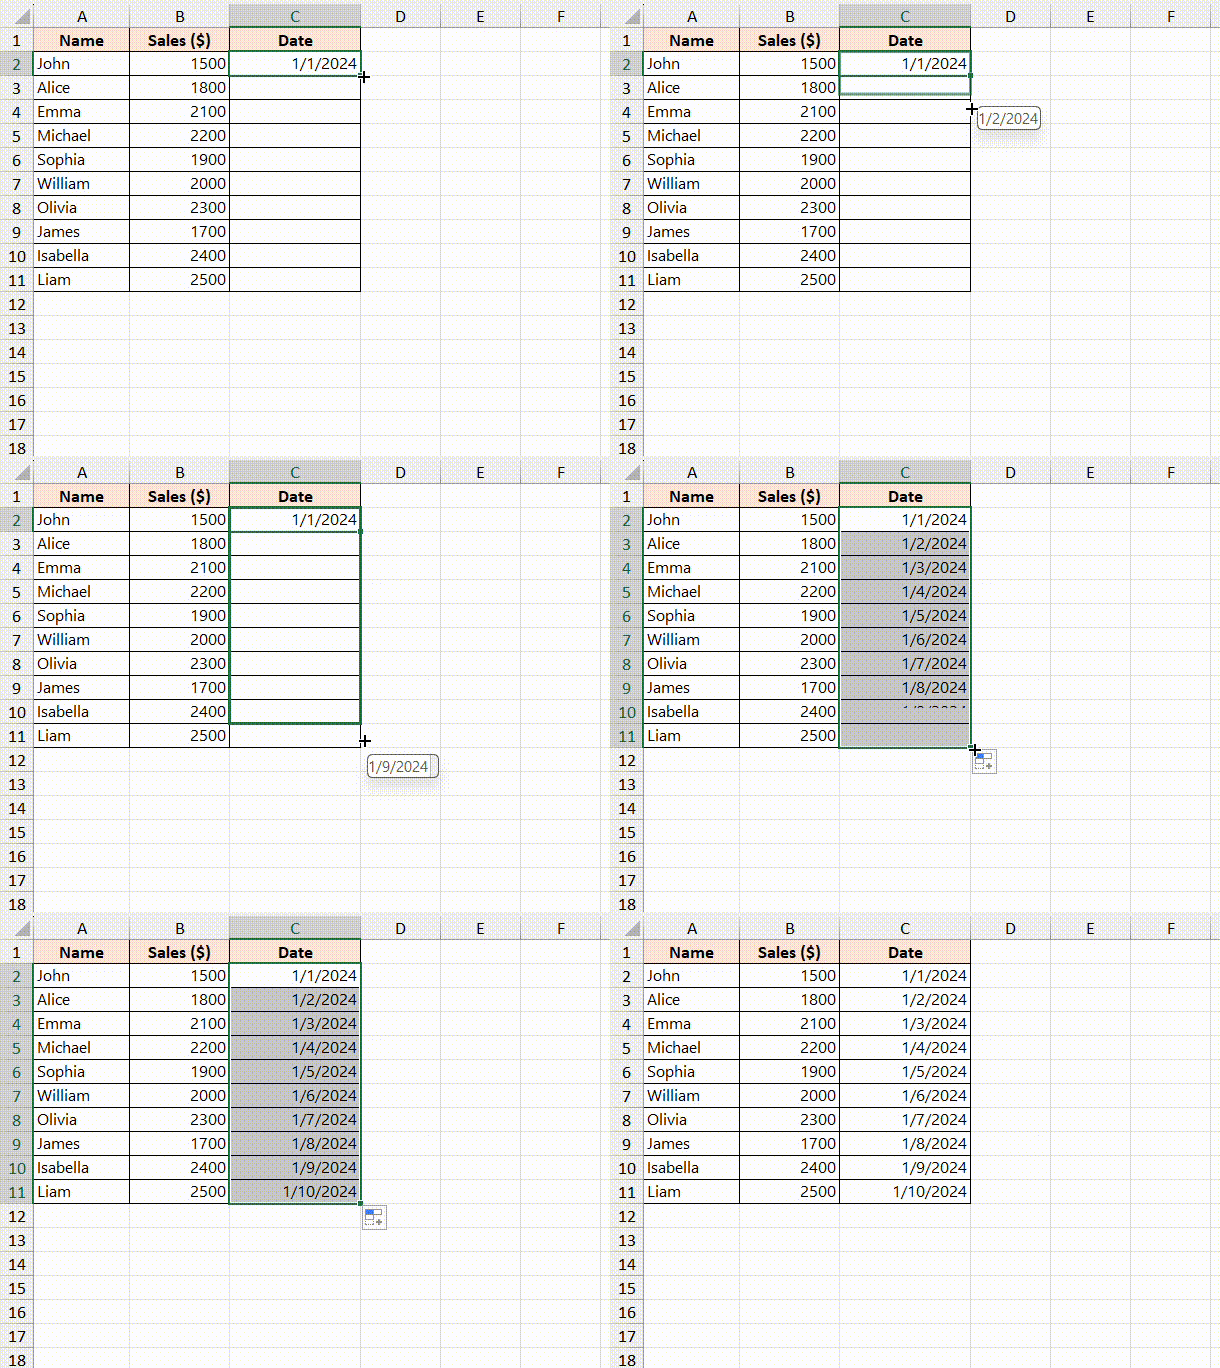
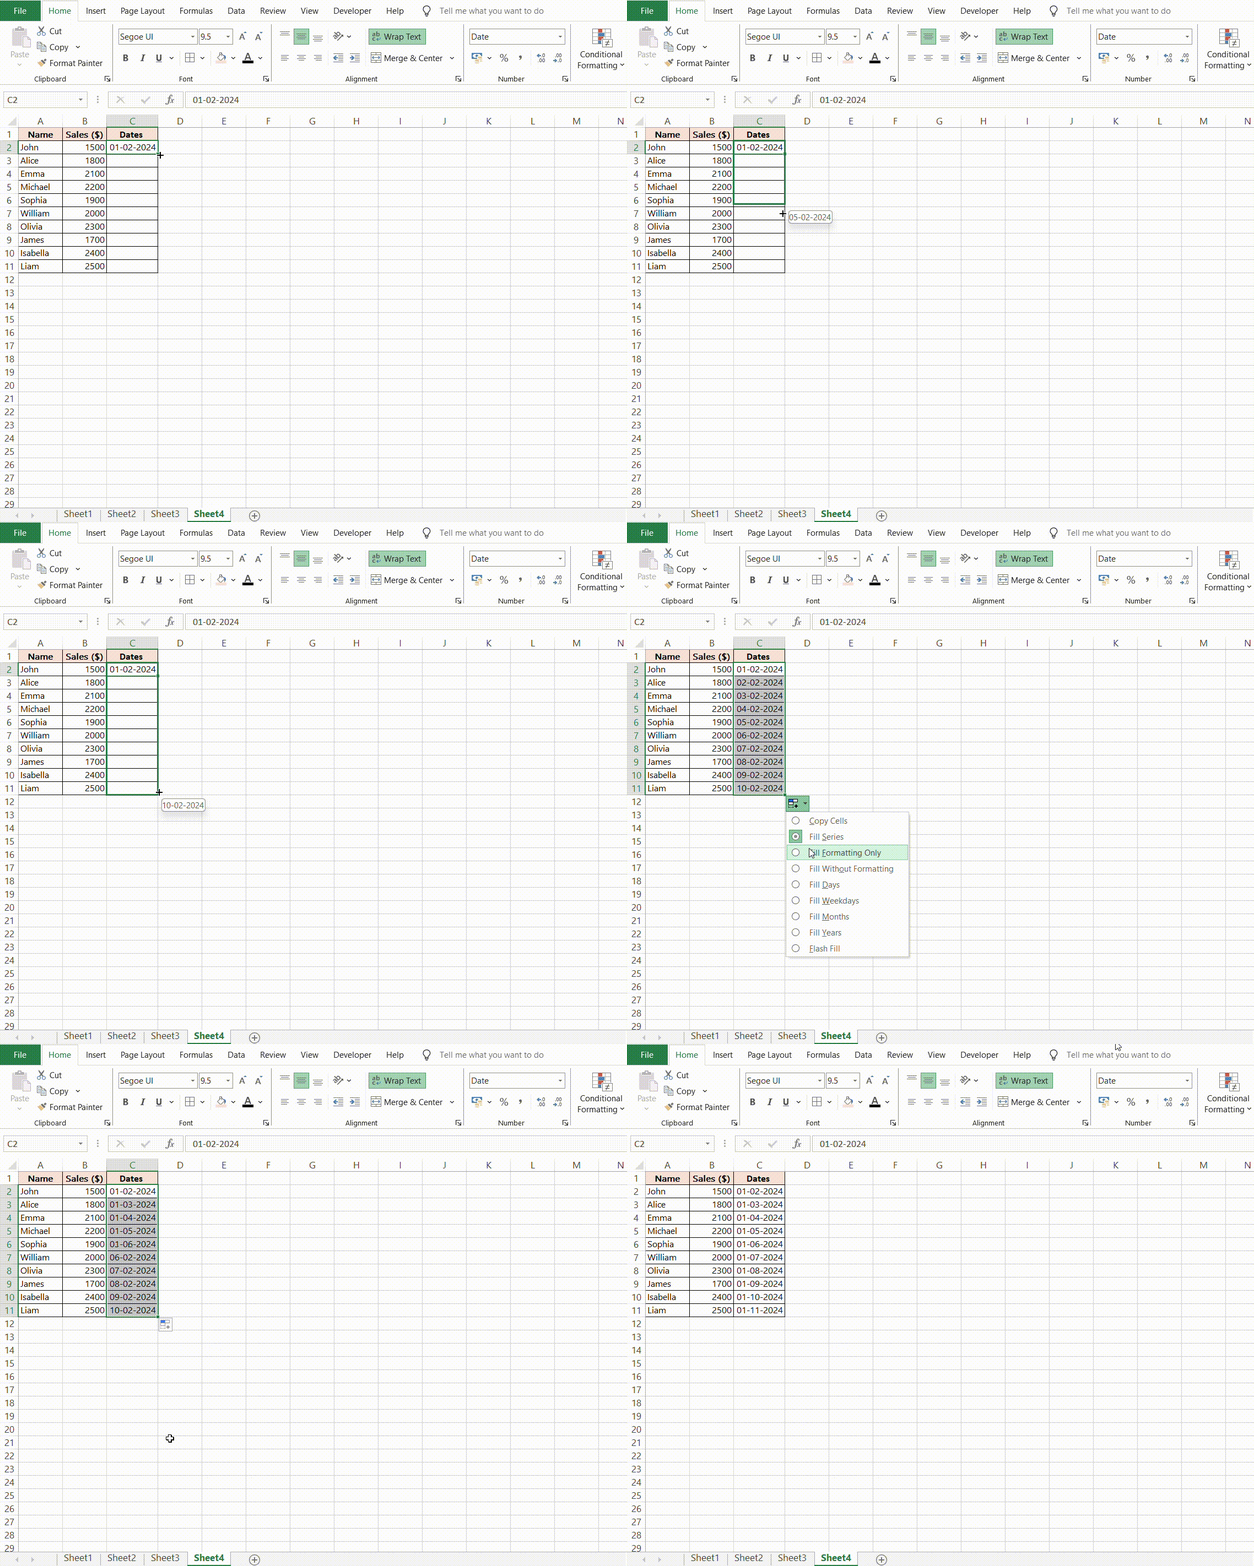
The Fill Handle in Excel is your magic wand for creating date series faster than you can say “Abracadabra!” Just type in the start date, select the cell, and then hover your cursor over the bottom right corner until you see a small square— that’s the Fill Handle. Click and drag down or across the cells where you want your dates, and voilà! Excel automatically fills in the following days.
If you’re aiming for a bit more control over the pattern, no problem. Just input a couple of dates that establish the pattern you need—say, two consecutive Mondays if you’re scheduling weekly meetings—and use the Fill Handle again. Excel, being the clever cookie it is, will pick up on the pattern and keep the dates rolling just how you need them.
Double-Click Magic: A Shortcut for Fast Autofills
For those of you who love a nifty shortcut, the double-click technique with the Fill Handle is like discovering a secret passage in Excel. It’s perfect when you have a column next to your dates that’s already filled with data. Simply enter your start date, find the Fill Handle, and instead of dragging, give it a quick double-click. Excel takes this as a cue to autofill the dates down the column, stopping right where the adjacent data ends. It’s like setting up dominoes with a flick of a finger — quick, efficient, and oh so satisfying.
This autofill stops precisely at the last filled cell of the adjacent column, so you don’t have to worry about overshooting your target range. It’s perfect for when you want to align a sequence of dates with a list you’ve already got in place, ensuring your data stays in perfect sync.
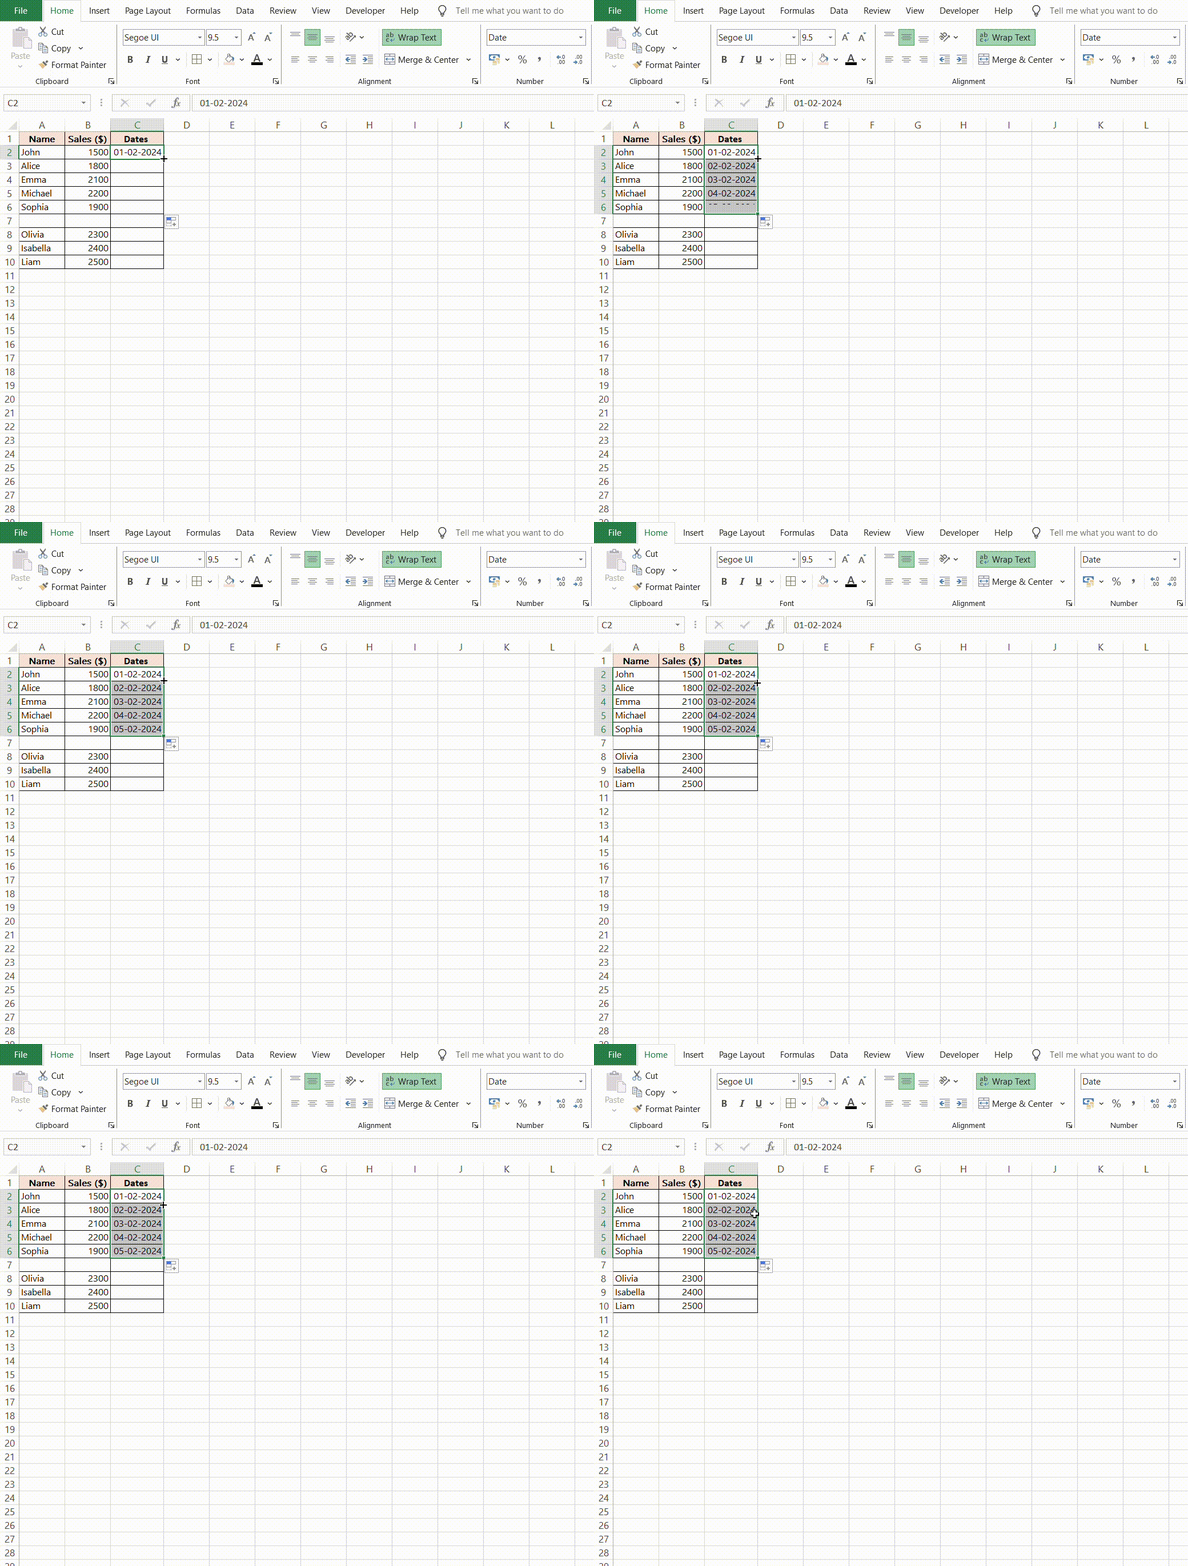
Just remember, if there are any empty cells in the adjacent column, this method will halt at the first gap it encounters. So, make sure your corresponding data is continuous for the best results.
Advanced Autofill Strategies
Skipping Weekends and Holidays in Date Sequences
If your work or project revolves around business days, chances are you’ll want to skip weekends and maybe even public holidays. Thankfully, Excel’s WORKDAY function is the superstar here, allowing you to create date sequences that do just that.
To do this, specify a start date and the number of workdays you want. Now, what if your weekends don’t fall on the typical Saturday and Sunday? No problem! The WORKDAY.INTL function can handle custom weekend days—you just need to define which days of the week are your weekends.
Example Dataset:
Suppose we have a project starting on 3 January, 2024, and we want to generate a sequence of workdays for the next 10 days, skipping weekends (Saturday and Sunday) as well as a public holiday on January 10, 2024.
Let’s us have a look at the steps below;
STEP 1: In cell B2, enter the start date: “2024-01-03”.
STEP 2: In cell B2, enter the formula: “=WORKDAY.INTL(B2,1,1)”. Press Enter.
STEP 3: Drag and drop the Autofill for the rest of the workdays until Workday 10. This generates a sequence of workdays starting from January 3, 2024, skipping weekends (Saturday, Sunday) and the public holiday on January 10, 2024. Adjust the parameters as needed for your specific requirements. You now have a dynamic list of workdays for your project timeline.
And for those days when offices are closed for holidays, Excel won’t leave you hanging. You can add a third parameter to the WORKDAY or WORKDAY.INTL formula to account for those specific dates, ensuring your sequence reflects the real working calendar.
Utilizing Excel Formulas to Generate Dynamic Date Series
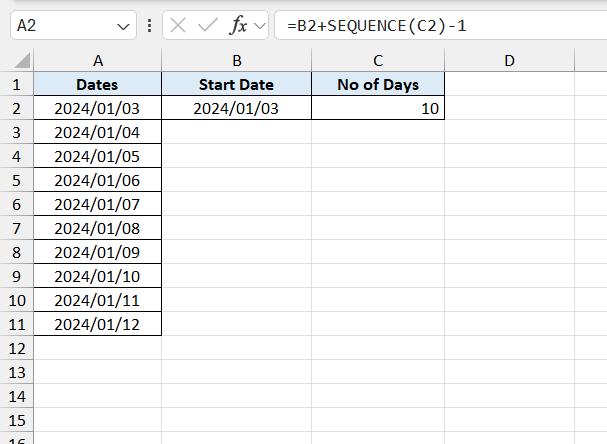
Taking your date series up a notch involves tapping into Excel formulas that adapt and change as your data evolves. The SEQUENCE function takes center stage in the array formula ensemble, allowing you to generate a dynamic series of dates that automatically update based on parameters you dictate.
To whip up a continuous series of dates, start with =SEQUENCE(n), where ‘n’ is the number of dates you want, and combine it with a starting date. For example, =B2 + SEQUENCE(C2)-1, with B2 holding your start date and C2 the number of days, will give you a straight run of dates.
Expert Tips and Tricks
Keyboard Shortcuts for Speedier Date Inputs
Excel’s keyboard shortcuts are the wind beneath the wings of efficiency for those who prefer keystrokes over mouse clicks. Here are a couple that will have you zooming through date inputs at lightning speed.
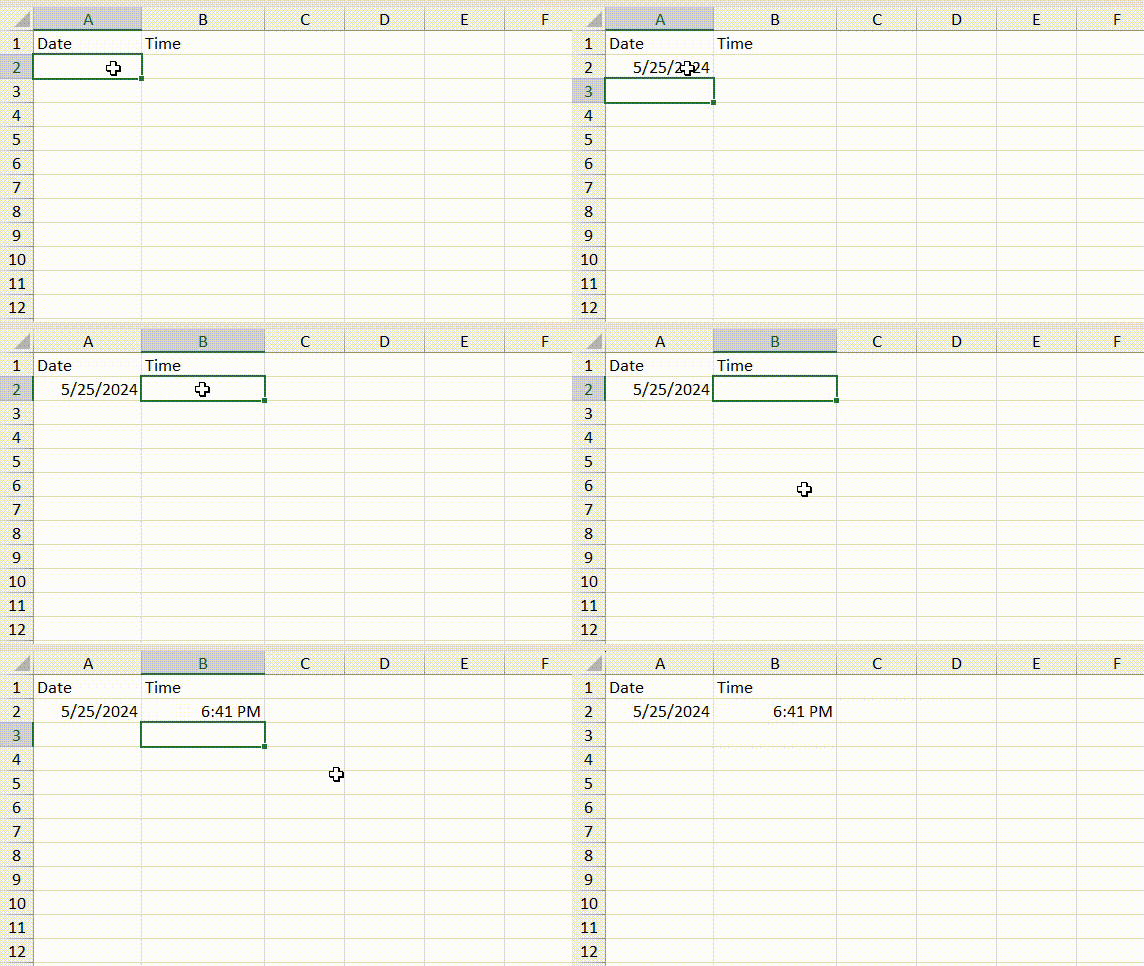
First off, you can insert today’s date instantly in any cell by pressing Ctrl + ; (that’s Control and the semicolon key). No more typing it out or reaching for the calendar, just a simple shortcut and you’re set. If you need the time as well, Ctrl + Shift + ; adds the current time beside the date.
Remember, these shortcuts are not just about the flash; they’re about saving your most valuable resource — time.
FAQs
How do I AutoFill dates in Excel without dragging?
To autofill dates in Excel without dragging, use the SEQUENCE function. Enter =SEQUENCE(number_of_dates,1,start_date,1) in the first cell of your desired range, replacing number_of_dates with the count of dates you want and start_date with the initial date. Excel will fill in the date series automatically for you.
How do I stop Excel from automatically changing dates?
To stop Excel from automatically changing date formats, pre-format the cells as ‘Text’ before entering dates, or disable the AutoCorrect options for dates. Navigate to ‘File’ > ‘Options’ > ‘Proofing’ > ‘AutoCorrect Options’, and turn off the date-related AutoCorrect features that might be interfering.
Can I autofill a date series without dragging the fill handle?
Yes, to autofill a date series without dragging the fill handle, start by entering your start date. Then select the cell, press Ctrl + E to open the ‘Series’ dialogue box, and input the step value and stop value for your sequence. Excel will autofill the date series according to your specifications.
How do I autofill dates incrementing by a specific number of days?
To autofill dates by a specific number of days, enter your starting date, and in the next cell, add the number of days you wish to increment by. For example, for a 4-day increment, if the start date is in cell A1, you would input =A1+4 in cell A2. Then select both cells, drag the Fill Handle down, and Excel will continue the pattern.
Why can’t I AutoFill dates in Excel?
If you can’t autofill dates in Excel, ensure the cells are formatted correctly as ‘Date. Also, check that the cell contains an actual date value and not text resembling a date. If the Fill Handle isn’t appearing, make sure it’s enabled in ‘Excel Options’ under ‘Advanced’ > ‘Editing options’. Finally, if the problem persists, try restarting Excel or repairing the installation.
John Michaloudis is a former accountant and finance analyst at General Electric, a Microsoft MVP since 2020, an Amazon #1 bestselling author of 4 Microsoft Excel books and teacher of Microsoft Excel & Office over at his flagship Academy Online Course.
