Have you encountered a scenario where you do not want to lock the whole sheet, but just a couple of cells in your Excel worksheet?
Locking an entire sheet is straightforward, but locking separate cells is a different story.
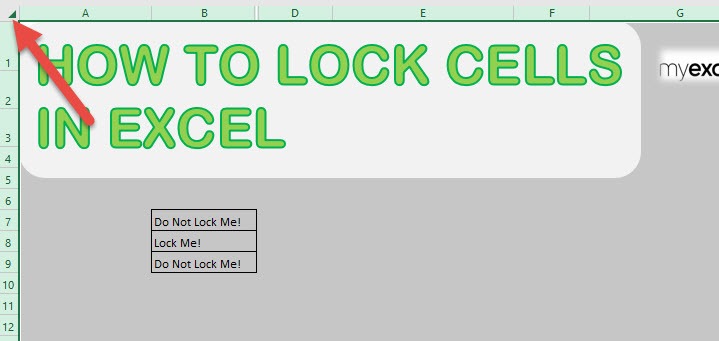
Let us say, we have this single cell that we want to lock in our Excel worksheet:
Here is the game plan:
- All of the cells are locked by default, however locked cells have no effect until you have protected the worksheet
- So we will unlock all of the cells
- Then select the single target cell and lock it
- After that, we will protect the worksheet and our target cell will now be locked!
I explain how How to Lock Cells in Excel below:
STEP 1: Select all of the cells by clicking the upper left corner:
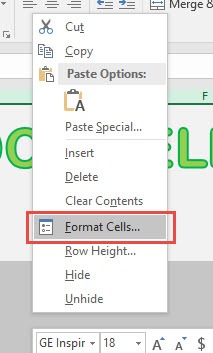
STEP 2: Right click any cell and select Format Cells:
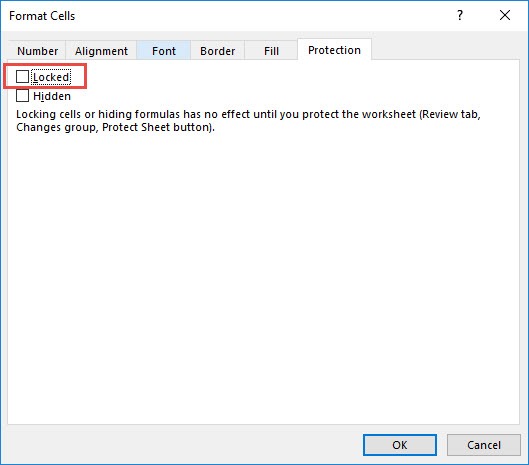
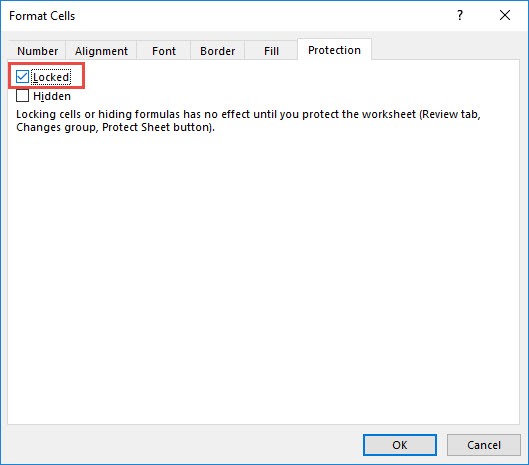
STEP 3: Ensure Locked is unticked. This will unlock our entire sheet. Click OK.
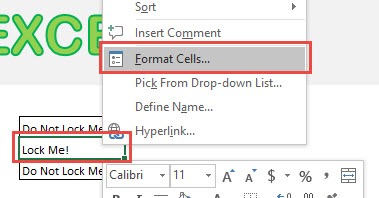
STEP 4: Right click on our target cell and select Format Cells:
STEP 5: Ensure Locked is ticked this time. This will lock our target cell. Click OK.
STEP 6: Now it is time to protect our Excel sheet and see the locking in action!
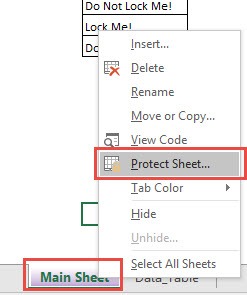
Right-click on the Worksheet Name and select Protect Sheet (or go to the ribbon menu and select Review > Protect Sheet)
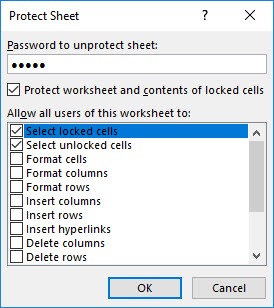
STEP 7: Type in a password and Click OK. In our example, I typed in excel as the password.
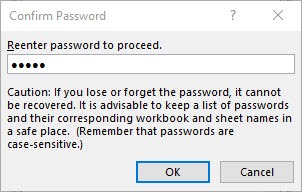
STEP 8: Retype the password and Click OK.
STEP 9: If you try editing your target cell now, Excel will not allow you to…And you are able to edit the other cells just fine!
How to Lock Cells in Excel
Bryan
Bryan is a best-selling book author of the 101 Excel Series paperback books.


