Power Pivot is a very powerful analytical tool which allows you to import data from various external sources!
This opens up many possibilities and gives you the power to do further data analysis and get insightful business metrics.
You can import data from the following sources:
FROM DATABASE:
- SQL Server
- Access
- Analysis Services
FROM DATA SERVICE:
- Windows Azure Marketplace
- OData Data Feed
- Suggested Related Data
FROM OTHER SOURCES:
- Oracle
- IBM DB2
- Microsoft Analysis Services
- Excel Files
- Text Files
- Plus many more places…
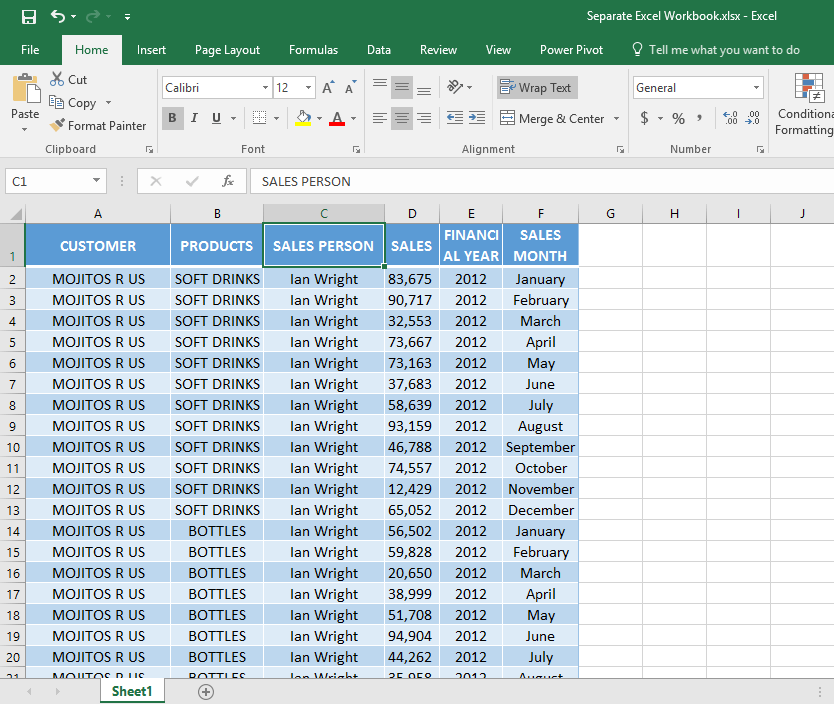
In our example below, we are going to import data from an Excel File called Separate Excel Workbook.xlsx which is saved in our desktop.
You can view below the data that is in this Excel File:
Please download this workbook to follow the tutorial below:
You also need to download the following workbook and save it in your computer’s desktop. You will need this file path for Step 4:
STEP 1: Open the Power Pivot Window. Go to Power Pivot > Manage.
(For Excel 2010, go to PowerPivot > PowerPivot Window)
STEP 2: This will open the Power Pivot Window. Go to Home > Get External Data > From Other Sources.
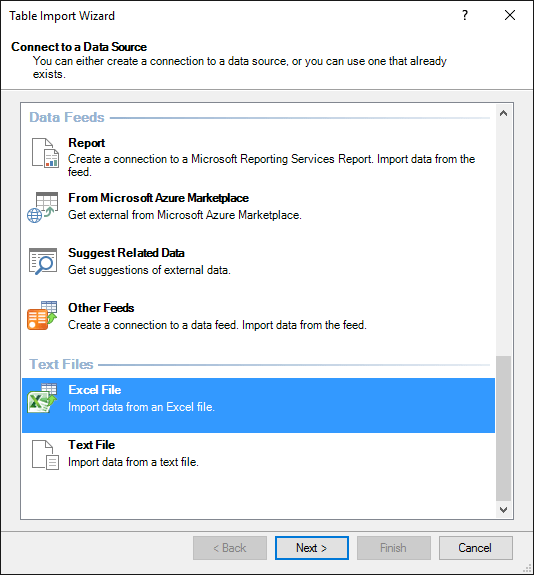
STEP 3: In the Table Import Wizard, pick Excel File and click Next.
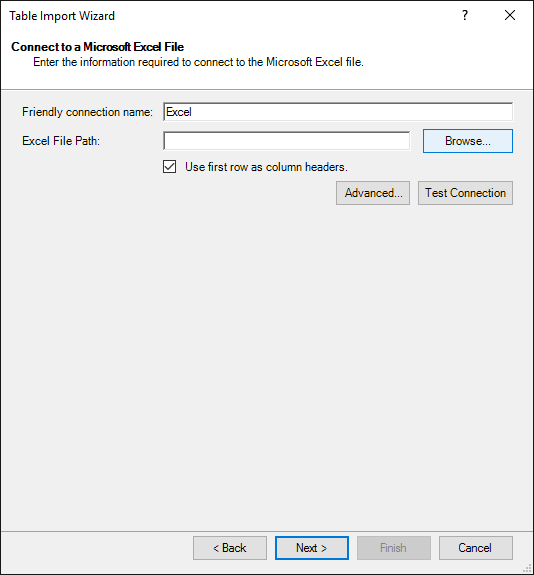
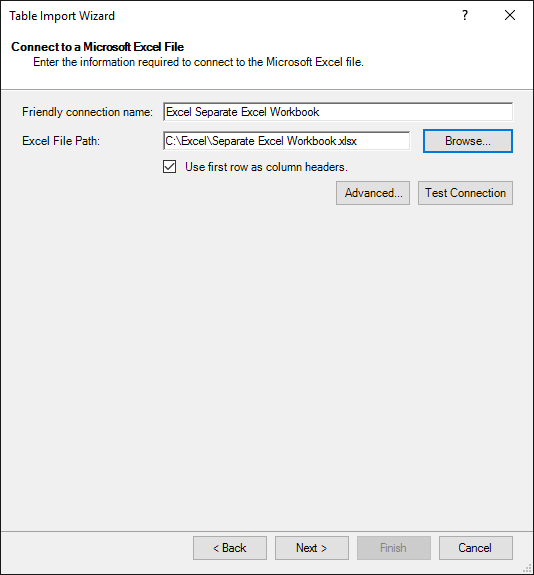
STEP 4: Browse for the Excel workbook that has your data.
Make sure check the Use first row as column headers checkbox i.e. Since our data has column headers.
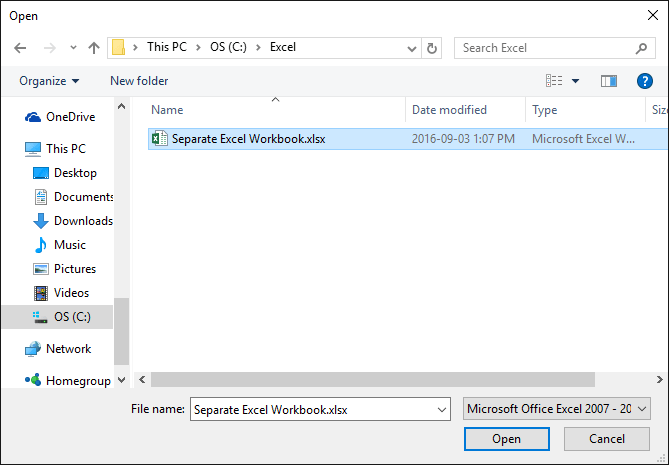
STEP 5: Select your file and click Open.
STEP 6: Click Next.
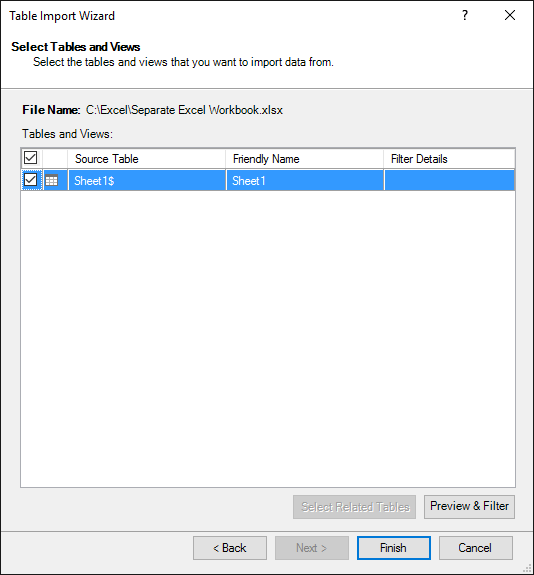
STEP 7: Make sure the Source Table from the imported Workbook is selected.
You can also click on the Preview & Filter button (bottom right hand corner) to choose or filter specific columns & data that you want to import:
When you have made your selection, click OK and then select Finish in the next screen.
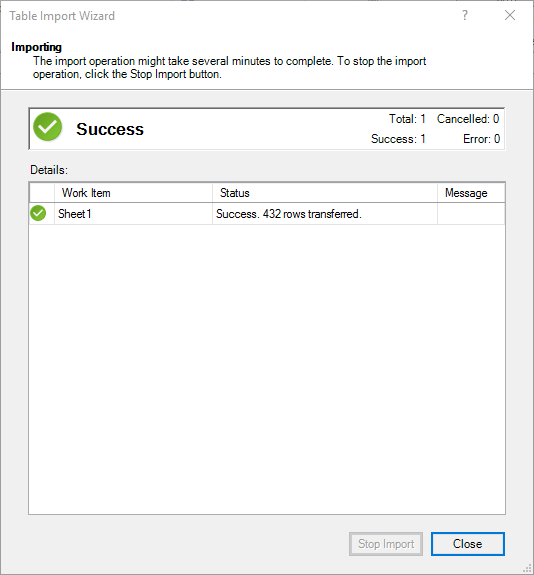
STEP 8: You will get the following Importing Success dialogue box which shows the number of rows that have been imported. Click Close.
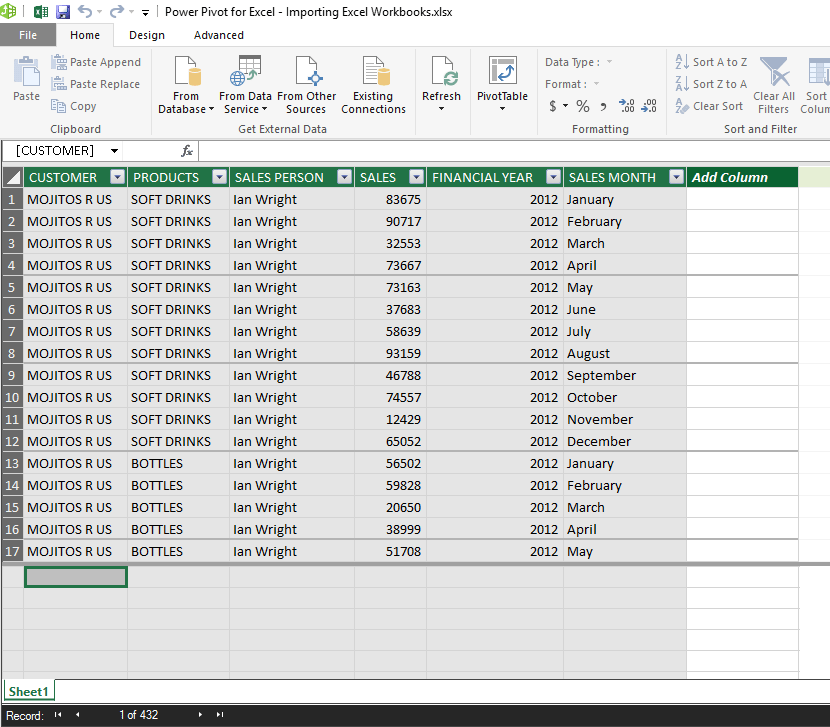
STEP 9: Your data is now ready for analysis using Power Pivot.
Bryan
Bryan is a best-selling book author of the 101 Excel Series paperback books.
