Incorporating images into Microsoft Excel not only elevates the aesthetic appeal of a spreadsheet but can significantly enhance its communicative power, especially for presentations requiring visual elements like product catalogs or employee directories. Proper preparation and understanding of the insertion process ensure that images contribute effectively to your data narrative.
In this article, we will cover a detailed guide on how to insert pictures in cells to beautify and enrich your spreadsheets with visual information.
Key Takeaways:
- Preparation is key: Organize your data and layout to accommodate images smoothly.
- Ease of insertion: Excel’s interface simplifies the process to inserting pictures in cells.
- Batch import for efficiency: Utilize Excel’s features to insert multiple images simultaneously.
- Creative usage enhances presentations: Embedding images can make spreadsheets more engaging and informative.
- Streamline with shortcuts: Keyboard shortcuts and organizing tips can expedite the process of managing images.
Table of Contents
Getting Started with Excel Images
A Brief Overview – Insert Pictures in Excel
For many, inserting images into Excel might not be a frequent task. However, when the moment arrives, that extra visual flair can transform a typical spreadsheet into an engaging data story. Whether you need to showcase product photos, add employee portraits, or craft a compelling report, incorporating images can certainly enhance the presentation of your data.
Preparing Your Excel Sheet for Image Insertion
Before you start adding pictures, it’s essential to tidy up your Excel sheet for a seamless integration. Begin by organizing your data to ensure that each image will match the corresponding cell. Keep extra space for larger images, or consider how you’d want them cropped to fit your layout. Here’s how you can prime your spreadsheet:
- Optimize Layout: Arrange the cells to provide sufficient space for images.
- Uniform Cell Size: Adjust the cell size for consistency, so each image fits neatly.
- Data Alignment: Make sure the data related to the images are aligned and easy to match.
- Backup Data: Always have a version saved without images, as adding many can slow down your workbook.
- Create a Master Sheet: If images will be included in a dashboard, a master sheet can help streamline the process.
For a smooth workflow, consider these preparation steps as the foundation for inserting images into Excel effectively.
The Insertion Process Simplified
How to Easily Insert Pictures in Cells
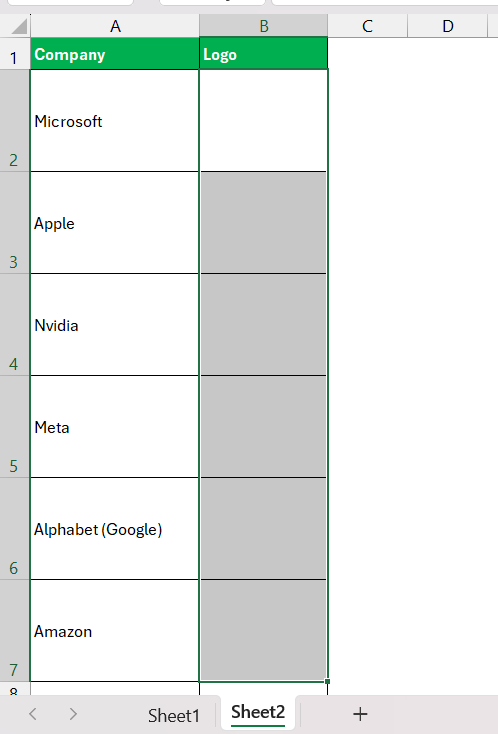
Adding pictures to individual cells in Excel can be a breeze once you get the hang of the steps. Let’s break it down:
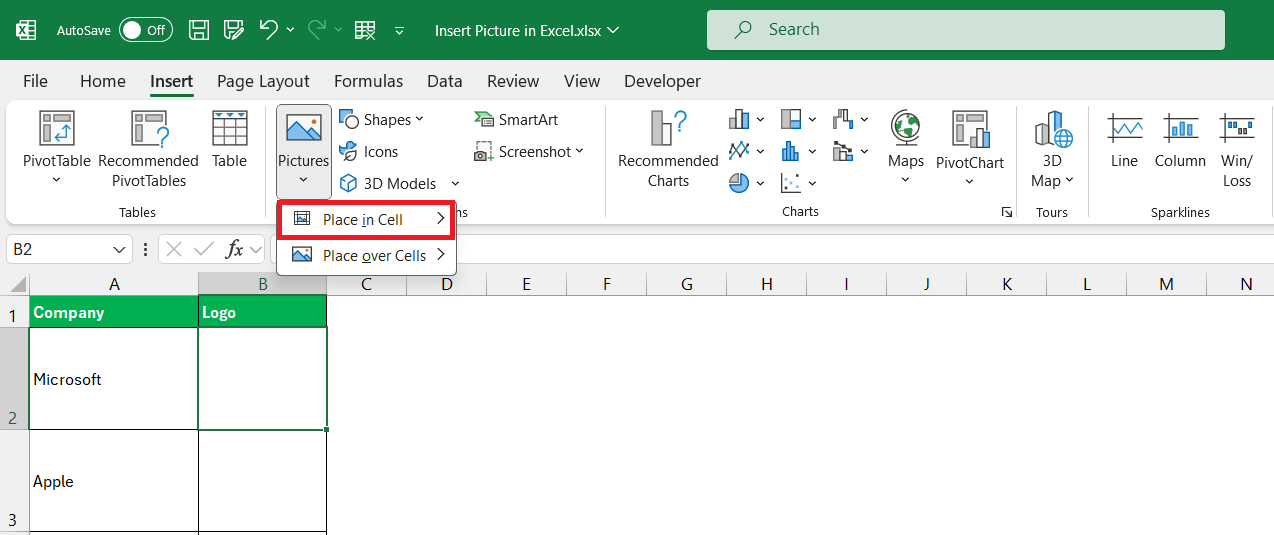
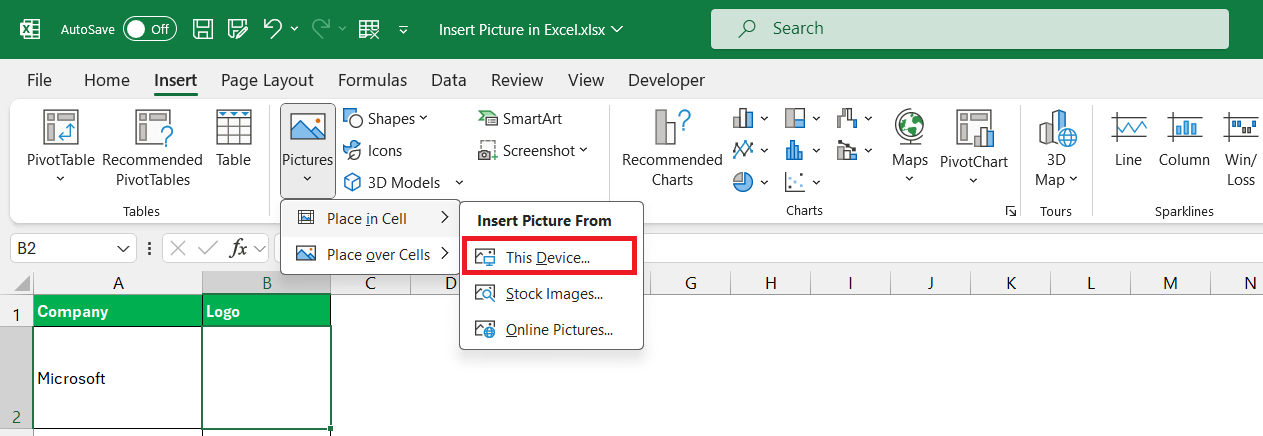
STEP 1: Launch Insertion Tool: Navigate to the “Insert” tab on Excel’s ribbon.
STEP 2: Illustrate Your Data: Click on “Pictures” in the “Illustrations” group. Select the “Place in Cells” command.
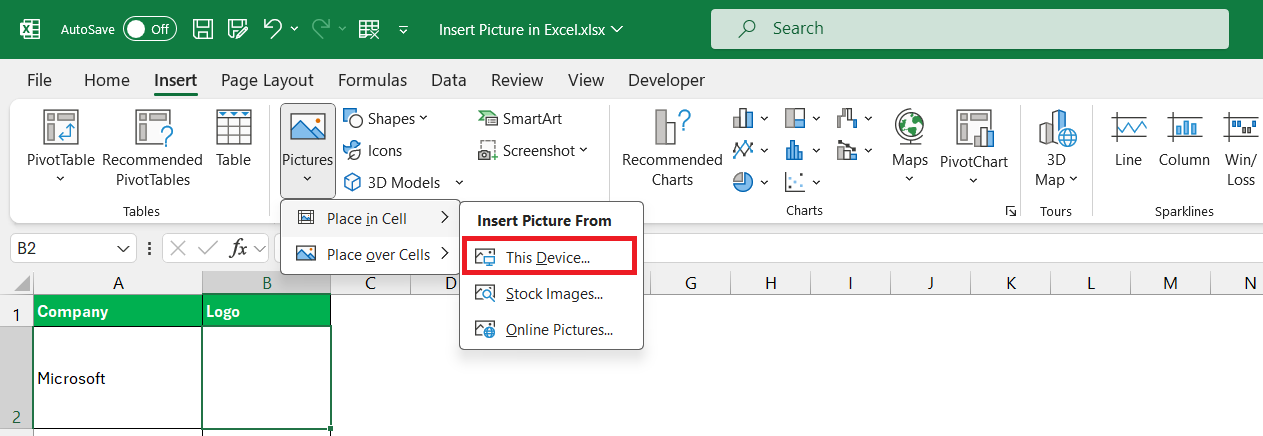
STEP 3: Choose Your Image: Pick the picture source, either from your device or online.
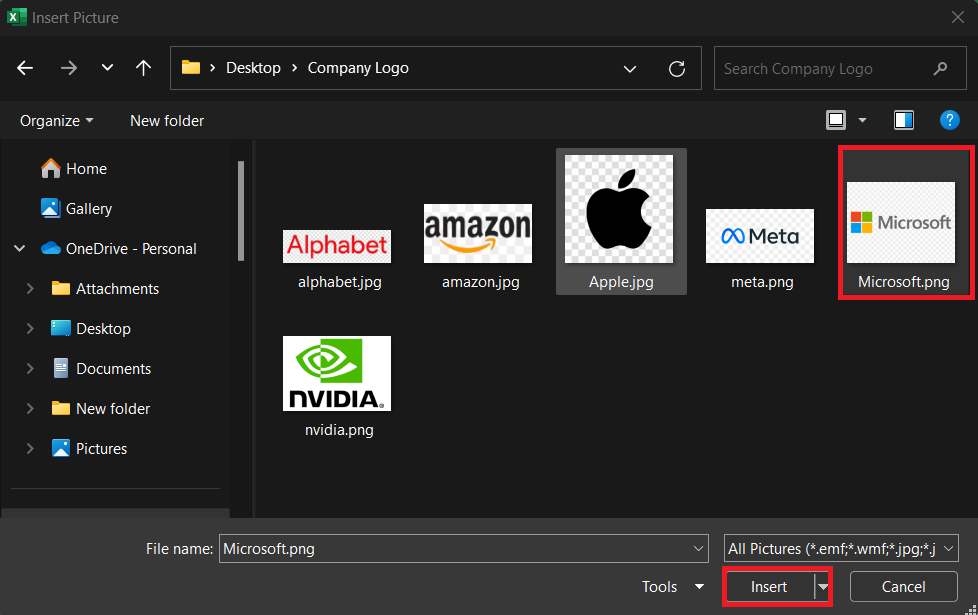
STEP 4: Insert and Adjust: Select the image, then hit “Insert”.
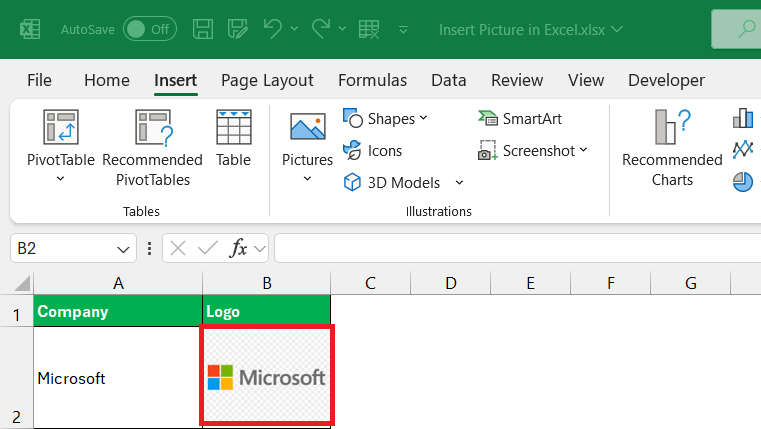
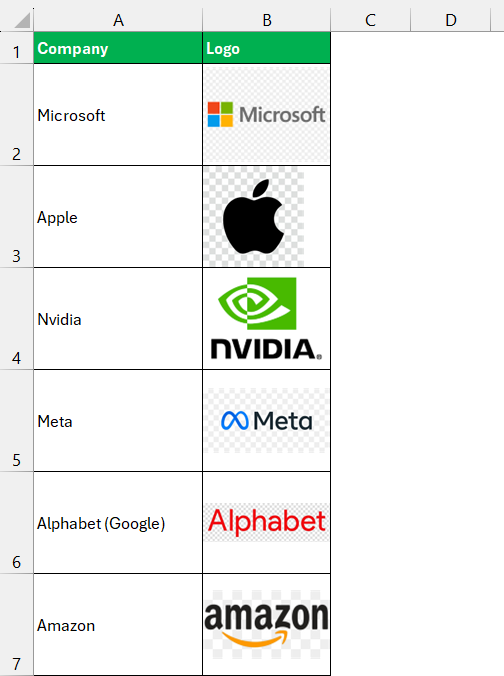
Your picture will comfortably nest within the targeted cell and will auto-adjust if you modify the cell’s dimensions.
Microsoft’s recent feature that allows direct placement into cells means you won’t struggle with alignment or sizing—the program does it for you!
Batch Importing Images into Multiple Cells
If you have an array of images to insert, doing them one by one could take ages. Luckily, there’s a way to batch-import pictures. Here’s your step-by-step guide to populating multiple cells with images in almost no time:
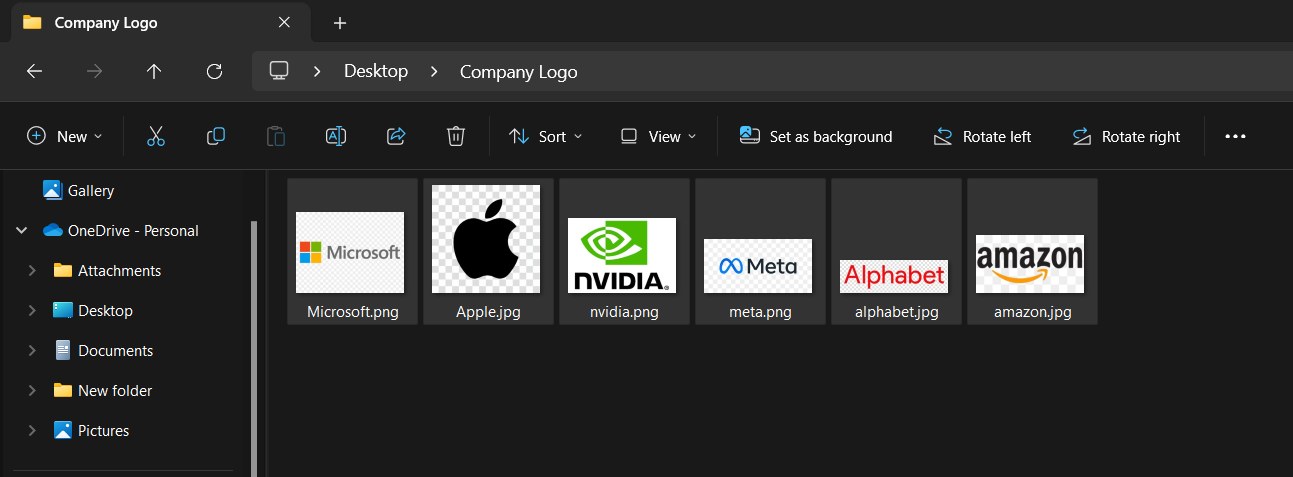
STEP 1: Use the “Ctrl” key for selecting multiple non-adjacent images, or the “Shift” key for adjacent images.
STEP 2: Go to the “Insert” tab and choose “Picture” > “Place in Cells” > “This device”.
STEP 3: Select all images and click on “Insert”.
All images will be inserted in the respective cells. Adjust the sizes to ensure they fit within the cells.
Creative Uses for Images in Excel
Enhancing Presentations with Cell-Based Images
Images directly anchored within cells bolster the clarity and appeal of your presentations. Whether you’re crafting an inventory list with product photos or a directory with staff headshots, embedded images make the data more relatable and easier to process. Keep these tips in mind:
- Visualize Your Data: Use cell-based images to create a visual index, facilitating quick recognition of items or categories.
- Presentation Ready: By having images tied to cells, your spreadsheets become instantly more presentation-friendly, as visuals guide viewers through your data’s story.
By linking the visual elements with the informational content, you reinforce the message and make your presentations significantly more memorable.
Dynamic Image Usage with Excel Formulas
Leveraging Excel’s formula capabilities can turn your static images into a dynamic component of your data narrative. Here’s how you can create an interactive visual experience:
- IMAGE Function Magic: Use the
=IMAGE("url")function to insert web-based images that update as the URL changes.
- Excel Dashboard Widgets: Craft dashboards that update images based on your data changes, giving a live feel to your metrics and reports.
These techniques allow your images to adapt as your data evolves, offering real-time insights with a visual punch.
Streamlining Your Workflow
Keyboard Shortcuts and Tips for Faster Image Insertion
Efficiency in Excel is often about knowing the right shortcuts and tricks. For faster image insertion, arm yourself with these keyboard shortcuts and tips:
- Quick Access to Insert: Use “Alt + N + P” to open the “Insert Picture” dialog without touching the mouse.
- Copy-Paste Mastery: Utilize “Ctrl + C” and “Ctrl + V” to copy and paste images quickly within your workbook.
- Moving Images: Select your image and then use arrow keys while holding “Alt” to move it snappily to the exact location.
- Size Adjustments: Hold the “Ctrl” key while dragging an image’s corner to resize proportionately.
Keep these keyboard shortcuts in mind as you work, and you’ll be inserting and managing images with speed and precision.
Keeping Your Data and Images Organized
Effective Management of Excel Image Libraries
Keeping a well-organized image library within Excel ensures easy access and a streamlined workflow. Implement these effective management tips:
- Folder Structure: Store related images in specific folders on your computer or network to make batch import easier.
- Naming Conventions: Use descriptive and consistent file names for quick identification and referencing in Excel formulas or VBA scripts.
- Regular Audits: Periodically review your image library to remove duplicates or outdated images, keeping the collection lean and relevant.
With these practices in place, you’ll maintain an efficient image library that complements your data management strategy.
Best Practices for a Neat and Tidy Spreadsheet
A well-ordered spreadsheet is not just visually appealing, but also functionally superior. Here are some best practices for keeping your Excel workbook clean and tidy:
- Consistent Formatting: Apply a uniform style to cells, especially those containing images, for a cohesive look.
- Grouping and Aligning: Use Excel’s grouping functionality to align images and their associated data, keeping everything in orderly blocks.
- Minimalism Wins: Avoid clutter by only including essential images and consider using thumbnails or icons when smaller visuals suffice.
- Cell Borders and Colors: Use cell borders and color coding strategically to delineate areas with images, making the sheet easier to scan.
- Comments and Instructions: Include comments or a separate instruction tab to guide users on how to interact with the images and data.
By following these tips, your spreadsheet will not only look professional but also be more intuitive to use for colleagues and clients alike.
FAQs
How Do I Ensure My Images Move with Their Corresponding Cells?
To guarantee your images stay with their designated cells when sorting or moving rows or columns around, right-click the image, then select “Format Picture.” Under the “Size & Properties” options, choose “Move and size with cells.” This anchors your images to the cells they belong to.
Can I Insert Pictures Using Excel Online or Mobile Apps?
Yes, you can insert pictures in Excel Online and mobile apps, although the functionality may be more limited when compared to the desktop version. Navigate to the “Insert” tab and select “Pictures” to add images from available sources such as your device or cloud storage.
How do I insert a picture into an Excel cell?
To insert a picture into an Excel cell, you can:
- Select the cell where you want the picture.
- Go to the “Insert” tab, then “Pictures,” and choose the image from your device.
- Once the picture is inserted, adjust its size to fit within the cell.
How do you insert a picture into text in Excel?
To insert a picture into text within Excel, you’ll have to:
- Insert a text box from the “Insert” tab.
- With the text box selected, go to “Format” tab, click “Shape Fill,” and choose “Picture.”
- Select the image you wish to use; it will fill the text box, behind any text.
How do I insert a picture into a folder in Excel using formula?
Inserting a picture into a folder in Excel by using a formula isn’t natively supported. However, you can write a custom VBA macro to loop through files in a folder and insert them into your spreadsheet. For pure formula use, consider leveraging Excel’s recent =IMAGE("file_path") function, but keep in mind it works with URLs and may not support local folders directly.
John Michaloudis is a former accountant and finance analyst at General Electric, a Microsoft MVP since 2020, an Amazon #1 bestselling author of 4 Microsoft Excel books and teacher of Microsoft Excel & Office over at his flagship Academy Online Course.

