Table of Contents
Let us look at each of these methods in detail.
Download the Excel Workbook below to follow along and understand How to Easily Install Excel Add-ins –
download excel workbookInstall-Excel-Add-ins.xlsx
Table of Contents
Installing an Add-in Through the Excel Ribbon
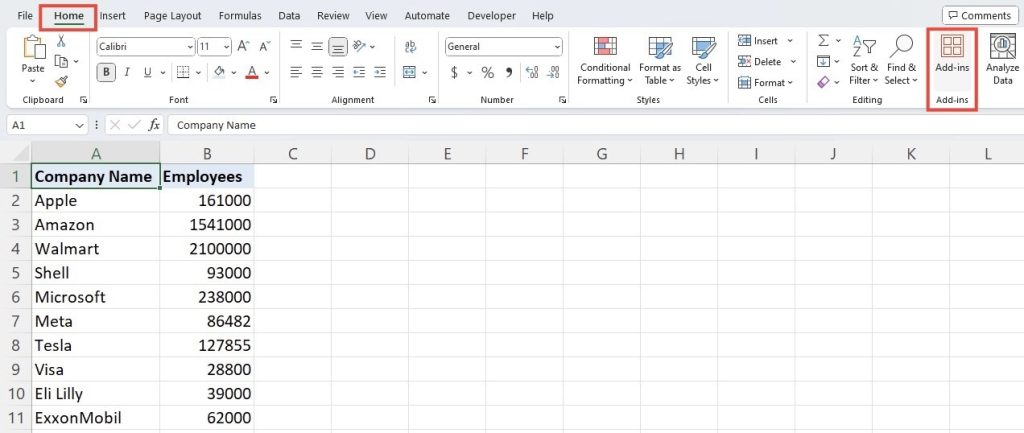
Let’s say we have data on some of the world’s largest companies and their employee population. We want to quickly create a visual reference that will display this information. There are plenty of Excel Add-ins we can utilize for data visualization. There are basically two ways to install and use an Add-in in Excel. Let’s start with the most straightforward method:
Got to the Home tab in the Excel Main Ribbon.
In the Add-Ins group, click on Add-ins.
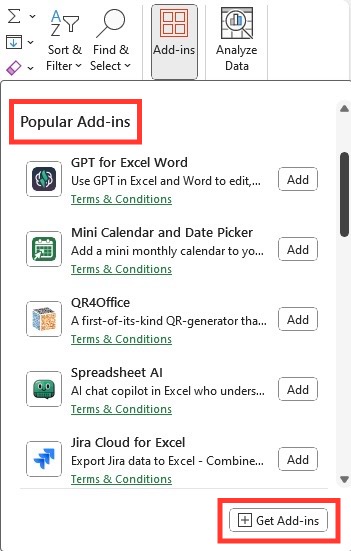
From here, you can choose from the most Popular Add-ins.
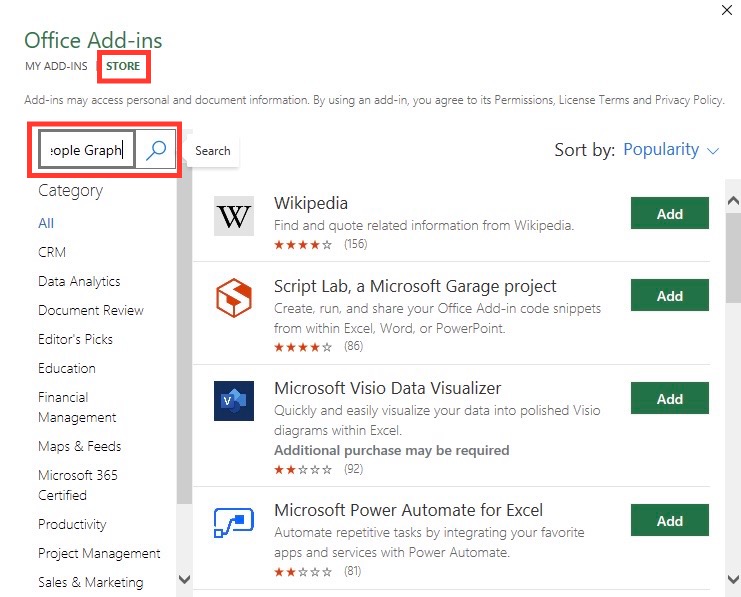
Click on the Add-ins group, then Store. This will take you to the Office Add-ins Store.
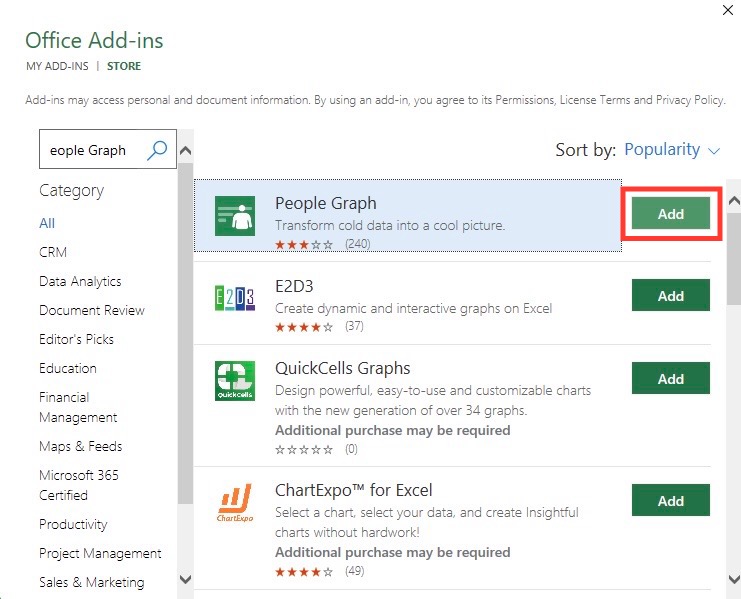
Browse or search for the add-in you want, then click on it. In our case, we will search for the People Graph Add-in.
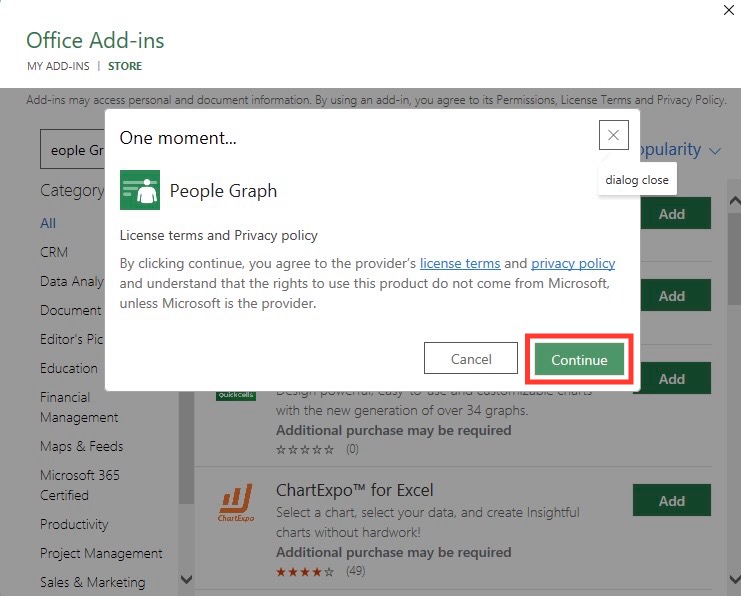
Click on Add to install the Add-in.
Confirm, then click on Continue.
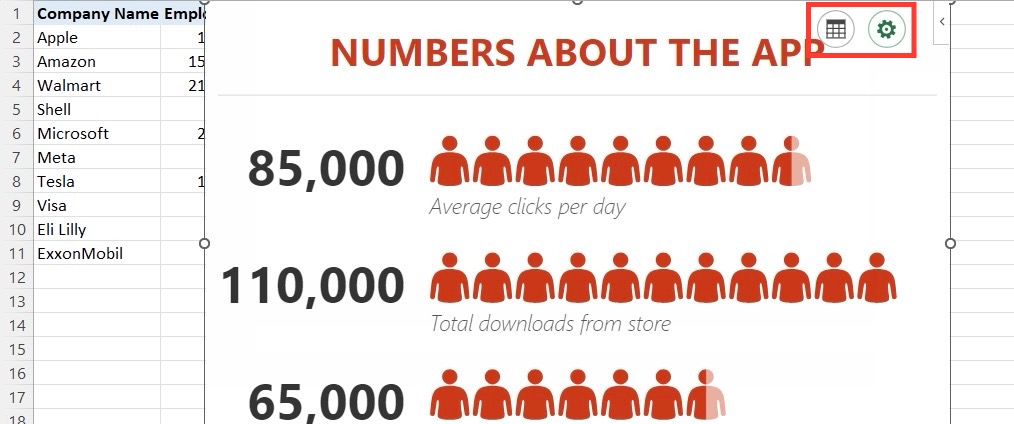
As you can see, you will be given the option to customize the functions and appearance of the Add-in.
Click on the Add-in window. A cog icon will appear, indicating access to the Settings.
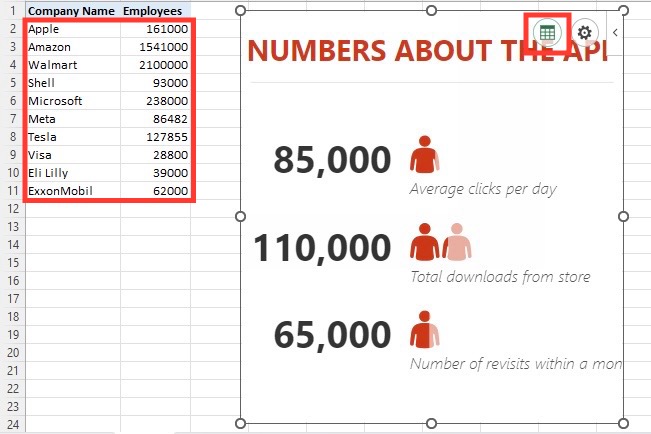
Select the Table icon to incorporate your data.
Highlight your data and click Create.
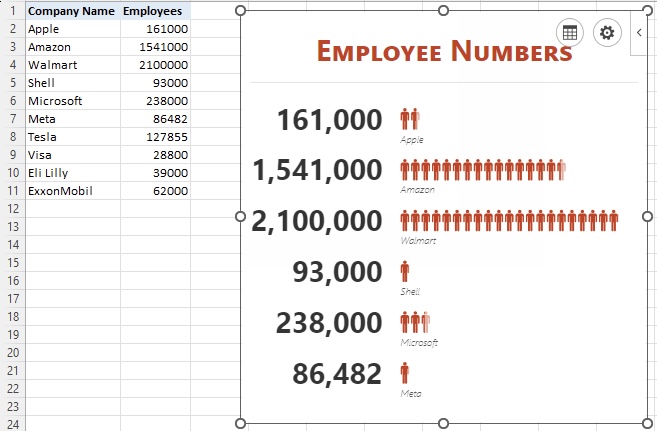
As you can see, the Add-in has helped us create a quick illustration of the data.
Installing Third-Party Add-ins
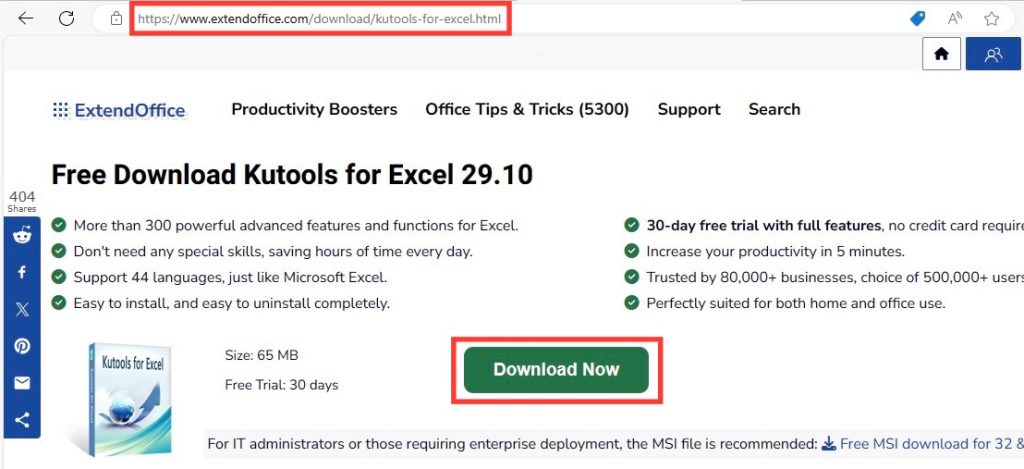
Go to the website of the Add-in maker. In our example, we will go to extendoffice.com.
Click on Download Now to download it to your computer.
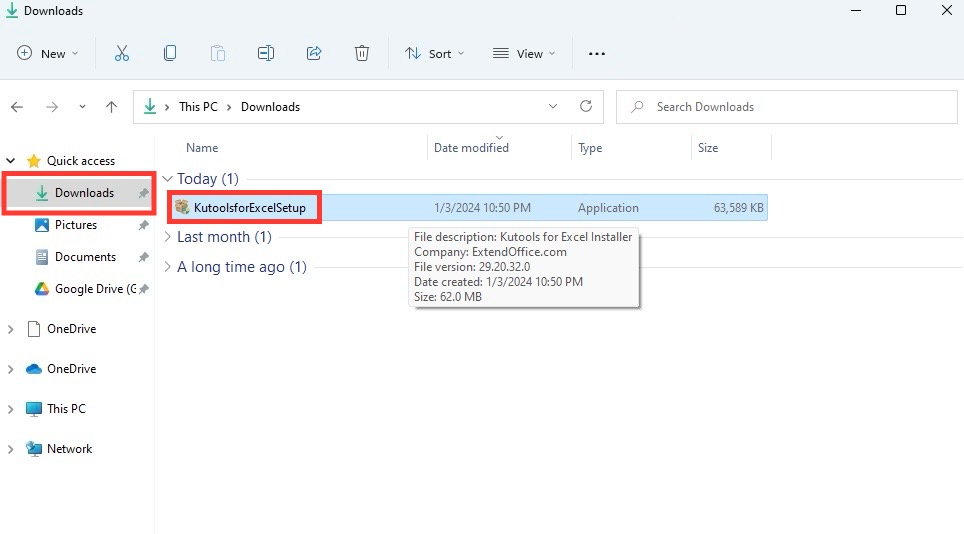
Locate the downloaded file in your computer and extract.
Double-click on the file to Open.
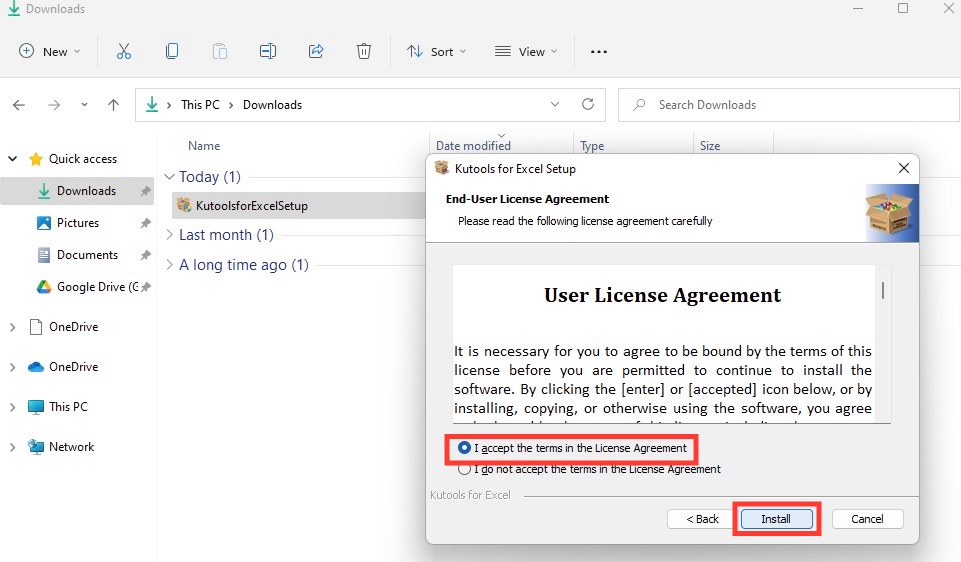
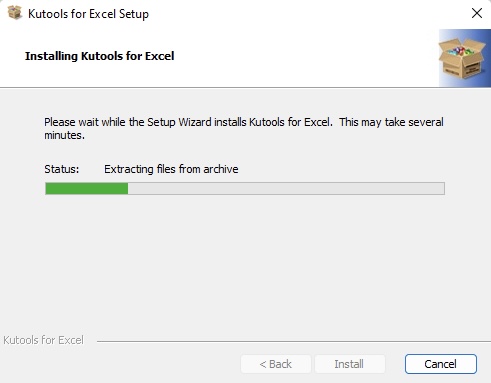
Accept the License Agreement and Install the file.
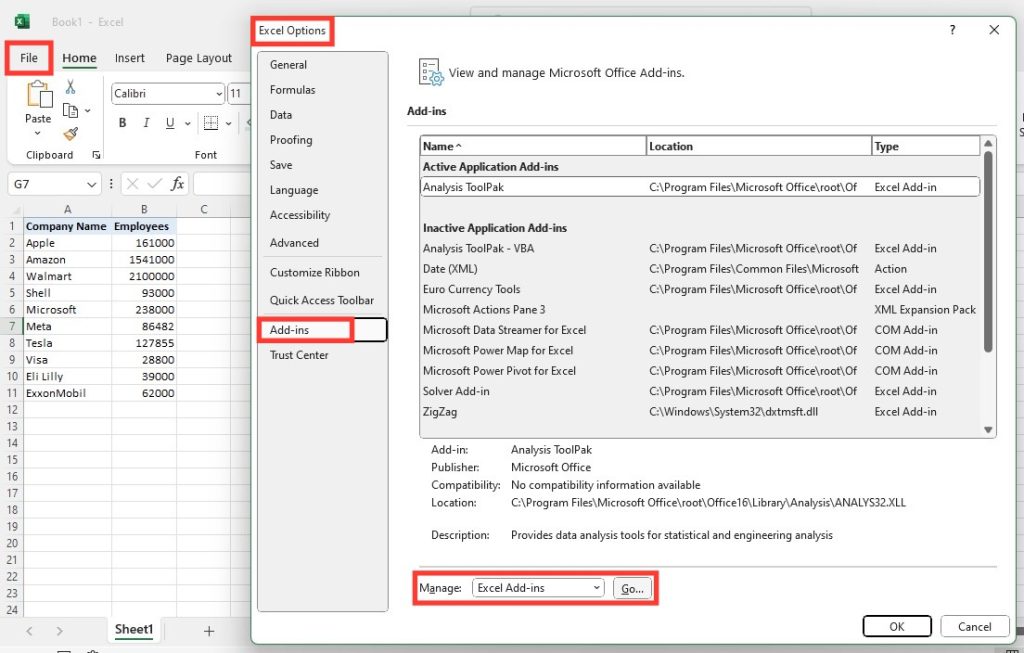
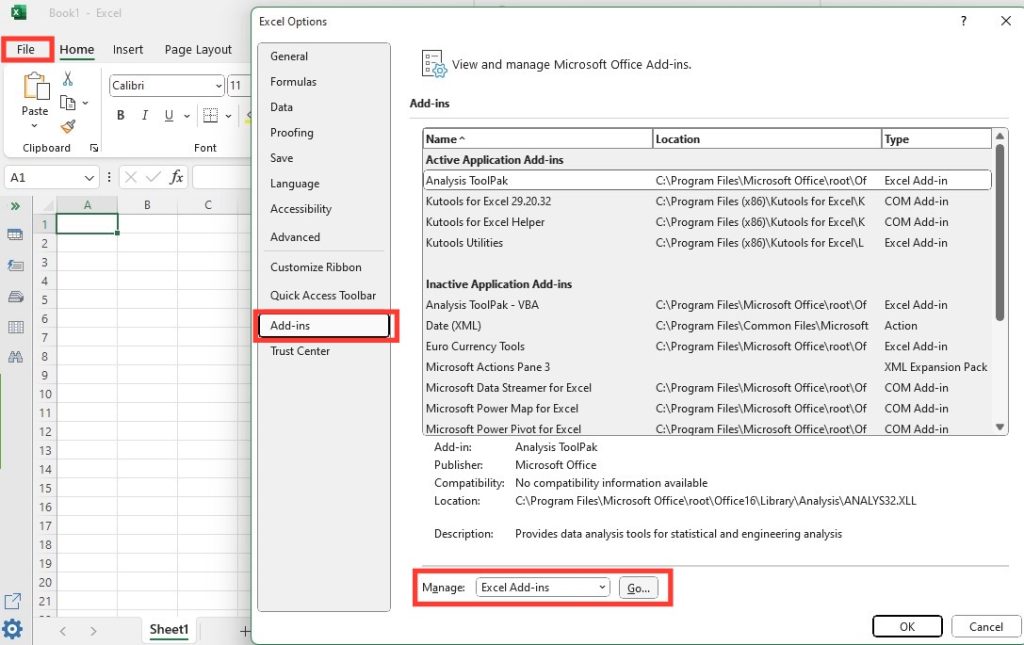
Click on the File tab in Excel. Select Options. Go to Add-ins on the left.
Select Manage at the bottom, then select Excel Add-ins. Click Go.
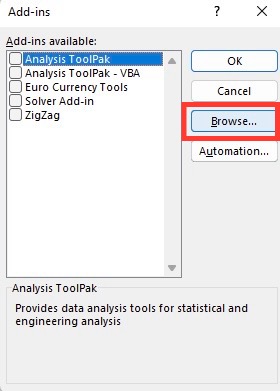
Click the Browse button.
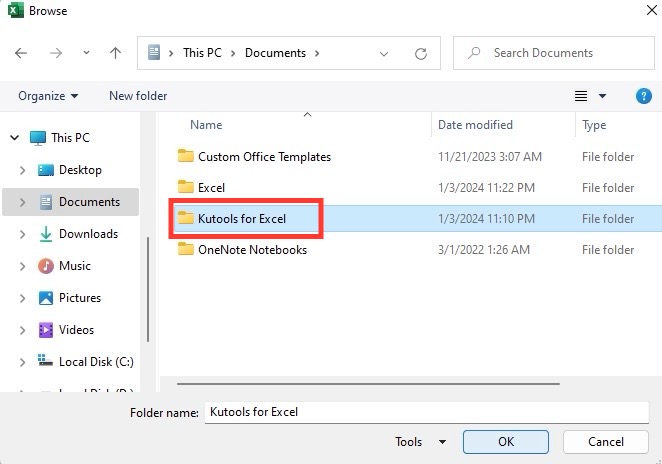
Locate the downloaded file on your computer.
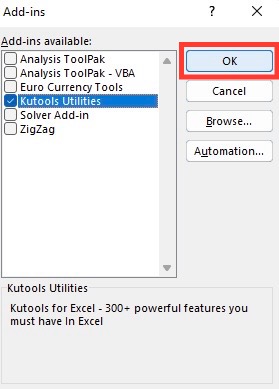
Click OK to install.
Confirm that you want to install the Add-in.
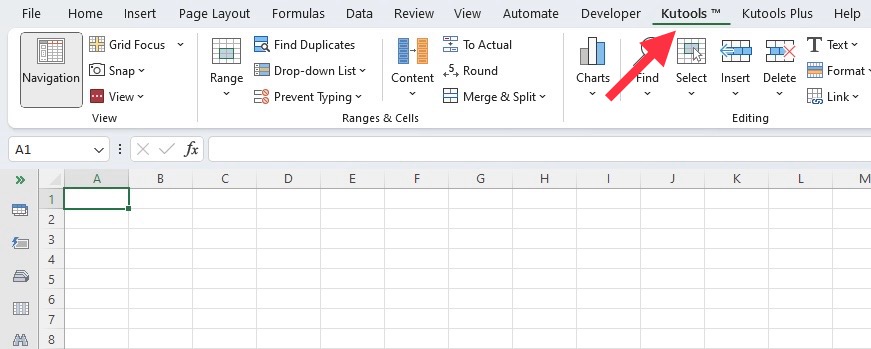
As you can see, the Add-in has been successfully integrated to Excel.
Unblocking an Excel Add-in File
Some users may have trouble accessing the Add-in even after successfully installing it and adding to the Ribbon. This is because Windows might have deemed the file to be a security risk. To unblock a file, follow these steps:
Search for the Excel Add-in file you want to unblock.
Make sure that the Add-in file is located in the Documents folder.
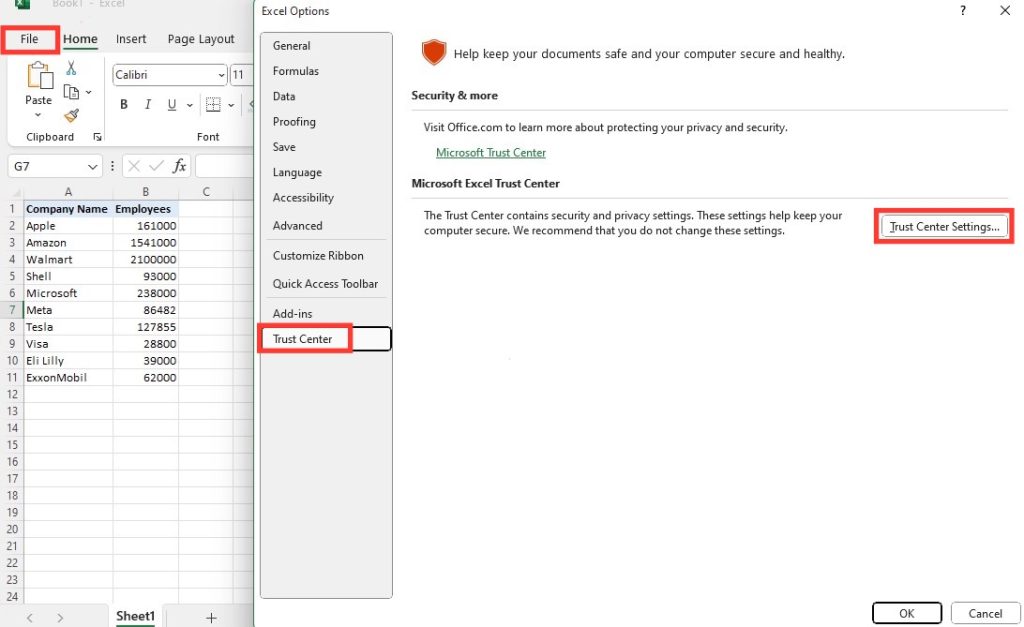
Click on the File tab in Excel. Select Options. Go to the Trust Center.
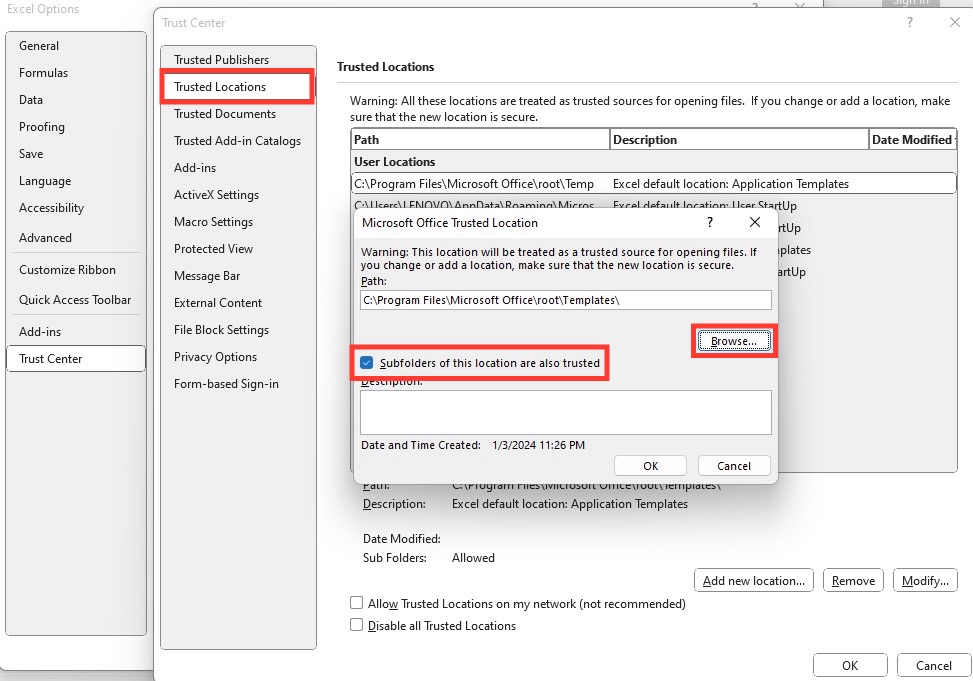
Click on Trust Center Settings. Then, Trusted Locations.
Go to Add new location. Click on Browse to choose the folder.
Click OK.
Tick the Subfolders of this location are also trusted checkbox. Click OK.
Close and reopen Excel.
As you can see, Excel has recognized the file without any restriction.
Fortunately, you only have to unblock a file once.
Note: Some Add-ins from less than reputable sites may carry viruses. Do your due diligence and download only from trusted websites.
Removing an Excel Add-in
If you find that you no longer have the need for an Add-in, you can opt to remove it from Excel. To remove an Add-in, follow these steps:
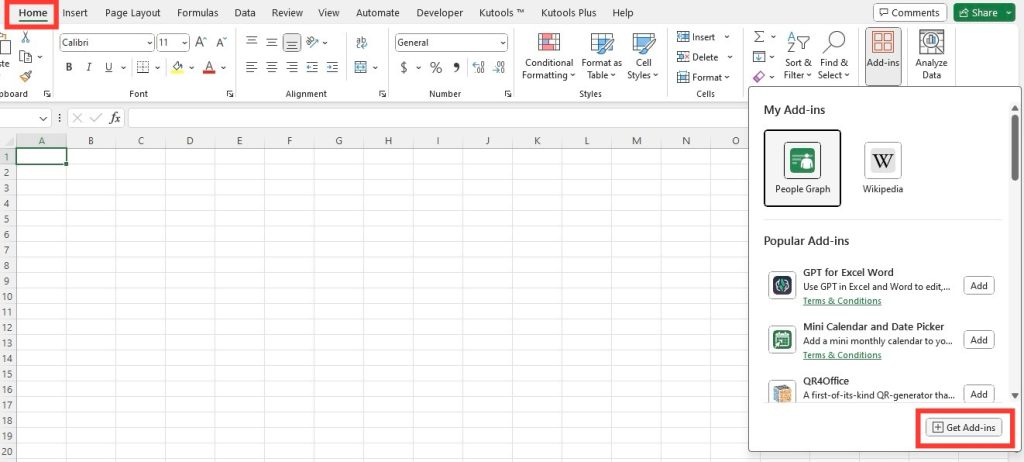
Go to the Home tab.
Click on Add-ins. Then, Get Add-ins.
Go to MY ADD-INS.
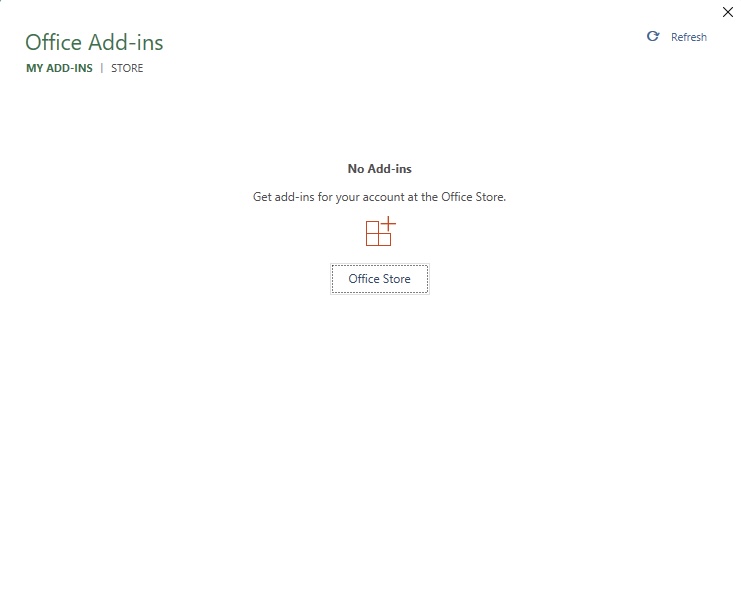
From here, you will see a list of your installed Excel Add-ins. Click on the one you want to remove.
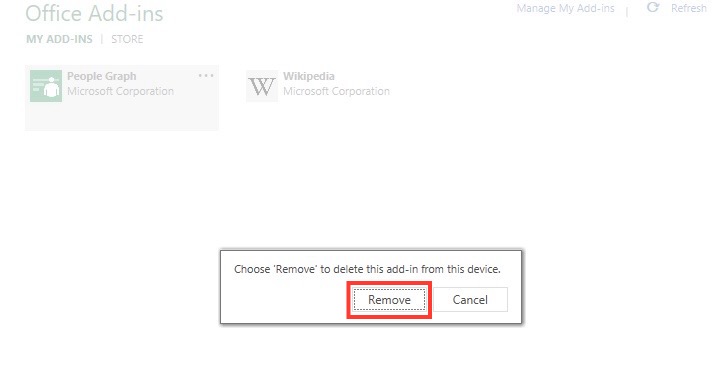
Click on the 3 dots on the upper right-hand corner of the Add-in to access the options menu. Click on the Remove button.
Click on Remove to confirm.
Deactivate an Excel Add-in
If you want to temporarily deactivate an Add-in, follow these steps:
Click on the File tab in Excel.
Go to Options, then select Add-ins.
Go to Manage Add-ins. From there, locate the Add-in you want to inactivate.
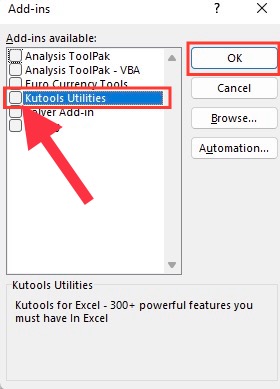
Untick the checkbox to Deactivate the Add-in.
Click OK.
Conclusion
There you have it! If you followed all the steps above, you should be able to install and use Excel Add-ins with ease. Hopefully you can use the Add-ins to your advantage in your next Excel project.
Download our 141 Free Excel Templates and Spreadsheets.
John Michaloudis is a former accountant and finance analyst at General Electric, a Microsoft MVP since 2020, an Amazon #1 bestselling author of 4 Microsoft Excel books and teacher of Microsoft Excel & Office over at his flagship Academy Online Course.
