Power Query lets you perform a series of steps to transform your Excel data.
One of the possible steps that surprised me was that I could list out the files in my computer!
This is useful if you want to do some analysis on your file list (i.e. finding a file, checking which files have the biggest size to clear up space).
Let’s go through the steps in detail:
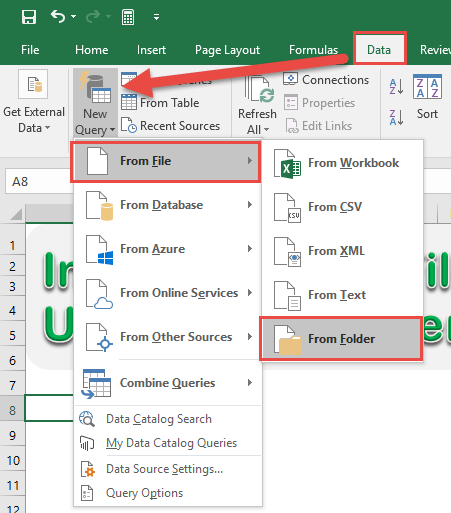
STEP 1: Go to Data > New Query > From File > From Folder
(In Excel 2010 & 2013 you need to go to Power Query > From File > From Folder)
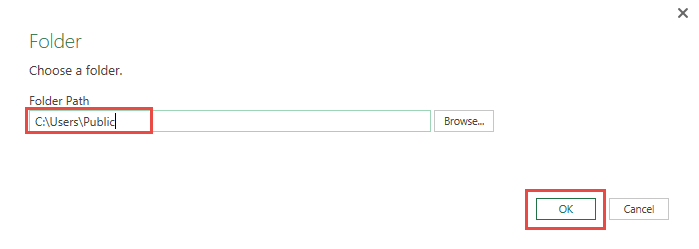
STEP 2: Type in the path you want to list the files from. You can also Browse for the folder. Click OK.
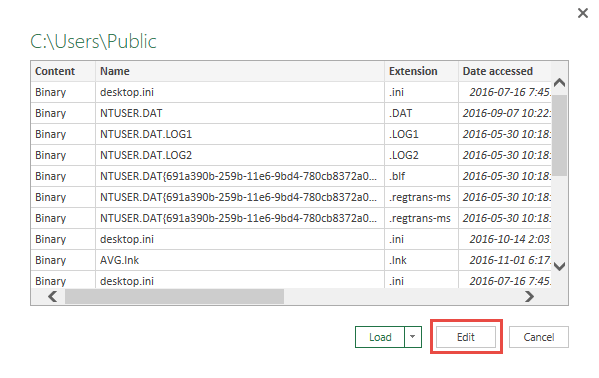
STEP 3: This will give you a preview the file list. Click Edit to examine it more inside the Power Query editor.
STEP 4: You are now inside the Power Query Window.
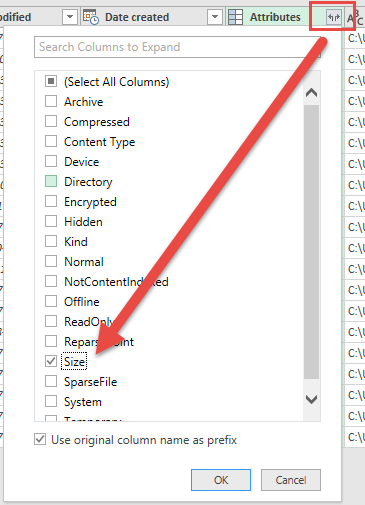
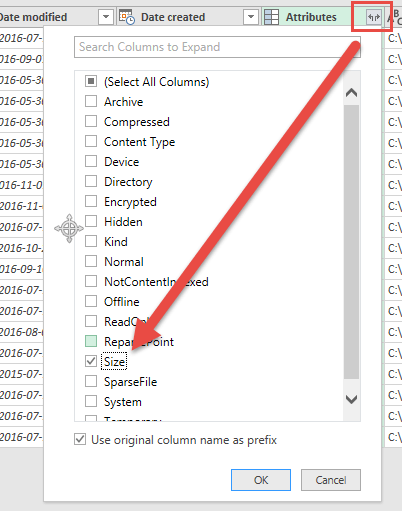
You can add more information into your Table by clicking the Icon beside Attributes.
For example we want to include the Size column. Uncheck (Select All Columns) and check Size. Click OK.
The size column is now shown.
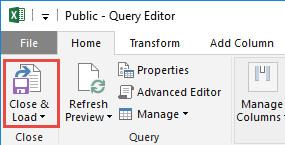
STEP 5: Click Close & Load from the Home tab and this will automatically open up a brand new worksheet in your Excel workbook with the new data.
You now have your spanking new file list!
HELPFUL RESOURCE:
Bryan
Bryan is a best-selling book author of the 101 Excel Series paperback books.

