101 Advanced Excel Formulas & Functions Examples!
Key Takeaways
- Select the right logo format and use high-quality images for the best outcomes when creating a transparent logo in PowerPoint, ensuring your branding appears consistent and polished.
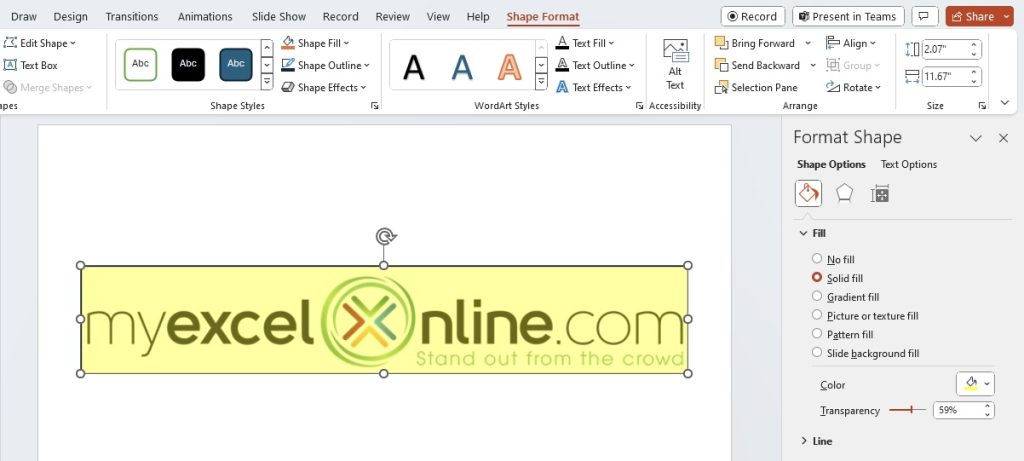
- Use PowerPoint’s “Format Picture” panel to access the “Fill” section, where you can choose “Solid Fill” and adjust the transparency slider until you reach the desired level of transparency for your logo.
- Apply these adjustments to seamlessly blend your transparent logo into various backgrounds in PowerPoint presentations, enhancing the visual appeal and maintaining a professional look for your brand.
Understanding the Basics of Image Transparency
Image transparency is a nifty feature that determines which part of an image is see-through and to what degree. Think of it as a window you can adjust to either showcase or obscure the view behind it. This quality is particularly useful when you want to layer images or let the background design shine through some parts of your image. In PowerPoint, tweaking an image’s transparency is a breeze, and understanding how it works can elevate your presentation’s visual appeal.
Table of Contents
Preparing Your Logo for Transparency
Selecting the Right Logo Format and Quality
When choosing a logo for PowerPoint, go for high-resolution unused gaming logos in either SVG or PNG format to ensure crispness and clarity. These formats preserve the quality of the image and offer transparency, doing away with unwelcome backgrounds. Always remember, a high-resolution image is a key to a logo that remains sharp and professional when scaled up for larger displays or high-definition screens.
Overview of Tools Available in PowerPoint
PowerPoint is equipped with a suite of intuitive tools to help you craft that perfect logo with a transparent background. You’ll find options to insert images, color selection features like ‘Set Transparent Color,’ artistic effects to customize your logo’s look, and even background removal tools to fine-tune transparency. These features are generally user-friendly, ensuring that you don’t need to be a design pro to make your logo blend perfectly with your slides.
Step-by-Step Guide to Making Your Logo Transparent
Inserting Your Logo into PowerPoint
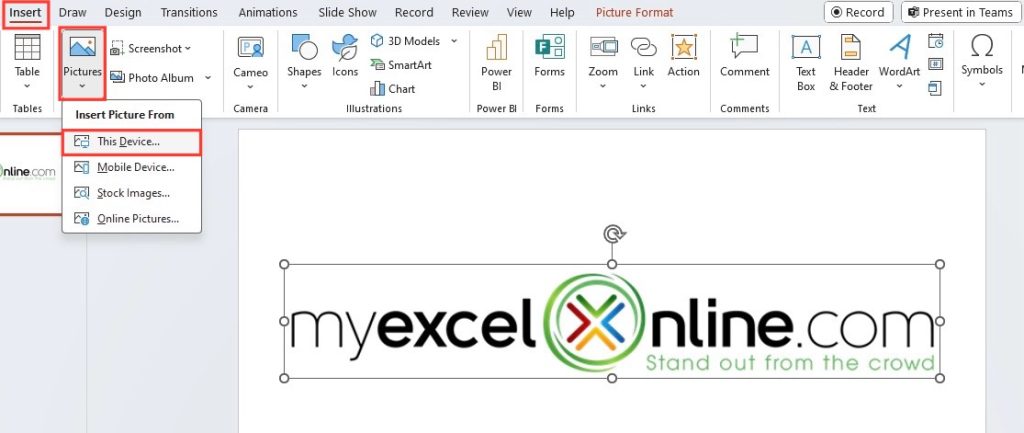
Getting your logo onto a slide is effortless. Start by popping open your PowerPoint presentation and selecting the slide that needs your logo. Click on the “Insert” tab, choose “Pictures,” browse for your logo file, and hit “Insert.” Voila! Your logo is now part of your slide, ready to be tweaked to perfection.
Using the ‘Set Transparent Color’ Feature
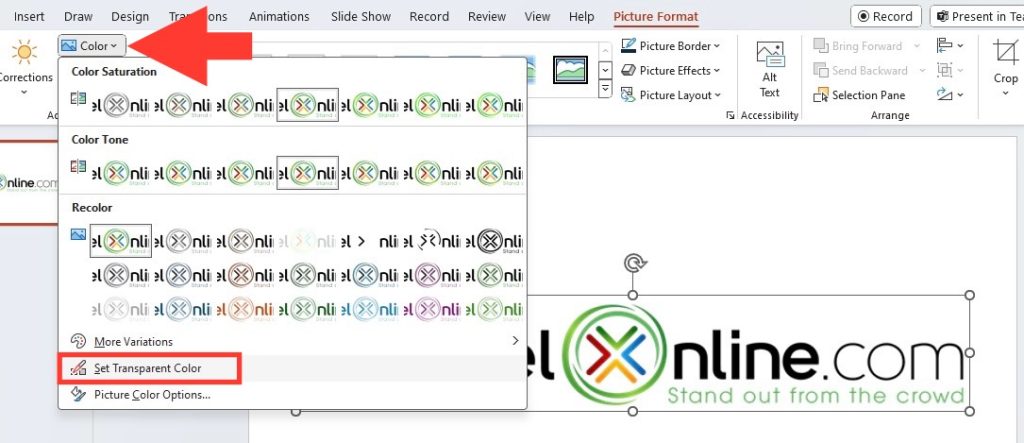
The ‘Set Transparent Color’ feature is a simple yet effective tool in PowerPoint for making solid backgrounds invisible. Here’s your quick guide: First, double-click your uploaded logo to activate the “Picture Tools” format tab. Locate the “Adjust” group, click on “Color,” and then select “Set Transparent Color.” Your cursor morphs into a pen-like icon; use it to click on the color in your logo you’d like to vanish. And just like that, you’ll see the selected color turn transparent!
Just keep in mind, this wizardry is best used on logos with solid, uniform colors to avoid any hiccups.
Fine-Tuning Your Transparent Logo
Adjusting the Transparency Level
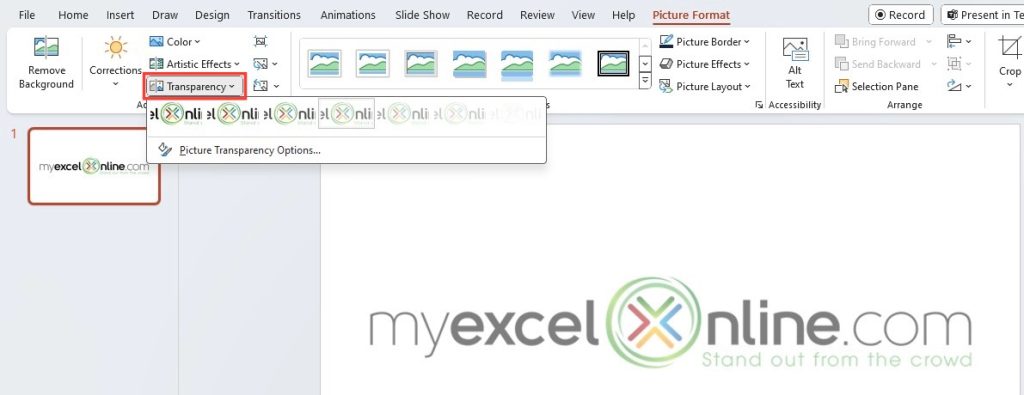
Fine-tuning the transparency of your logo can significantly enhance the look of your slides. After inserting your logo, just head over to the “Picture Format” tab and hit “Transparency.” You’ll see a range of presets that let you dial the transparency up or down with a single click. Want more control? Select “Picture Transparency Options” for a slider that adjusts transparency to the exact percentage you require, anywhere from fully opaque to completely see-through.
Crafting the Perfect Transparent Gradient Overlay
Want to add some artistic flair to your logo? Consider layering a transparent gradient for an elegant touch. First, draw a shape over your logo using ‘Insert’ and ‘Shapes’, then right-click and pick ‘Format Shape.’ Under ‘Fill,’ opt for ‘Gradient fill,’ and then play with the gradient stops—each stop’s transparency can be set from 0% (fully opaque) to 100% (completely transparent). This way, you can craft a gradient that gently transitions, putting the spotlight on your logo or balancing text visibility with stylish design.
Remember to save this custom gradient to quickly replicate your unique style across different slides.
Saving and Implementing Your Transparent Logo
Exporting Your Logo with a Transparent Background
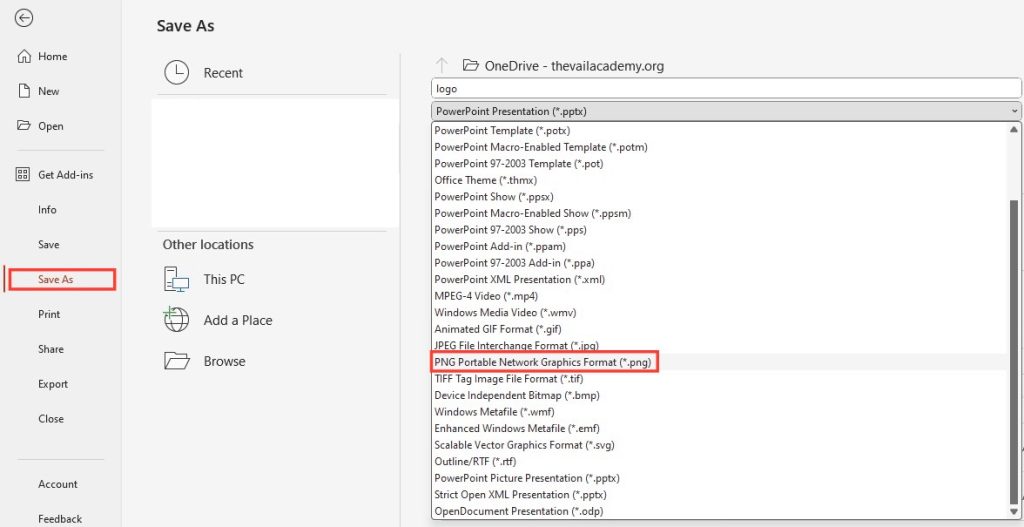
To wave goodbye to the background once you’ve perfected your logo’s transparency, just head to the “File” menu, tap “Save As,” and choose where to stash your masterpiece. When picking the file type, hunt down PNG or TIFF, since they’re champs at handling transparency. Then hit “Save,” making sure the “Save transparency” checkbox is ticked, and you’re golden! Your logo is saved, background-free, primed for wherever your brand needs to shine.
Tips for Using Your Transparent Logo in Presentations
Once your logo is transparent, here’s how to make the most of it:
Placement: Position your logo where it’s visible but not obstructive in the slide. Corner placements are often preferred when using the logos in company profile presentations or business decks.
Size: Adjust your logo size proportionally to avoid distortion. In some slides, you may want to enlarge the logo, while in others keep it smaller.
Color Schemes: Make sure your logo colors complement your presentation’s theme.
Consistency is key to effective branding. When using picture transparency options for logos in your PowerPoint presentations, ensure that the size, position, and colors of your logos remain consistent throughout your slides. This will create a cohesive and professional look for your presentation.
FAQs
What file types support transparency in logos for PowerPoint?
PNG and TIFF are your go-to file types for logos with transparency in PowerPoint. They simulate invisible backgrounds with ease, allowing your logo to blend smoothly with any slide. Just make sure to save in these formats to keep that clean, clear look.
How do I ensure my logo maintains its quality when made transparent?
Always start with a high-resolution version of your logo, preferably in PNG or SVG format, to ensure it remains crisp when you make it transparent. Additionally, avoid resizing it too much within PowerPoint to prevent any quality loss.
How do I remove the white background from a logo in PowerPoint?
Use the ‘Remove Background’ tool in PowerPoint to zap away the white backdrop. Simply click on the logo, head to the ‘Picture Format’ tab, and select ‘Remove Background’. Resize the box to keep what you need, click ‘Keep Changes’, and your logo will emerge background-free!
John Michaloudis is a former accountant and finance analyst at General Electric, a Microsoft MVP since 2020, an Amazon #1 bestselling author of 4 Microsoft Excel books and teacher of Microsoft Excel & Office over at his flagship Academy Online Course.
