The Mail Merge function in MS Word helps you print or email bulk messages that feel personalized. It just requires a data source for your recipients, using which it will easily combine a word document with your data to create personalized letters.
Now let us start with the process of Mail Merge. Watch it on YouTube and give it a thumbs-up!
A Mail Merge function requires basically two things:
- A document that contains the content of your letter.
- A data source from where you will get all the information about your recipients.
This can be from various sources like MS Excel, a CSV, or even your contacts in Microsoft Outlook. You can also download your contacts from different email programs and use that file as your data source.
Follow the steps below to know how to use Mail merge in MS Word:
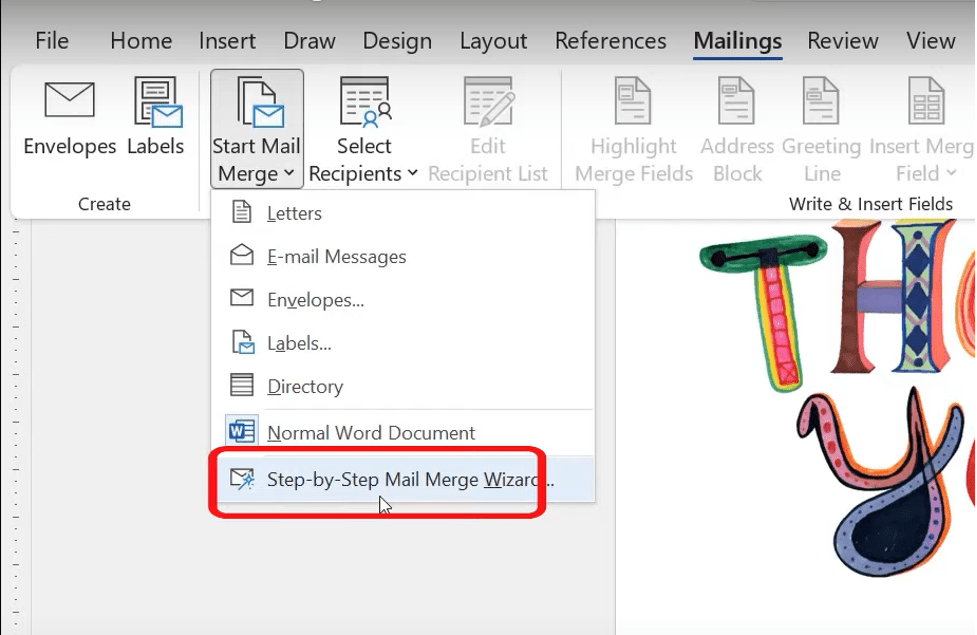
- Go to the Mailings tab
- Click on the Start Mail Merge > Step-by-Step Mail Merge Wizard option.
This will open up the Mail Merge Wizard on your screen. Now it is a simple step-by-step process that you need to follow.
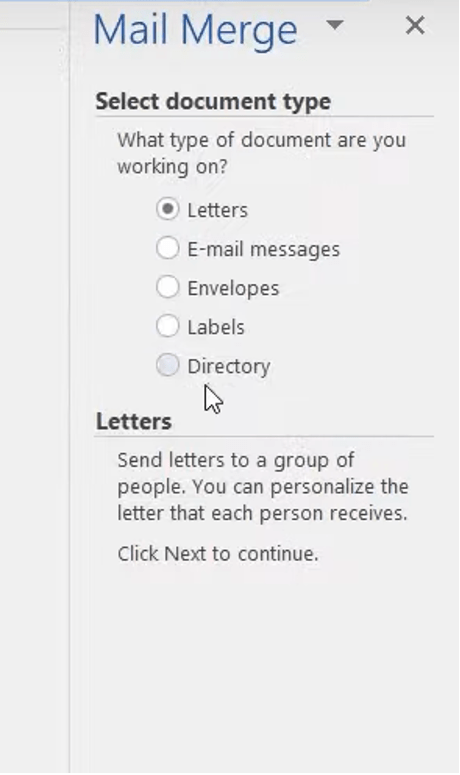
STEP 1
- Under the Select document type list, choose the type of document that you want.
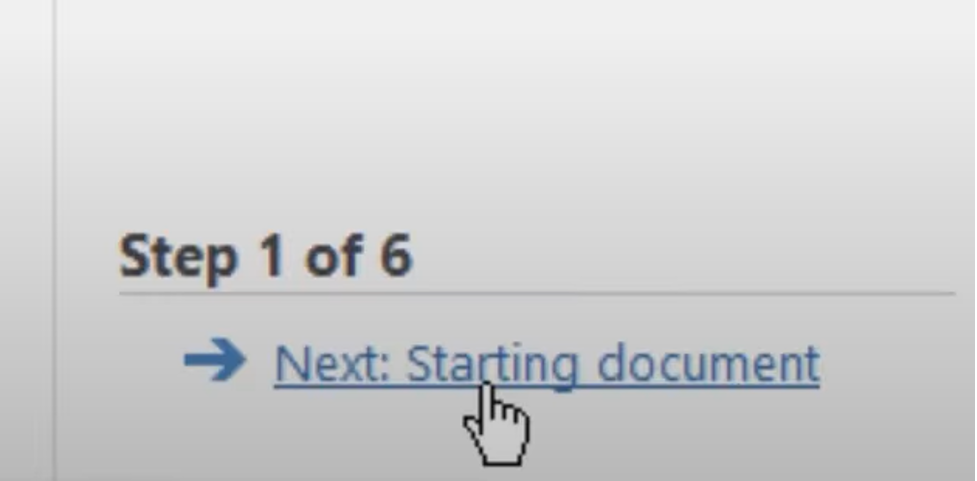
- Go to the bottom of the Wizard and click on Next: Starting Document.
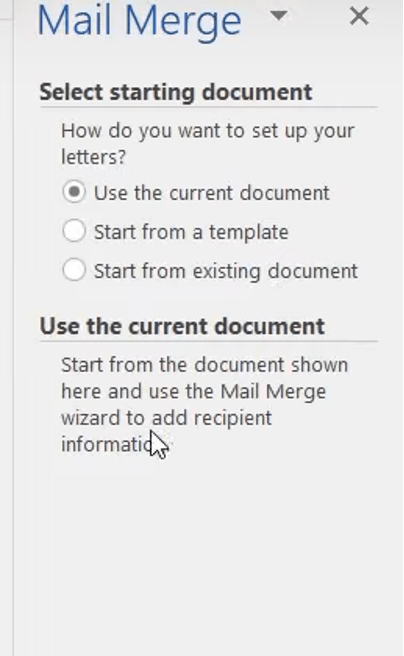
STEP 2
Now that the wizard has advanced, the next step is to select or create a starting document.
- You can either use the current document or a template or an existing document as the basis for the mail merge. Choose whichever option you want under Select starting document list.
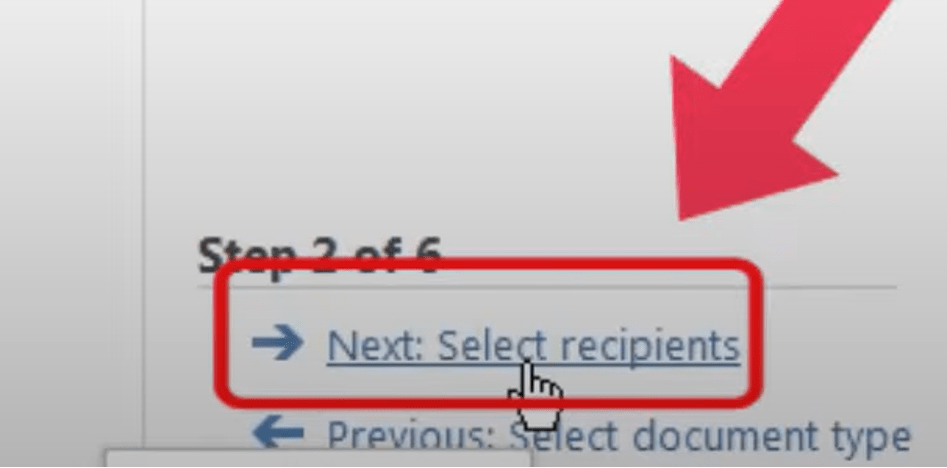
- Go to the bottom of the Wizard and click on Next: Select recipients.
STEP 3
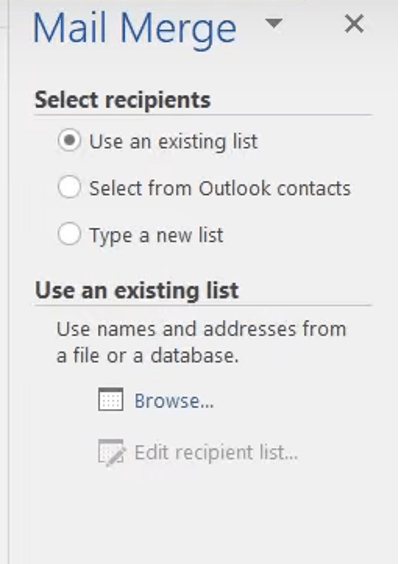
Now you must decide where you will obtain your list of addresses. You can use an existing list or you could alternatively use Outlook contacts, or manually create your own list.
- Under the Select recipients’ list, Choose the method that you want.
You can choose Select from Outlook contacts if you want to use your contacts on Outlook. You can even choose the Type a new list and manually create a new list for your contacts.
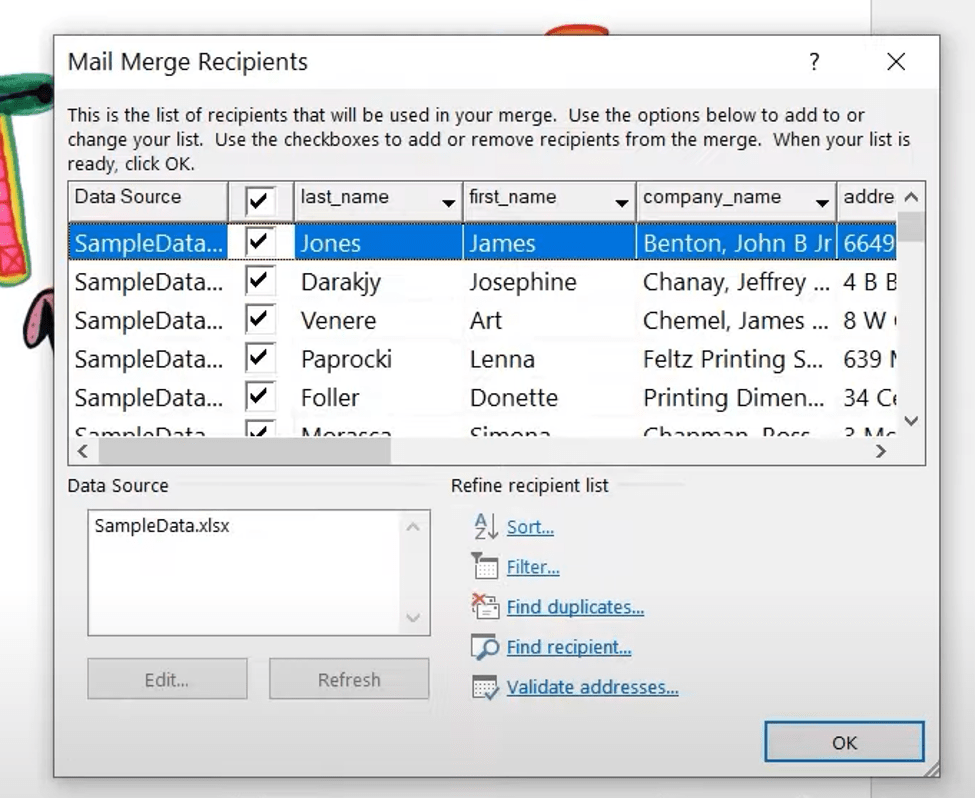
- Click on Browse. Navigate to the file you want and double-click on it. You will get a small window showing the name of the worksheet where all of your data is. Click on OK.
- It will show you a preview of your data. Once checked, click on OK.
- Go to the bottom of the Wizard and click on Next: Write your letter.
STEP 4
Now that you have imported your list of recipients, you need to write your letter. Here you will manage the contents of your letter.
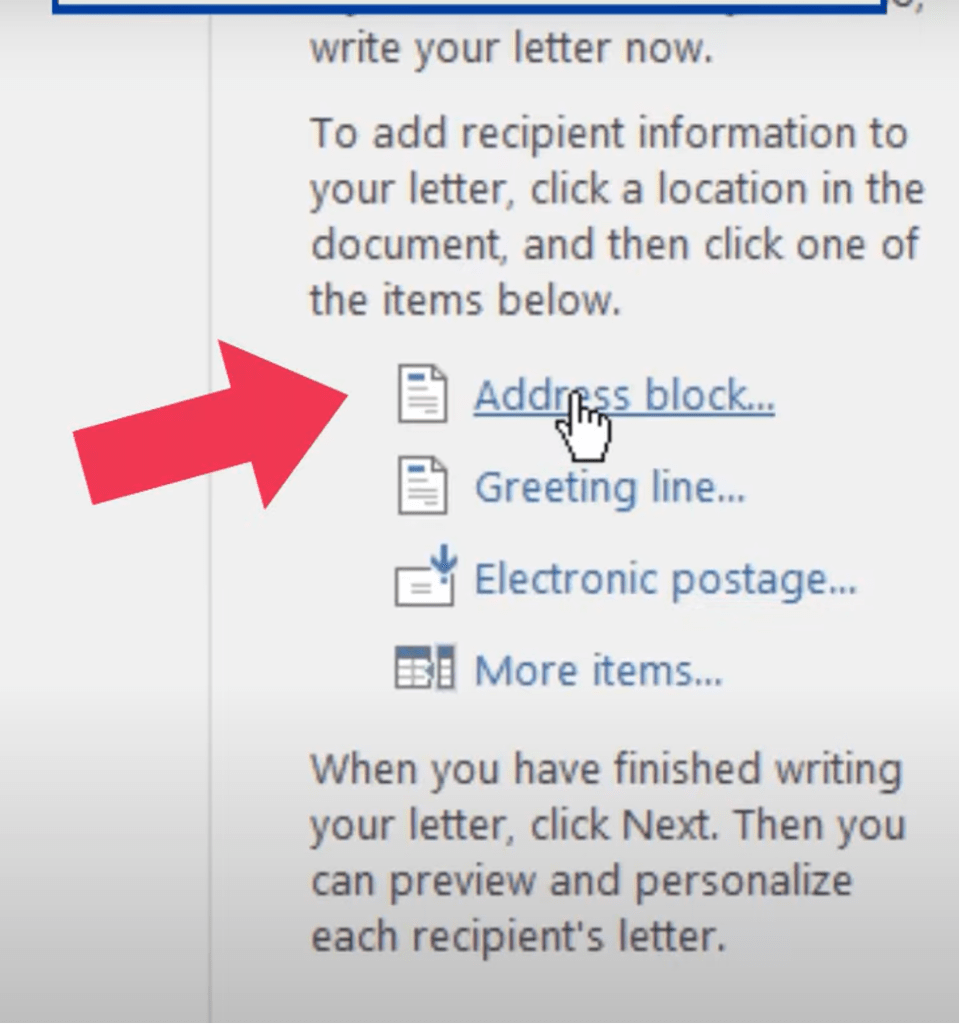
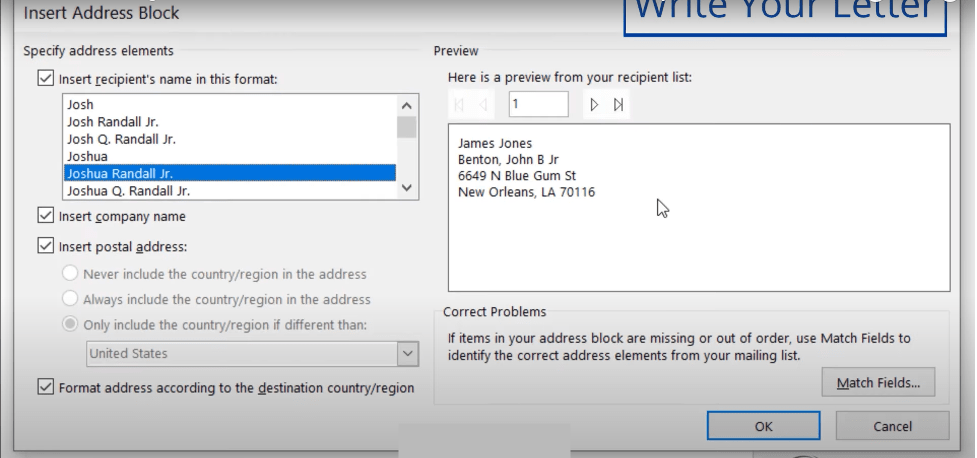
- Click on Address block.
A small window will open.
- Choose the format in which you want to display the name of your recipient. You can check out the different options available such as company name or different displays for address as well.
Once you have selected everything according to your needs, click on OK.
- Now you can press enter a few times so that your letter looks clean.
- Now click on the Greeting line in your Mail Merge wizard. Here you can explore the different types of greetings you want. You can choose long formal names or shorter, more personal name formats. Once done, click on OK.
- Go to the bottom of the Wizard and click on Next: Preview your letters.
STEP 5
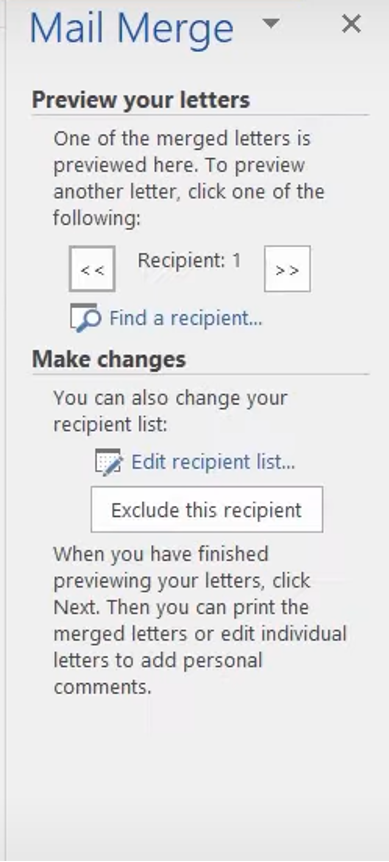
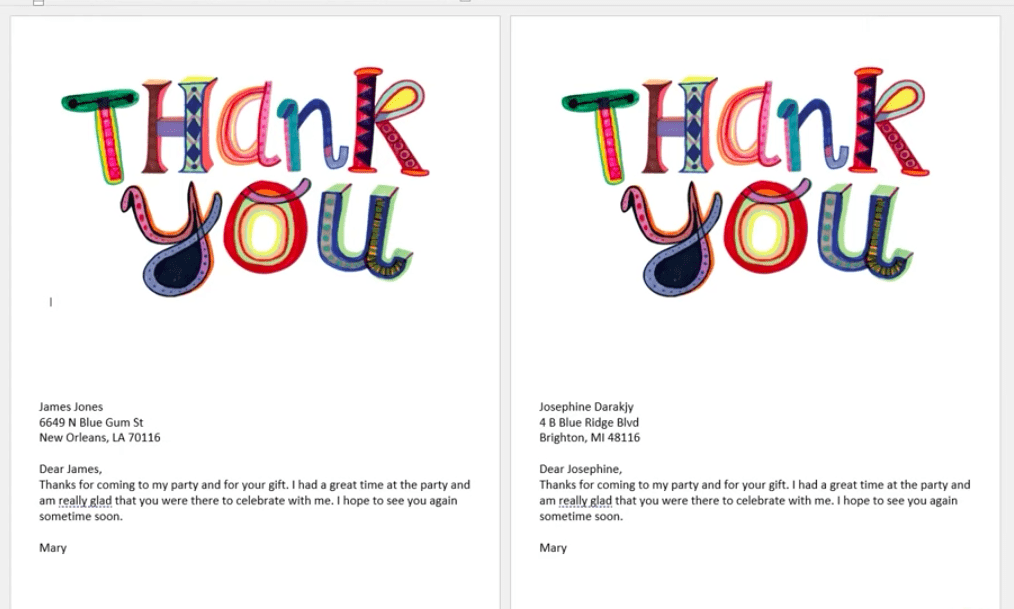
Now you will be able to preview the different letters that you have created. The placeholders that were inserted in the previous step for address and greeting lines will now be changed and will show the actual data imported from the recipient’s list that you imported.
You can easily click on the double arrows in your wizard under the Preview your letters to navigate between the letters and review your data.
Once you are reviewed your letters, go to the bottom of the Wizard and click on Complete the merge.
STEP 6
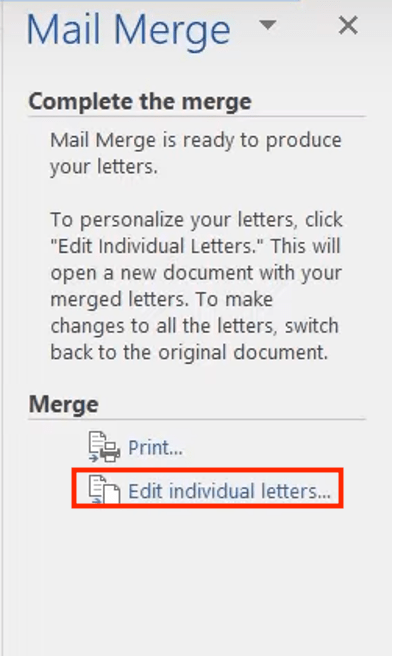
It can also happen that you want to edit any particular letter with some personal comments. You can easily do that by
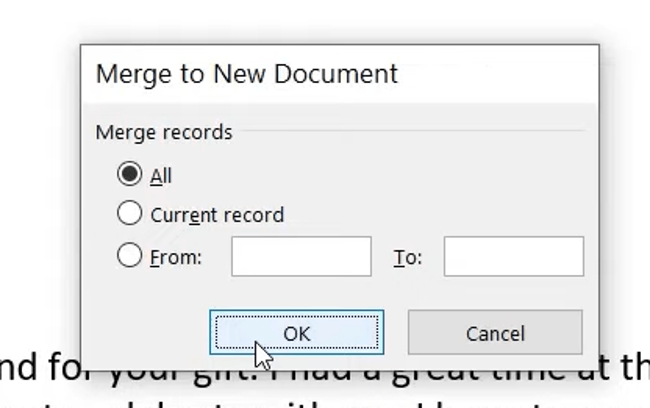
- Click on Edit individual letters.
- Click on OK
- Scroll to the letter you want to edit and type your content.
You will notice that only that particular letter has been edited and the rest are still following the Mail Merge format that you had created.
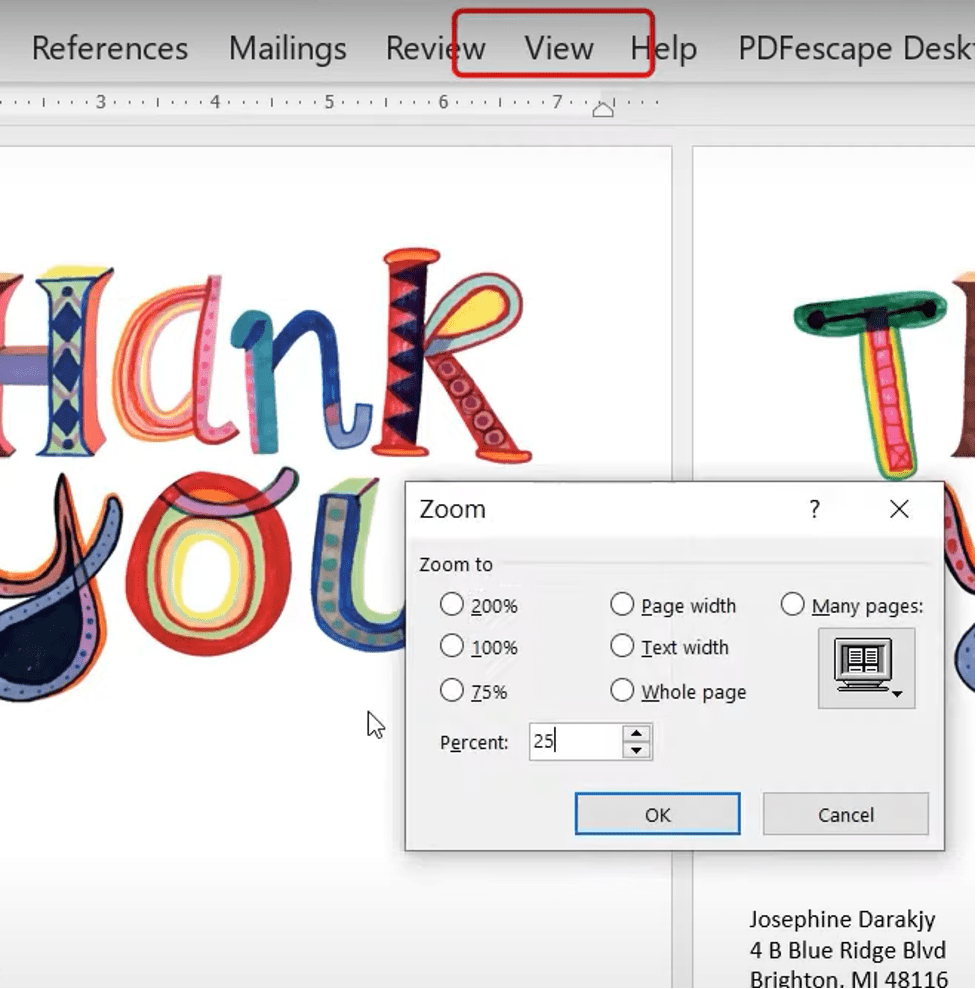
Quick Tip: You can go to View > Zoom and set it to 25% to view your documents at a smaller size, making it easier to find the one you are looking to further edit.
Hope this article has shown you how simple and efficient it is to use mail merge. Hopefully, you can now easily use this function to optimize your work, or else you can always come back here to brush up on your basics.
Click here to download 101 Free Word Templates that you can use and customize!
You can learn more about how to use Excel by viewing our FREE Excel webinar training on Formulas, Pivot Tables, and Macros & VBA!
John Michaloudis is a former accountant and finance analyst at General Electric, a Microsoft MVP since 2020, an Amazon #1 bestselling author of 4 Microsoft Excel books and teacher of Microsoft Excel & Office over at his flagship Academy Online Course.
