Excel offers a plethora of functions to its users, the OFFSET function is one of the lesser-known yet incredibly versatile functions. It is primarily used to retrieve data from a specified range of cells. In this article, we will explore the OFFSET function in Excel, understand its syntax, and discover various use cases that demonstrate its utility in real-world scenarios.
Let’s explore these topics in detail!
Download the Excel Workbook below to follow along and understand How to use the OFFSET function in Excel – download excel workbookOFFSET-Function-in-Excel-1.xlsx
Introduction & Syntax
OFFSET function returns a reference to a range, from a starting point to a specified number of rows, columns, height, and width of cells. You can specify the number of rows and the number of columns to be returned, making it a crucial function to create dynamic named ranges.
It is especially helpful when you are working on a dataset that keeps adding or removing rows/columns. OFFSET function will automatically adjust your data range in formulas or charts and help you in creating interactive dashboards, dynamic charts, and more.
The syntax of this function is –
=OFFSET(reference, rows, columns, [height], [width])
where,
- reference: This argument defines the starting point, or anchor, from which Excel will begin counting rows and columns.
- rows: The number of rows to move from the reference cell. A positive value will move the reference down, while a negative value will move it up.
- columns: The number of columns to move from the reference cell. A positive value will move the reference to the right, and a negative value will move it to the left.
- height (optional): Specifies the height, or the number of rows, in the range to return. If omitted, Excel will return a single cell.
- width (optional): Specifies the width, or the number of columns, in the range to return. If omitted, Excel will return a single cell.
Now that we have understood the syntax of the OFFSET function, let us understand this function better with an example.
Example 1 – Basic
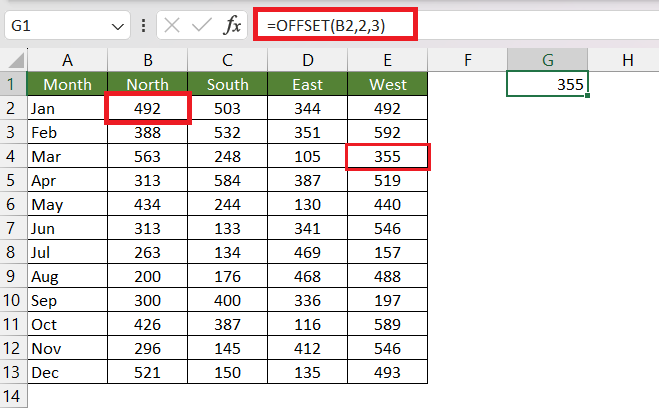
Suppose you have a dataset, and you want to retrieve the value in a cell that is 2 rows down and 3 columns to the right of the starting point, which is cell B2. The formula of this example is –
=OFFSET(B2,2,3)
where,
- B2 is the initial reference point
- 2 is the row argument
- 3 is the column argument
Excel will start from cell B2 as the initial reference point. It then proceeds to shift 2 rows downward (specified by the ‘rows’ argument) and 3 columns to the left (as indicated by the ‘columns’ argument). As a consequence, the outcome of this OFFSET formula is the value located in cell E4.
Example 2 – OFFSET with SUM
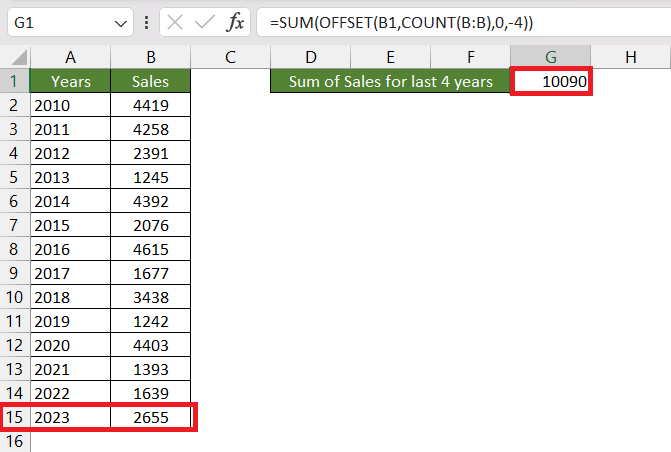
The OFFSET function can be combined with other functions to perform calculations on a dynamically selected range. For instance, let’s say you have yearly sales in column B, and you want to calculate the sum of the last 4 years. The general formula for summing the sales for the last N years –
=SUM(OFFSET(B1,COUNTA(B:B),0,-N,0)
- B1 is the starting point.
- COUNTA(B:B) can be used to count how many transactions are present in column B. We move down to the last transaction in column B.
- 0 is used because we want to stay in the same column.
- -N is provided as height as we need to include N years and we need to move up so we have used the negative sign.
This formula calculates the sum of a dynamic range of values in Excel. It starts at B1, moves down to the last transaction in column B, stays in the same column, and then moves up by “N” rows to the value for the last N years. Finally, we use SUM function to add those values.
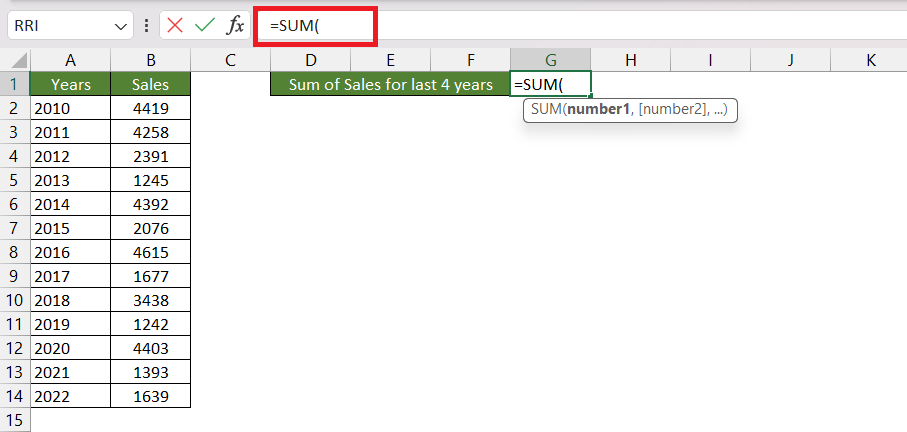
STEP 1: Enter the SUM formula.
=SUM(
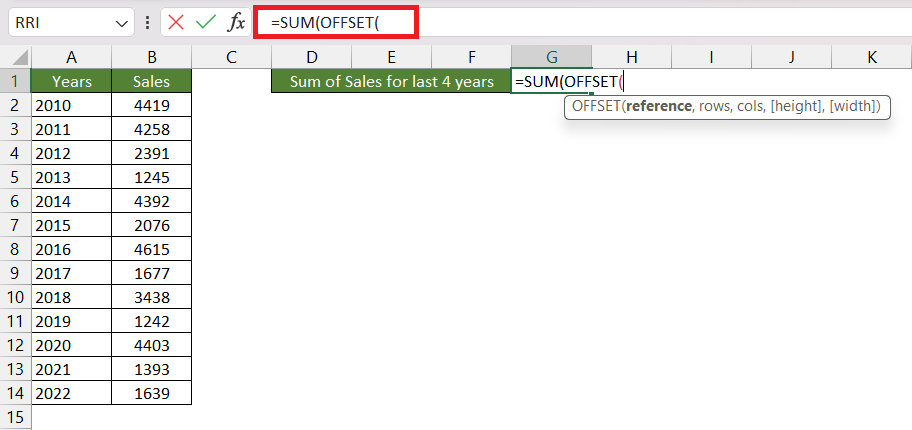
STEP 2: Enter the OFFSET formula.
=SUM(OFFSET(
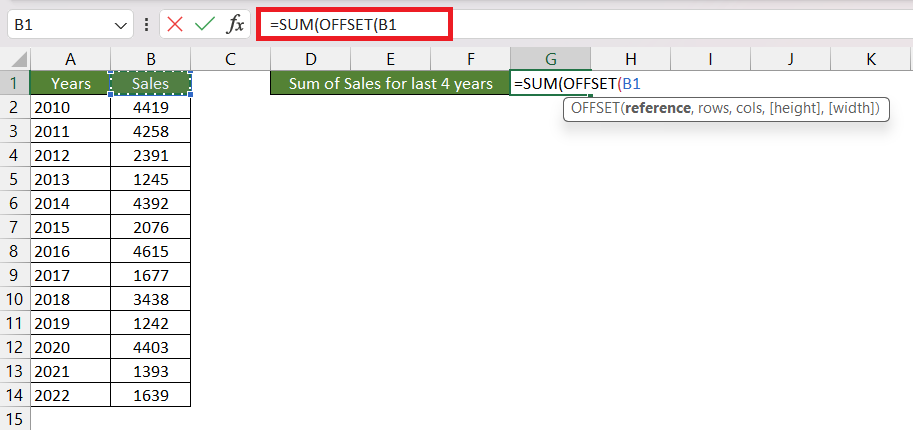
STEP 3: Enter the first argument i.e. reference. Here, it is cell B1.
=SUM(OFFSET(B1
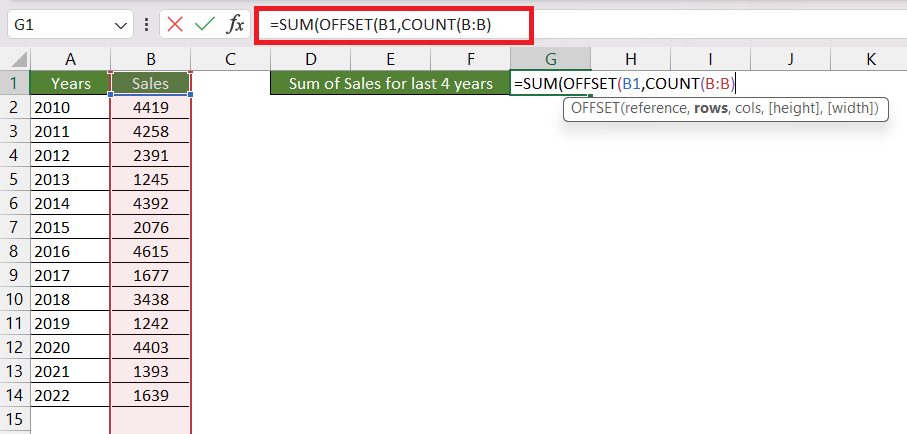
STEP 4: Enter the second argument i.e. rows. Here, it is COUNT(B:B) as it will move us to the last transaction in column B.
=SUM(OFFSET(B1,COUNT(B:B)
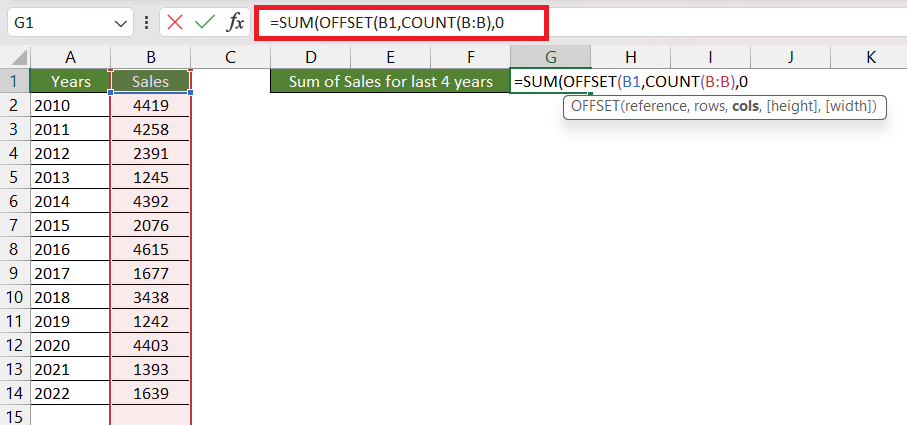
STEP 5: Enter the third argument i.e. columns. Here, it is 0 as we need to stay in the same column as the reference.
=SUM(OFFSET(B1,COUNT(B:B),0
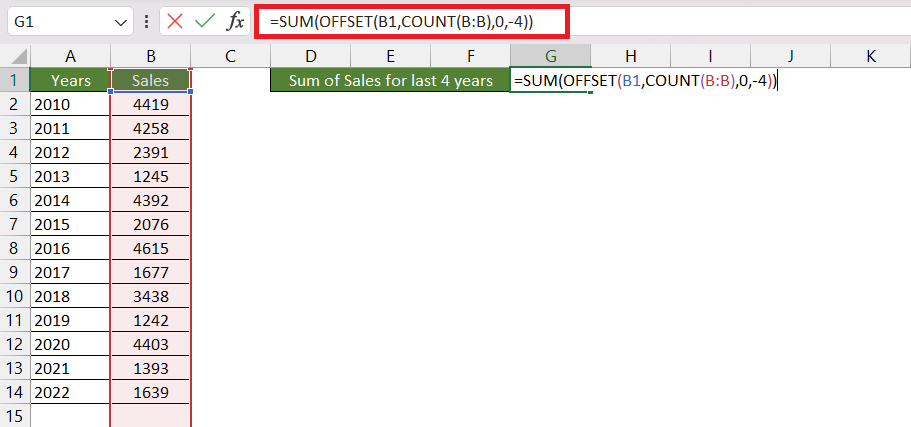
STEP 6: Enter the fourth argument i.e. height. Here, it is -4 as we need to sum the values for the last 4 years (moving up).
=SUM(OFFSET(B1,COUNT(B:B),0,-4)
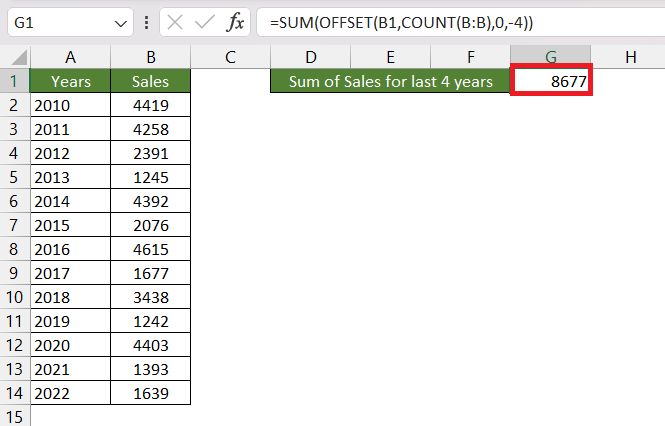
Excel will show the summation of the last 4 years and provide you with the result.
Now, let’s add another year to our data – 2023 sales. The formula updates automatically and provides the summation of the new 4 years i.e. 2020, 2021, 2022, and 2023.
Things to Note
- OFFSET doesn’t actually move cells or change what you see on your screen; it just tells Excel where to look.
- If you forget to tell OFFSET how tall or wide you want your selection to be, it will be the same height or width as the reference.
- If rows and cols offset reference over the edge of the worksheet, OFFSET returns the #REF! error value
- OFFSET is a volatile function i.e. it will recalculate the value each time there is any change in the worksheet. This may slow down your worksheet.
Conclusion
In summary, Excel’s OFFSET function is a versatile tool for dynamically selecting and manipulating data in your spreadsheets. It allows you to define a starting point and then specify the number of rows and columns to move to create dynamic ranges.
Remember that OFFSET is not limited to just locating data; it can also be used in combination with other functions for calculations. sales.
Further learning:
- Sum the Last 7 Transactions with the Offset Function
- Return the Last Value in a Column with the Offset Function
- Create a Dynamic Data Range with the OFFSET function
Click here to access Microsoft’s tutorial on the OFFSET Function!
John Michaloudis is a former accountant and finance analyst at General Electric, a Microsoft MVP since 2020, an Amazon #1 bestselling author of 4 Microsoft Excel books and teacher of Microsoft Excel & Office over at his flagship Academy Online Course.
