Power Query lets you perform a series of steps to transform your messy Excel data.
One of the most common steps I do, is to clean my data and remove rows, and Power Query gives you a lot of options to do so!
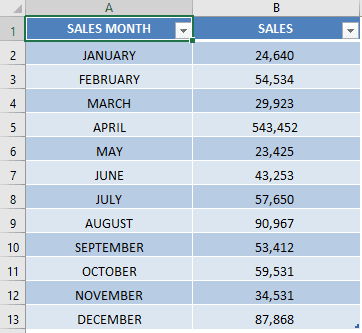
Here is our source table that we want to modify:
Let’s go through the steps in detail:
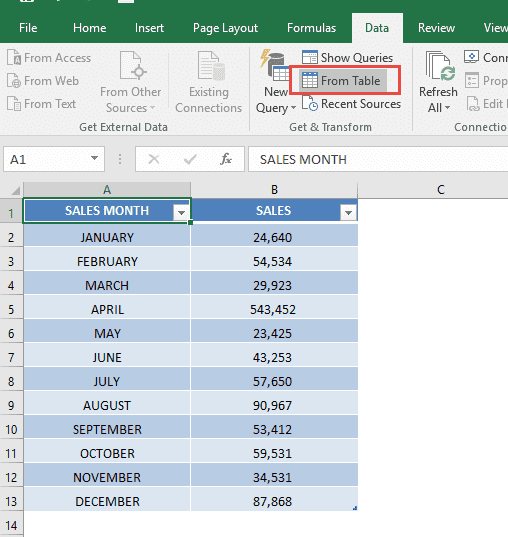
STEP 1: Our sample data contains the Sales numbers for each month. Let us first prepare to use this data in Power Query.
Go to Data > Get & Transform > From Table (Excel 2016) or Power Query > Excel Data > From Table (Excel 2013 & 2010)
Excel 2016:
Excel 2013 & 2010:
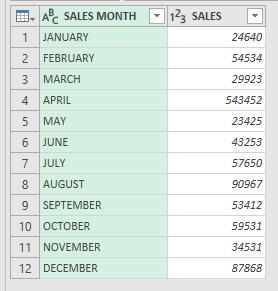
STEP 2: This will open up the Power Query Editor.
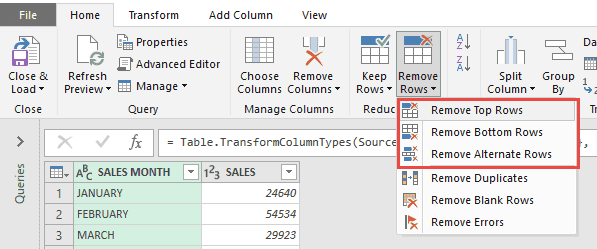
If you go to Home > Reduce Rows > Remove Rows
There are a lot of options! Let us see these 3 in action:
- Remove Top Rows
- Remove Bottom Rows
- Remove Alternate Rows
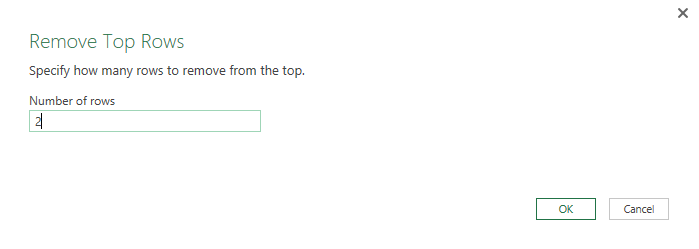
STEP 3: Go to Home > Reduce Rows > Remove Rows > Remove Top Rows
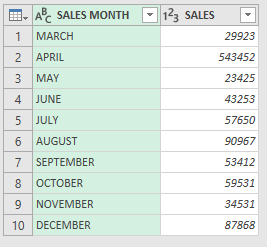
Let us try to remove the first two rows. Input 2 as the number of rows. Click OK.
You can see January and February are now removed.
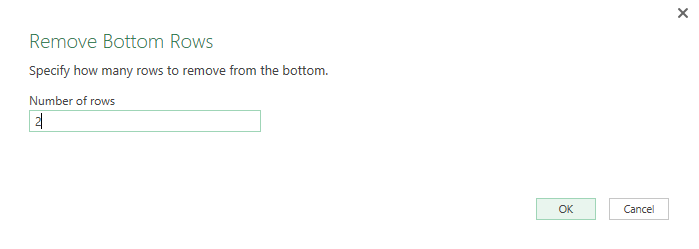
STEP 4: Go to Home > Reduce Rows > Remove Rows > Remove Bottom Rows
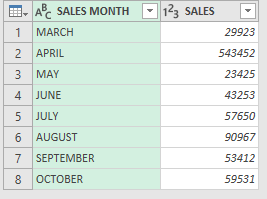
Let us try to remove the bottom two rows. Input 2 as the number of rows. Click OK.
You can see November and December are now removed.
STEP 5: Go to Home > Reduce Rows > Remove Rows > Remove Alternate Rows
This is a bit trickier to use. Let us say we want to remove the following months: 3 (March), 6 (June) and 9 (September).
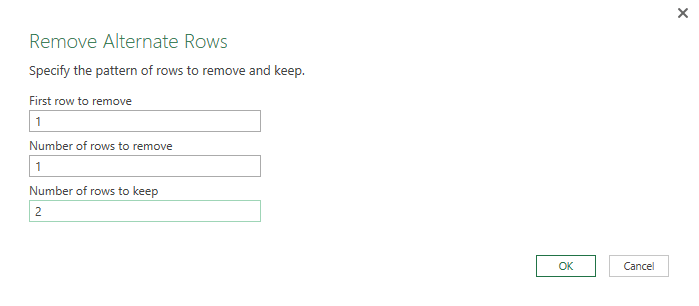
To do that, let us input the following:
- First row to remove – 1
- Number of rows to remove – 1
- Number of rows to keep – 2
- Click OK.
This will remove starting from the first row, then the pattern is that row will be removed, then skip the next 2 rows, then do the same pattern again. Essentially it means removing the first row of every 3 rows.
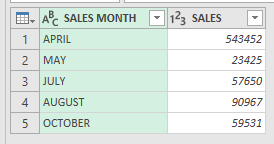
You can see March, June, and September are now removed.
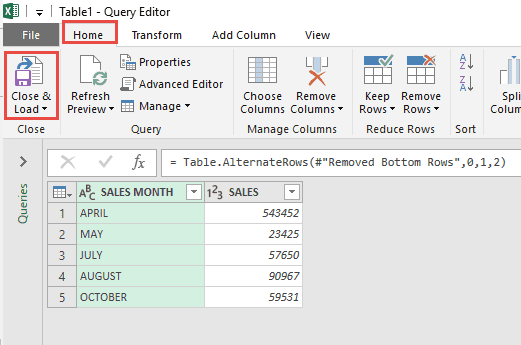
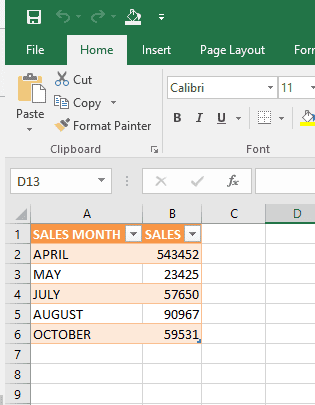
STEP 6: Click Close & Load from the Home tab and this will open up a brand new worksheet in your Excel workbook with the new data.
You now have your new Excel table with the cleaned up rows!
Further Learning:
- Delete Steps Until End In Power Query
- Comment In Query Steps In Power Query
- Extract Length Using Power Query
Bryan
Bryan is a best-selling book author of the 101 Excel Series paperback books.
