Having a perfect first impression is very important in this rapidly advancing world. In the corporate world, your resume is the first impression that a company gets about you. An outstanding resume has the potential to open doors because it:
-
- Catches the attention of employers and recruiters
- Sells your most vital talents and accomplishments.
You can easily create a resume in Microsoft Word. You won’t even have to use a template to complete this task. So let’s see how to create a resume in MS Word in just 5 minutes!
Watch it on YouTube and give it a thumbs-up!
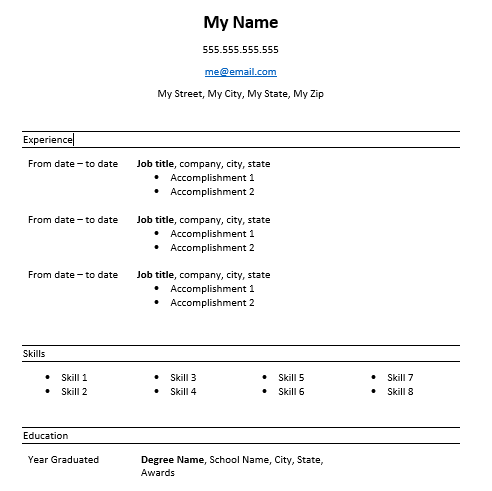
So, a resume can be divided into 4 major topics, namely – Contact information, Experience, Skills, and Education.
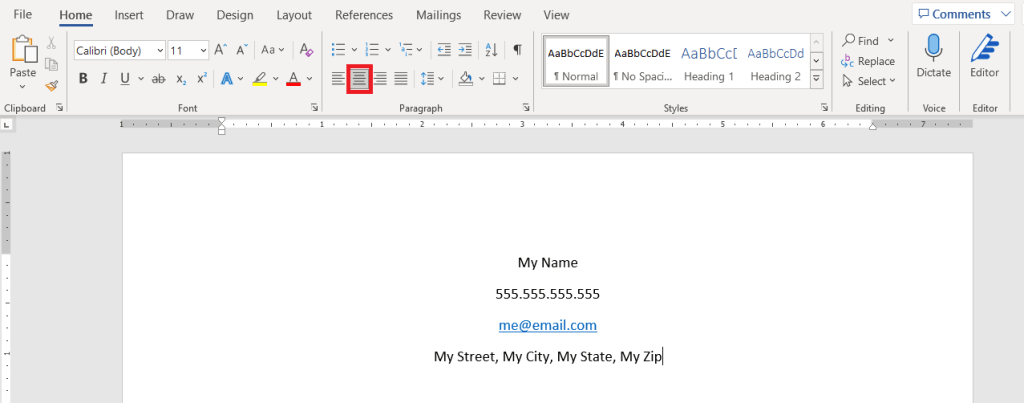
Let’s start the resume with your contact information. Following aesthetic formatting, you should center align your text. Now you can enter information about yourself like:
- Your name
- Your phone number
- Your email address
- Your address (State, City, Street, and Zipcode)
Once you have entered your information, go to the next line and left-align your text once again. Write down the remaining sections for your resume.
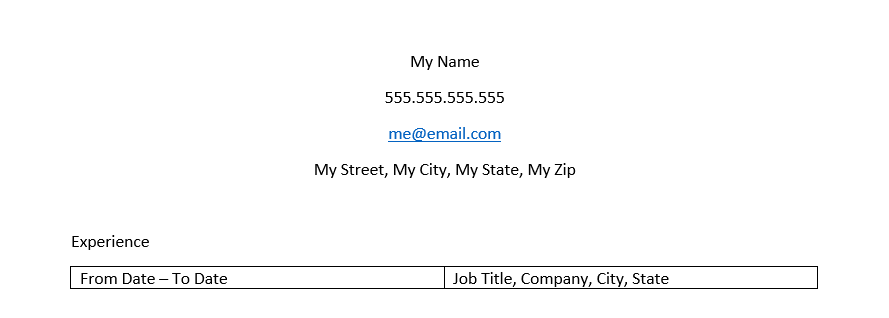
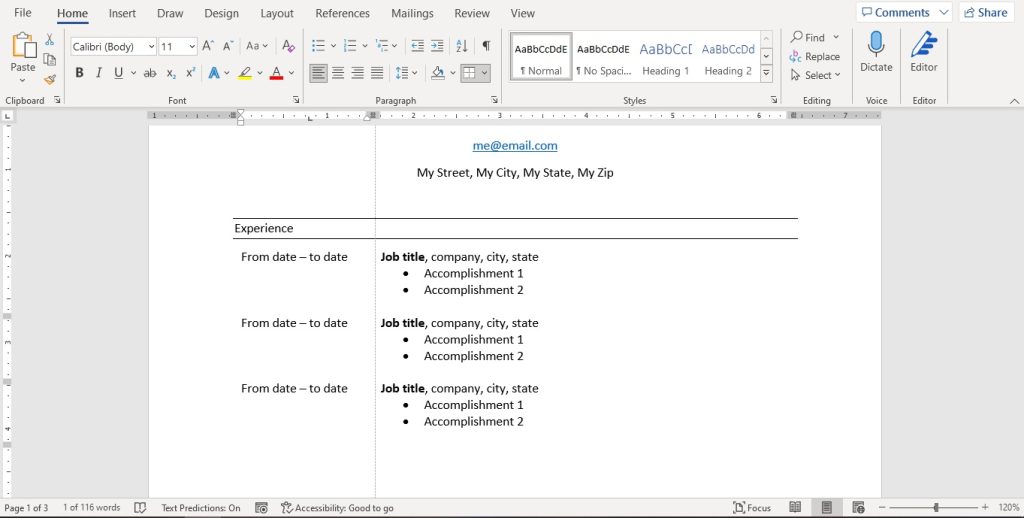
Follow up the contact information with an Experience section.
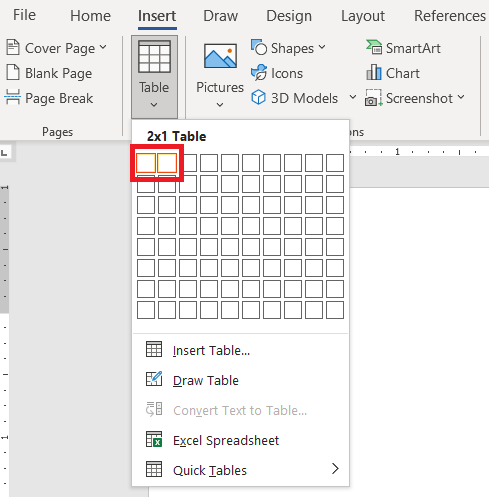
Go to Insert and click on the 2×1 table from the menu bar under the Experience section title.
The first column of the table will be of the dates you’ve worked and the second column will be of Job Title, Company & City / State.
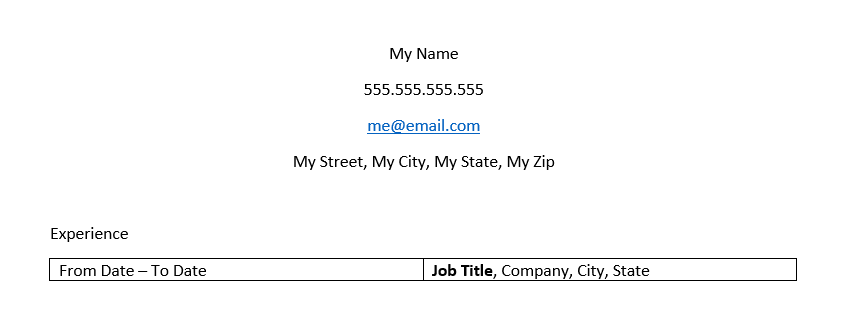
Make sure to bold the text “Job Title” so as to add emphasis to it. Press Ctrl + B to make any text!
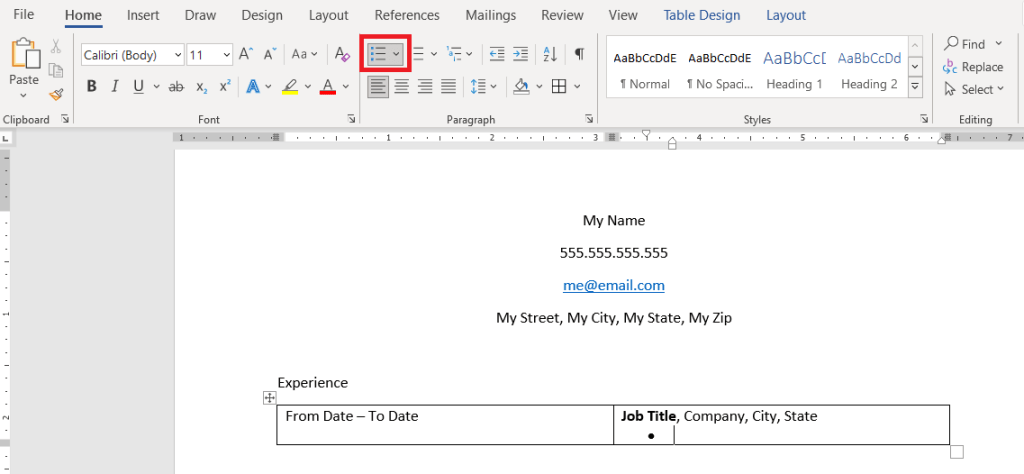
In the second column, press Enter to go to the next line and then click on the bullets icon from the Home toolbar at the top. This allows you to enter your experience in a bulleted list format.
Once you have finished entering the details of your last job, you can press the Tab button to insert a new row.
To add details of other previous jobs that you had, simply copy the text in the first row and paste it into the second row. This way you can easily follow the format and just edit the text as you want.
Let’s move to the Skills section.
You can similarly insert a table to highlight your skills.
- Go to Insert and click on the table from the menu bar under the Skills section title.
- You can select the number of columns according to your need. Let’s go with a simple 4×1 table.
- Go to Home and click on the bulleted list icon.
Now, you can enter the skills that you have picked up. Decide the number of skills that you want to display per column, and then move on to the next column.
Once you have entered your skills, it’s time to enter your Education details.
Following our previous format, we will insert a table to highlight our education details:
- Go to Insert and click on the 2×1 table from the menu bar under the Education section title.
- In the left column, you can enter the year you graduated.
- In the right column, you can enter details such as Degree Name, School Name, City, State, and Awards.
- Make sure to bold the Degree name so as to add emphasis. You can press enter and add any awards that you might have received.
Next, you can hit Tab to insert a new row, where you can enter any certificates or any other degrees or programs that you may have.
Now that the basics of your resume are complete, we can move on to formatting the resume to make it look more attractive.
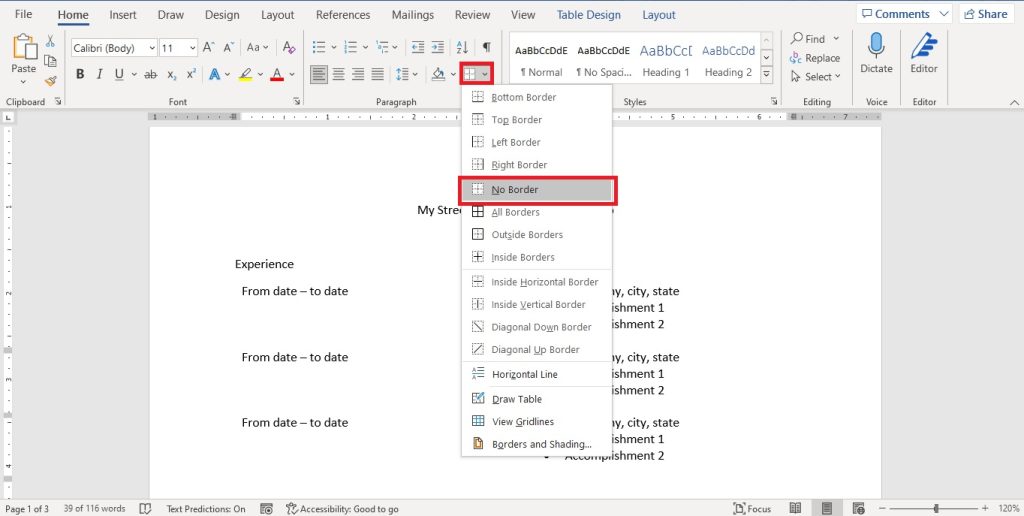
Under the Experience title, select your table, and go to Home > Borders > No Borders. This will give a cleaner look to your resume. You can apply these same steps to the tables under the Skills and Education titles as well.
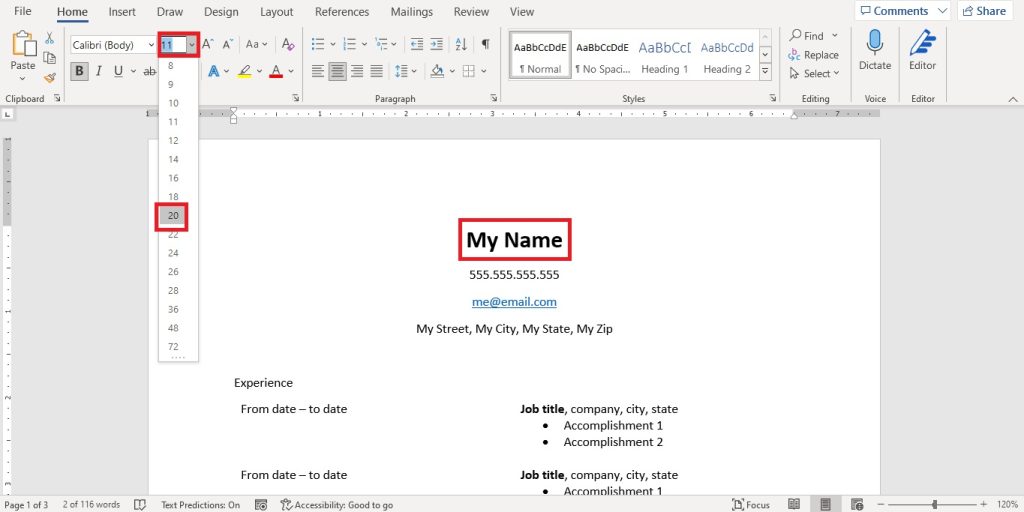
You can select your name and increase its size by going to Home > Font size and increasing it. You can even select a different font for your name to highlight it.
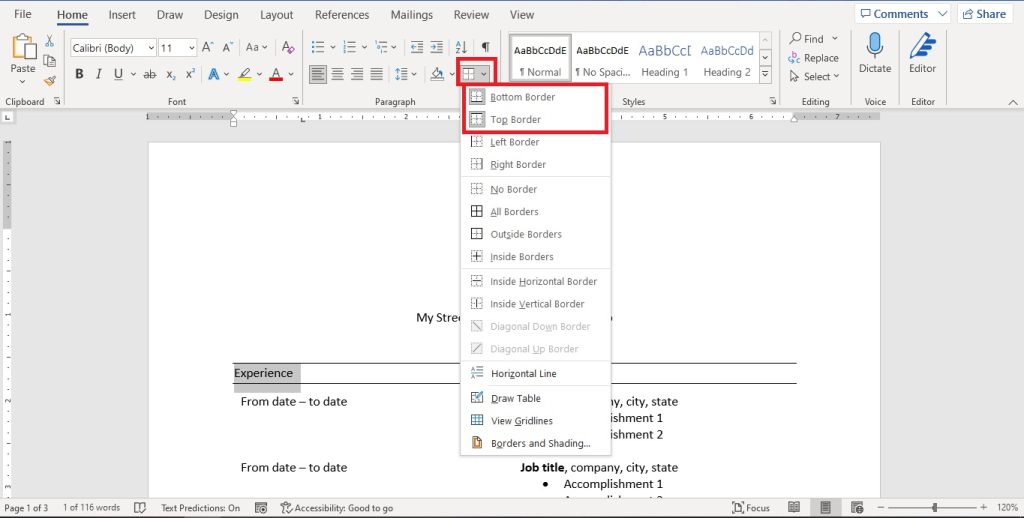
You can select your section titles (Experience, Skills, and Education) and insert the Top and Bottom borders by going to Home > Borders. This will give a nice segmented view to your resume and make each section stand out.
You can also select the table under your Experience title and hover your mouse over the center bar until you get the left and right arrows.
You can hold down the left mouse button and drag it to the left to have more room for your experience and less room for the dates.
You can do the same for your Education table as well.
Your resume will have a proper alignment as you have used tables, and it will be easy to edit in case of any additions in the future as well.
Once you have finished these basic formatting, you will notice that your resume now has a clean and concise structure, with important elements gaining the spotlight.
Hopefully, this article has given you insight as to how to build an effective resume, which helps you land your desired jobs!
Click here to download 101 Free Word Templates that you can use and customize!
You can learn more about how to use Excel by viewing our FREE Excel webinar training on Formulas, Pivot Tables, and Macros & VBA!
John Michaloudis is a former accountant and finance analyst at General Electric, a Microsoft MVP since 2020, an Amazon #1 bestselling author of 4 Microsoft Excel books and teacher of Microsoft Excel & Office over at his flagship Academy Online Course.
