If you are about to write a term paper and thinking of using MS Word, then keep reading!
In this tutorial, we will be providing you with a brief overview of some of the features of Microsoft Word 365 that can be used when writing a term paper:
Watch it on YouTube and give it a thumbs-up!
One of the most important aspects of writing a term paper is references. So let us start with the References tab of MS Word.
Referencing quotes in your paper can be a challenging task. Fortunately, you can easily add them to your term paper in Microsoft Word. You can add references to quotes in two ways:
Endnotes
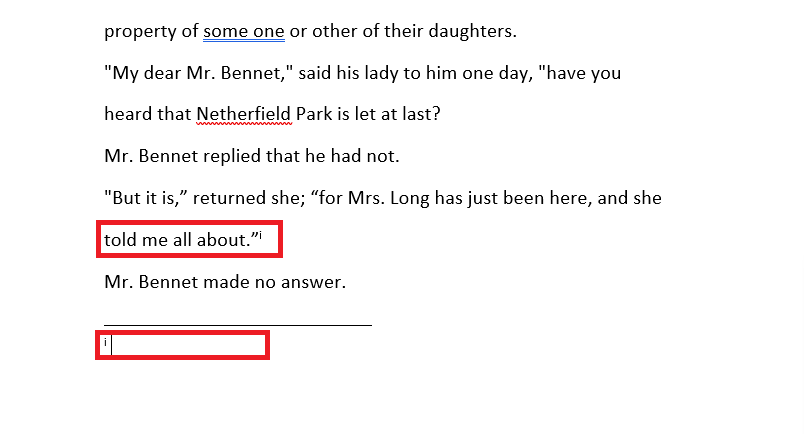
Endnotes appear at the end of your entire paper. You can click your cursor after the quote where you want to add endnotes and then go to References > Insert Endnote.
A reference tag will appear after your quote in the form of a superscripted number, which corresponds to your endnote number. You can easily add your reference in the endnotes.
Footnotes
Suppose you want to show a particular reference at the end of the page in which the quote is written, then you can choose to add a footnote.
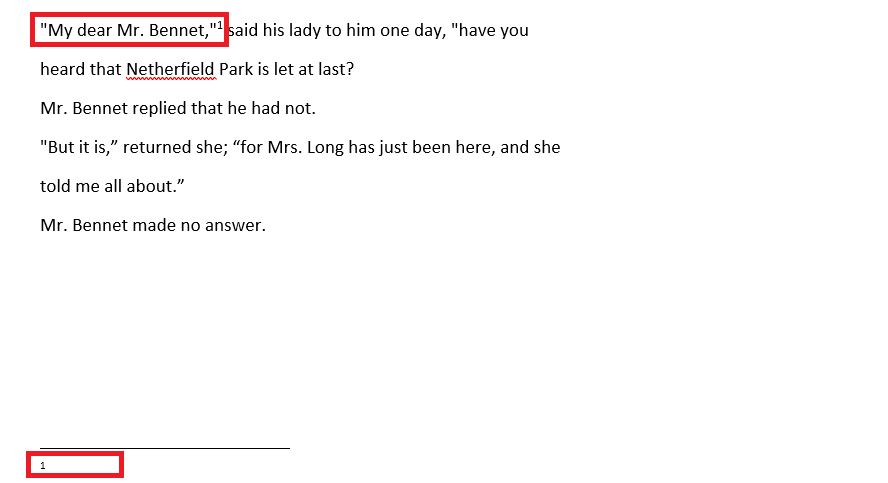
Simply click your cursor after the quote and then go to References > Insert Footnote.
This will insert a footnote at the bottom of the page. You will similarly see a superscript number at the end of the quote that corresponds to your footnote number.
The difference between a footnote and an endnote is at a footnote is at the bottom of the page while an endnote is at the bottom of the entire term paper.
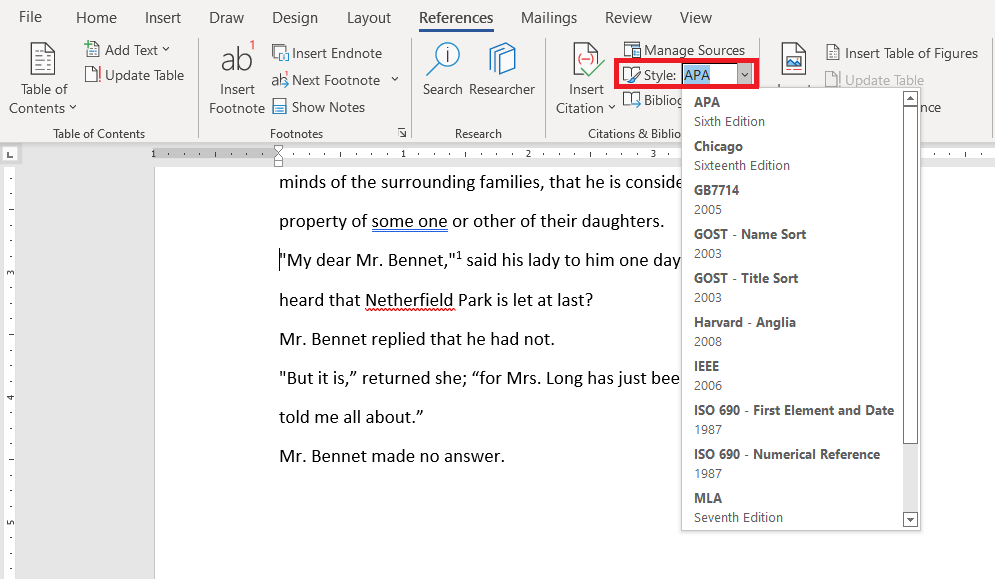
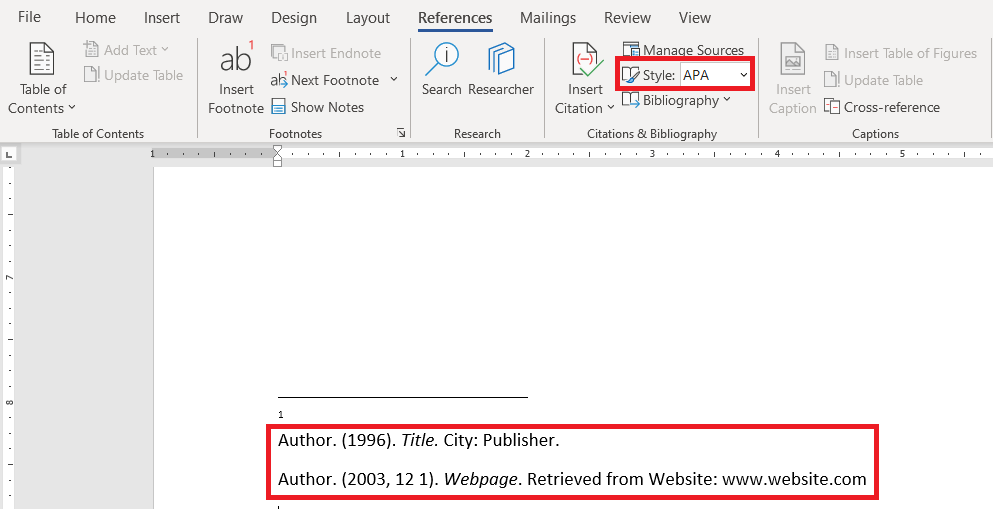
When adding citations and bibliography, a general style to follow is the APA style for technical papers and MLA format for humanities. MS Word is very helpful in this regard, as it gives you a list of different styles to choose from. You can set your style by –
- Go to References
- In the Citations & Bibliography block, click on the Style drop-down menu
- Select the style you want
Now you can add your citations to your term paper in Microsoft word by following these steps –
- Go to References > Insert Citation
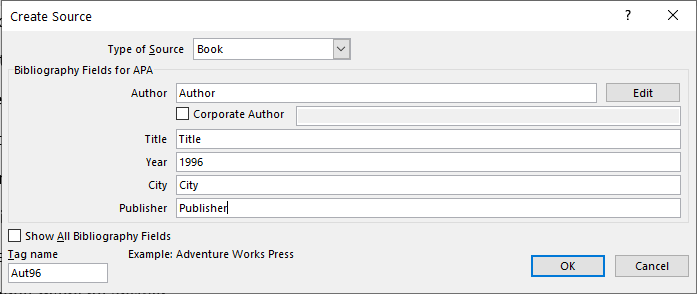
- Click on Add New Source
This will open up a window with different placeholders asking for different information like name of author, title, year, type of source, etc. This part makes writing bibliographies in MS Word super easy.
You can add all your citations one by one by clicking on Add New Source and filling out the details.
Now that all your citations are entered, you might get confused as to how to show these in the proper format in your bibliography. But this is where MS Word takes care of all your problems.
To insert your bibliography simply –
Place your cursor at the end of your paper, where you want your bibliography.
Go to References > Bibliography drop-down menu > Insert Bibliography.
Doing the above steps will automatically enter all your citations in the chosen style.
Hence you no longer need to worry about the chronology or the format of the bibliography.
You can even edit your previously entered sources by –
- Go to References
- Click on Manage Sources
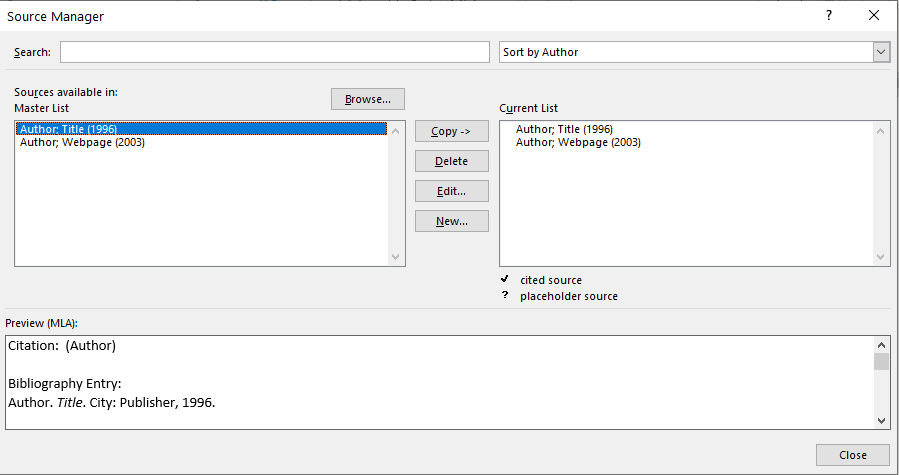
This will open a window that shows all the sources that you have entered.
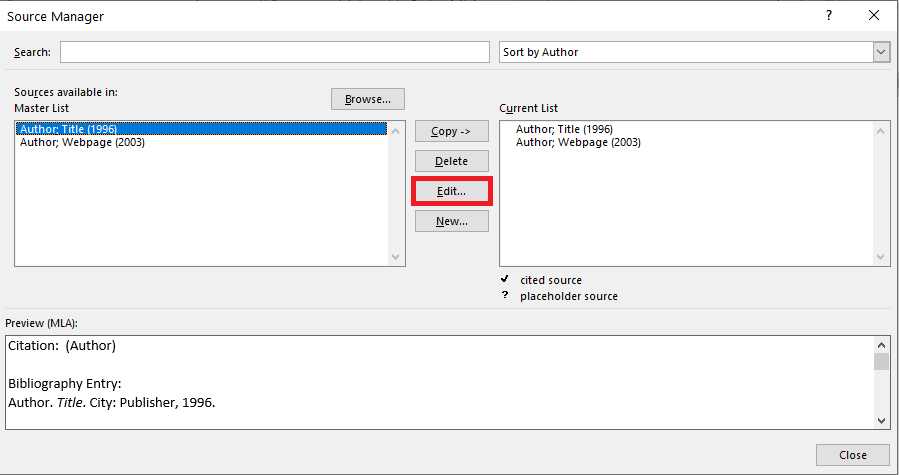
You can click on any of the sources and click on Edit to edit its information.
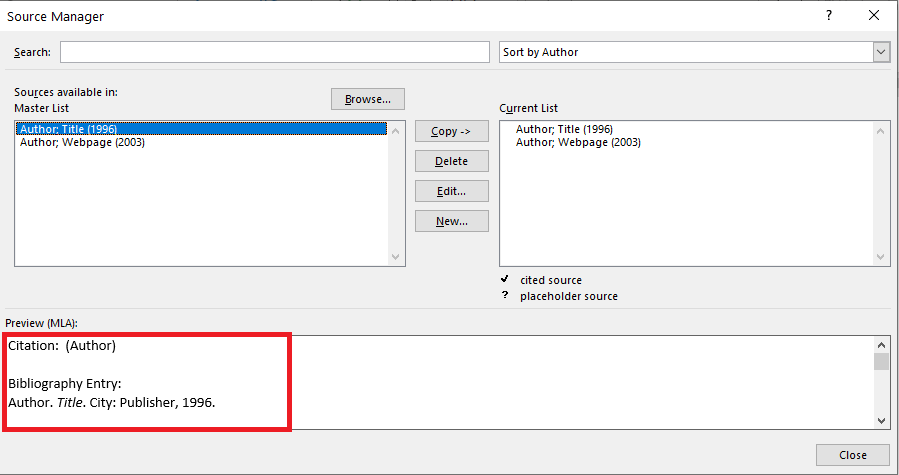
The bottom of the window also shows a preview of the source that you have currently clicked on.
Inserting a table of contents in MS Word is a process that will generate an automatic table, and in that process, your paper will also be formatted in such a way that your chapters and subsections stand out.
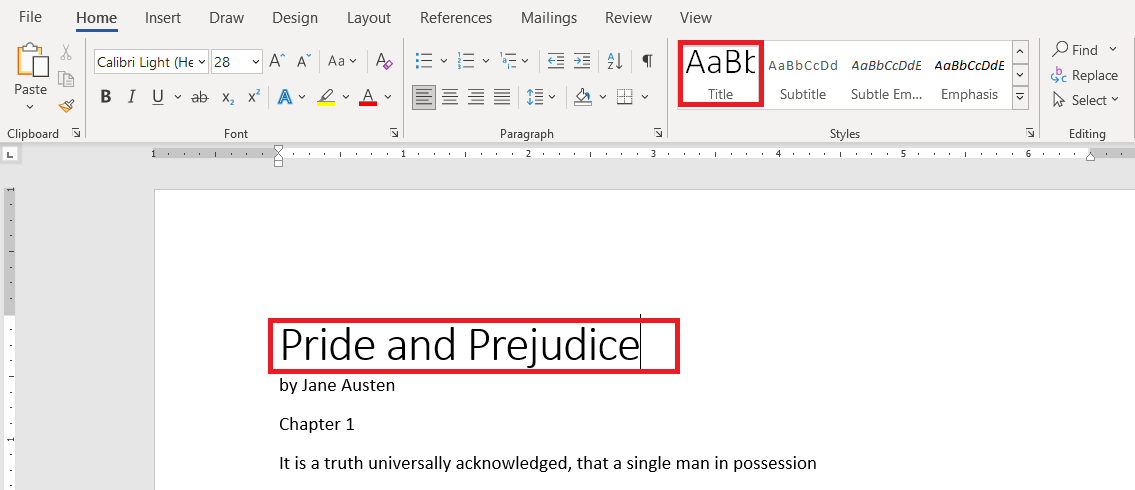
Going to the Home tab, you will find a Styles block having different styles like Normal, Title, Heading 1, etc. You can apply these styles by selecting your text and clicking on the style you want.
Now, you can turn the title of your paper to Title style, which will make it stand out from your regular text.
The auto-generated table of contents in MS Word only shows Text that is entered in the Heading style. It does not show Normal or Title styles.
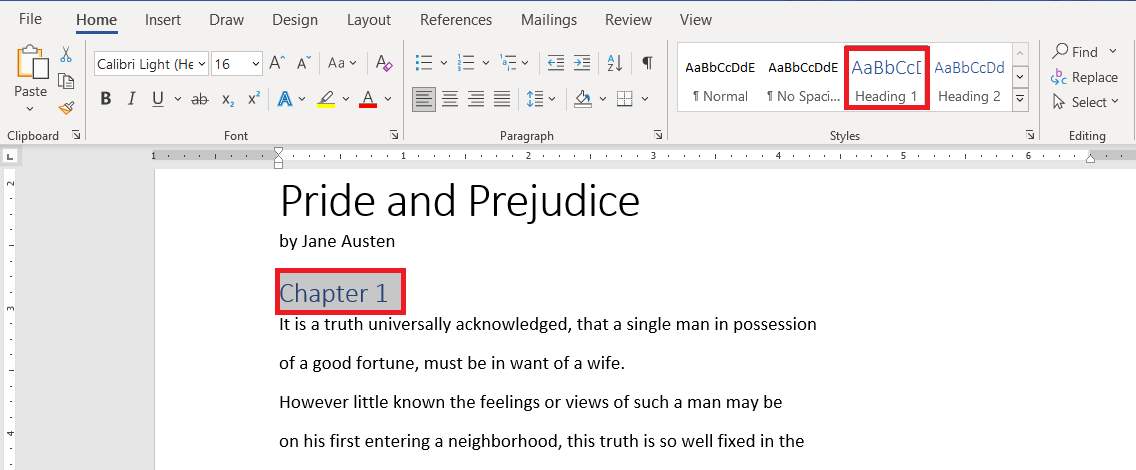
So just change the style of your chapter heading to Heading 1, your chapter section headings to Heading 2 style, sub-section headings to Heading 3 style, and so on.
You will notice that while doing so, the heading texts now appear different from the rest of the text in your paper. Hence your headings are also standing out now, giving a more aesthetic look to the entire document.
Now to enter the table of contents –
- Place your cursor where you want the table, generally at the start of the paper.
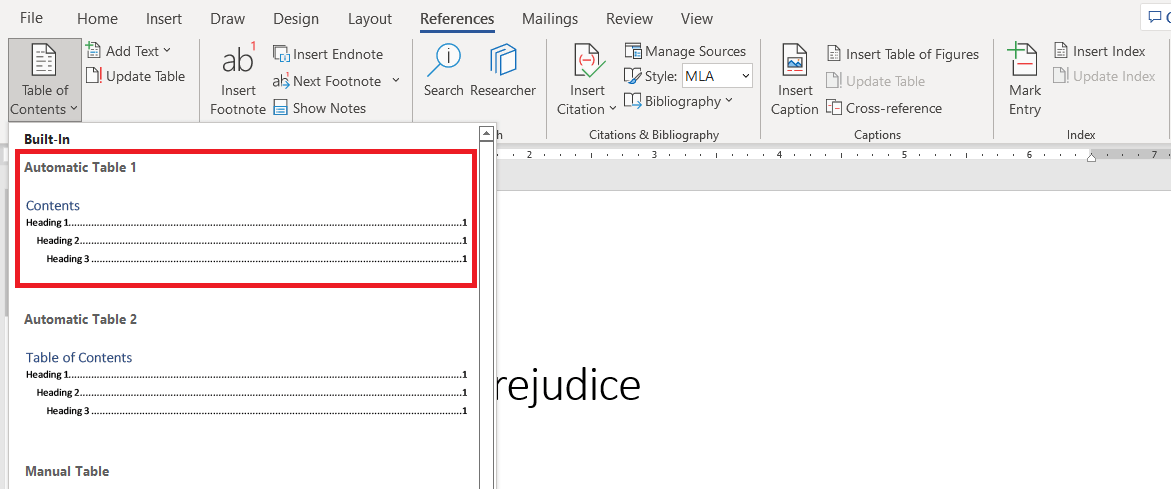
- Go to References
- Click on the Table of Contents drop-down menu and select an automatic table format.
Now you will see that a table of contents is generated with page numbers
If you add further changes to your paper, just go to References > Update Table.
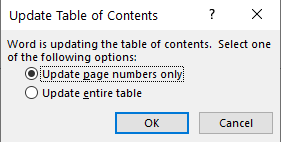
You will be presented with two options:
- Update page number only – This will only update the page number of the chapters and sections that are already displayed in the table. A new heading will not be added to the table.
- Update entire table – This will update the entire table, including new sections and headings.
Another amazing feature of the table of contents is that if you Ctrl + Click on any heading, you will be transported to the start of that heading. This feature is especially helpful in navigating long papers.
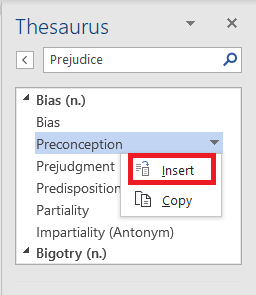
To improve the quality of your paper, you can use the Thesaurus tool. It gives a list of similar words that you can use instead of the one written in your paper. To use this tool simply :
- Go to the Review tab.
- Select a particular word and click on Thesaurus
To insert a suggested word, just click on the down arrow beside the word and click insert.
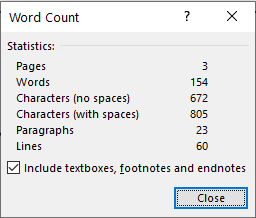
The Word Count button is also present in the Review ribbon, which shows you the number of words in your document.
This can also be viewed on the status bar.
In the end, you should always check the grammar of your paper. Go to Home > Editor, which will go through your paper and show any spelling or grammatical errors.
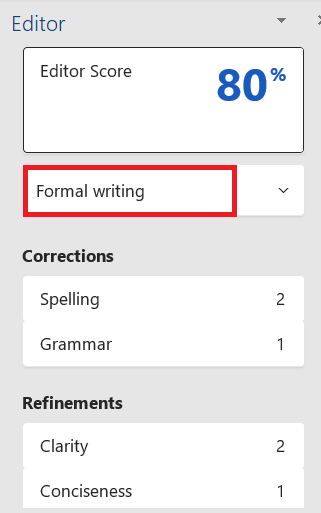
It will show the number of spelling and grammatical errors, and you can click on any one of these categories and go through all the errors while making any changes if necessary.
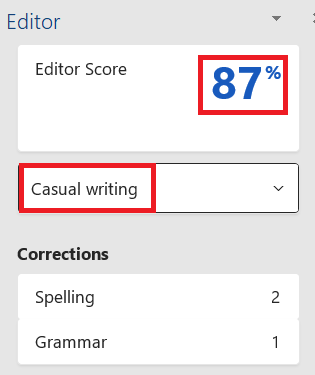
It even shows a score based on the type of your paper, ranging between Formal, Professional, and Casual. If you change the category from Formal writing to Casual. The score will be updated.
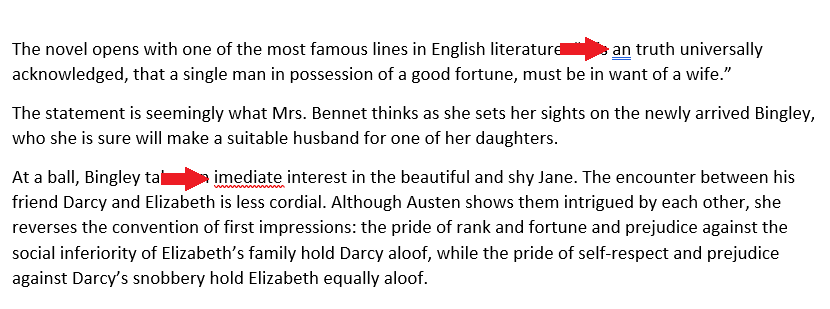
Next, we have a section on Corrections that points out the number of spelling and grammar errors present in your paper. The red underline denotes spelling errors whereas the blue double underlined line denotes grammar errors.
Summary
In this article, we went over how to create endnotes and footnotes, create a bibliography and table of content, do a grammar check and word count, and use the editor option in Microsoft Word.
Using these helpful features of Microsoft Word, you can ace writing your term paper!
Click here to download 101 Free Word Templates that you can use and customize!
You can learn more about how to use Excel by viewing our FREE Excel webinar training on Formulas, Pivot Tables, and Macros & VBA!
John Michaloudis is a former accountant and finance analyst at General Electric, a Microsoft MVP since 2020, an Amazon #1 bestselling author of 4 Microsoft Excel books and teacher of Microsoft Excel & Office over at his flagship Academy Online Course.

