Download our 141 Free Excel Templates and Spreadsheets!
Key Takeaways
- Utilize the “Wrap Text” feature by selecting an image and choosing a wrapping option, such as “Square” or “Tight,” which allows text to flow around the image in a clear, visually appealing way.
- Adjust the image’s position by dragging it to the desired location on the slide, and then modify the text alignment to wrap around the image, ensuring a balanced and professional look.
- Incorporate text boxes strategically around the image to simulate text wrapping, providing flexibility to place text in specific areas for a customized layout that enhances the presentation’s visual flow.
Insert and Adjust: Direct Text Wrapping in PowerPoint
Although PowerPoint’s capabilities are more limited than Word’s, they’re still quite effective for most needs. By enabling the ruler and gridlines from the “View” tab, you can align text boxes with precision around images, ensuring that your content looks polished and professional. This convenience means you can streamline your workflow, especially when updates or quick changes are needed.
Wrapping text around an image in PowerPoint isn’t as straightforward as in Word, but you can achieve a similar effect by manually adjusting text boxes and images. Here’s a brief step-by-step guide:
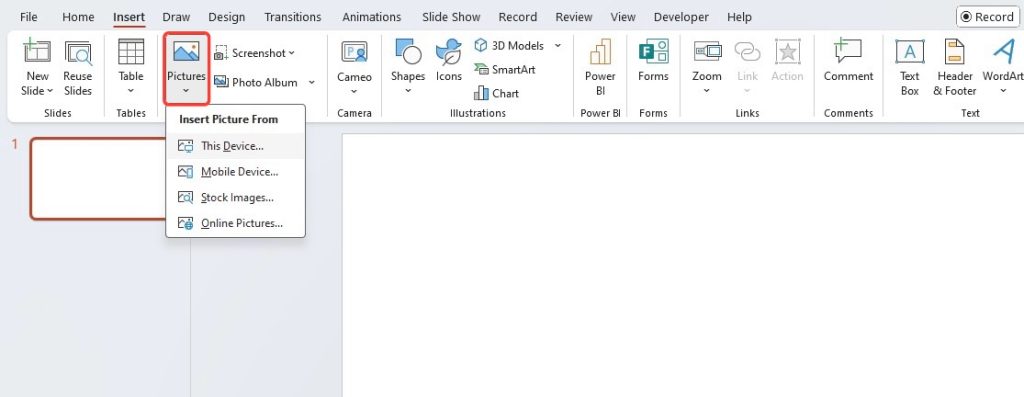
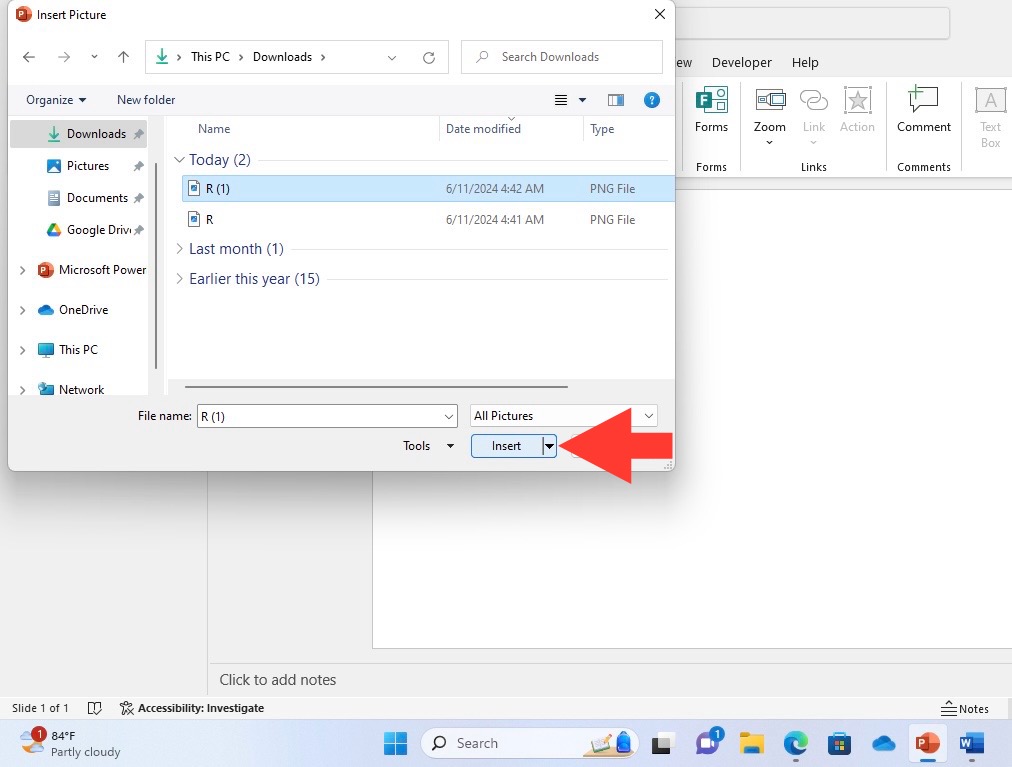
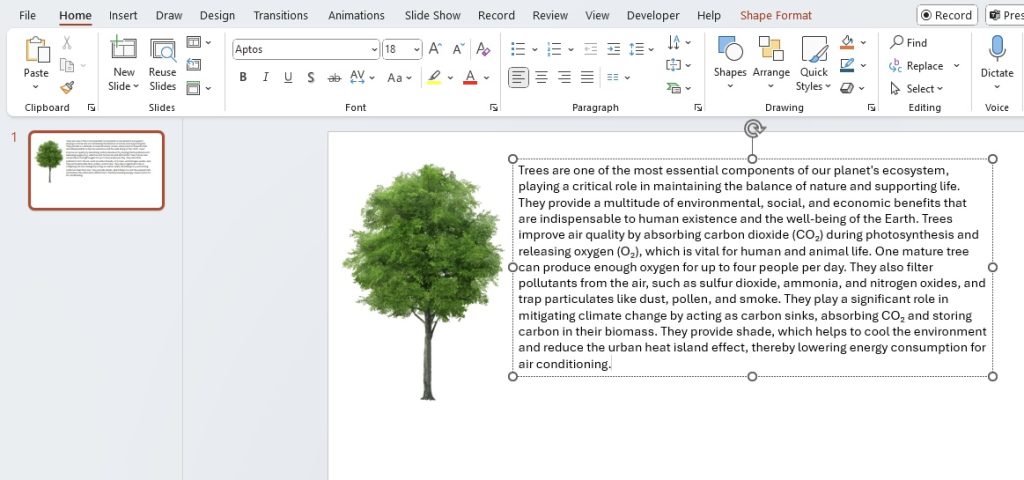
STEP 1: Open your PowerPoint presentation > Go to the slide where you want to insert the image > Click on the Insert tab > Select Pictures and choose the image from your computer.
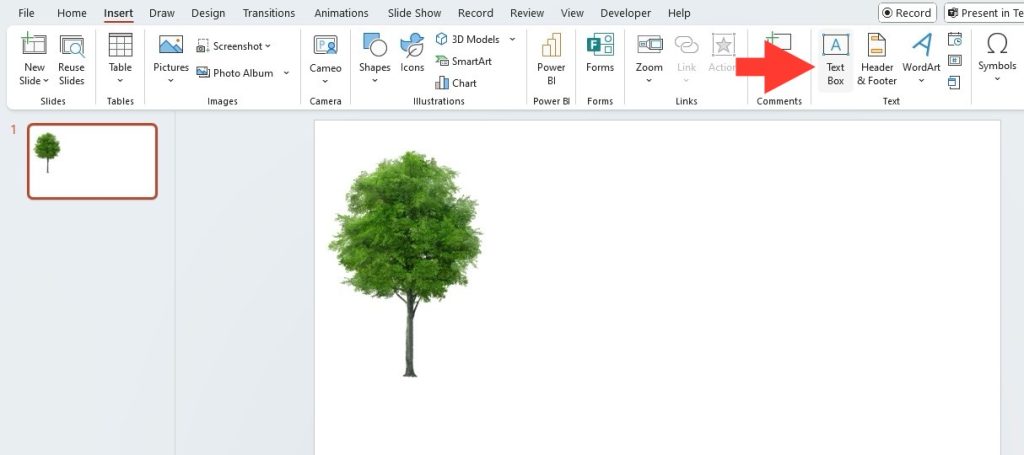
STEP 2: Go to the Insert tab > Click on Text Box > Draw a text box where you want your text to appear around the image.
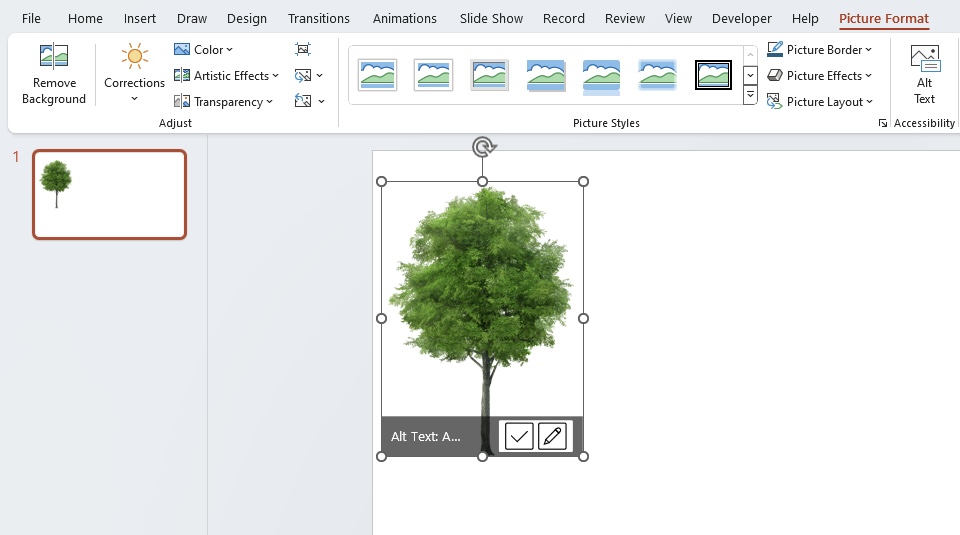
STEP 3: Click on the image to select it > Drag the image to the desired position on the slide.
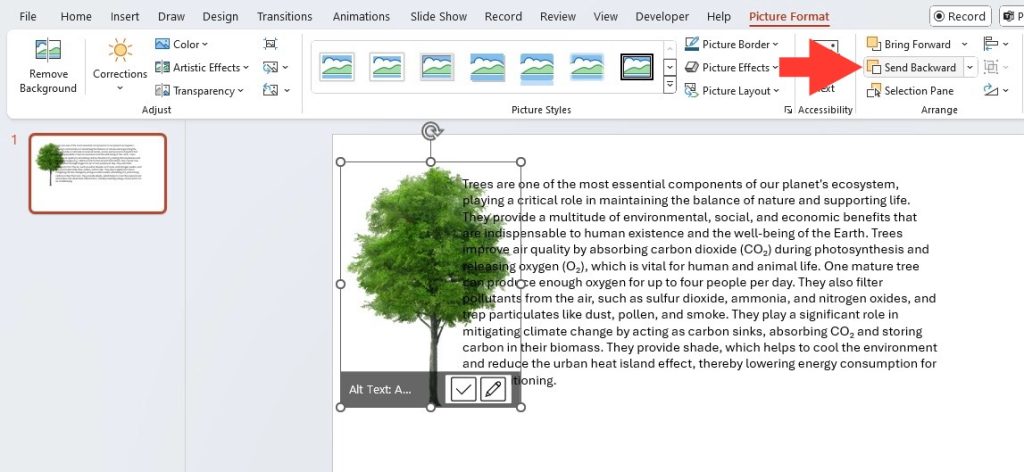
STEP 4: While you have the image selected, click on the Picture Format tab and select Send Backward.
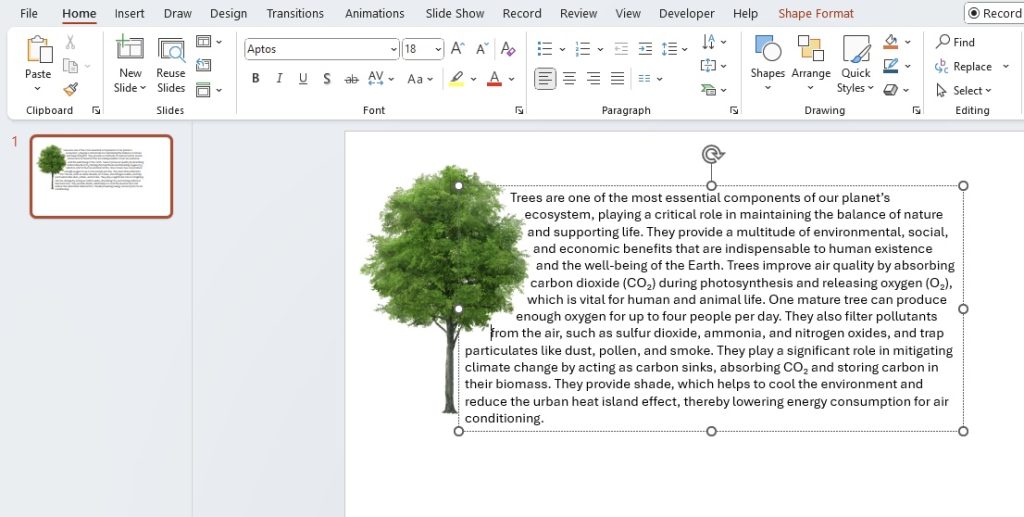
STEP 5: Click on the text box to select it > Enter your text in the text box > Resize and use the space bar to fit around the image as much as needed.
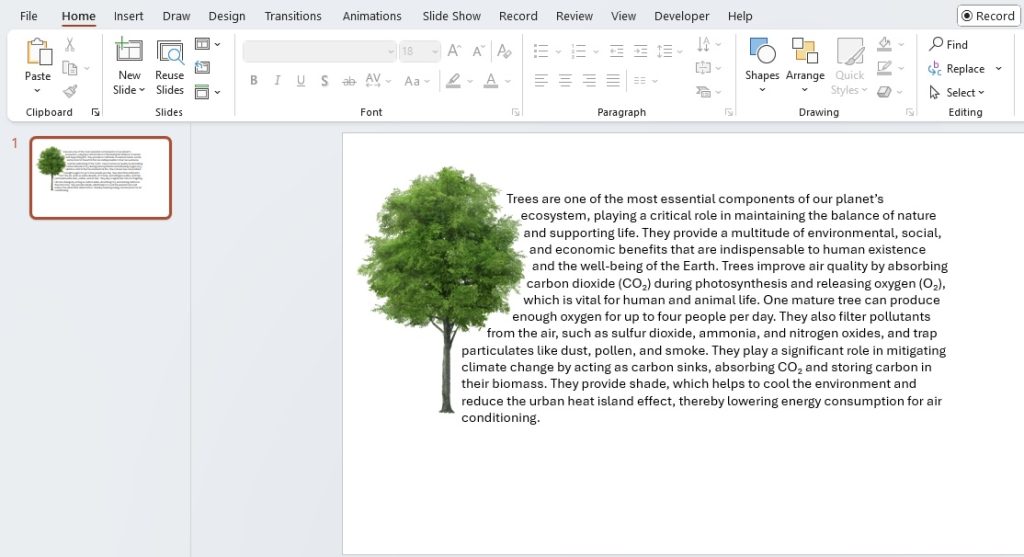
STEP 6: Adjust the position of the image and text box to ensure the text wraps around the image properly > Add additional text boxes if necessary to wrap text on different sides of the image.
By following these steps, you can create a visual effect similar to wrapping text around an image in PowerPoint.
Table of Contents
Step-by-Step Guide to Text Wrapping Elegance
Choose Your Image Wisely
Choosing the right image is a crucial first step in the text-wrapping process. Opt for visuals that reflect the core message of your slide, and make sure they’re high-resolution to avoid a pixelated appearance when projected. Consider the image’s orientation and background—will it allow for clear and readable text? When your image compleates your narrative rather than competing with it, your audience can effortlessly interpret your message at a glance.
Crafting Text to Complement Your Visuals
When wrapping text around an image, the content should complement the visual, not overshadow it. Draft your text with brevity and impact in mind, ensuring it’s concise enough to fit neatly around your chosen image while still conveying the essential information. Balance is key; your text should guide your audience through the visual narrative without detracting from the image’s power. Aim for harmony between words and visuals to create a slide that’s both informative and aesthetically pleasing.
Creative Solutions for Non-Standard Layouts
Text Boxes: Precision and Freedom
Text boxes in PowerPoint are your secret weapon for achieving ultimate precision and creative freedom. They allow you to position text exactly where you want it, wrapping it snugly around the edges of your visuals without disturbing the overall design. With text boxes, you can make use of wide boxes for overarching narratives and narrow ones for detailed descriptions, customizing the size and position to fit perfectly with your imagery. Embrace the flexibility text boxes offer and create tailor-made designs that speak volumes.
Advanced Techniques: Grouping for Complex Arrangements
For those who are ready to take their presentation design to the next level, mastering the advanced technique of grouping is essential. Grouping enables you to manage complex arrangements with ease, binding multiple objects together so they can be moved and formatted as a single entity. This method is incredibly useful when dealing with layered objects or when your slide requires a dynamic hierarchy of visuals and text. With grouping, you gain control over the depth and interaction of your elements, ensuring your message is delivered with visual clarity and impact.
Customization: Taking Control of Your Presentation’s Look
Exploring Alternative Wrapping Options
Beyond the standard wrapping techniques, PowerPoint allows you to explore alternative options to wrap text in unique and creative ways. Experiment with text effects like curve, arch, or circle to frame your image, adding an unconventional twist to your presentation. Assess the suitability of these options based on your content and the tone of your presentation. It’s about striking the right balance between creativity and comprehension, ensuring your alternative text wraps contribute to a visually stunning and coherent message.
Frequently Asked Questions about Wrapping Text around an Image in PowerPoint
How Do I Choose the Right Text Wrapping Option for My Presentation?
Choosing the right text wrapping option hinges on the layout and purpose of your presentation. Consider the image’s role: is it a focal point or supporting visual? For focal images, wrap text around the edges; for supporting visuals, overlay might work better. Factor in audience, context, and the amount of text. When in doubt, opt for simplicity to maintain readability.
Why is my text not wrapping in PowerPoint?
Your text might not wrap in PowerPoint if the text box settings aren’t configured correctly. Make sure the box is large enough and doesn’t have the “Do not wrap text” option selected. Check for manual line breaks or objects overlapping the text area, and adjust the text box properties to allow wrapping.
What Are Some Common Challenges When Wrapping Text and How Can I Overcome Them?
Common challenges with text wrapping include text overlap, inconsistent spacing, and difficulties aligning text with complex images. To overcome these, use gridlines for precise placement, adjust text box margins for even spacing, and apply text effects thoughtfully. Remember, practice makes perfect, so experiment with different techniques for best results.
John Michaloudis is a former accountant and finance analyst at General Electric, a Microsoft MVP since 2020, an Amazon #1 bestselling author of 4 Microsoft Excel books and teacher of Microsoft Excel & Office over at his flagship Academy Online Course.
